Windows 11 is possibly the most stable and bug-free operating system on release in Microsoft’s history, but some people still run into problems with their sound not working or acting in strange ways, just as they did on Windows 10.
With so many computer configurations and third-party sound hardware, Windows 11 will inevitably run into sound issues on some systems. If you’re struggling to hear anything from your Windows 11 PC’s speakers or another audio device, try these tips to fix the issue.
Install the Right Drivers and Software
Before troubleshooting, install the right software if you’ve just upgraded to Windows 11 or have completed a clean install and have no sound from the outset.
Windows 11 has access to a vast set of sound drivers and can download drivers for your sound card automatically. Still, it’s almost always better to head to the laptop or sound card manufacturer’s website and download the latest official version than relying on generic device drivers.
Check the Basics First
Before you get carried away with all the technical aspects of solving your audio problem, check the basics:
- Reboot your PC.
- Unmute the computer and make sure the volume isn’t set to zero.
- Check that your speakers are turned on.
- Check that your speakers are connected to the correct audio output.
- Unplug anything from your sound card that’s not your desired output device.
- Check that your onboard audio is enabled in the UEFI or BIOS menu.
Many audio issues turn out to be something simple that you’ve overlooked, so go through the basics even if it seems obvious.
Use Audio Troubleshooter
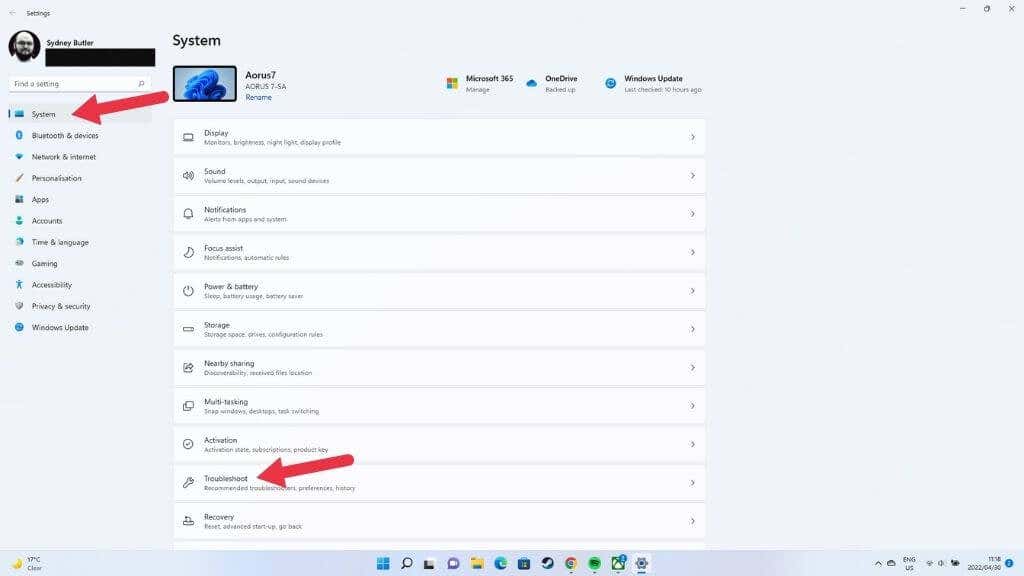
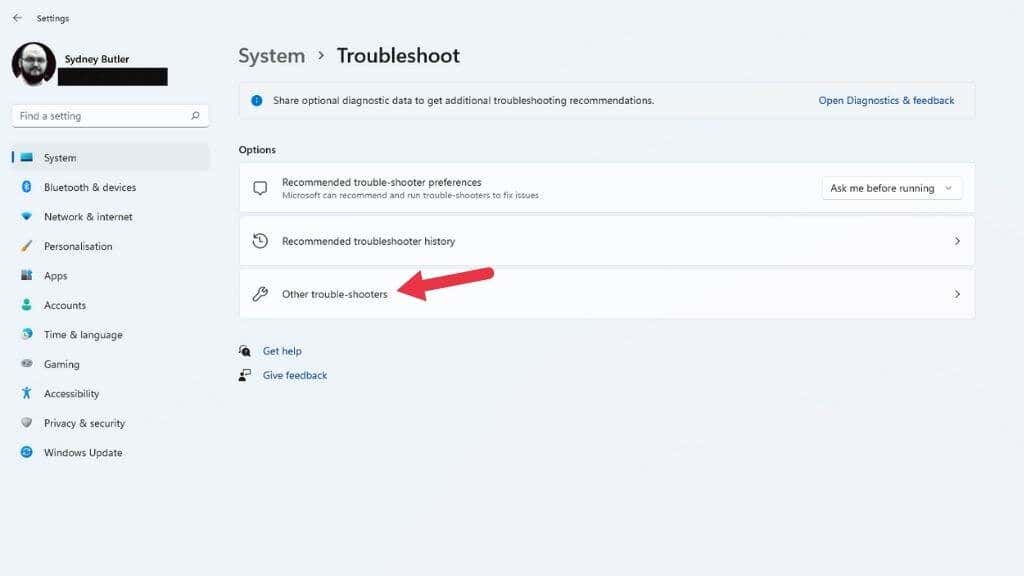
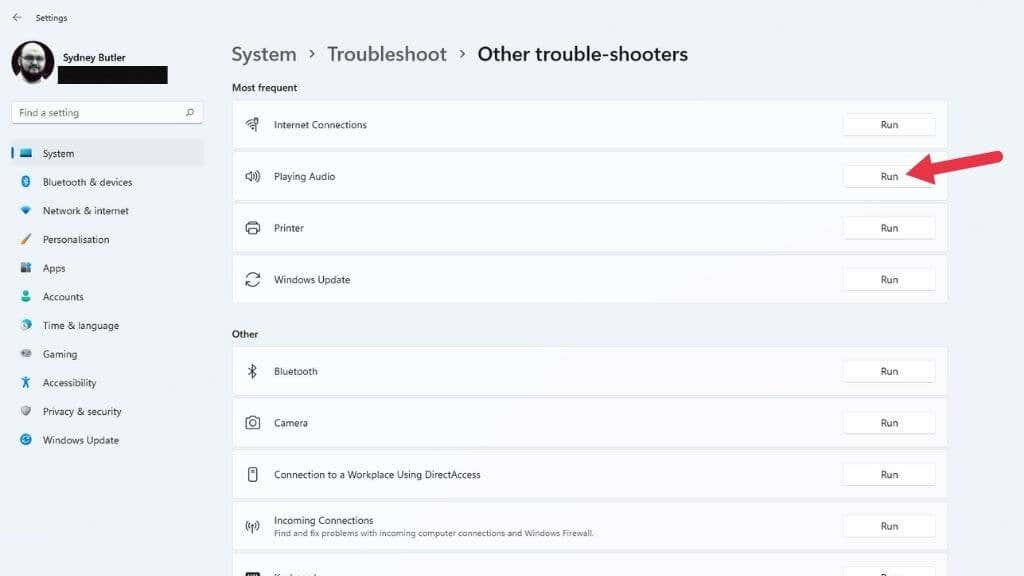
Windows 11 has an automated audio troubleshooter that can fix Windows sound problems without complicated steps. We suggest using the troubleshooter first before trying any of the more advanced solutions below:
- Select the Start Button
- Open Settings (the cog icon).
- Open System.
- Go to Troubleshoot > Other Troubleshooters.
- Select Run next to the Playing Audio troubleshooter.
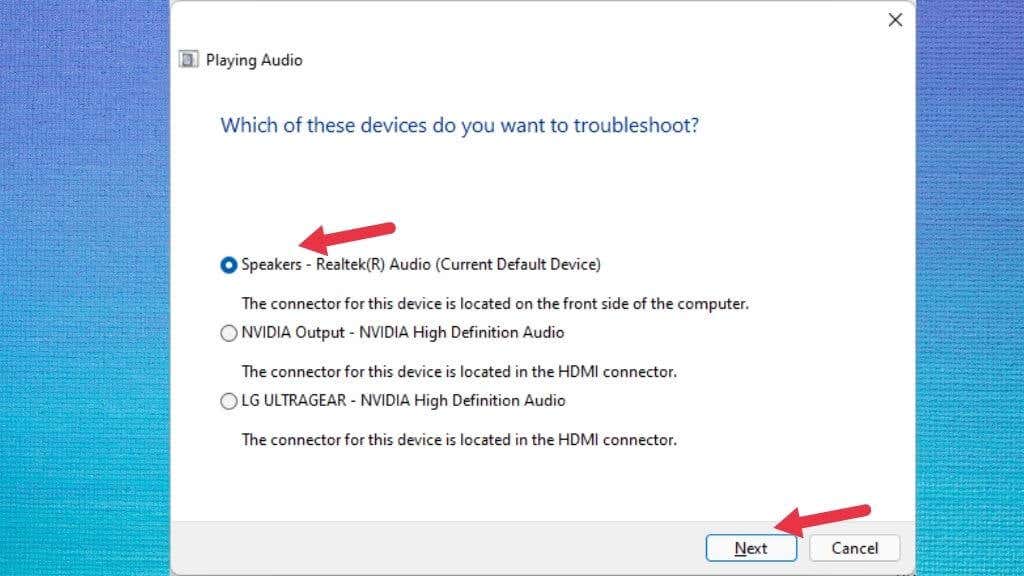
From here, choose the audio device you want to check and just let the troubleshooter run its course.
It will indicate if any problems were found and whether it could fix them.
Ensure Audio Enhancements Are Disabled
Windows 11 has an Audio Enhancements feature that improves the audio coming out of your speakers or headphones. It consists of Bass Boost, Headphone Virtualization, and a loudness equalization feature.
By default, it’s disabled since it can cause issues with some sound devices. Someone may have enabled Audio Enhancements without your knowledge, so ensuring the feature is turned off is worth it.
- Open the Start Menu.
- Select the Settings cog.
- Choose System.
- Select Sound.
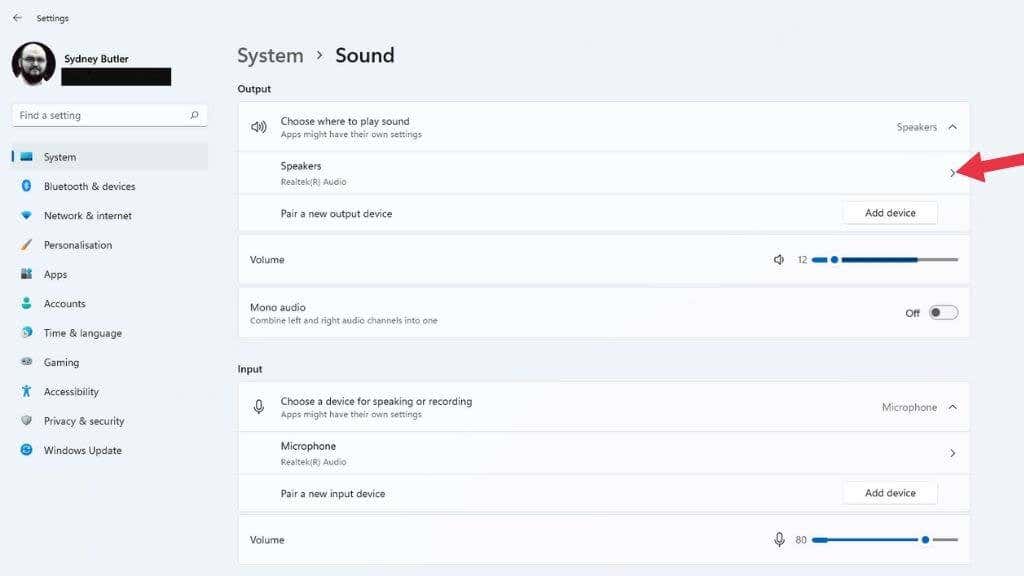
- Under the Output section, select Speakers (or the relevant device).
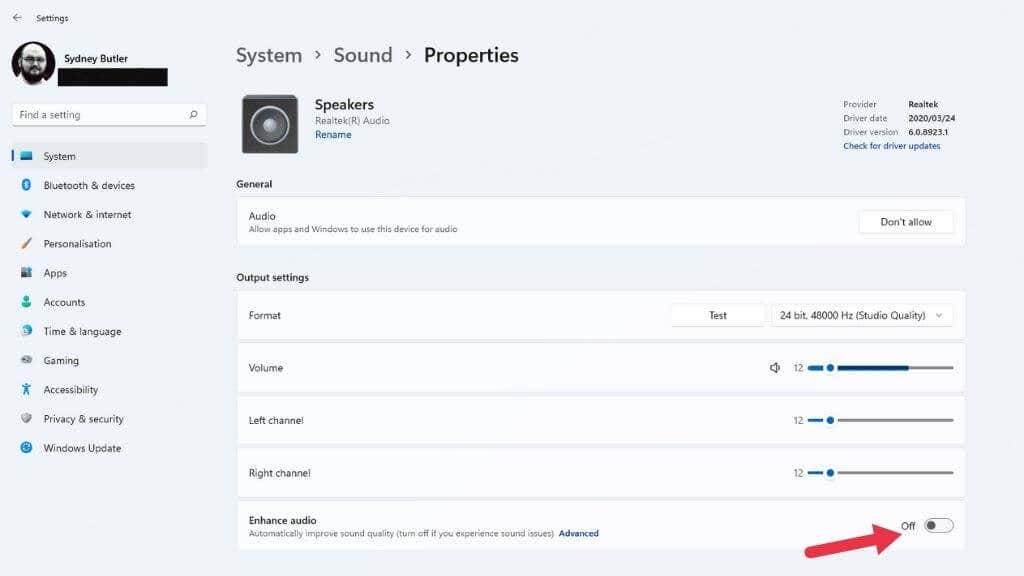
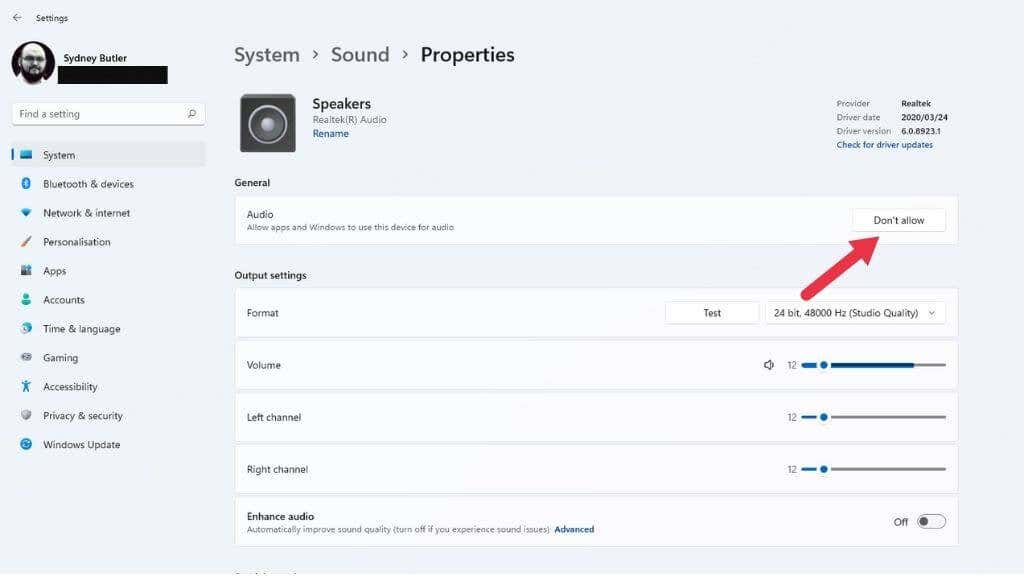
- Next to Enhance Audio, make sure the setting is toggled Off.
If the setting was changed, try to play the audio again and check whether it’s working correctly.
Choose the Correct Audio Device
If your computer has more than one audio device, you may not hear any sound because audio is routed to the wrong output device. A typical example is an audio output on your monitor. HDMI and DisplayPort connections also carry sound, and many monitors have speakers or headphone outputs. Windows may detect this as the last audio device connected and switch to it.
You can change audio devices using quick settings:
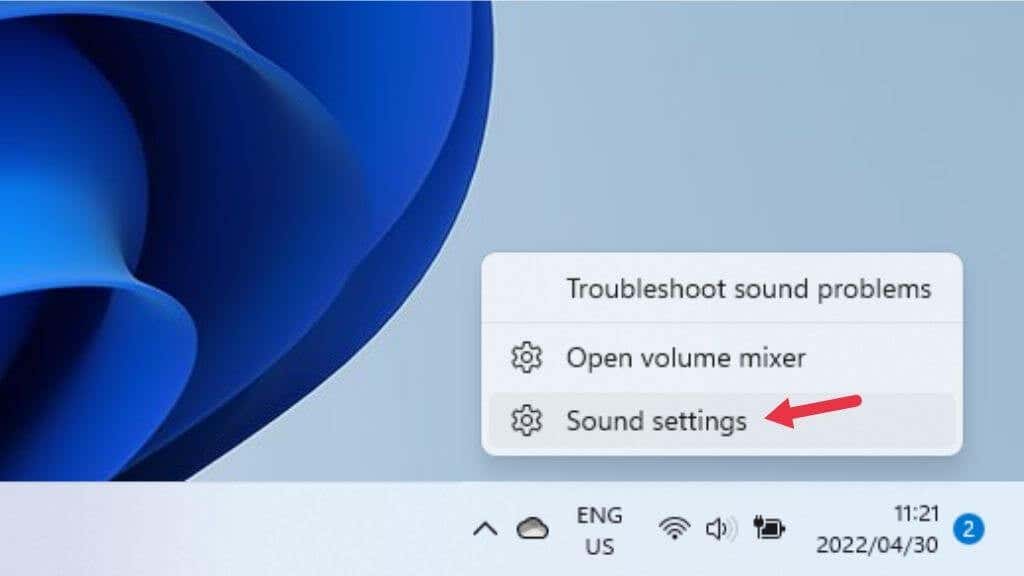
- Rick-click the speaker icon in the notification area of the Taskbar.
- Select Sound Settings.
- Under Choose where to play sound, tick the audio device you want to hear.
If you want to disable an audio device so that it’s never selected by Windows, select the right-facing arrow next to that device under Choose where to play sound. Then select Don’t Allow next to Allow apps and Windows to use this device for audio.
Alternatively, you can also change a device to your default audio device here so that Windows factors it over other devices. Just select the drop-down menu next to Set as default sound device and choose to use it as the default.
Check Per-App Audio Output Settings
If the sound isn’t playing just for specific applications, it could be that the app in question isn’t assigned to the correct audio output device. You can try closing and opening the app again, but if that doesn’t work, you can check whether that app has been assigned to the correct output.
- Open the Start Menu.
- Select the Settings cog.
- Choose Sound.
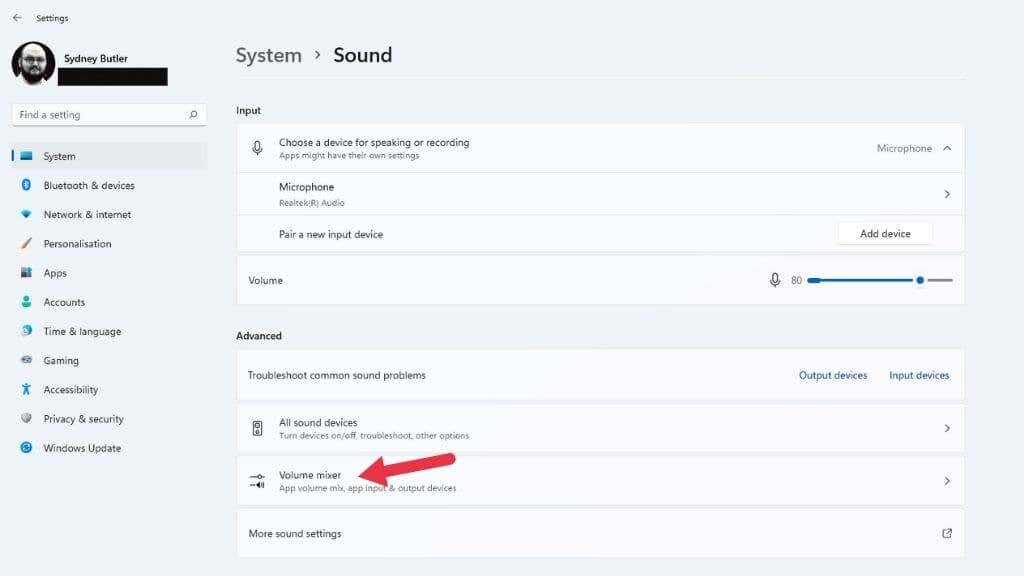
- Next, choose Volume Mixer under the Advanced section.
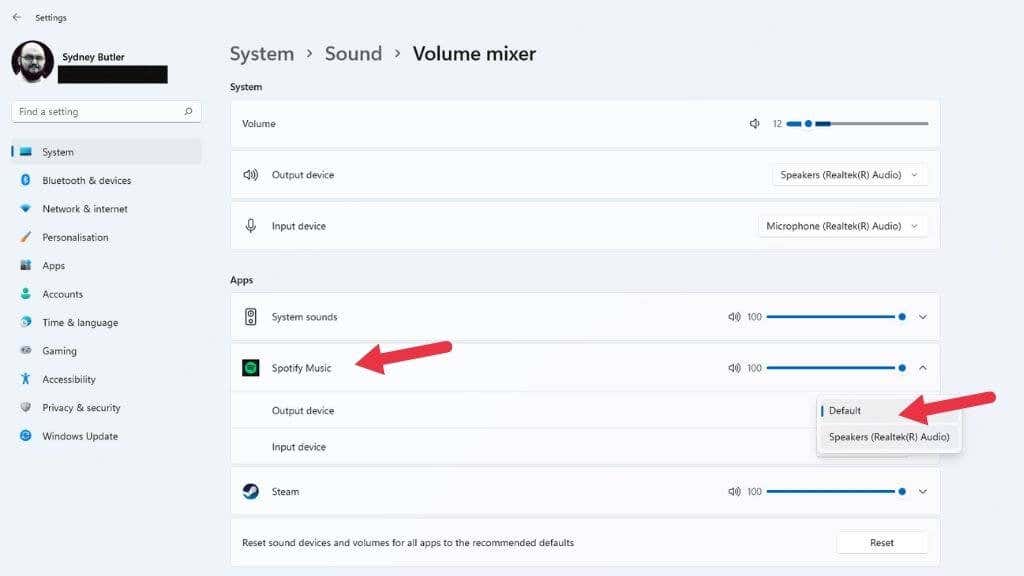
- Under Apps, choose the app you’re having issues with.
- Under Output Device, use the dropdown menu to choose the device you want to use with that app if it’s not the correct one.
Tip: Incidentally, this is a great way to have different apps play their sound through your headphones and speakers simultaneously.
Restart the Audio Service
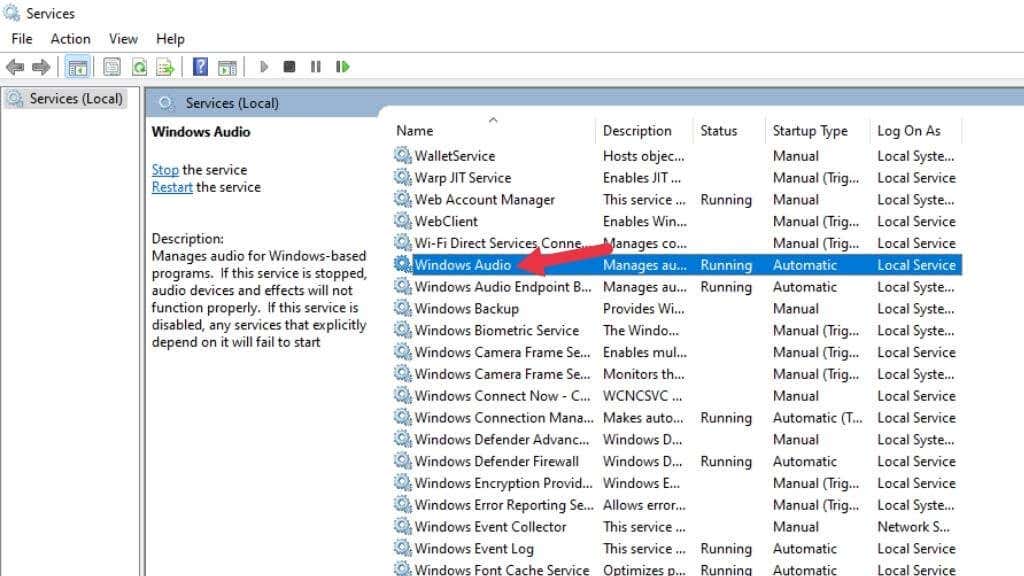
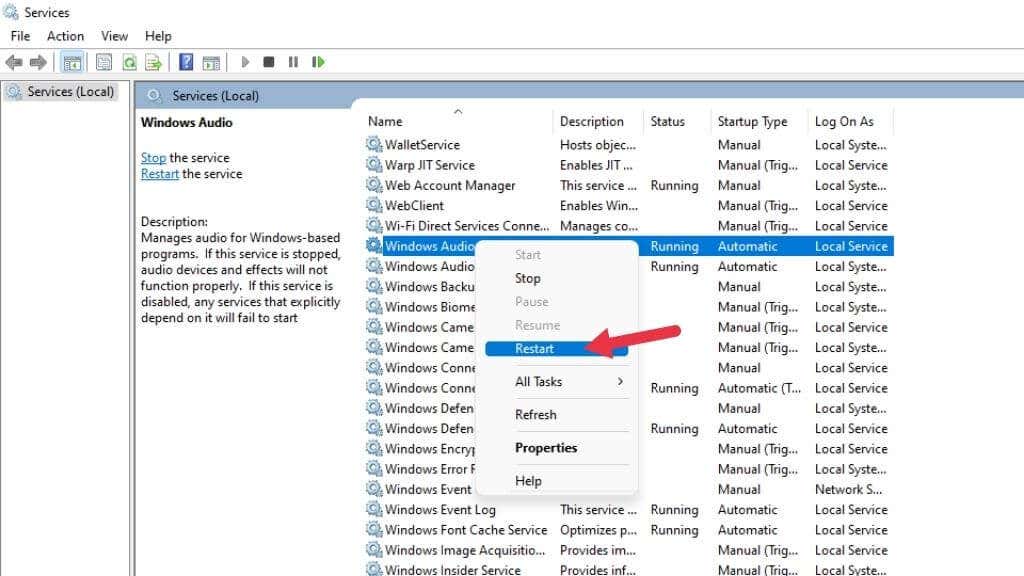
The Windows Audio service may have stopped working for some reason, which may not be related to your hardware or hardware drivers, nor any setting. A quick way to rectify this is by restarting the service manually:
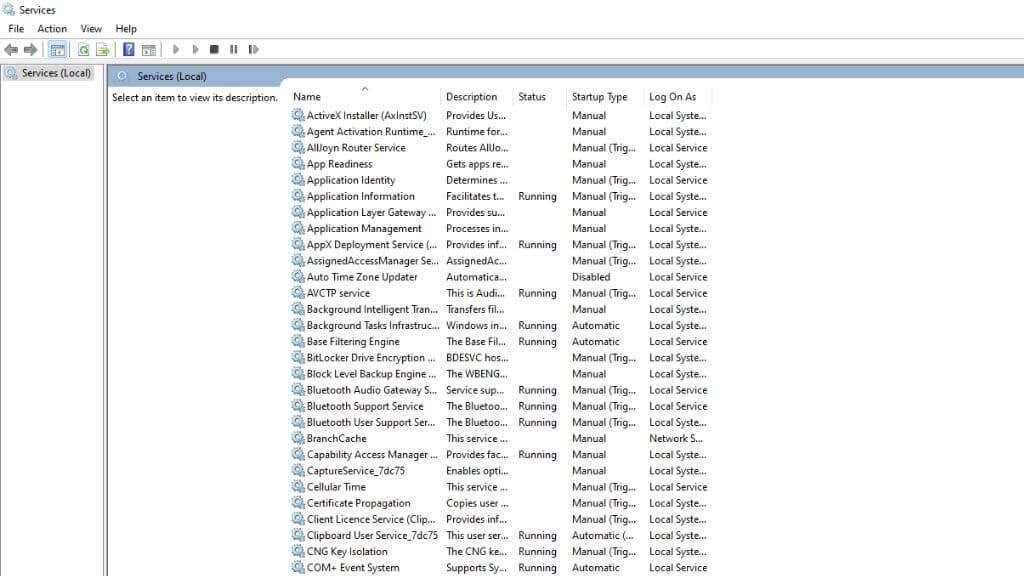
- Open the Start Menu and type Services.
- Open Services from the search results.
- Look for Windows Audio and select it.
- Right-click on Windows Audio and select Restart.
- Next, do the same with Windows Audio Endpoint Builder and Remote Procedure Call.
Hopefully, your audio should be back.
General Troubleshooting
There are more general troubleshooting steps you can take if the audio-specific fixes above didn’t work for you:
- Make sure Windows 11 is up to date.
- Update drivers or uninstall, then reinstall them.
- Check the Device Manager for any errors on your audio devices.
- Roll back your audio driver if the problem started recently.
- Consider rolling back the last Windows update if the problem started after it.
Any recent change to your computer might be responsible for audio issues, so if possible, try to undo the last thing that happened before your audio stopped working.
Try a New Audio Device
If you can’t get your computer’s built-in soundcard to work, using a separate audio device can help determine if the problem is with Windows or with your audio hardware.
If you have a Bluetooth audio device or a USB-based headset or speakers, these represent their own separate audio devices. Your motherboard’s sound hardware may have failed if you get correct playback through a different device, and driver reinstallation doesn’t work.
