Many Windows users report a frustrating glitch in which their search bar closes as soon as they open it. While the cause of this bug is unknown, it’s very likely due to corrupted system files.
In this troubleshooting guide, we’ll list 8 solutions for both Windows 10 and Windows 11 that should help get your search bar working once again.
1. Change the Windows Search Registry Entry
One of the most common causes for the Windows Search bar to stop working correctly is corrupt registry entries. By deleting these entries, you can force Windows to automatically recreate them, fixing the problem.
Here’s how:
- Press the Windows key + R to open the Run dialog box.
- Type “regedit” and press Enter.
- Navigate to the following entry:
Computer\HKEY_CURRENT_USER\Software\Microsoft\Windows\CurrentVersion\Search
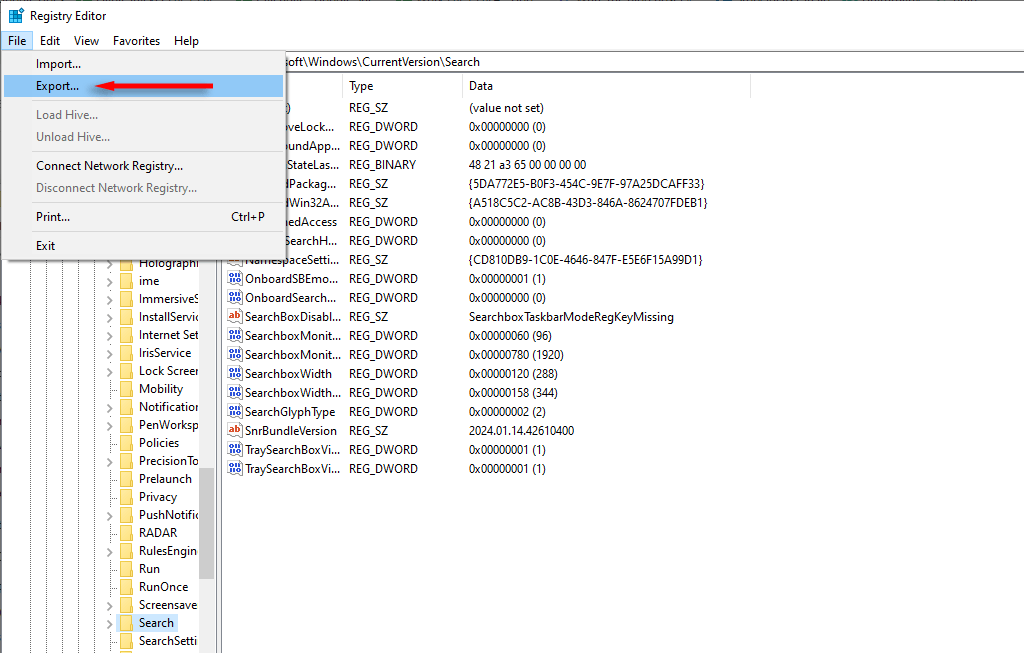
- Select File > Export to back up these registry entries somewhere safe on your PC.
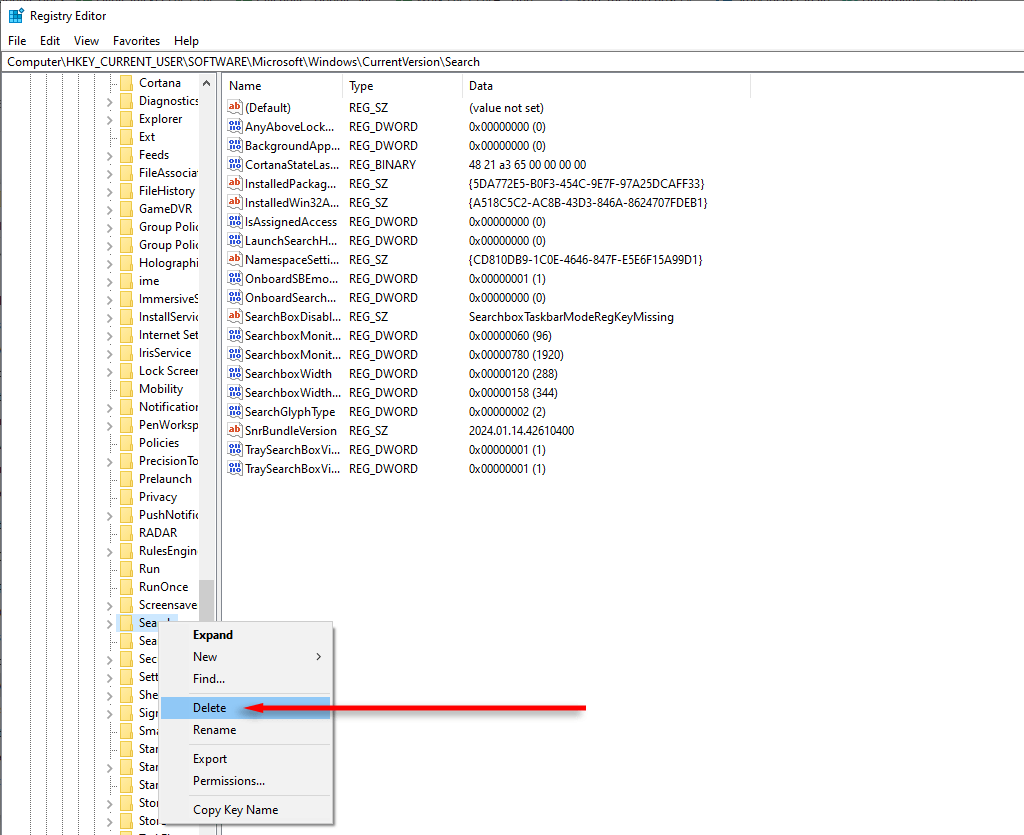
- Next, delete the Search registry key (and all subkeys). To do so, right-click Search and select Delete.
- Restart your PC, then try to use the Windows Search box again.
2. Restart the SearchHost.exe and Windows Search Processes
SearchHost.exe is the application Windows uses to search files on your PC. If Windows Search isn’t working, restarting the host process might help. To do so:
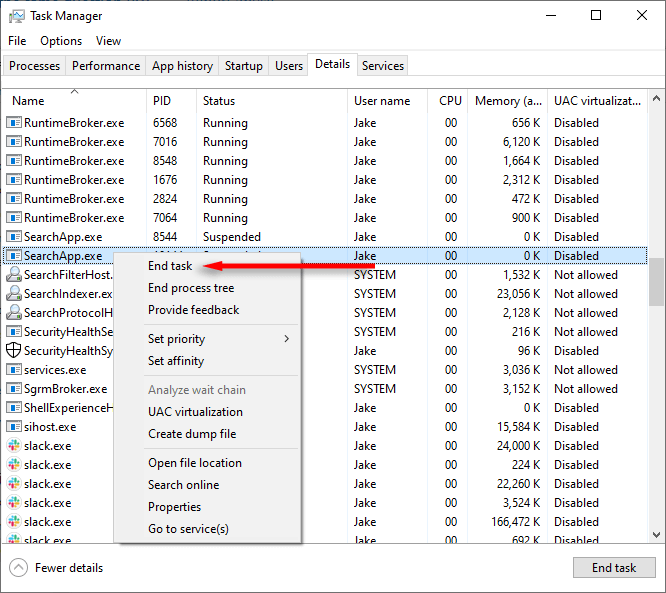
- Press Ctrl + Shift + Esc to open the Task Manager.
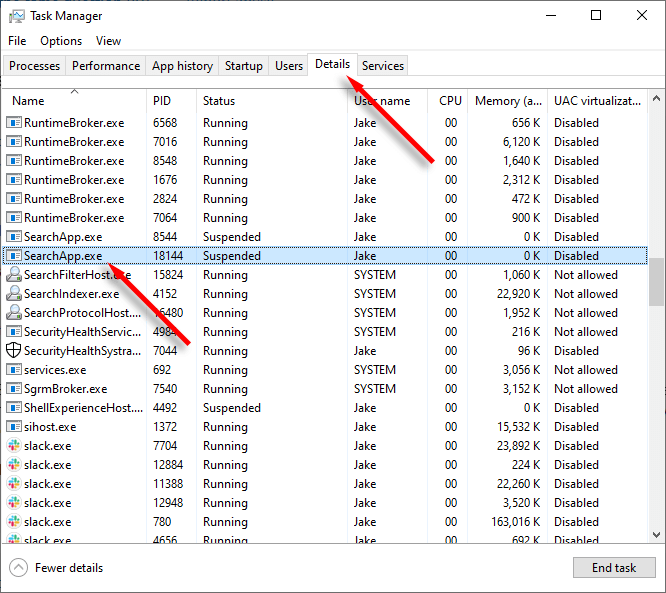
- Scroll down and find SearchHost.exe in the Details tab.
- Right-click SearchHost.exe and select End task.
- Confirm your choice, then try to use Windows Search.
- Do the same for SearchUI.exe. If SearchUI.exe isn’t present, do the same for SearchApp.exe.
3. Restart the Windows Search Service
If something has gone wrong with the Windows Search service, restarting it might get it working again. Here’s how:
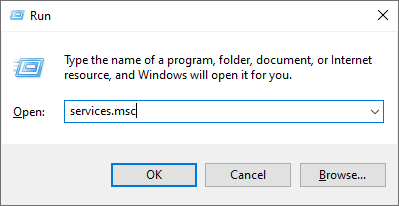
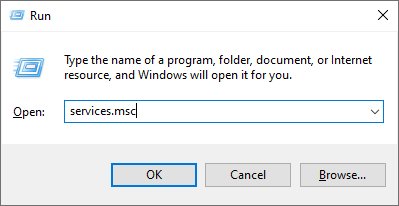
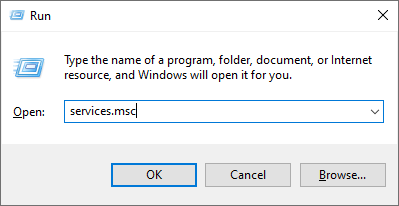
- Press Win + R to open the Run dialog box.
- Type “services.msc” and press Enter.
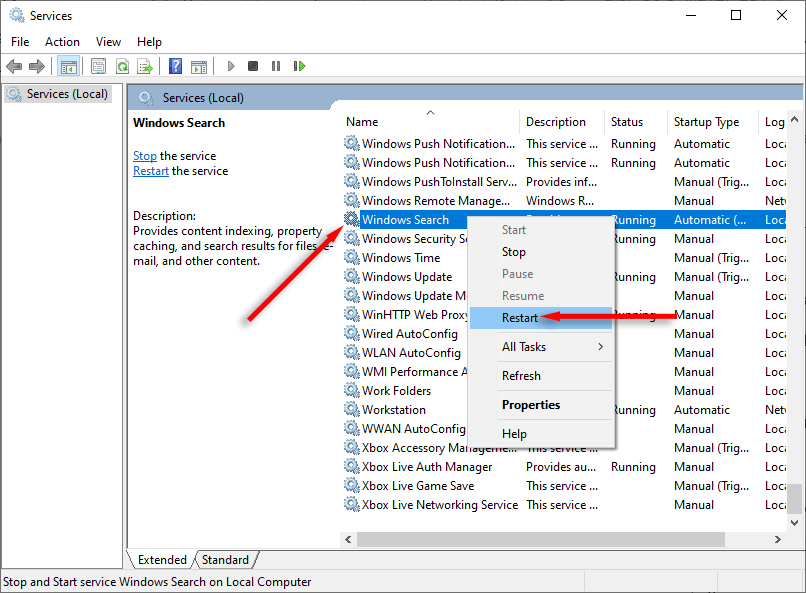
- Find and right-click Windows Search, then press Restart.
You can also restart the search service by using a script created by Microsoft.
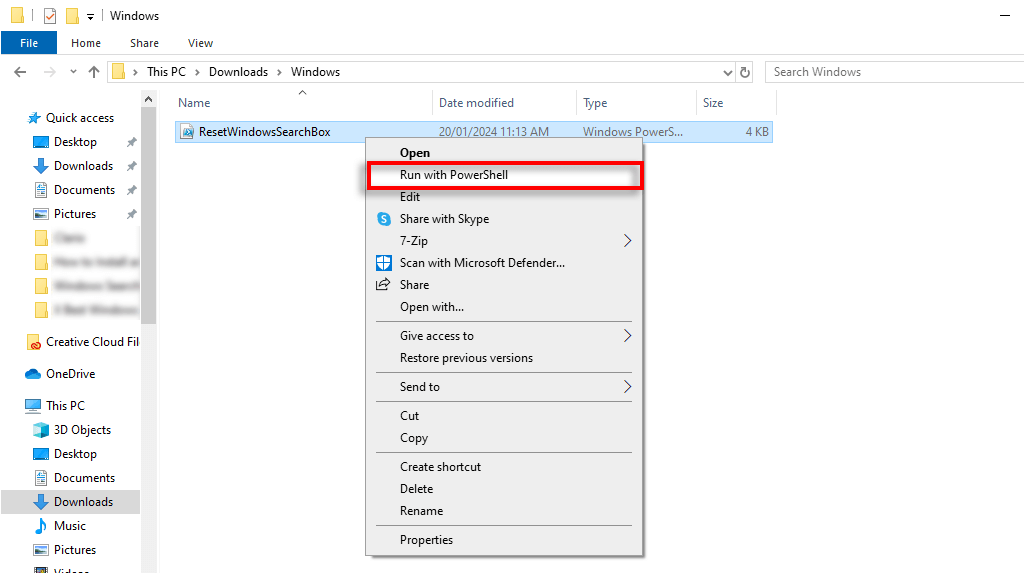
- First, download the script called “ResetWindowsSearchBox.ps1” from the Microsoft page.
- Once downloaded, right-click the file and select Run with PowerShell.
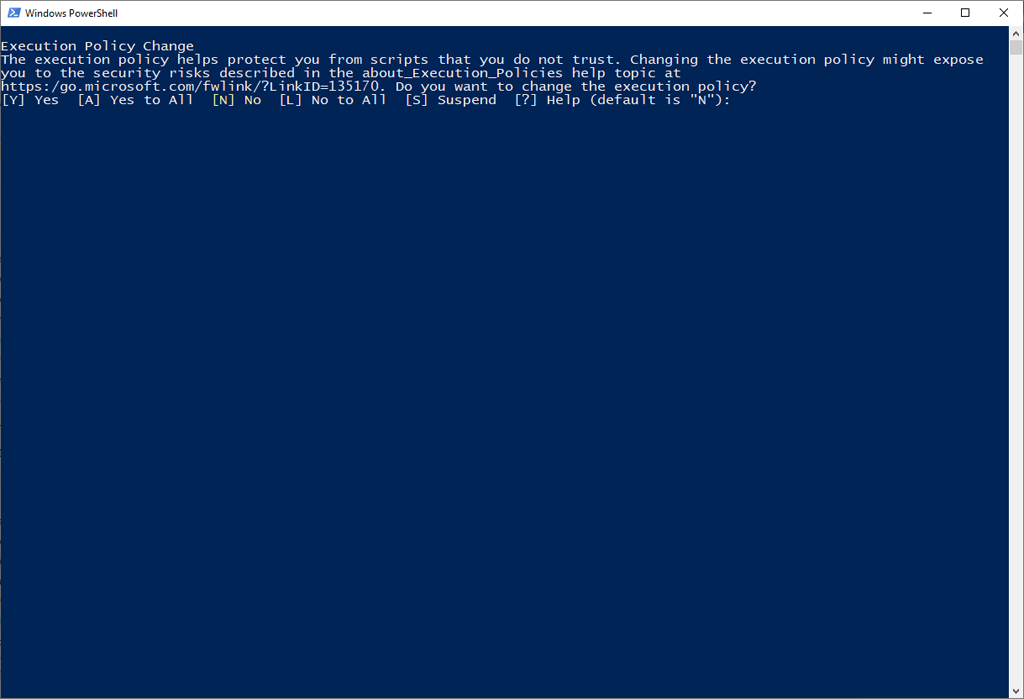
- If asked to confirm your choice, type Y and press Enter.
- Wait for the process to complete. If you receive an error message, type the following command and press Enter:
Set-ExecutionPolicy -Scope CurrentUser -ExecutionPolicy Unrestricted
- Repeat steps 2 and 3, then enter the following command and press Enter:
Set-ExecutionPolicy -Scope CurrentUser -ExecutionPolicy Restricted
4. Rebuild the Search Index
Windows generates a search index that acts like a map of all your files. However, the Windows Search Indexer may have been corrupted, leading to your Windows Search problems. To check whether this is the case, you can try rebuilding the search index as follows:
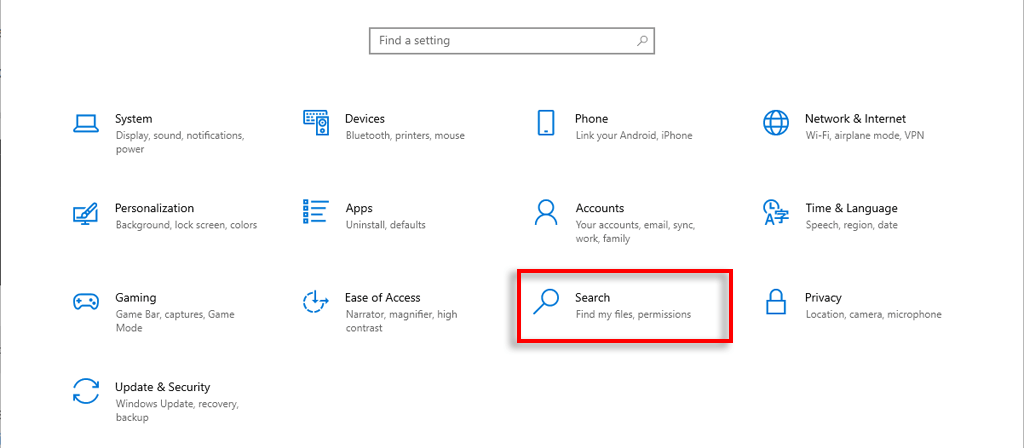
- Press Win + I to open Settings.
- Select Search.
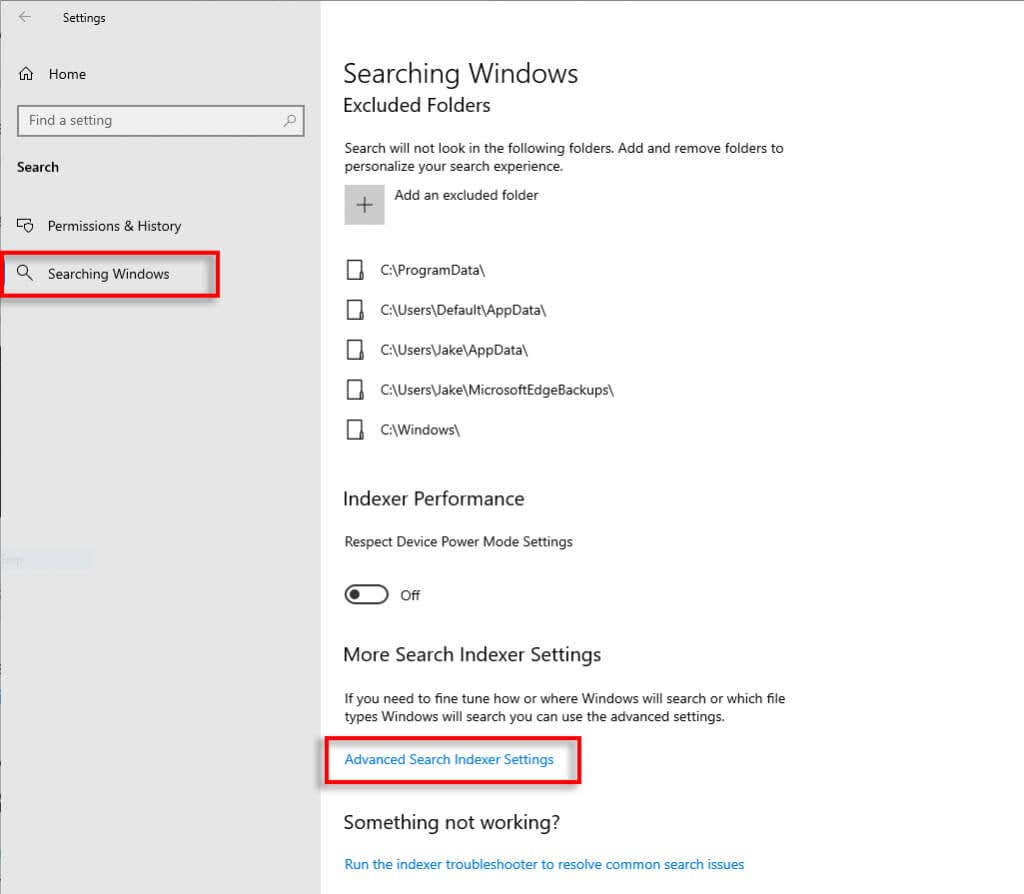
- Select Searching Windows in the left-hand sidebar.
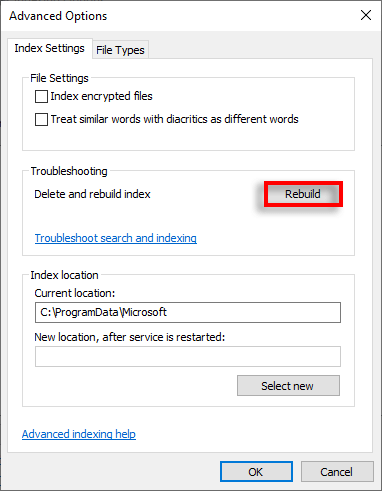
- Scroll down and select Advanced Search Indexer Options.
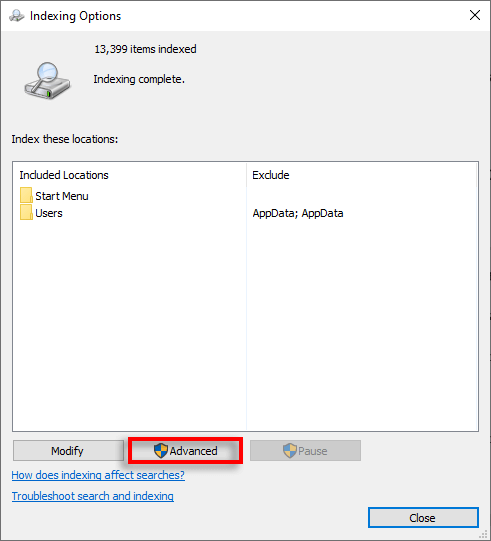
- Tap Advanced.
- Select Rebuild.
- Press OK and wait for Windows to rebuild the search index. Once it’s done, check to see whether the search bar is working.
5. Repair all Windows Apps Using PowerShell
Some users report that using a command to repair Windows apps can resolve the search bar issue. Here’s what to do:
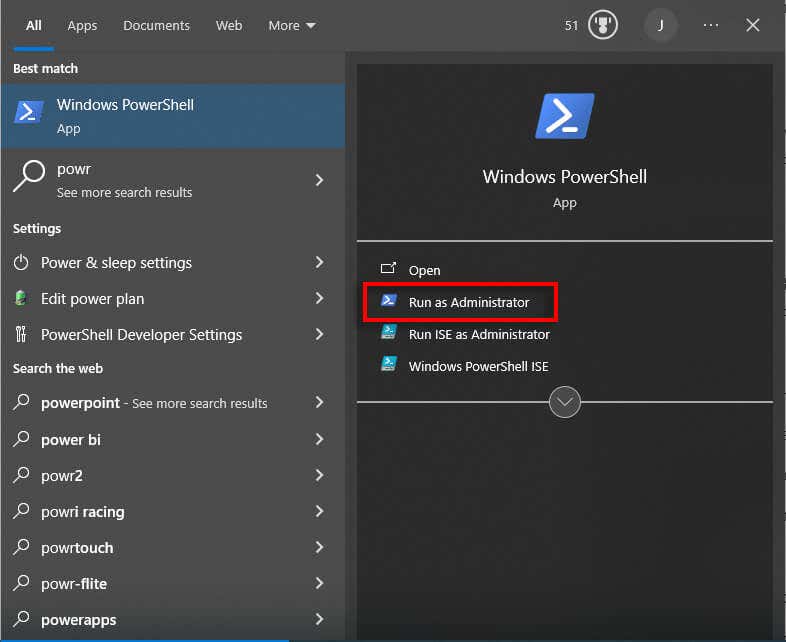
- Open the Start Menu and type “powershell.”
- Right-click PowerShell and select Run as Administrator.
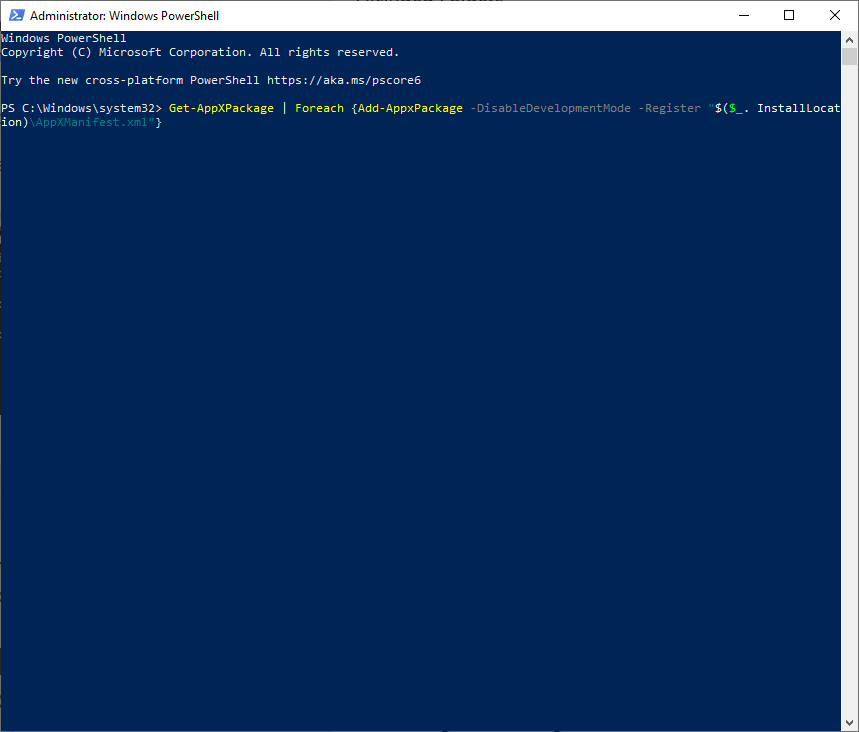
- Copy and paste the following command into PowerShell, then press Enter:
Get-AppxPackage Microsoft.Windows.Search | foreach {Add-AppxPackage -register “$($_. InstallLocation)\appxmanifest.xml” -DisableDevelopmentMode}
- Then, copy and paste the next command into PowerShell:
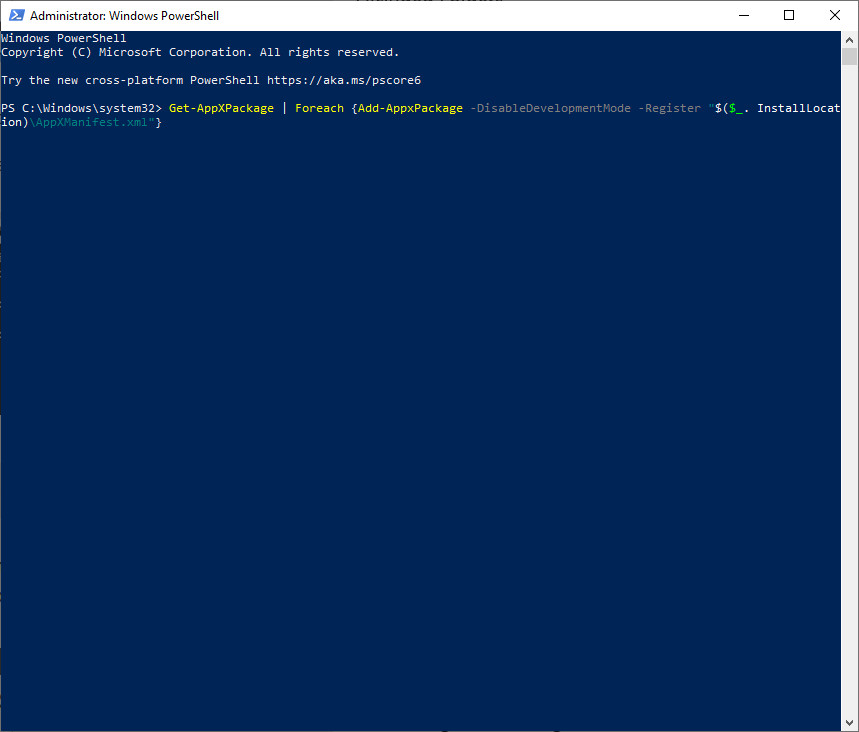
Get-AppXPackage | Foreach {Add-AppxPackage -DisableDevelopmentMode -Register “$($_. InstallLocation)\AppXManifest.xml”}
Next, you need to perform a clean boot of Windows:
- Press the Windows key + R to open Run.
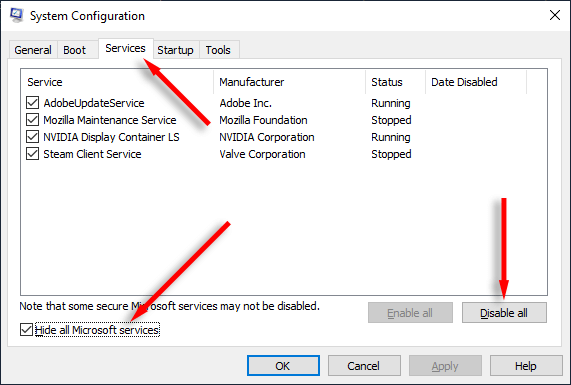
- Type “msconfig” and press Enter.
- Select System Configuration.
- Press the Services tab and make sure that “Hide all Microsoft services” is ticked.
- Select Disable all.
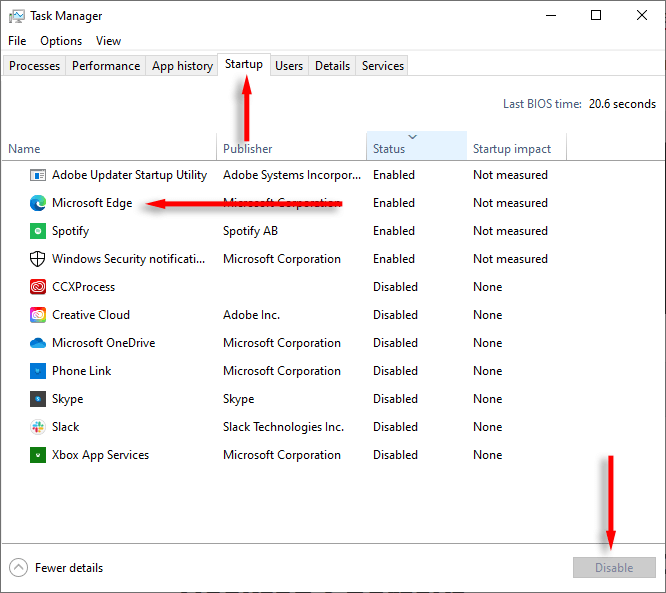
- Press Ctrl + Shift + Esc to open Task Manager.
- Select the Startup tab and disable all unnecessary services.
- Restart your computer and check if the Windows Search bar works.
6. Run the Search and Indexing Troubleshooter
If nothing has worked, Windows might be able to resolve your search bug via the Search and Indexing troubleshooter. To try this:
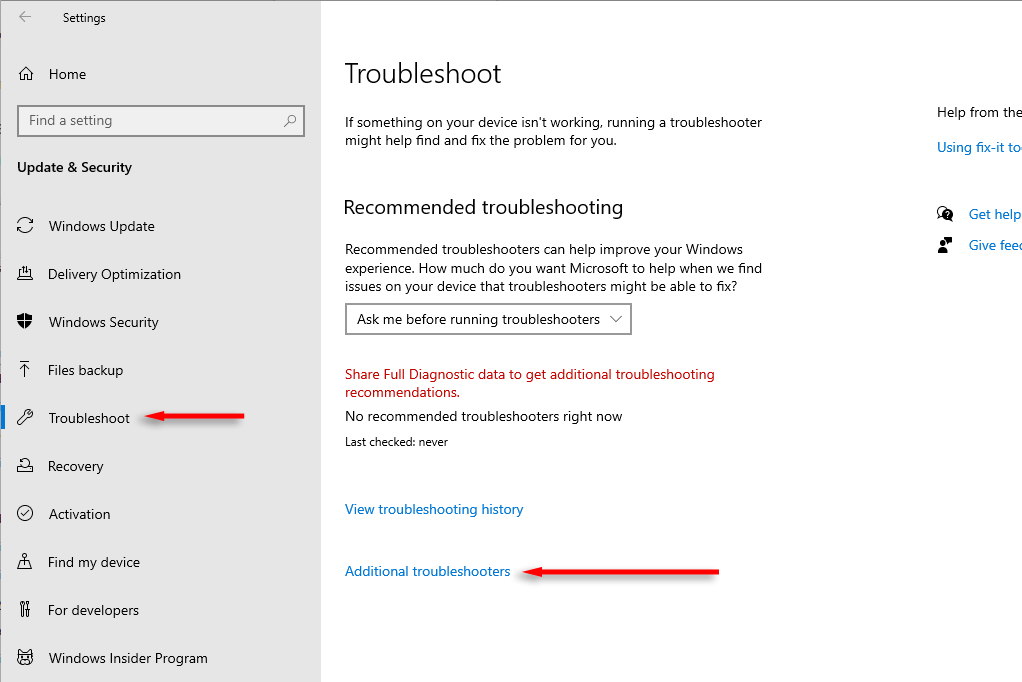
- Press the Windows key + I to open Settings.
- Select Update & Security, then choose Troubleshoot.
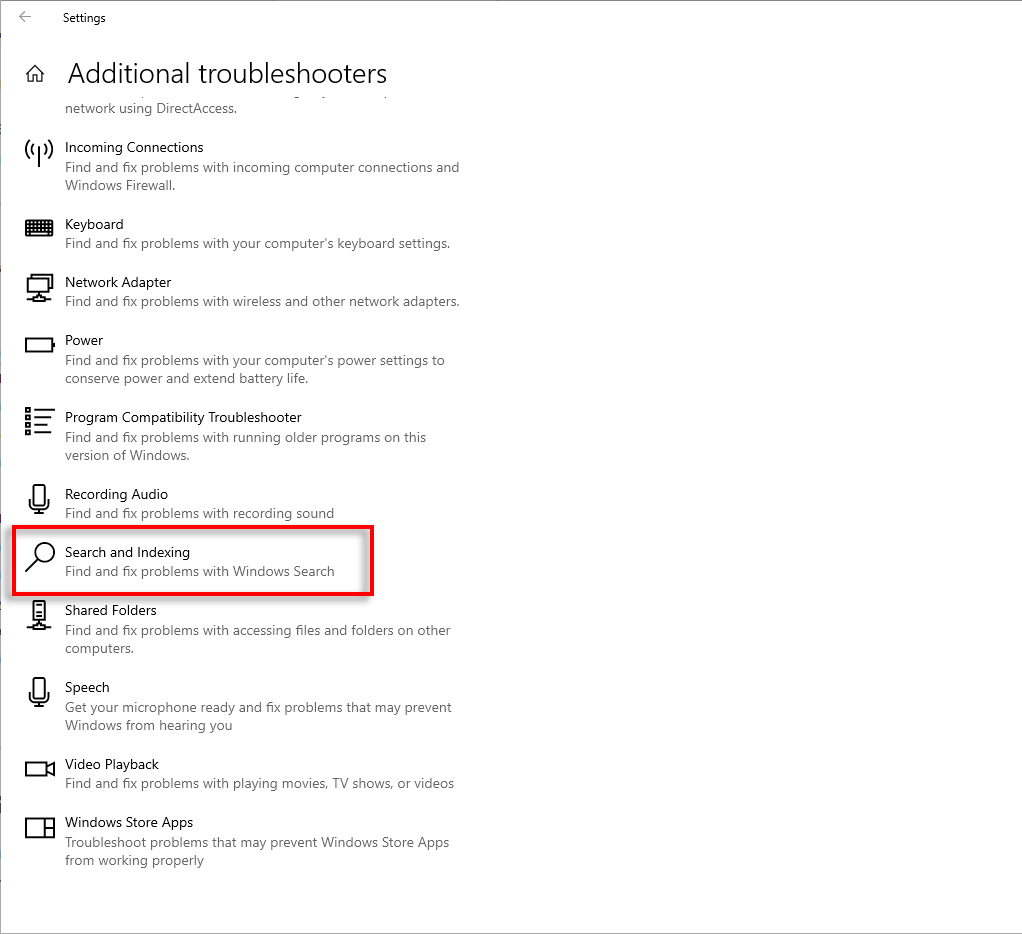
- Select Additional troubleshooters.
- Scroll down to Search and Indexing and select Run.
- Select the issues you’re having with the Windows Search feature, then press Next.
- Follow the on-screen instructions and reboot your PC once completed, then check if Search is working correctly.
7. Use the SFC and DISM Tools to Repair Search
Some users report that the SFC and DISM commands can help resolve problems with Windows Search. Here’s what to do:
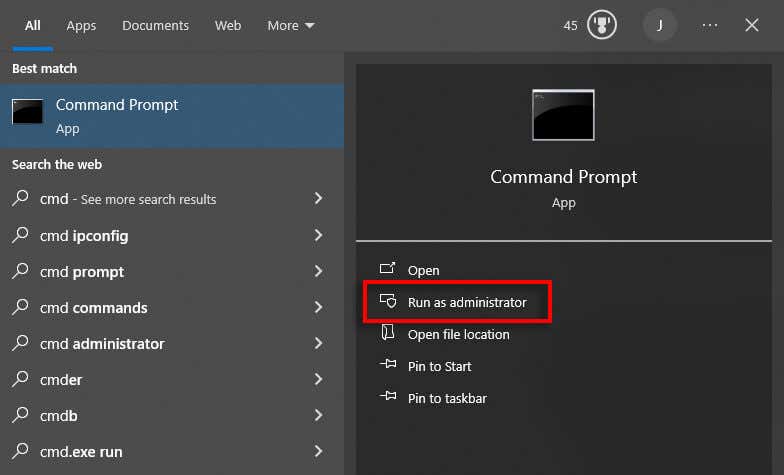
- Open the Start Menu, type “cmd,” and press Run as administrator.
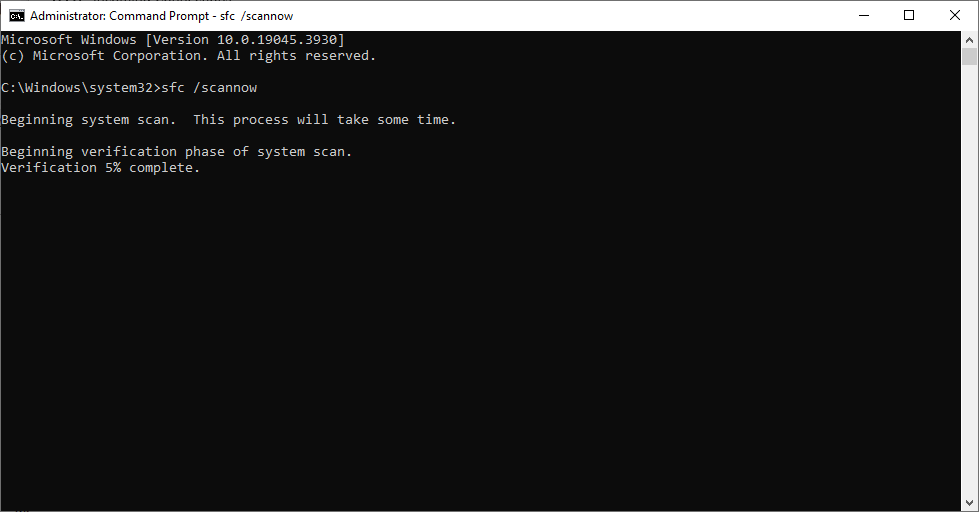
- Type the following command and press Enter:
SFC /scannow
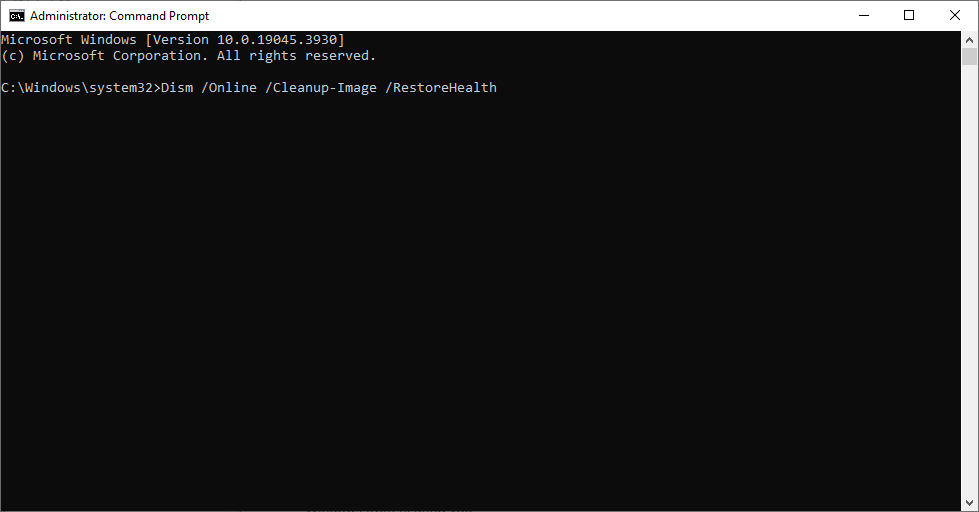
- If that doesn’t work, you can try resolving potential file corruption using the DISM tool. Type the following command and press Enter:
Dism /Online /Cleanup-Image /RestoreHealth
8. Run Windows Update
While the Windows Search problem is likely caused by corrupted system files, a simple Windows Update can be enough to get it working again. To check if there are available updates:
- Open Settings.
- Select Update & Security.
- Choose Windows Update and press Check for updates.
- If there are any available, install them and restart your computer.
Search Away!
The Windows Search feature is the easiest way to find key settings, files, and folders on your PC. If it stops working, it means you’ll have to spend much longer to manually find these files and folders. Hopefully, the solutions we’ve listed help you return the search bar to full functionality.

