Have you run into an nvlddmkm.sys failed error on your Windows 11 or Windows 10 PC? There’s a great chance your installed NVIDIA drivers are faulty. You can fix your installed drivers as well as make a few other tweaks to resolve your issue. We’ll show you how to do just that so you can start using your PC normally.
The nvlddmkm.sys file is one of NVIDIA’s graphics card driver files. You get the above error when something’s wrong with your drivers. You can update your PC, disable GPU overclocking, remove apps that might be interfering with your GPU, and reinstall the drivers to possibly fix your issue.
Boot Your PC in Safe Mode to Use the Troubleshooting Tips
The nvlddmkm.sys failed error is a BSOD (blue screen of death) error, which means you’re stuck on a blue screen on your PC. If the error remains, you’ll have to boot your Windows PC in safe mode to use the following fixes. We have a guide on that topic, so check that out to learn how to reboot your computer in safe mode.
Restart Your PC
If you’ve just booted up or restarted your PC only to be greeted with the above error, give your PC another reboot to fix your problem possibly. Restarting your computer often helps fix many minor issues.
You can use your machine’s Power button to turn the system off and back on.
Update the Windows Version
Another easy fix you can apply to resolve your issue is to bring your Windows version up to date. Your current system might have a bug, causing your error. Updating your system will likely patch that bug.
On Windows 11
- Open Settings by pressing Windows + I.
- Select Windows Update in the left sidebar.
- Choose Check for updates on the right pane.
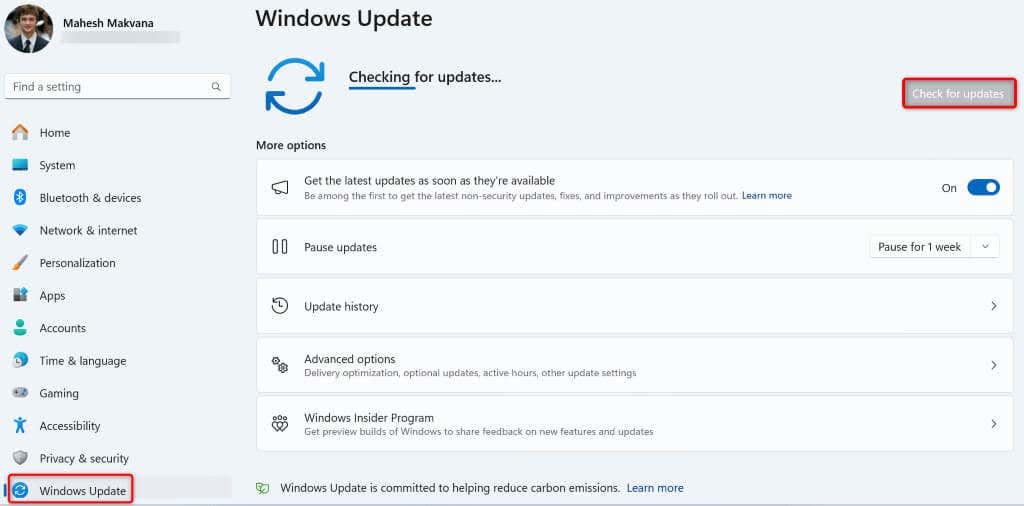
- Download and install the available updates.
- Restart your PC.
On Windows 10
- Launch Settings by pressing Windows + I.
- Select Update & Security in Settings.
- Choose Windows Update in the left sidebar.
- Select Check for updates on the right pane.
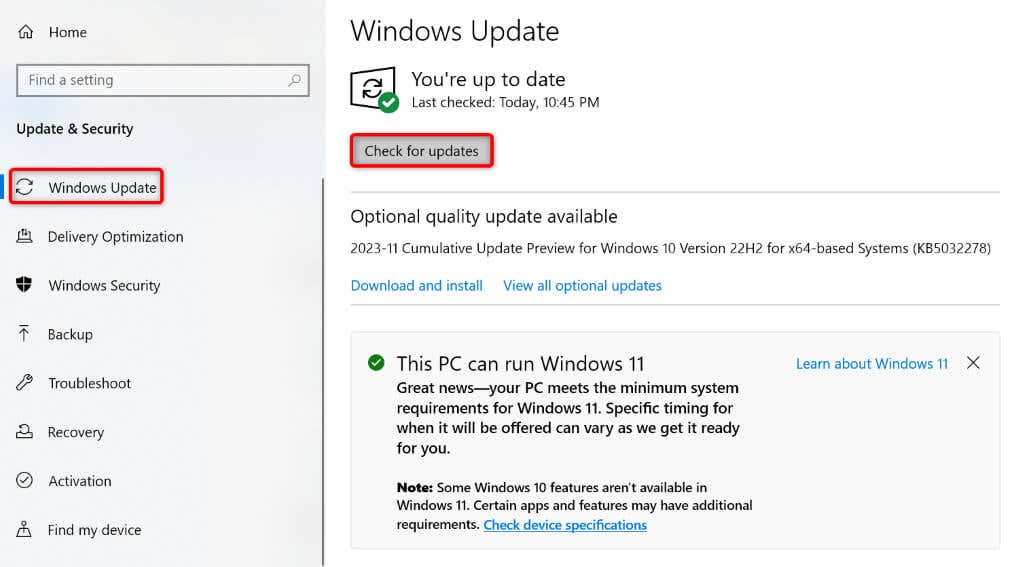
- Download and install the latest updates.
- Reboot your PC.
Turn Off GPU Overclocking on Your PC
If you’ve overclocked your GPU, turn that off and see if that resolves your problem.
How you disable overclocking depends on how you overclocked your device in the first place. In most cases, you’ll use the same tool that you used for overclocking to disable overclocking. Once you’ve done that, reboot your PC, and your issue should be resolved.
Uninstall the Apps Affecting Your Graphics Card
If you’ve installed an app that tweaks your graphics card options, that app might have caused your issue. In this case, it’s worth removing that app to fix your issue. You can always re-install an app if you want.
On Windows 11
- Launch Settings using Windows + I.
- Select Apps > Installed apps in Settings.
- Find your app on the list, select the three dots next to the app, and choose Uninstall.
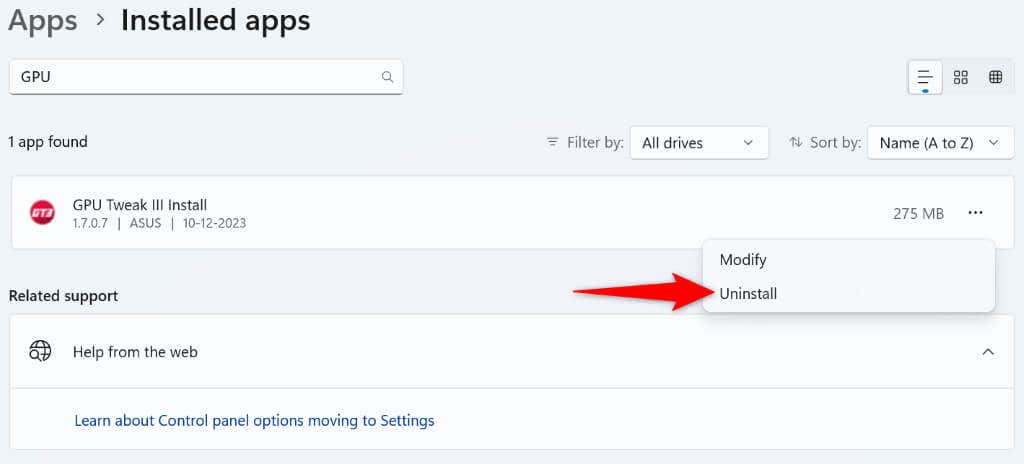
- Select Uninstall in the prompt.
- Reboot your PC.
On Windows 10
- Open Settings using Windows + I.
- Select Apps in Settings.
- Locate your app, select the app, and choose Uninstall.
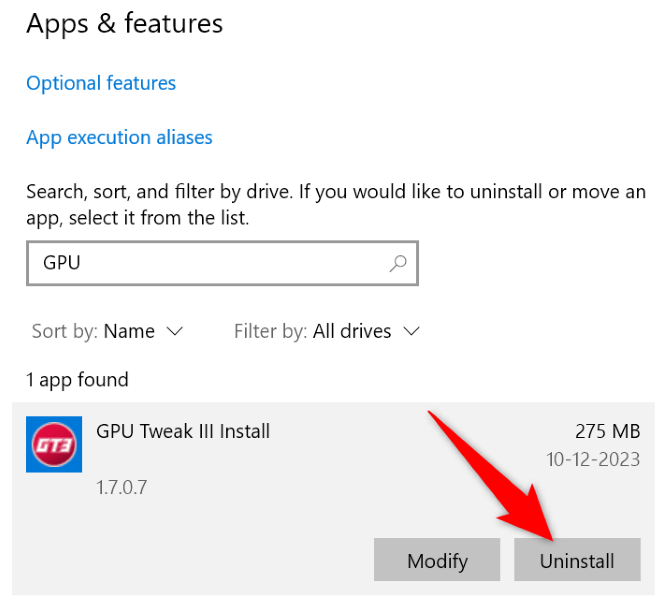
- Select Uninstall in the prompt.
- Restart your PC.
Uninstall the NVIDIA Graphics Card Driver Update
If you started getting the nvlddmkm.sys failed error after updating the graphics card drivers, the recent driver update might be faulty. Sometimes, you end up receiving corrupted drivers, causing various issues on your PC.
In this case, roll back the driver update to resolve your issue.
- Open the Start menu, find Device Manager, and launch the utility.
- Expand Display adapters, right-click your graphics card, and choose Properties.
- Access the Driver tab in the Properties window.
- Select Roll Back Driver to uninstall the driver update.
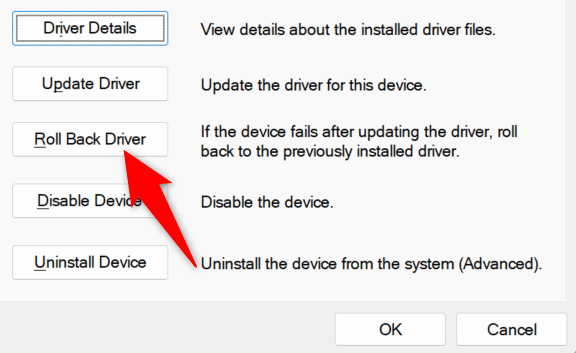
- Choose the reason you’re uninstalling the update and select Yes.
Uninstall and Reinstall the NVIDIA Graphics Card Drivers
If your PC’s installed NVIDIA graphics card drivers are corrupted, that might be why you’re receiving an nvlddmkm.sys failed error. In this case, remove the existing drivers and perform a clean install of the drivers.
There are two stages to do that:
Step 1: Uninstall the Existing Drivers
- Right-click the Start menu icon and select Device Manager.
- Expand Display adapters, right-click your graphics card, and choose Uninstall device.
- Enable the Attempt to remove the driver for this device option and choose Uninstall.
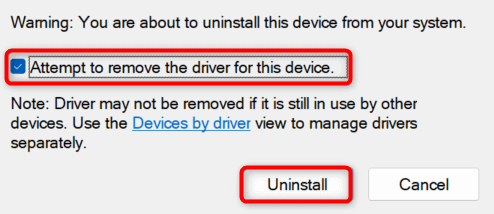
- Restart your PC when you’ve removed the drivers.
Step 2: Perform a Clean Installation of the Drivers
You can install the latest drivers using two ways. Both methods achieve the same result.
Way 1. From the NVIDIA Website
- Launch a web browser on your PC and access the NVIDIA Driver Downloads site.
- Choose your specific graphics card model using the displayed drop-down menus and select Search.
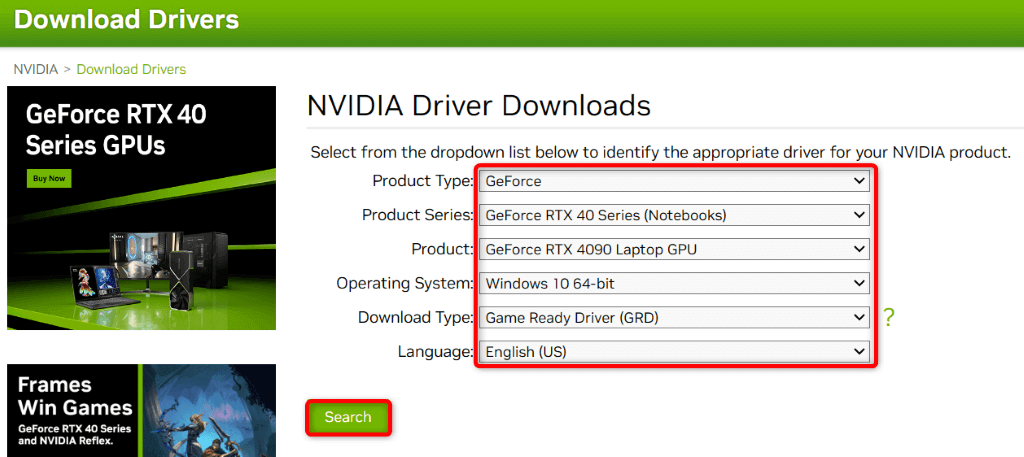
- Select Download on the following screen to download the latest drivers.
- Run the downloaded file and follow the on-screen instructions to install the latest drivers.
- Restart your PC after installing the drivers.
Way 2. Using the NVIDIA GeForce Experience Tool
- Download and install the NVIDIA GeForce Experience tool on your PC if you haven’t already done so.
- Launch the installed tool.
- Select the Drivers tab at the top of the tool.
- Select Check for Updates to find the latest drivers.

- Choose Download next to the latest driver.
- Select Express Installation to begin installing the latest drivers.
- Restart your PC.
Fix Windows’ Memory Issues
If your computer’s RAM (Random Access Memory) has problems, that can cause the above error on your PC. In this case, use the built-in Memory Diagnostic tool to find and fix your RAM issues.
- Open the Start menu, find Windows Memory Diagnostic, and launch the tool.
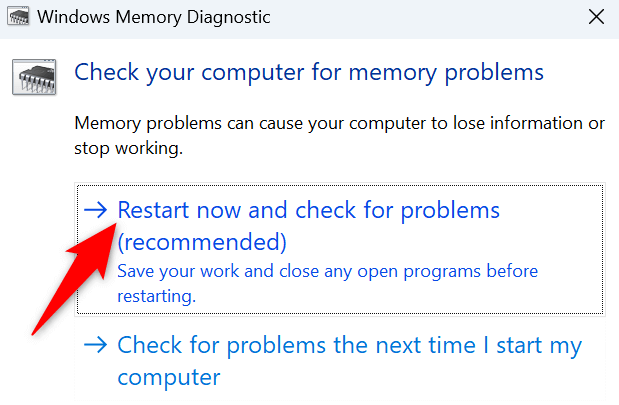
- Select Restart now and check for problems (recommended) in the tool. Note that this will reboot your PC, so save your unsaved work.
- Wait for the tool to find and fix your PC’s memory issues.
Fix Windows’ Damaged System Files
If the nvlddmkm.sys failed error persists, your Windows system files might be corrupted. Such corruption can cause various issues. One way to fix this problem is to replace your system’s broken files with working files.
A built-in tool called SFC (System File Checker) on your PC allows you to do just that. The tool automatically finds the corrupted files on your system and replaces those files with working ones.
- Launch the Start menu, find Command Prompt, and select Run as administrator.
- Choose Yes in the User Account Control prompt.
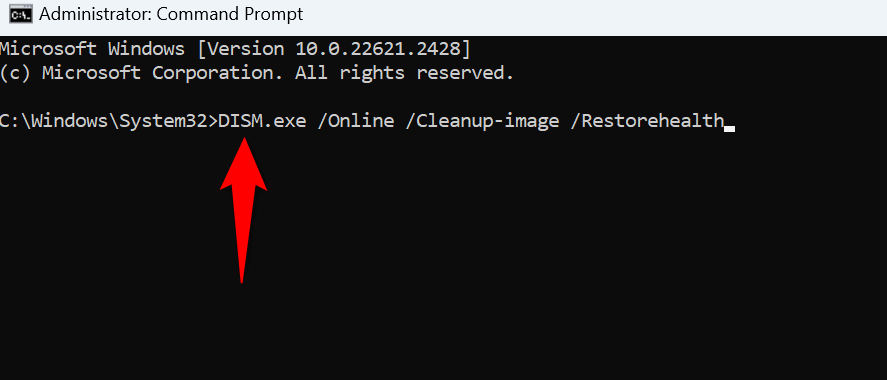
- Type the following command on the CMD window and press Enter. This command gets the required files to fix your system’s damaged files.
DISM.exe /Online /Cleanup-image /Restorehealth
- Run the following command to begin fixing your system’s bad files: sfc /scannow
- Reboot your PC.
Resolve an NVIDIA BSOD Error on Your Windows PC
Constantly getting a nvlddmkm.sys failed error is extremely frustrating as you can’t perform your tasks on your PC. Luckily, you can fix your graphics card-related problem by applying a few tweaks here and there on your computer, as explained above.
Once you’ve done that, your PC will start just as it should, letting you perform all your tasks.
Related Posts
- Preparing for Windows 10 End of Support: Upgrading to Windows 11
- How to Fix a “This file does not have an app associated with it” Error on Windows
- How to Fix an Update Error 0x800705b4 on Windows
- How to Resolve “A JavaScript error occured in the main process” Error on Windows
- How to Fix the Network Discovery Is Turned Off Error on Windows
