There are several reasons you might want to password protect pages on your WordPress (WP) site, including:
- Needing a secure place to share content with current or potential clients.
- Using your website to only share images, stories, or communications with family or friends.
- Restricting content for invited webinar attendees only.
- Including content that is for paid members and not the general public.
- Blocking off some content areas for business websites based on the employee’s role in the company.
- Ensuring outsiders can’t see proprietary content for medical or educational facilities.
Below are several ways to password protect single pages or posts, specific categories, or your entire WordPress website.
Password Protect a Page Or Post In WordPress
The easiest way to restrict access to a post or page is to edit the visibility settings in WP.
- Start by opening or editing a page in your WP dashboard. On the right-hand side, under Publish, click on Edit next to Visibility.

- Select Password protected, enter a password, and click OK.
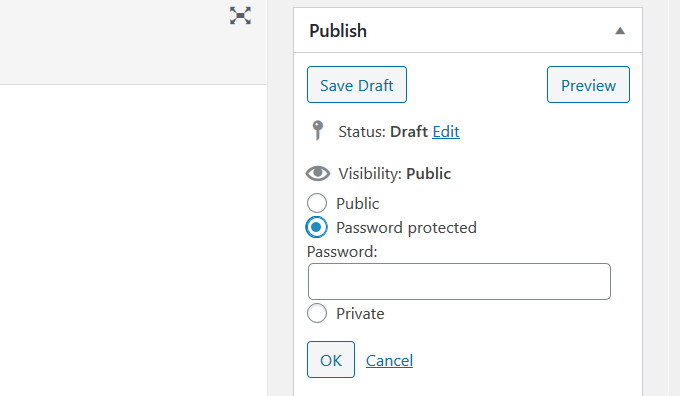
- Publish the page and see the results. Now, when anyone looks at that page, they will be asked to enter the password.
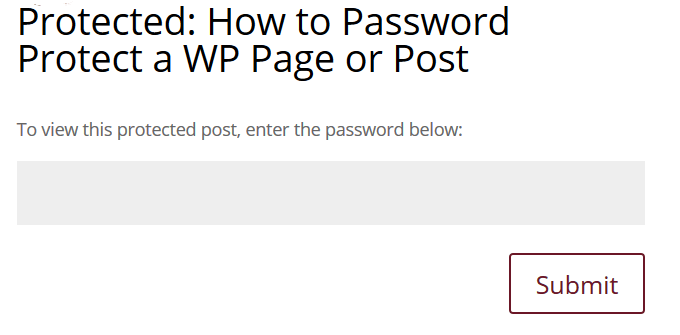
- Only those with the correct password will have access to your content. This process is useful if you want to protect a few pages or posts.
Password Protect Post Categories in Your WordPress Site
If you have specific categories of posts on your site that you want to protect with a password, use the Access Category Password plugin.
Download, install, and activate the plugin.
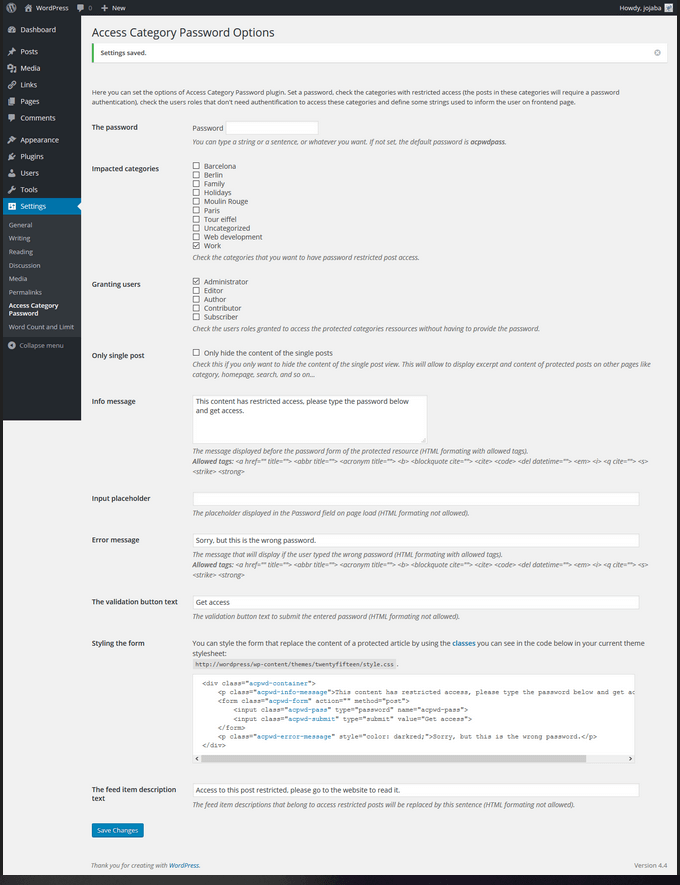
Choose to restrict access to posts within a specific category by assigning a password. Both the excerpt and content of the posts are replaced by a form that visitors will need to complete to gain access.
WP generated feeds are modified. You can define a description in the settings that users will see. The parameters are defined as:
- The password website visitors will need to access restricted categories.
- Choose the categories you want to protect by ticking off the boxes in Impacted categories.
- The Granting users section refers to the roles of your website users. The ones you check will not need to enter a password.
- If you check off Only single post, the post content will display on your homepage or archive pages. Only the single post page of posts from the restricted categories will be protected. Leave this unchecked as the default.
The other settings for this password protect plugin are defined below:
- Add the message users will see before the password form in Info message.
- Choose what you want displayed in the Password field and put it in Input placeholder.
- Specify the text you want to appear as an Error message if a visitor uses the wrong password.
- For the validation button text, input what you want the button to say such as Get access.
- If you don’t like the Styling of the form, add custom styling.
- Add your feed description text.
How To Password Protect Part Of a WordPress Post Or Page
You can also password protect only part of a public page or post with another WP plugin called Passster – Password Protection.
Just as you do for all WP plugins, download, install, and then activate it.
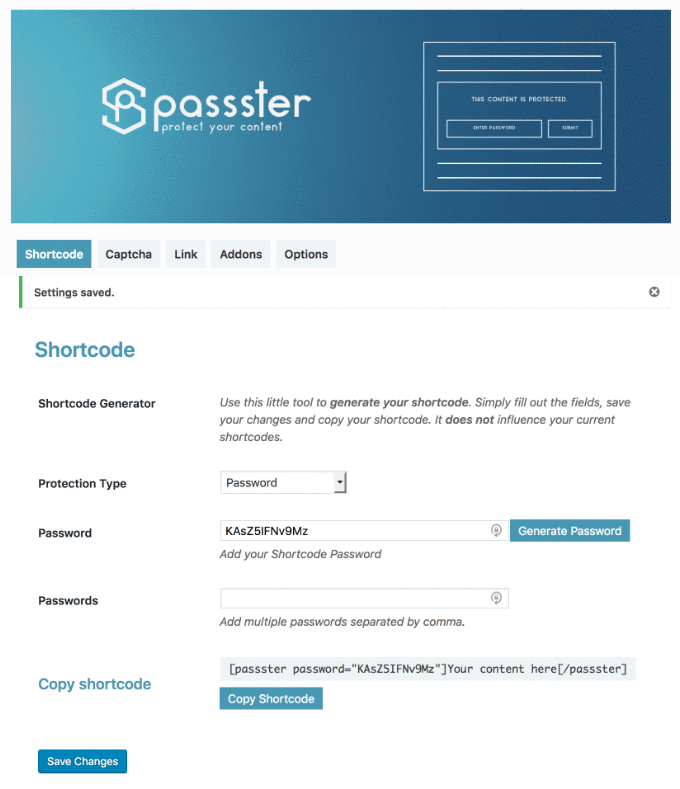
Inside your WP dashboard, go to the Settings of the plugin. Create a shortcode and a Password or automatically have it generated for you.
In your WP editor, paste the shortcode in the section you want to protect and write the content.
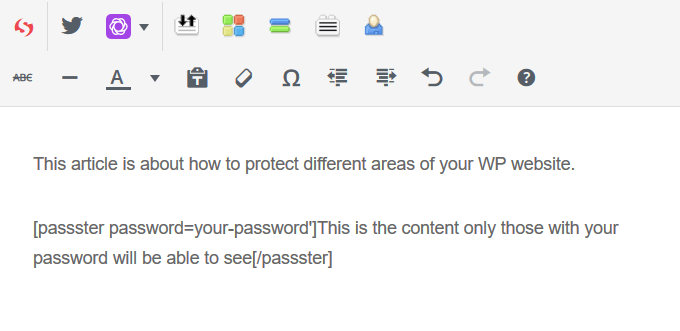
Visitors will see all your content except what you have put inside the shortcode section.
Password-Protect Your Entire WordPress Site
To password protect your entire WordPress site, you can again use a third-party plugin. There are several password-protect plugins from which to choose.
We will discuss the Password Protected free plugin by Ben Huson.
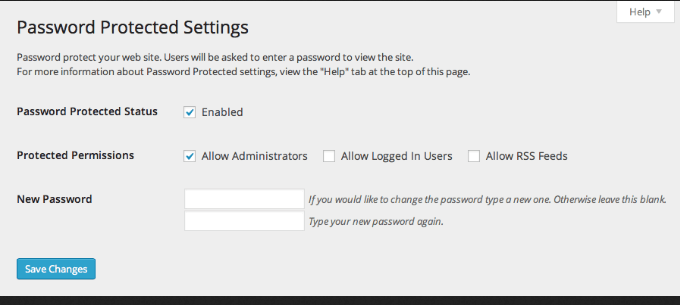
- Download, install, and activate the plugin. To configure the settings, go to Settings > Password Protection.
- Tick off the box next to Password Protected Status to enable the plugin. If you tick off the box next to any of the Password Permissions options, those visitors will not need a password to access your site.
- Add your password in the New Password box and click Save Changes.
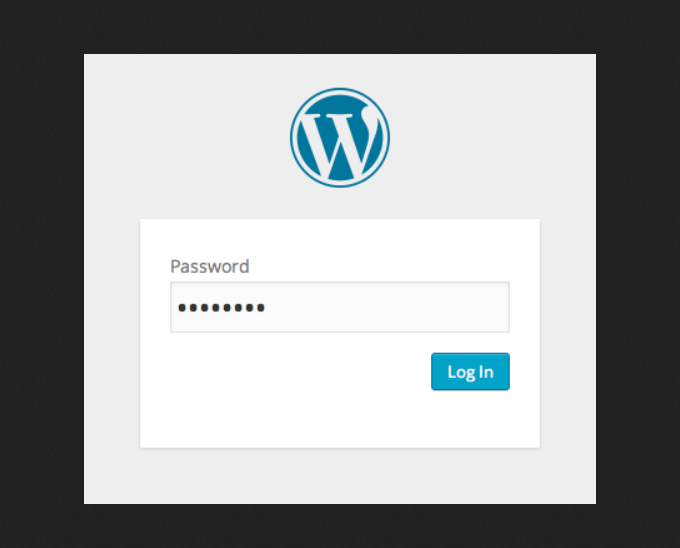
- After you activate the plugin, when a visitor lands on your site, they will see a shorter version of the WP login page and be asked to enter a password.
Keep in mind that the plugin will only protect your WP site. If someone has a direct link to a file or image on your server, they will be able to see that file.
As you can see, there are several ways to password-protect your WordPress site. For individual posts or pages, you can use WordPress built-in functionality. Other parts, sections, or the entire site will need third-party plugins.