Did you know that your own content, produced to a high standard, is not only one of your most potent online assets but also a gift that can keep on giving? Your own content provides the foundation for a ranking opportunity in Google, produces brand and/or name recognition and is the basic means by which you can produce an income online.
It’s also yours to re-purpose from written content to slideshows, video, rich media and more. The prevalence and interest in video consumption is of particular interest to anyone wanting to make waves and gain traction online.
Lumen – A Way To Make Easy Animated Videos
Not a video creation expert? There is no need to worry. Among the tools available online, Lumen5, an intuitive drag-and-drop video tool, can help you to quickly and easily turn your written content into engaging animated shareable video.
The pricing ranges from free to Enterprise-level plans. The free version gives you access to:
- Popular themes.
- The standard media library.
- More than 3,000 music tracks.
You can also create and download five videos per month. The resolution of the video is lower than with paid versions and will include the Lumen5 logo in the credits.
If you want to remove the logo and create a higher-res video, you will need to upgrade. However, the upgraded costs are very reasonable compared to the value. The lowest-level package is only $29/month when billed monthly and $19/month if billed annually ($228).
Try using Lumen5 for free first following the steps below. If you like it and want to upgrade, you can always do so later.
Choose a Format
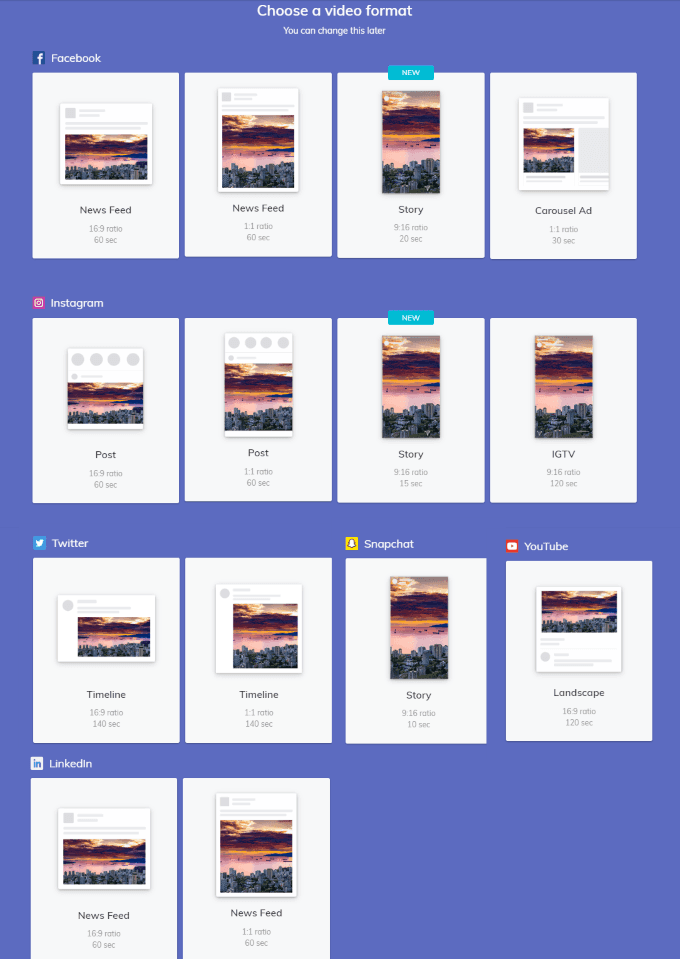
When you click Create Video, you will be given the option of choosing the social media format or custom format you want to use. Or you can skip this step.
Keep in mind that you can change it at any time. The available options are for:
- Facebook.
- Instagram.
- Twitter.
- Snapchat.
- YouTube.
- LinkedIn.
- Pinterest.
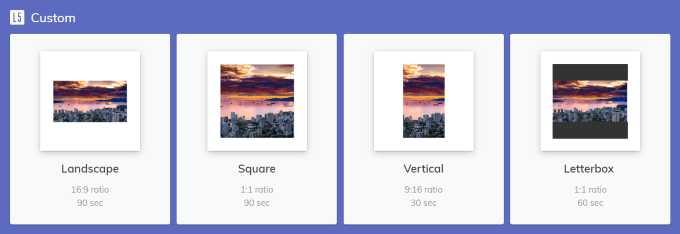
- Custom (Landscape, Square, Vertical, Letterbox).
Choose a Theme
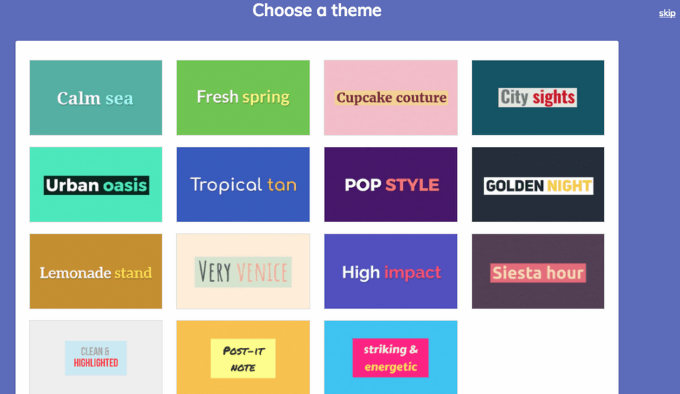
Lumen5 provides several themes for you to choose.
Brand Your Video
Add your brand to your videos by adding a logo, setting the color scheme, and selecting or uploading the font you want to use.
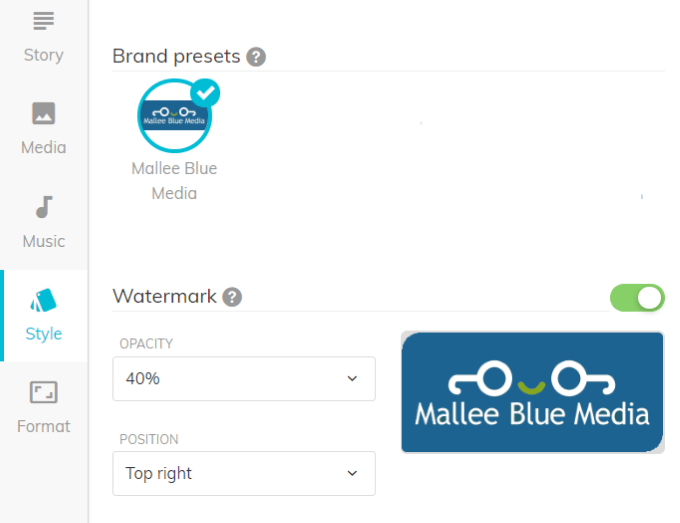
Start by clicking on Style in the left side navigation.
Add Your Logo
You can choose to upload your logo or not include one by toggling the button next to Watermark. When it’s green, it means your uploaded logo will appear in your video.
The opacity and position of your logo are also up to you. Click on the drop-down menu next to each to see your options and choose one.
Choose Your Colors
From the Style menu option, you can select the text and background colors that match your brand identity.
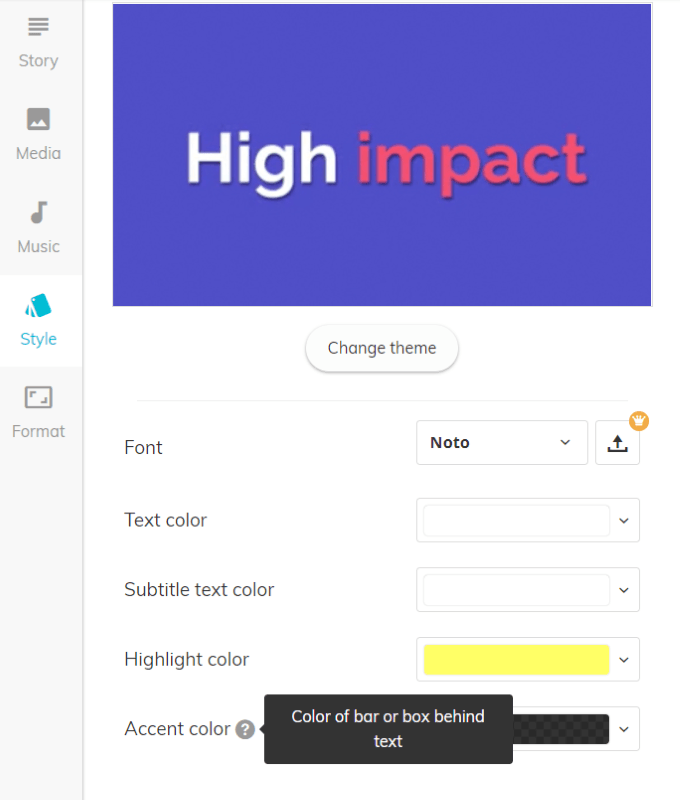
You can change the theme by clicking the Change theme button. To find the color of the text, subtitle, highlighted area, and accent color you want to use, click the drop-down button next to each option.
Follow the same process to select your preferred font or upload your own.
Convert Your Existing Content
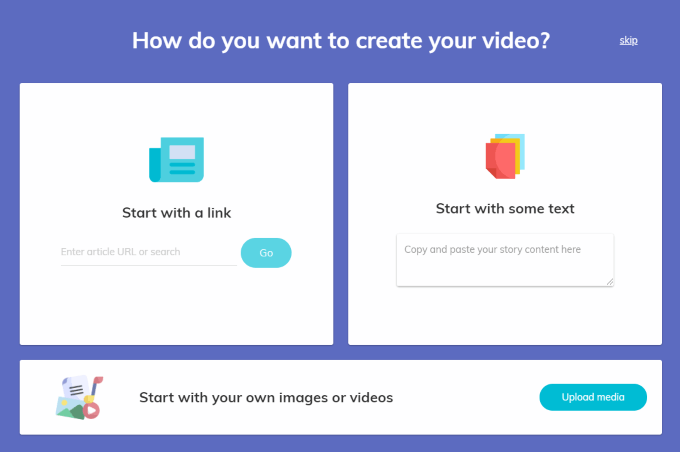
There are three simple ways you can convert your existing content using Lumen5. You can:
- Enter the URL of your blog post.
- Copy and paste your text into the space provided.
- Upload your own images and videos.
Your Storyboard
A foundation for your video is automatically created whether you put in a URL or paste content into the text box.
The text will appear in your editing dashboard on the left side of the screen. The storyboard will appear on the right side.
When you enter a URL, Lumen5 uses artificial intelligence (AI) to handpick sentences (see the highlighted text) and imagery for you.
You have the option to keep their suggestions or clear the board.
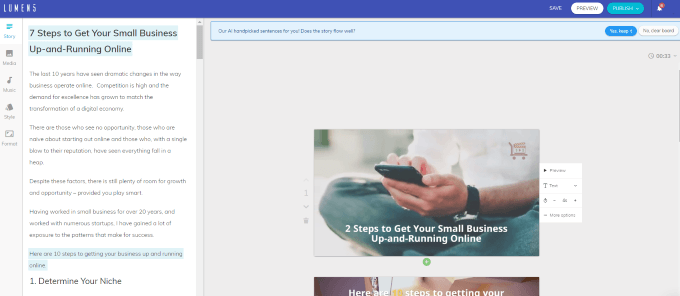
If you choose to accept the AI suggestions, you can still make edits. For example, let’s say you want to include the first paragraph. Click on it and it will be added to the storyboard.
The system will automatically create a sub-scene (an additional slide with the same image or video) if your text is too long.
The procedure is the same if you choose to discard the AI suggestions.
Edit Text
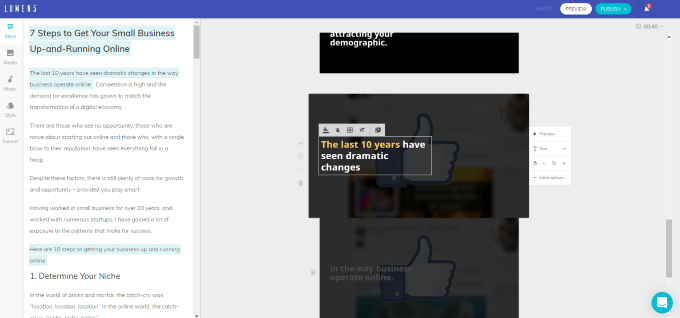
To edit the text in your storyboard, click inside the box and make any changes you desire. You can edit, add or delete text.
Using AI, Lumen5 automatically calculates:
- Where to position the text.
- How long each slide should be.
- Which text to highlight.
However, you can override the suggestions and make any changes you want. Note that the media background will be animated in the rendered video. You can preview the animation for each slide by clicking Preview.

You can choose what kind of text you want (if any). Your options are:
- Title.
- Plain text.
- Quote.
- No text.
For example, if you want your text to be Title text, click Title and it will change.
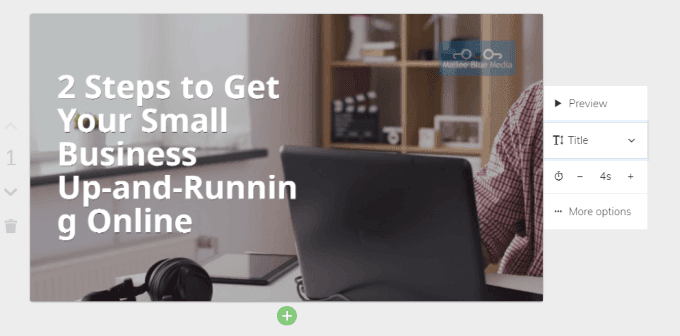
Note that the text in the slide above used as Title text cuts off the word Running. You have a few choices to fix this.
Change The Position Of The Text
If you click inside the slide near the text, it will open some more editing features, including Text position. This is the function you want to use.
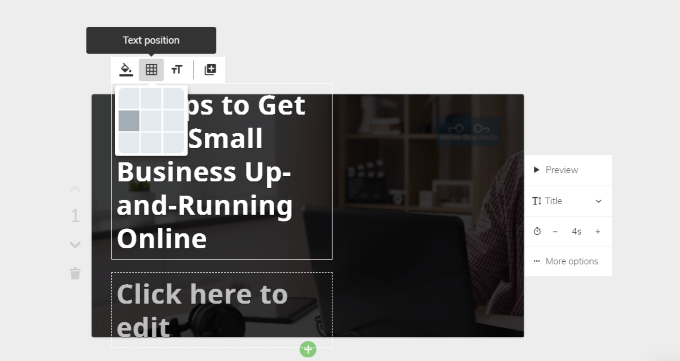
If you center the text, it will not cut off a word. It does still however cut off the hyphenated words. It’s better than before, but still not ideal.
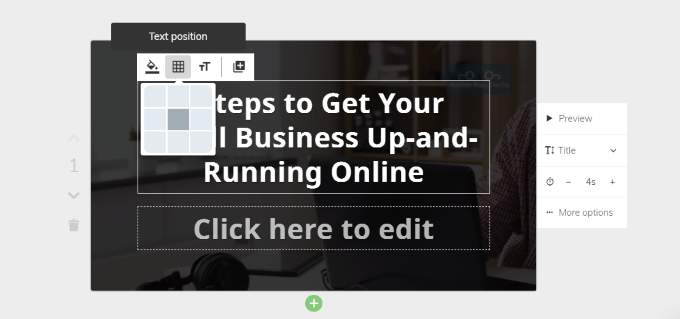
You can play around with the text and summarize it to make it fit better. For this tutorial, I changed the text to read Get Your Small Business Up-And-Running Online In 2 Steps.

That looks much better. If you try different variations of location and verbiage and it still doesn’t look right to you, you can revert it to regular text from Title text.
When you are editing your text and want to force a word to the next line, if you click the enter key on your computer, Lumen5 will create a sub-scene (additional slide).
If you want to keep the text on the same slide, hold down the “shift” key on your computer while you hit enter.
How To Highlight Text
Start by selecting the text you want to highlight and click on the Highlight icon. The image below shows the results.

Choose Your Media
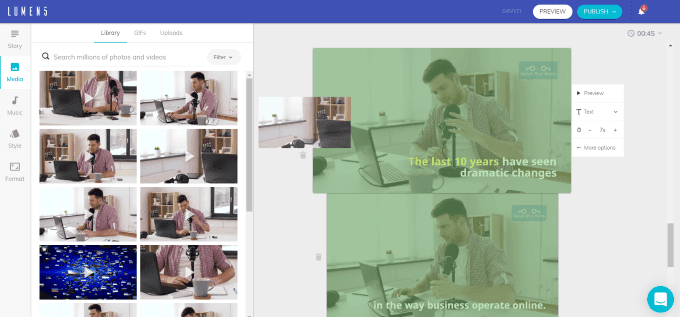
You have control over every aspect of each slide, including choosing a background from the media library or uploading your own (maximum size is 15MB).
- Select Media from the navigation on the left side to search from and choose media from the Library, GIFs, and Uploads. Also note there is a filter which allows you to choose from Videos, Photos, or Editorial.
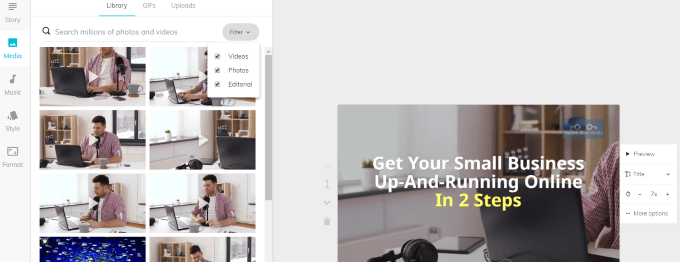
- Once you find a media file you want to include in your storyboard, drag it from the media section to the slide where you want to use it.
More Editing Options
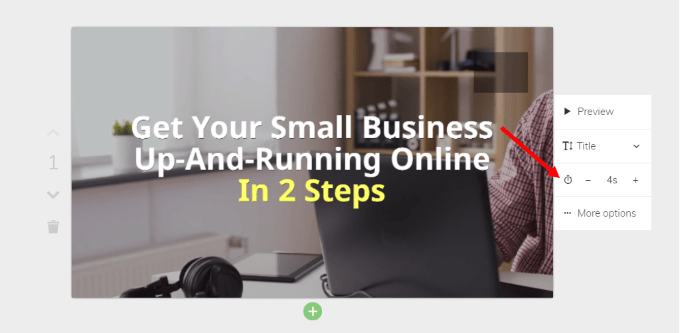
Although Lumen5 automatically assigns the length of time each slide plays, you can change it. Look for the time icon and click the plus or minus sign to change how long you want the slide to last.
Trim a Video Or Change The Layout
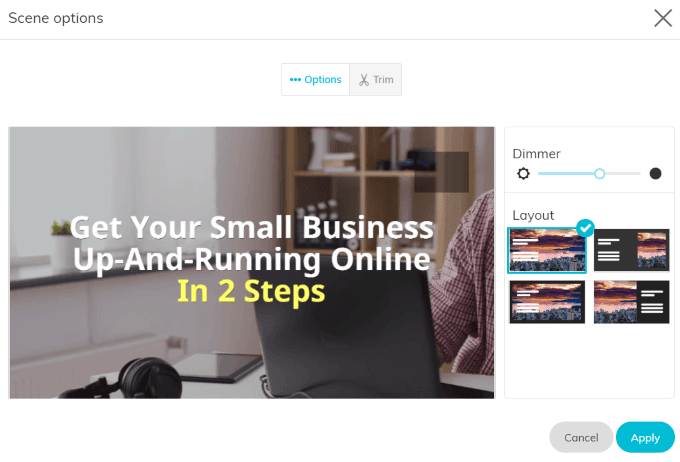
- Click on More options seen in the screenshot above. A pop-up box will open where you can change the layout or the dim level.
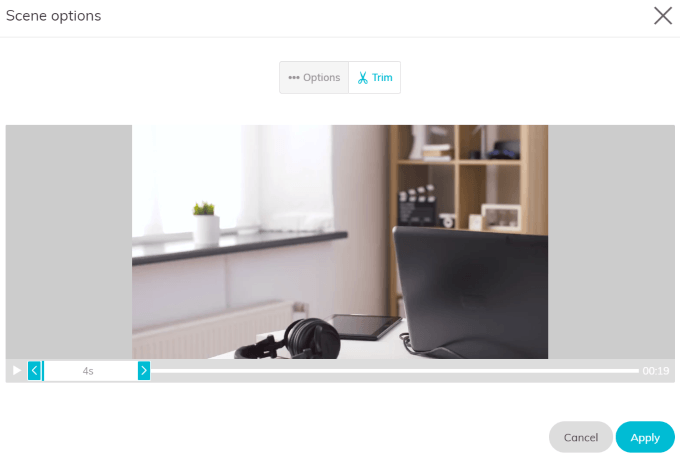
- You can also adjust the length of a video background by clicking Trim from the same pop-up box.
Add Or Delete a Scene Or Subscene
Look at the green bar on the bottom of the slide in the image below.
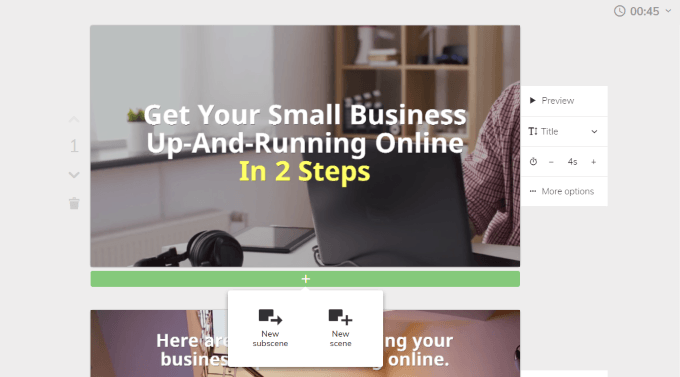
When you click the + sign, you will see that you can add a scene or a sub-scene.
The down arrow, located on the left side of the slide, will move the slide down in your storyboard. As this is the first slide, you will only see a down arrow.
Other slides will have both an up and down arrow to move the slide to where you want it.
The garbage can icon is exactly what it looks like it is. Click it to delete any slide you don’t want to be included in your video.
Add Music
Lumen5 gives you access to a library of copyright-free audio files. You can also upload your own. Select Music from the left-hand navigation area.
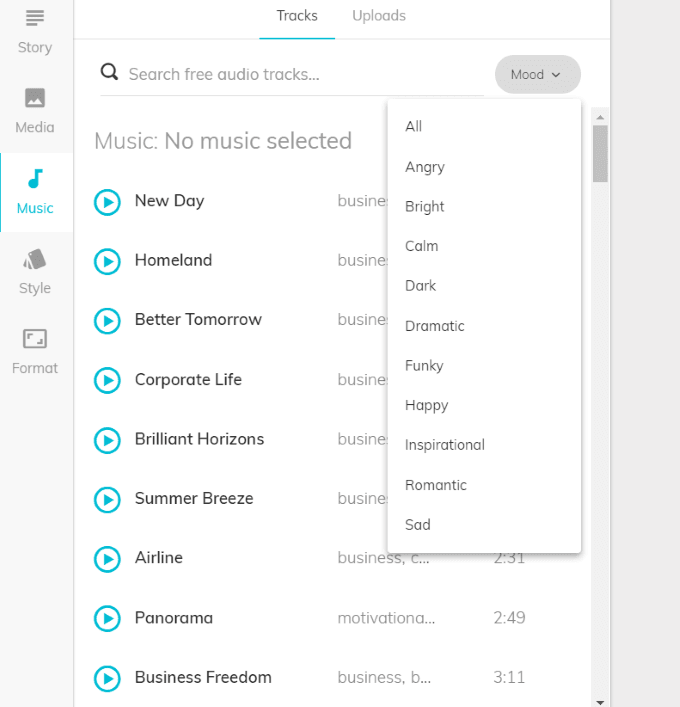
Notice that you can also sort the library by mood, making it easier to find a track with the right feel for your video.
Listen to a track by clicking the Play icon on the left. Once you find (or upload) the music you want, apply it to the video by clicking on it.
If you don’t want to include music, leave that section blank.
Preview & Publish Your Video
When you have all your slides the way you want them, you can preview the video to make sure you are happy with it. You can then either go back and edit it further or publish your video.
Look at the top right-hand corner of your storyboard to see the total length of the video. If you want, you can click on the drop-down next to the time and change the speed to Fast or Slow. The default is Normal.
Click Publish when you are ready for Lumen5 to work its magic. It takes a few minutes for your video to render. You will receive an email when it is finished.
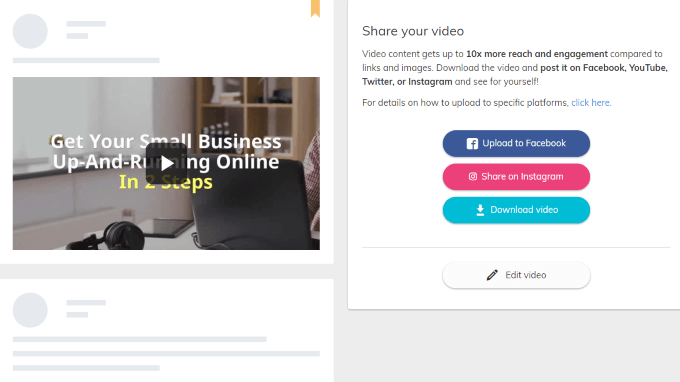
Go back to your dashboard and click on your completed video. You can upload it to Facebook, share it on Instagram, download it to your computer, or edit it if there are more changes you want to make.
Lumen5 offers a multitude of options and features to help you create a compelling, engaging, and professional video to promote your business.