If you’re connecting to a remote desktop using the Virtual Network Computing (VNC) protocol, your connection might not be secure. Some VNC clients, like the popular TightVNC, don’t encrypt your connection beyond the initial sign-in stage. To get around the problem, you can tunnel a VNC connection over a Secure Shell (SSH) tunnel.
Not only does an SSH tunnel provide an entirely secure connection for VNC, but it also allows you to use VNC connections when the typical VNC port (port 5901) is blocked. Some corporate networks will block common ports like port 5901 for extra security, so tunneling VNC over SSH would allow you to get around this problem.
Setting Up PuTTY
Windows 10 does have an SSH client built-in, thanks to the Windows PowerShell, but this is only a recent development. If you want to know how to tunnel VNC through SSH, it’s recommended you use PuTTY to make the connection to your SSH server.
PuTTY offers a graphical user interface that can easily be configured to allow you to tunnel other software, like your VNC viewer, over the connection. For this to work, you’ll need to have a suitable SSH server installed on the remote desktop PC or server you’re looking to connect to over VNC.
- To start, download PuTTY and open the client.
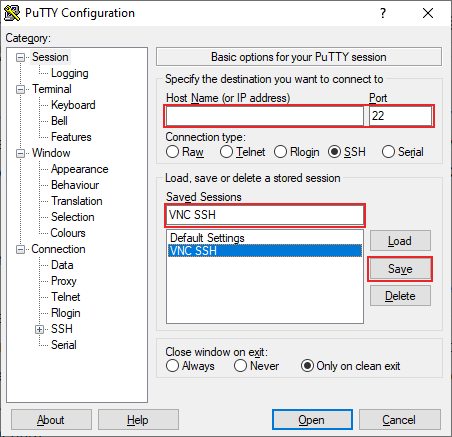
- The main Session menu allows you to type your server IP address or hostname. Type your SSH server address in the Host Name (or IP address) text box. If your SSH port is different from the standard port 22, type this in the Port box.
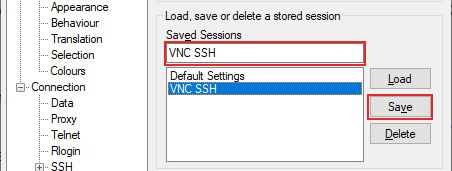
- You’ll also want to save this session, so in the Saved Sessions text box, add a suitable name for your SSH connection, then click the Save button.
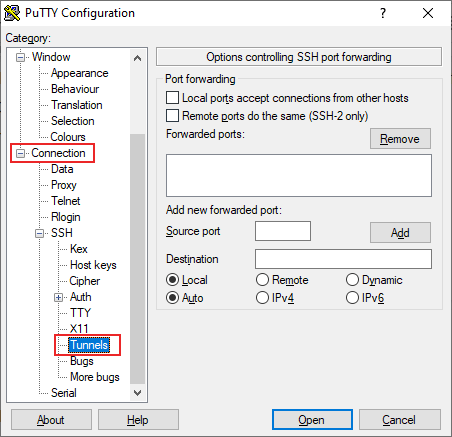
- In the left-hand menu, expand the Connection tab, then do the same for the SSH. Click on Tunnels.
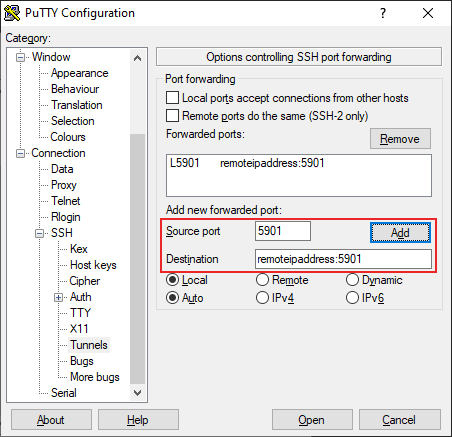
- In the Port forwarding section of the Tunnels menu, you’ll be providing the details to allow PuTTY to tunnel your VNC connection over SSH. In the Source port text box, type 5901. In the Destination text box, type your remote IP address:5901, using the IP address of the remote desktop PC or server. For instance, 192.168.1.100:5901 would be suitable.
- Return to the Session section, click on your saved session name under Saved Sessions, then click Save to save your settings.
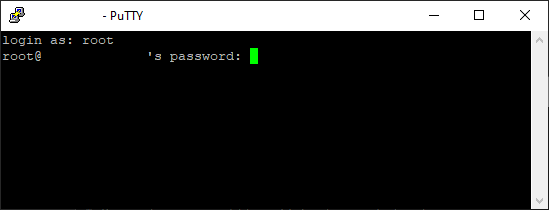
- With your PuTTY settings ready, make the SSH connection by clicking Open at the bottom. You’ll be required to insert the username and password required to make your SSH connection as PuTTY makes the attempt.
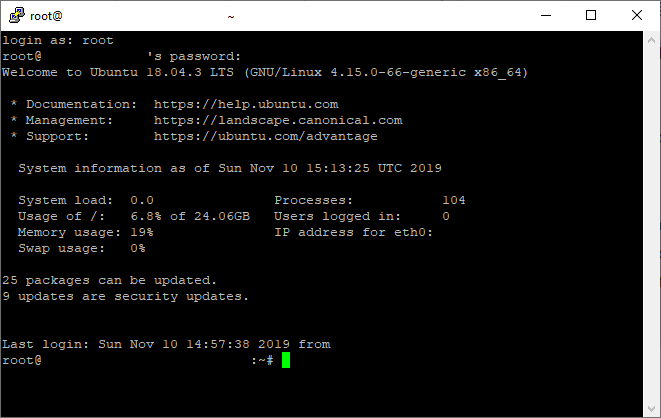
- Once the login process is complete, you’ll be given access to the SSH terminal window for your remote desktop.
With the SSH tunnel to your remote desktop server active, you’ll now be able to make a VNC connection. You can use any VNC client you choose, but this guide will run through how to connect using TightVNC, a popular and free VNC client for Windows and Linux.
You can minimize PuTTY while the connection is active.
Connecting Using TightVNC
If your SSH connection is active, connecting using TightVNC is pretty simple. This assumes that your VNC server is running on your remote PC or server.
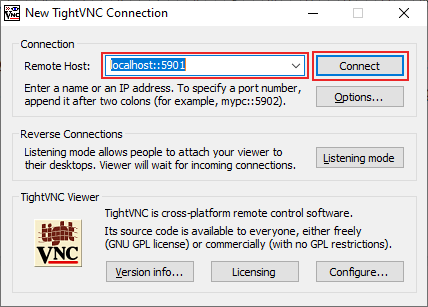
- Open TightVNC to begin. In the Connection section, type localhost::5901 or 127.0.0.1::5901 into the Remote Host text box. PuTTY is monitoring this port and will automatically forward this connection, when the attempt is made, to your remote server.
- You can configure your VNC connection further by clicking Options but, if you’re ready to connect, click Connect.
- You’ll be asked for your VNC server password, so provide this in the VNC Authentication pop-up window, then click OK.
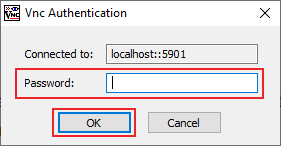
If your SSH connection is working correctly, TightVNC should load your remote VNC desktop window, ready for you to use.
SSH Clients With Tunneling Support
While TightVNC is a popular Windows client for VNC connections, it doesn’t support SSH tunneling within the client itself, requiring you to use PuTTY to make the connection.
Other VNC clients, however, do include SSH tunneling within the client itself. One example is SSVNC which, while basic, will tunnel over SSH before making a VNC connection. SSVNC is supported by Windows and Linux operating systems.
- Open the SSVNC client and, within the main SSVNC client window, fill in the required fields. Under VNC Host:Display, type SSHusername@remoteIPaddress:1. Replace SSHusername with the username you’d use for your SSH connection, and replace remoteIPaddress with your remote desktop IP address. For example, root@192.168.1.100:1.
- Make sure you select the Use SSH or SSL+SSL option before you connect. When you’re ready, click the Connect button.
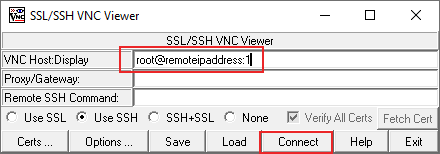
- You’ll be asked for your SSH password in a pop-up terminal window. Provide your password, then press enter on your keyboard.
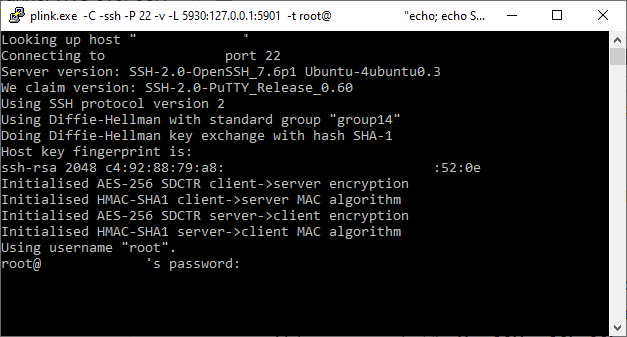
Once the SSH tunnel is active, your VNC connection will begin, and your VNC client window should appear, where you can begin using your remote desktop.
While VNC connections aren’t encrypted by default, Microsoft’s own Remote Desktop Protocol is encrypted. If you’re running Windows and you’re planning on connecting to a remote Windows PC or server, you can connect using the Remote Desktop Connection tool instead.
Related Posts
- How to Repair a Corrupted User Profile in Windows 11
- Preparing for Windows 10 End of Support: Upgrading to Windows 11
- How to Access and Change Your WiFi Router Settings (2025 Edition)
- How to Install the Latest Large Language Models (LLMs) Locally on Your Mac
- How to Find Circular References in Microsoft Excel