
Outlook rules automatically move incoming emails into folders the moment they arrive – no manual sorting required. The setup looks different depending on whether you’re using classic Outlook or the new Outlook for Windows, so follow the section that matches your version.
Which Outlook Are You Using?
Before creating a rule, figure out which version you have. In classic Outlook, you’ll see a File tab in the top-left ribbon. In new Outlook for Windows (the default in Microsoft 365 as of 2026), there’s no File tab, just a gear icon in the top-right corner.
The two versions handle rules differently:
- Classic Outlook: Uses the full Rules Wizard with client-side and server-side rules. Supports actions like playing sounds, running macros, and printing.
- New Outlook for Windows / Outlook on the web: Server-side rules only. Simpler interface, but no sounds, macros, or script actions. Only works with Microsoft-hosted mailboxes (not Gmail or Yahoo accounts added to Outlook).
Step 1: Create Your Destination Folders First
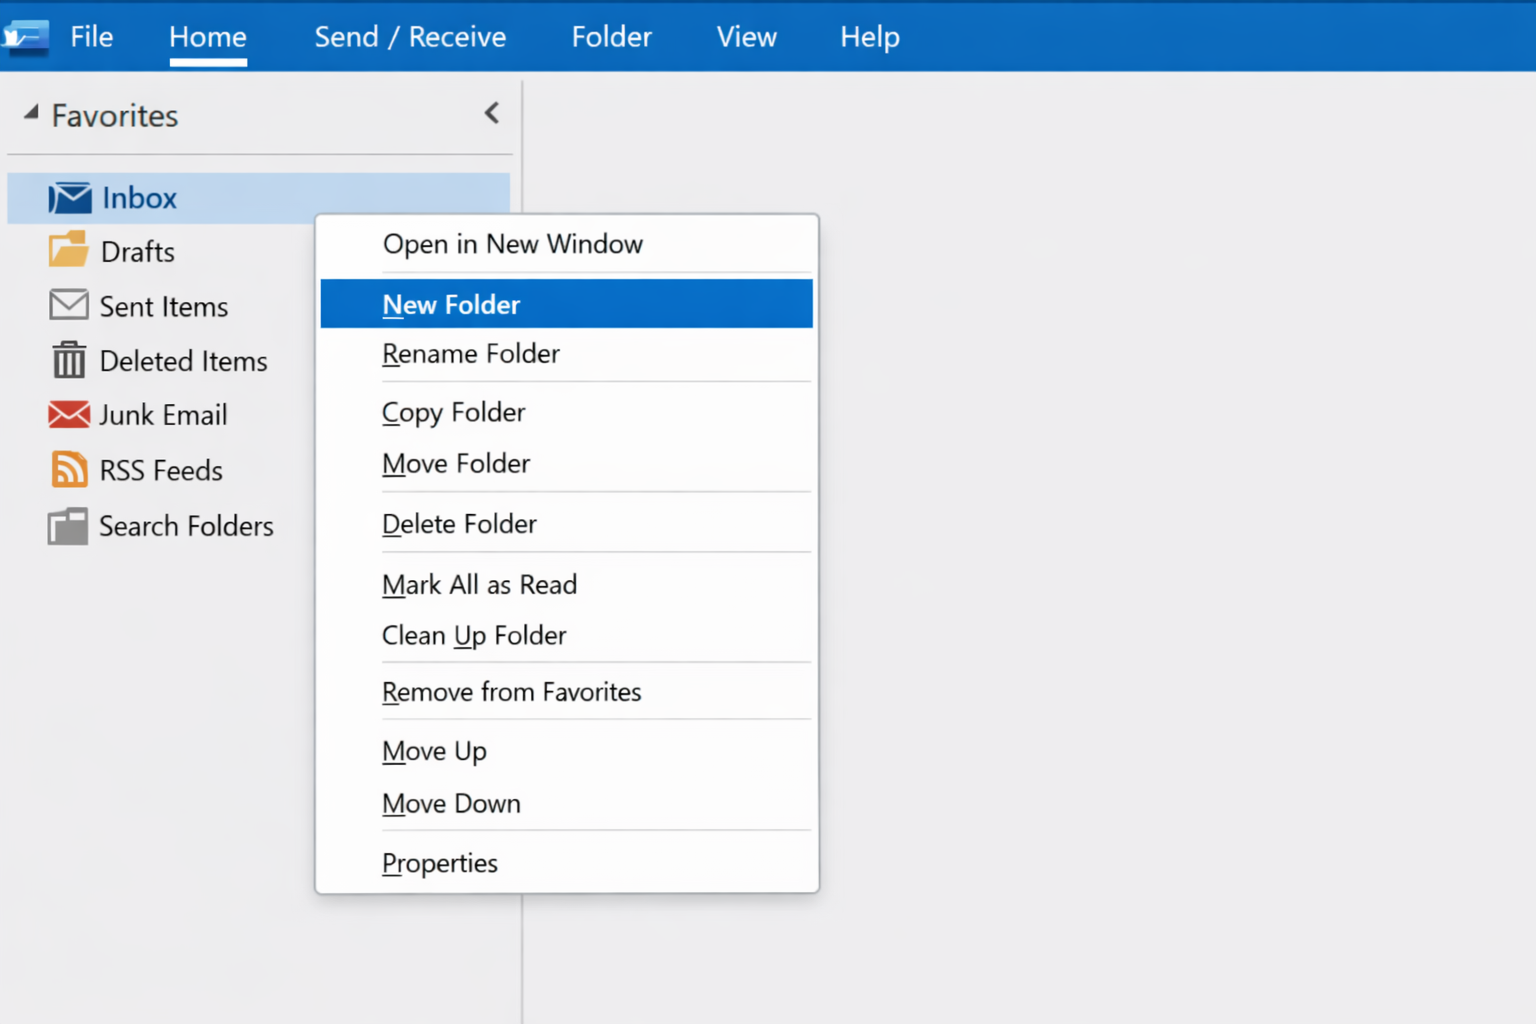
Rules need somewhere to send mail. If you haven’t set up folders yet, do that before creating any rules.
- In the left sidebar, right-click Inbox.
- Select New Folder.
- Type a name, something like Work, Newsletters, Family, or Bank Statements — and press Enter.
- Repeat for any other folders you need.
How to Set Up Rules in Classic Outlook (Microsoft 365 Desktop / Outlook 2019–2021)
Fix #1: Use the Rules Wizard for a quick sender-based rule
This is the fastest way to move all emails from a specific person or domain into a folder.
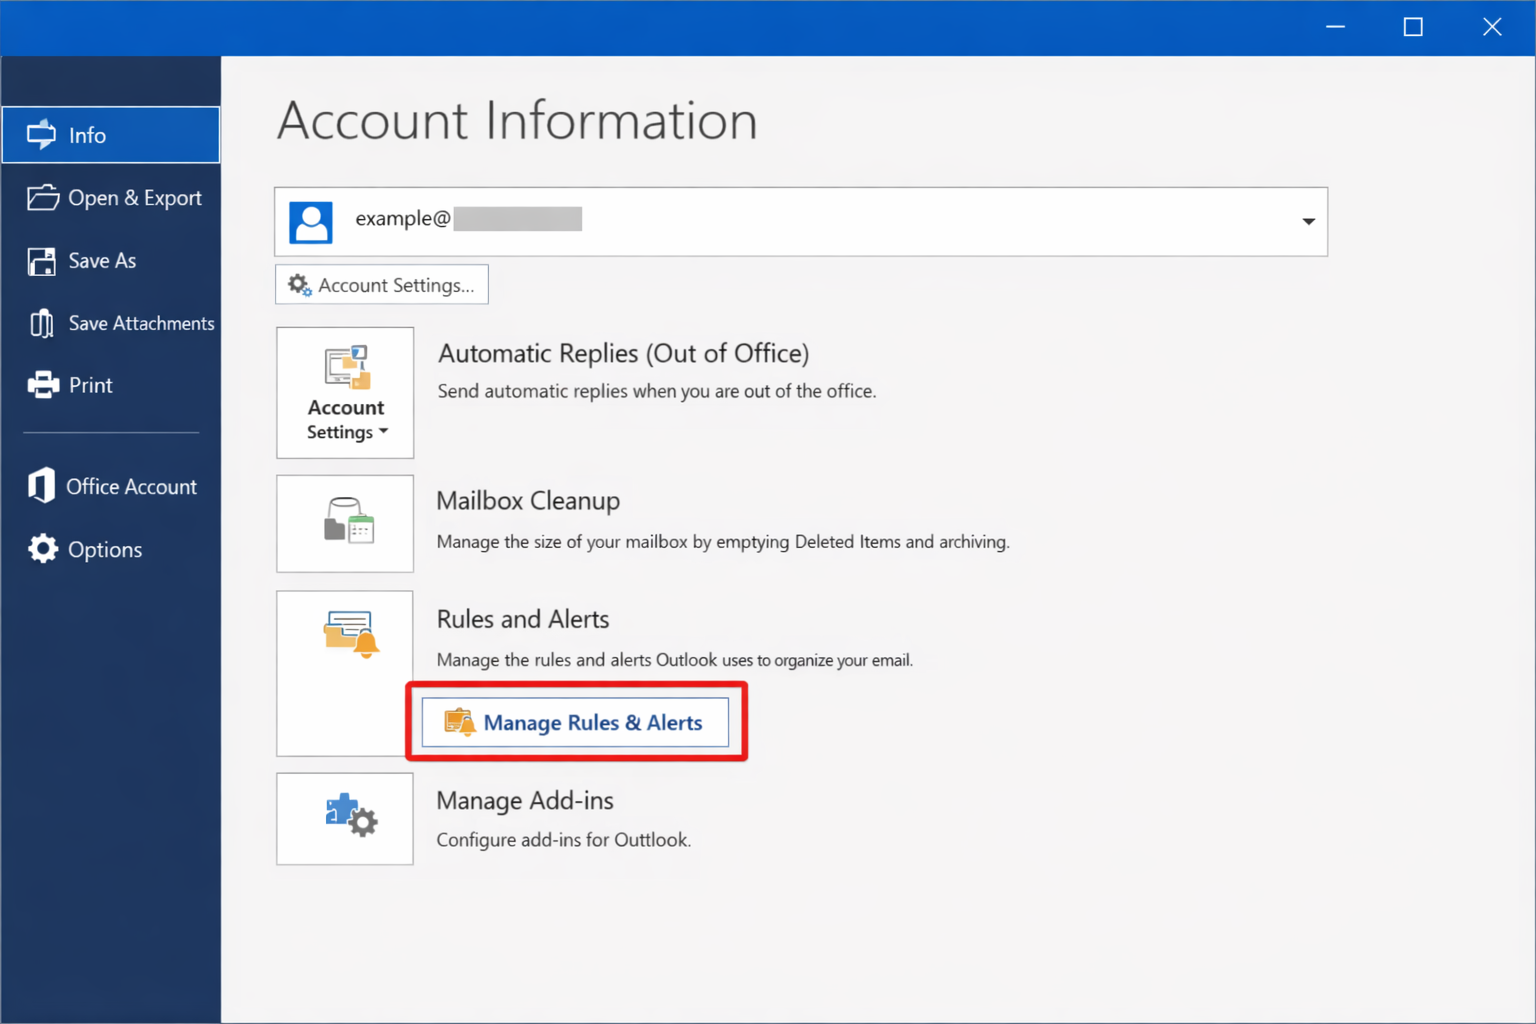
- Open Outlook and click the File tab in the top-left ribbon.
- Click Manage Rules & Alerts.
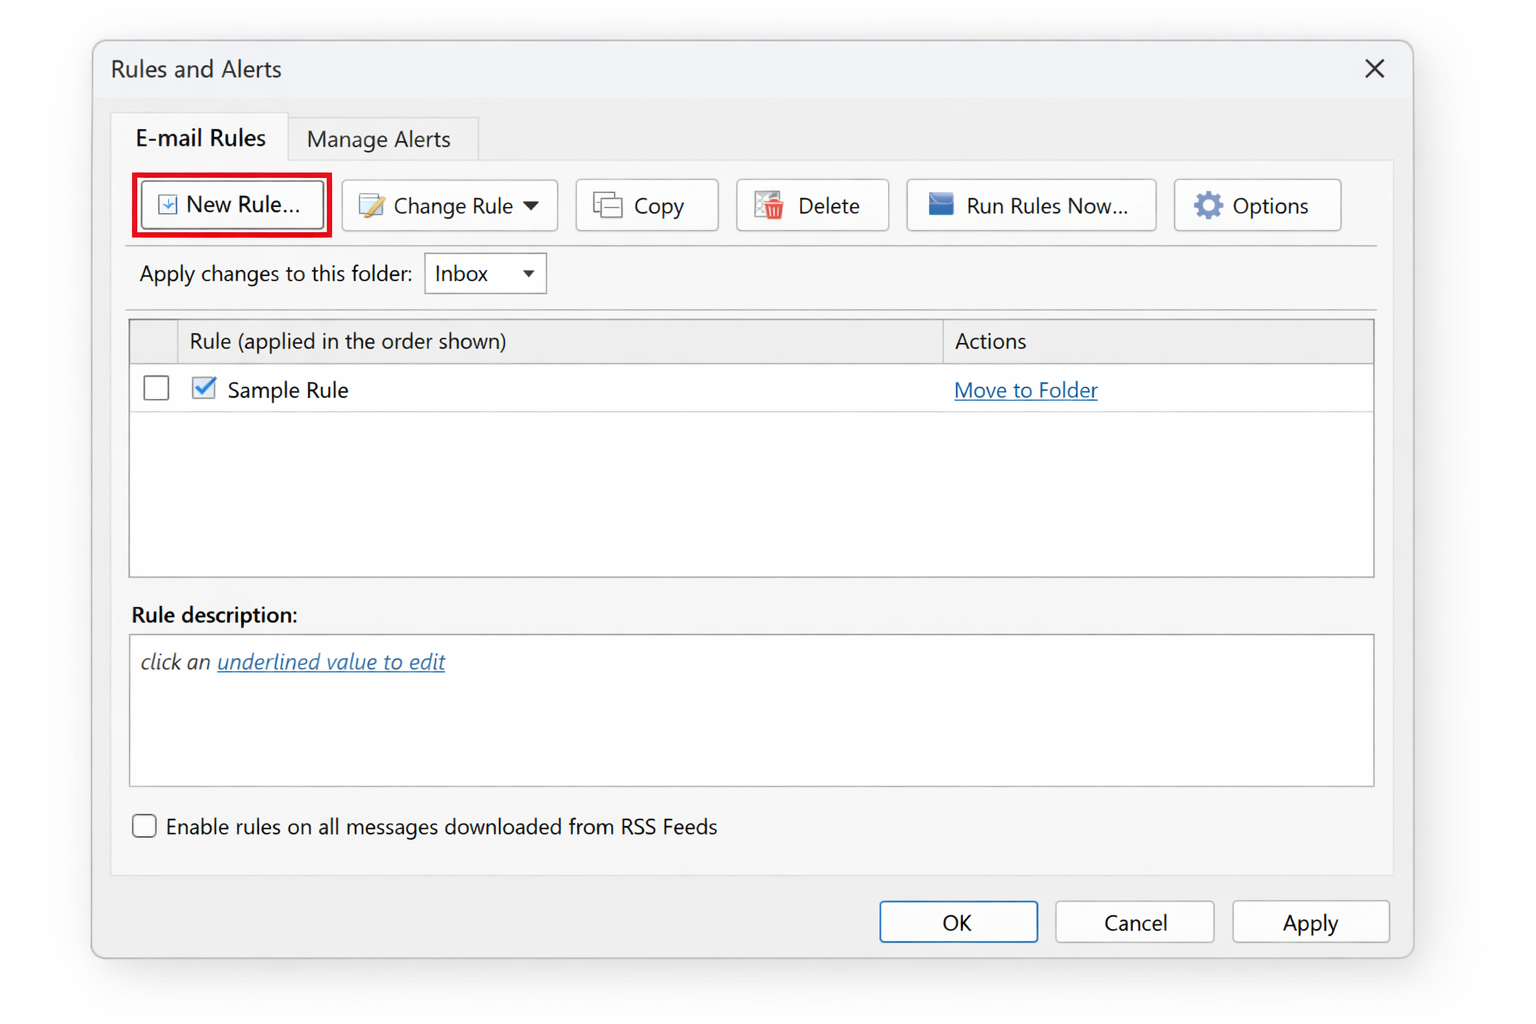
- In the Rules and Alerts window, click New Rule.
- In the Rules Wizard, select Move messages from someone to a folder under “Stay Organized.” This is the most common template.
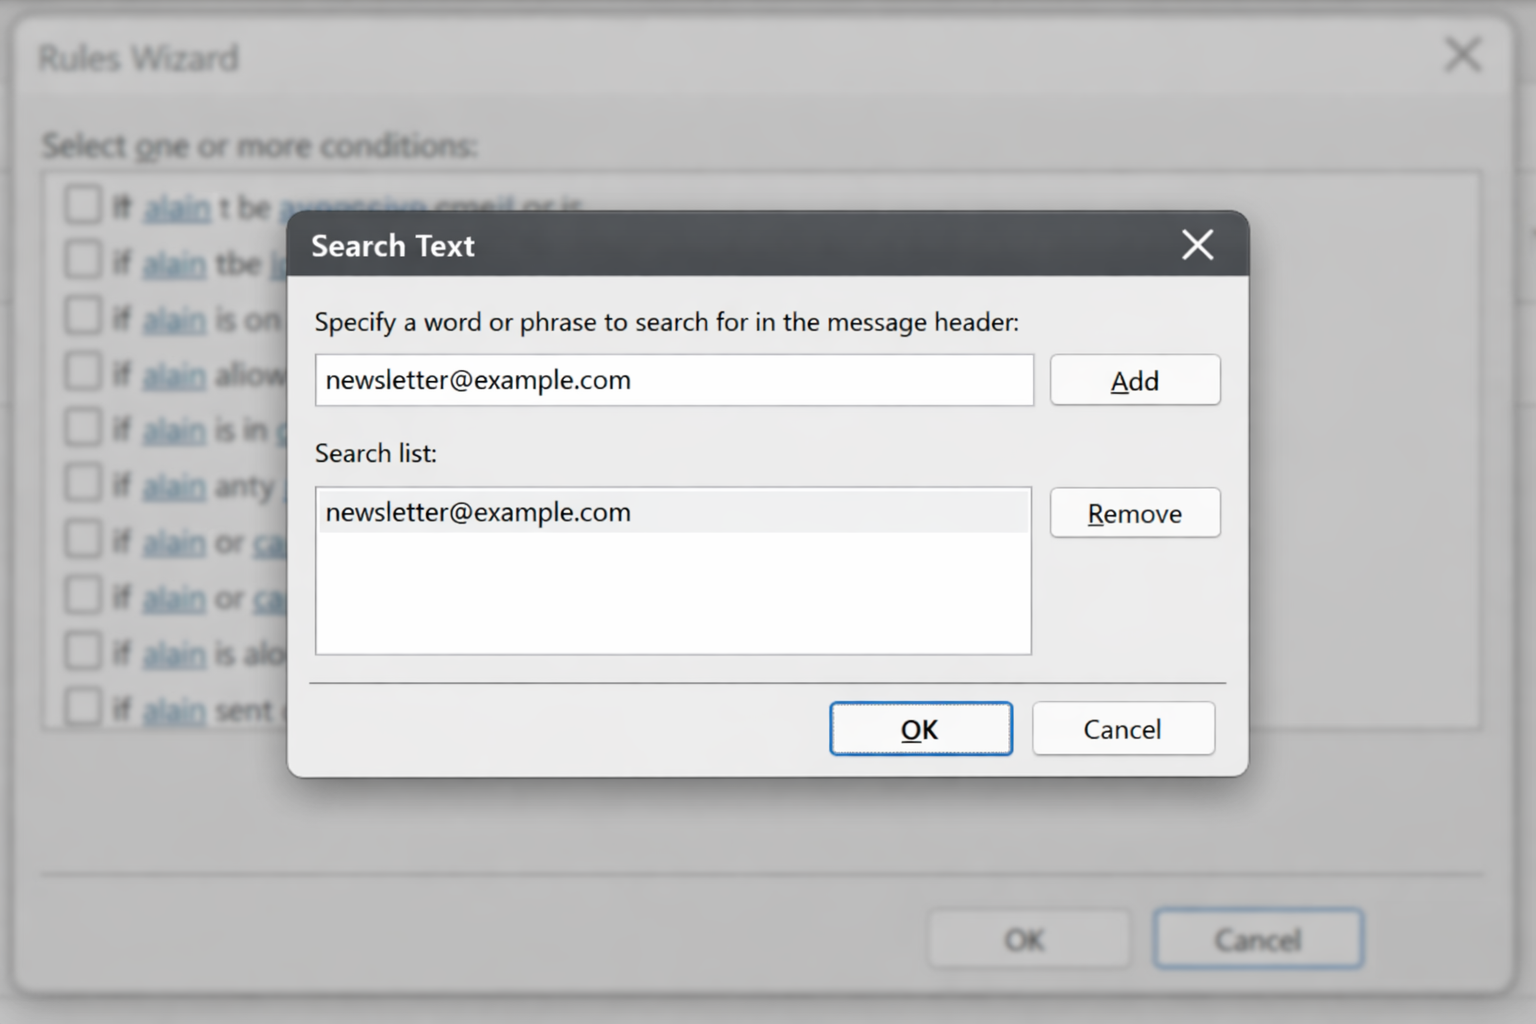
- In the Step 2 box at the bottom, click the underlined link people or public group.
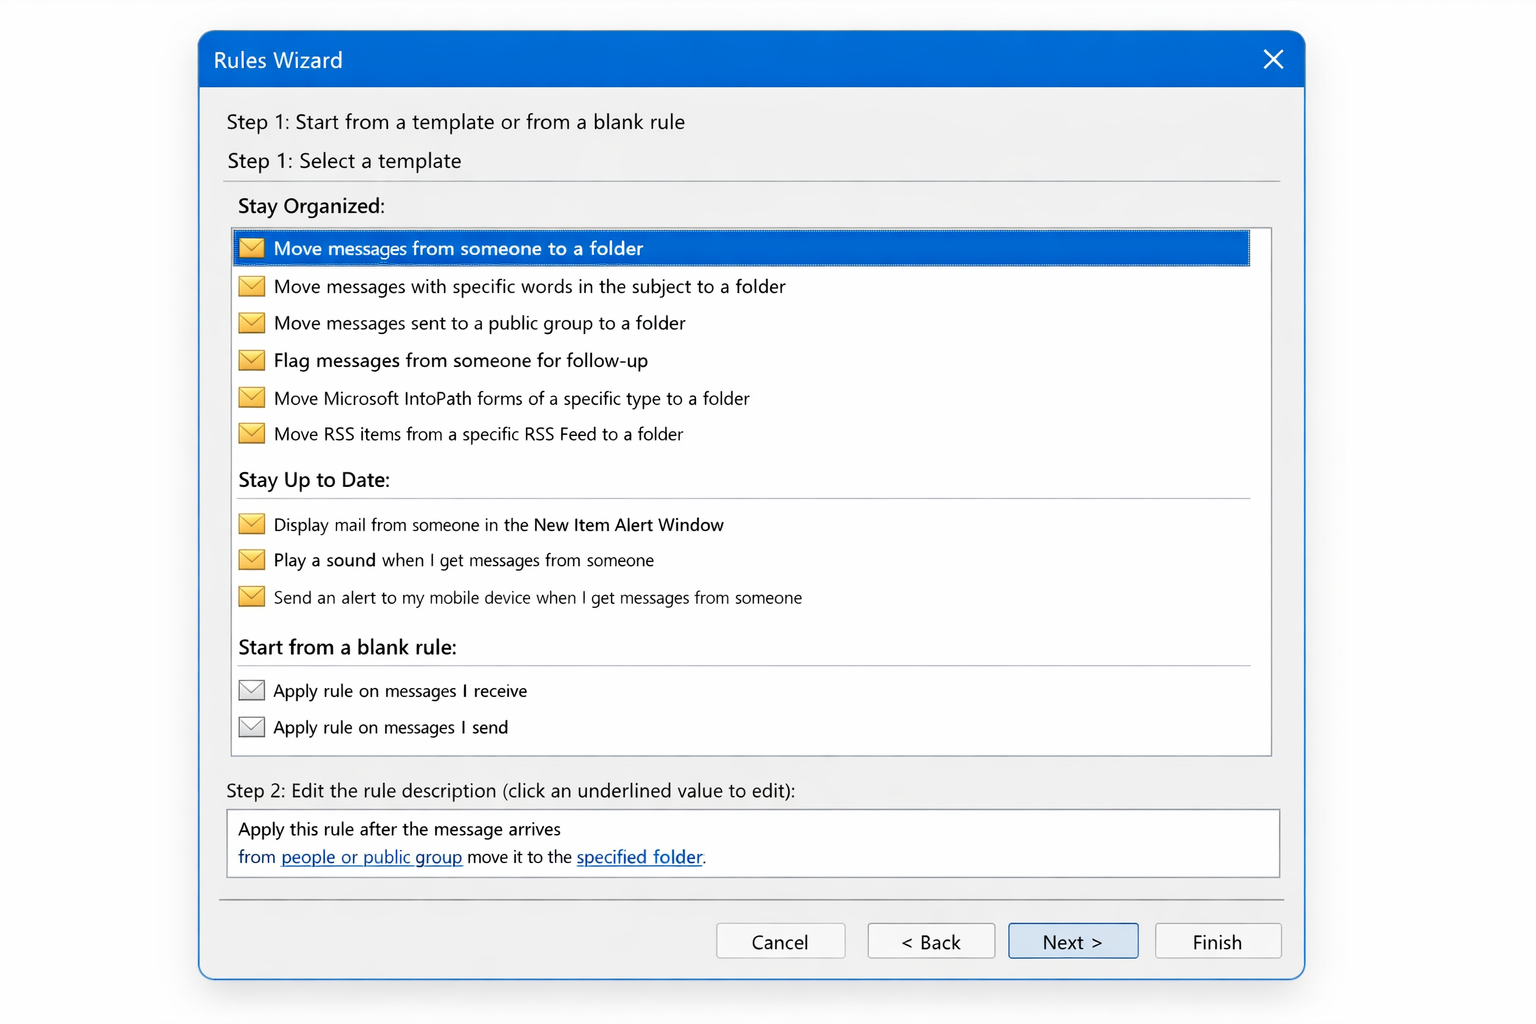
- In the address dialog, type the sender’s email address in the From field and click OK. You can also select a contact from your address book.
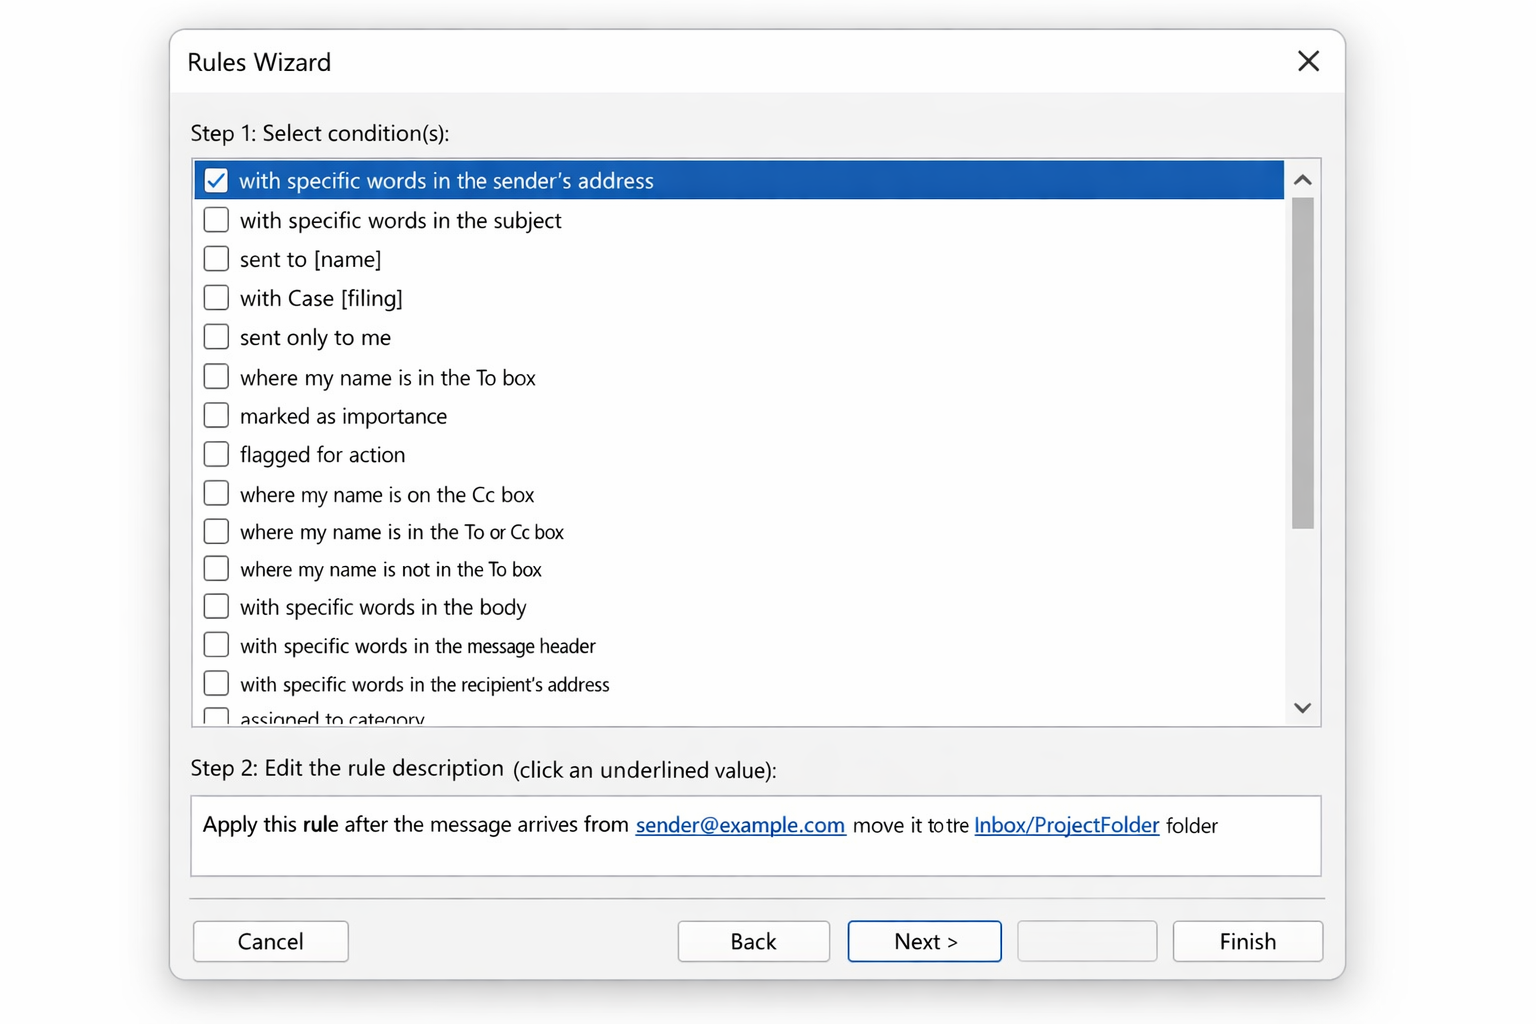
- Back in the Rules Wizard, click the underlined link specified folder next to “move it to the” text
- Browse to the destination folder, select it, and click OK. To create a new folder on the spot, click New.

- The Step 2 box now shows your complete rule with real values filled in. Click Finish if you’re done, or click Next to add more conditions, actions, or exceptions.
Fix #2: Add extra conditions, actions, or exceptions
If you need the rule to do more or to skip certain emails, click Next instead of Finish after setting the basic condition.
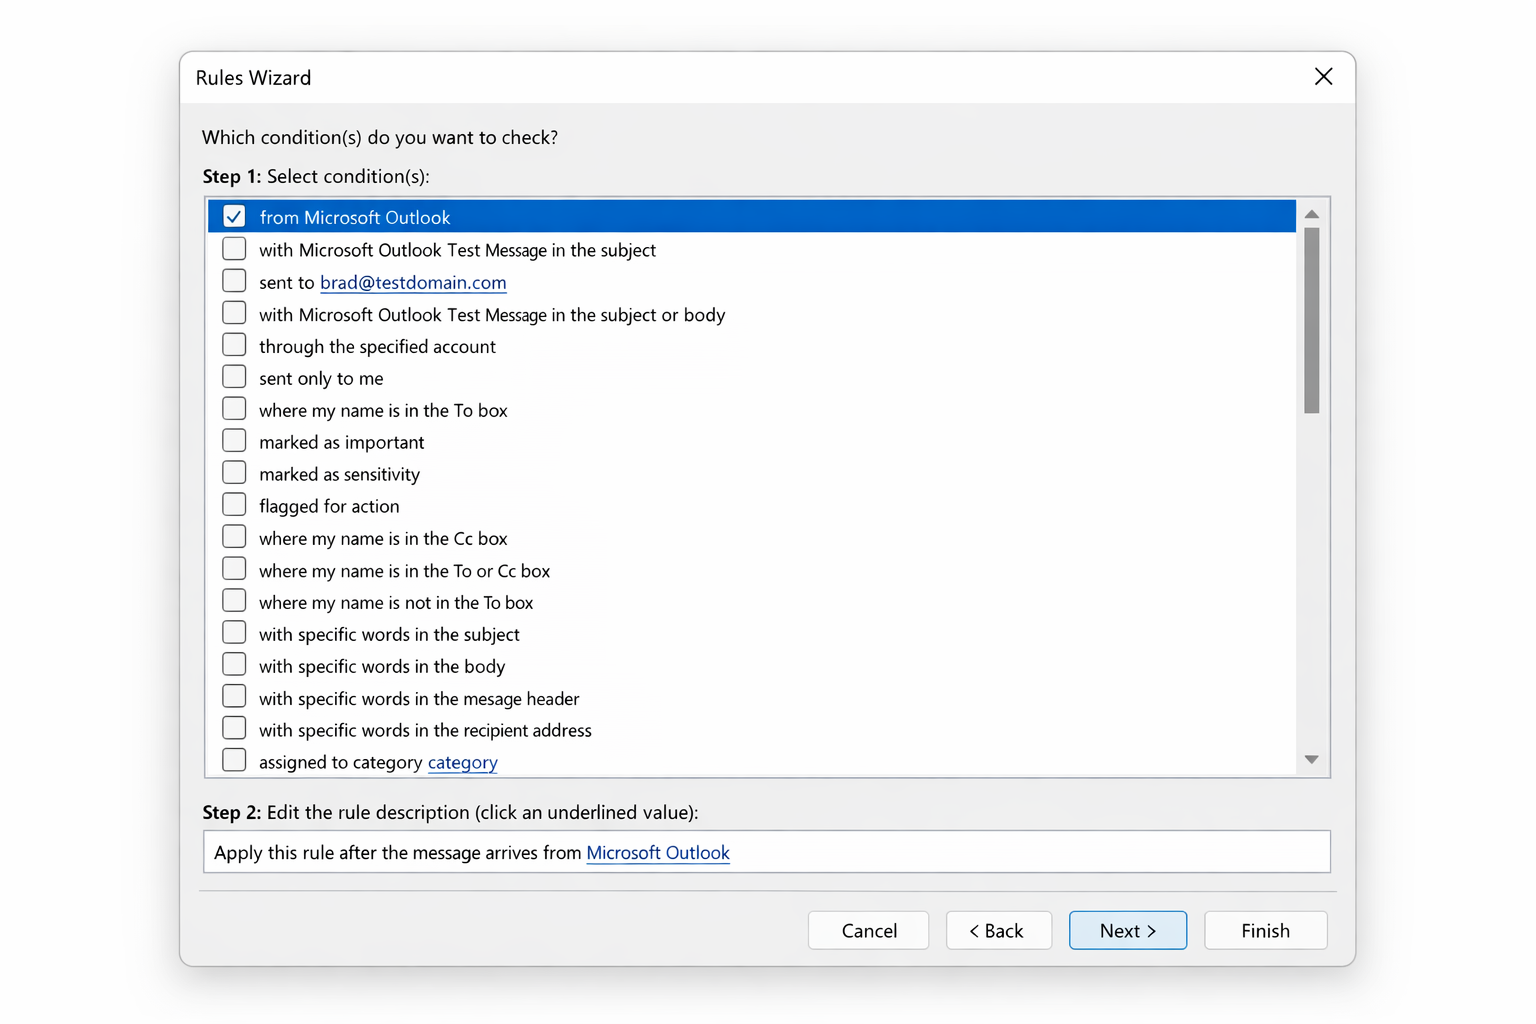
- On the Conditions screen, check any additional boxes you need (e.g., “with specific words in the subject,” “sent only to me”). Each checkbox adds a new underlined link to the Step 2 box, click each link to set its value.
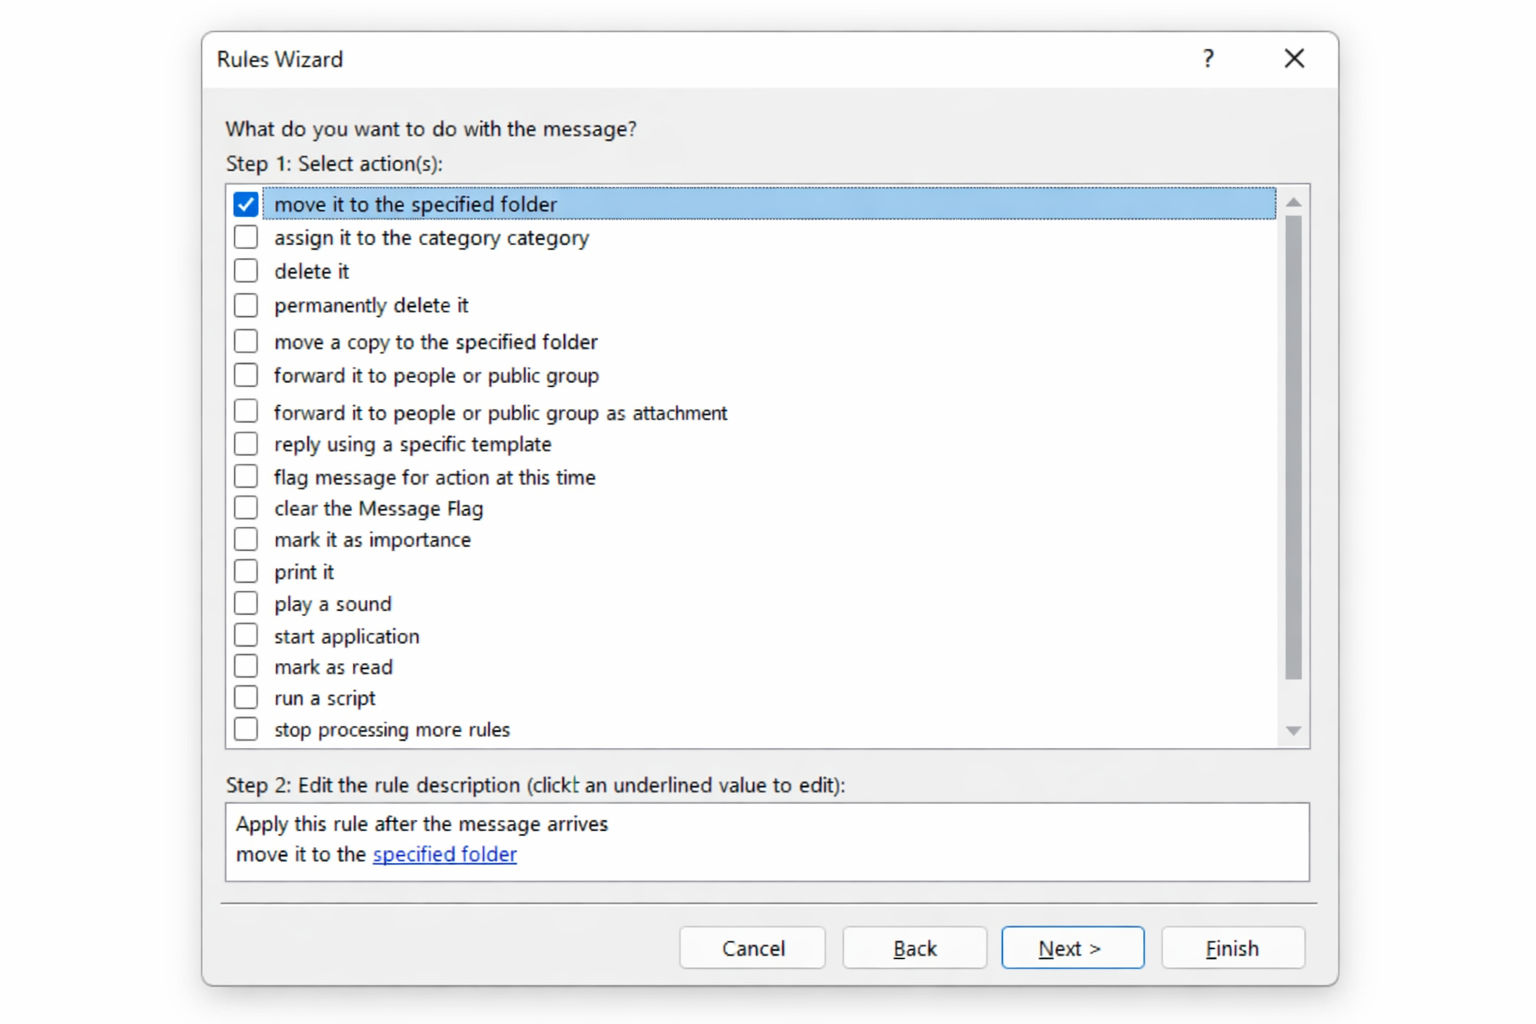
- Click Next to reach the Actions screen. The default action is “move it to the specified folder,” but you can add more: forward a copy, mark as read, assign a category, and others. Note: actions like “play a sound,” “print it,” and “run a script” are only available in classic Outlook as they don’t exist in new Outlook.
- Click Next to reach the Exceptions screen. Add any exceptions here — for example, “except if it is marked as important.” Leave it blank if you don’t need any.
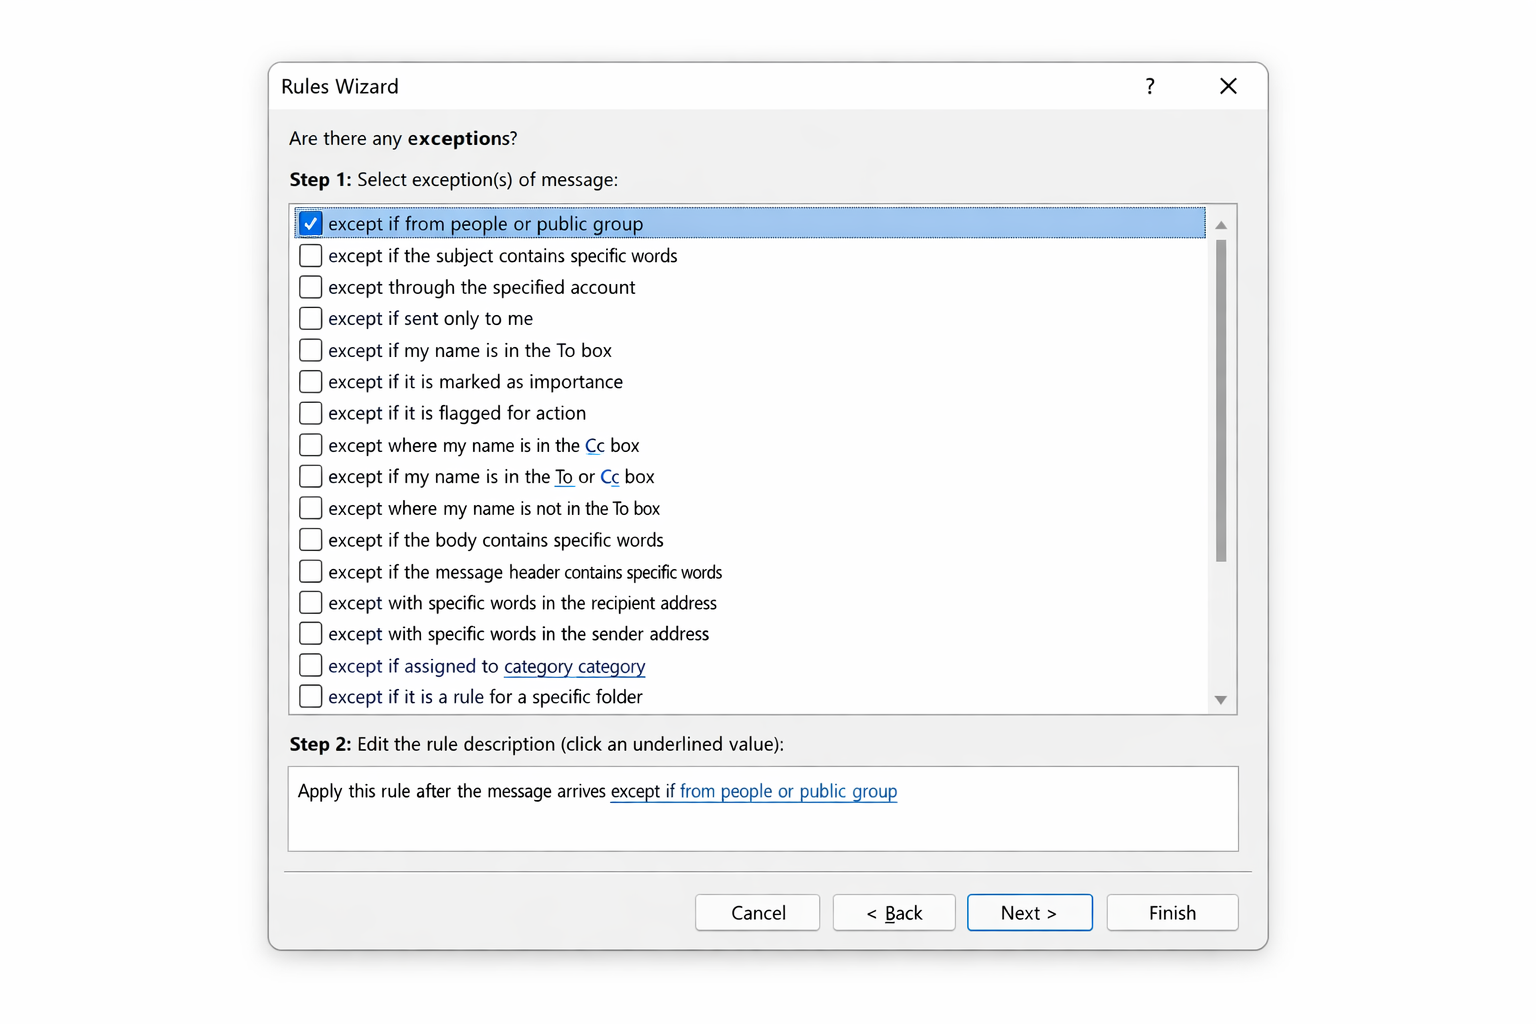
- Click Next to reach the final Finish rule setup screen. Give the rule a clear name like “Move Newsletters” so you can identify it later.
- Check Run this rule now on messages already in Inbox if you want to sort existing emails immediately.
- Click Finish.
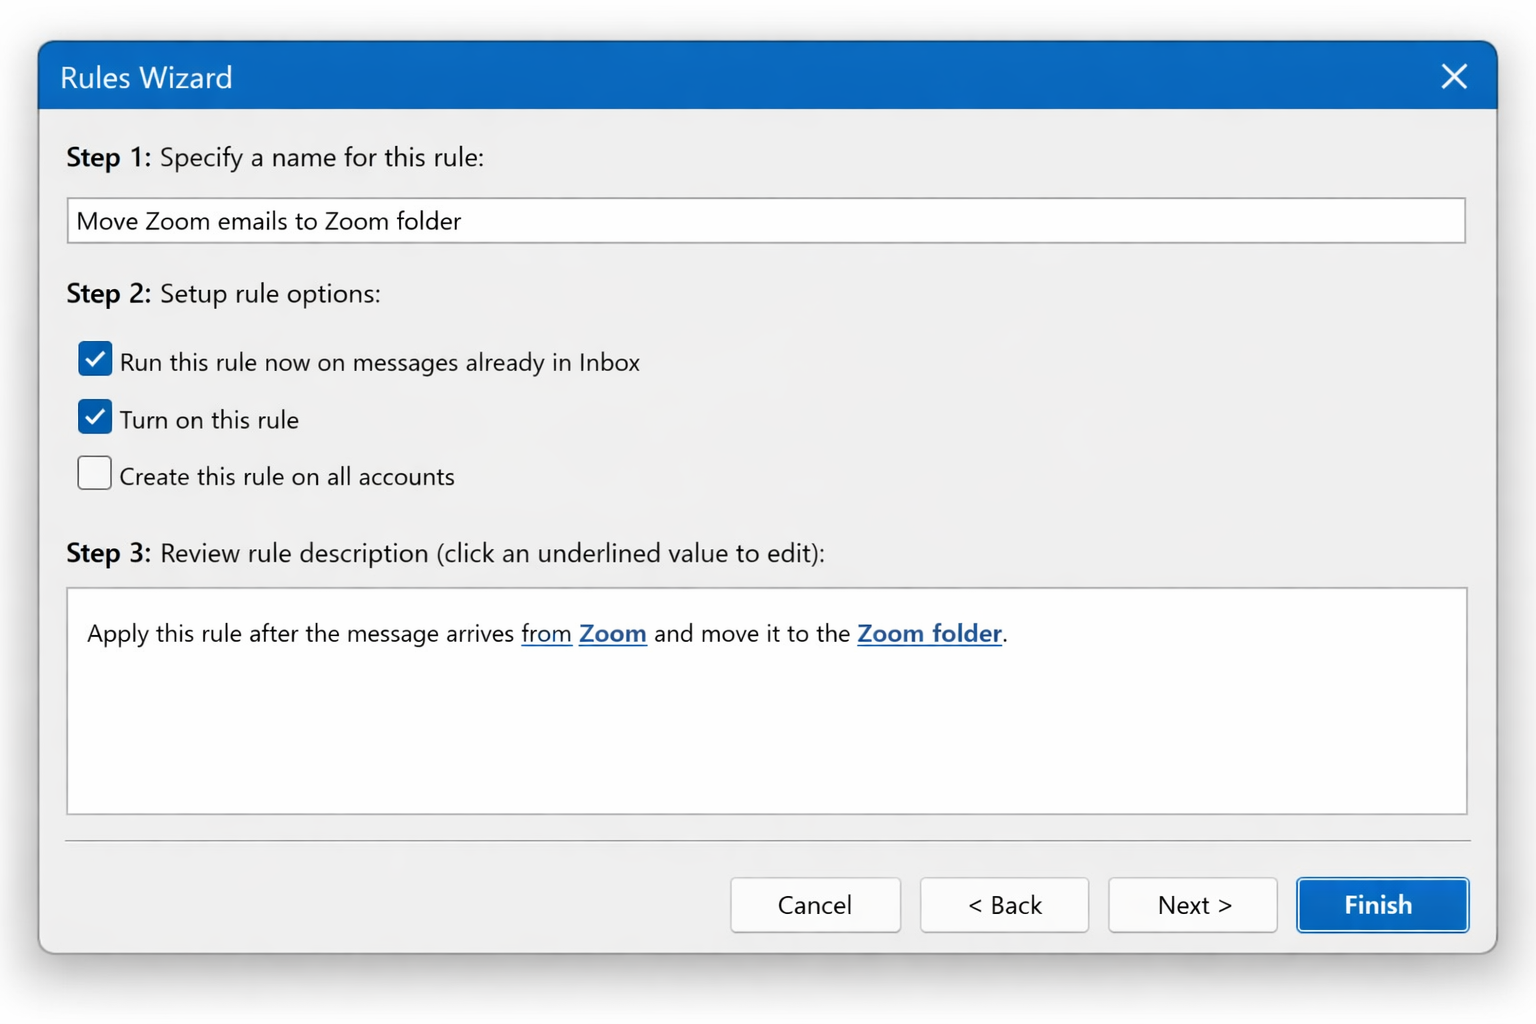
If a dialog warns you that this is a “client-only rule” – meaning Outlook needs to be running for it to work, click OK to accept. To avoid this, use server-side conditions only (sender address, subject keywords) rather than client-side ones like “on this computer only.”
How to Set Up Rules in New Outlook for Windows (2026)
New Outlook dropped the Rules Wizard entirely. Rules are now server-side only and live in Settings.
Fix #3: Create a rule via Settings in new Outlook
- Open new Outlook and click the Settings gear icon in the top-right corner.
- Select Mail from the left panel, then click Rules.
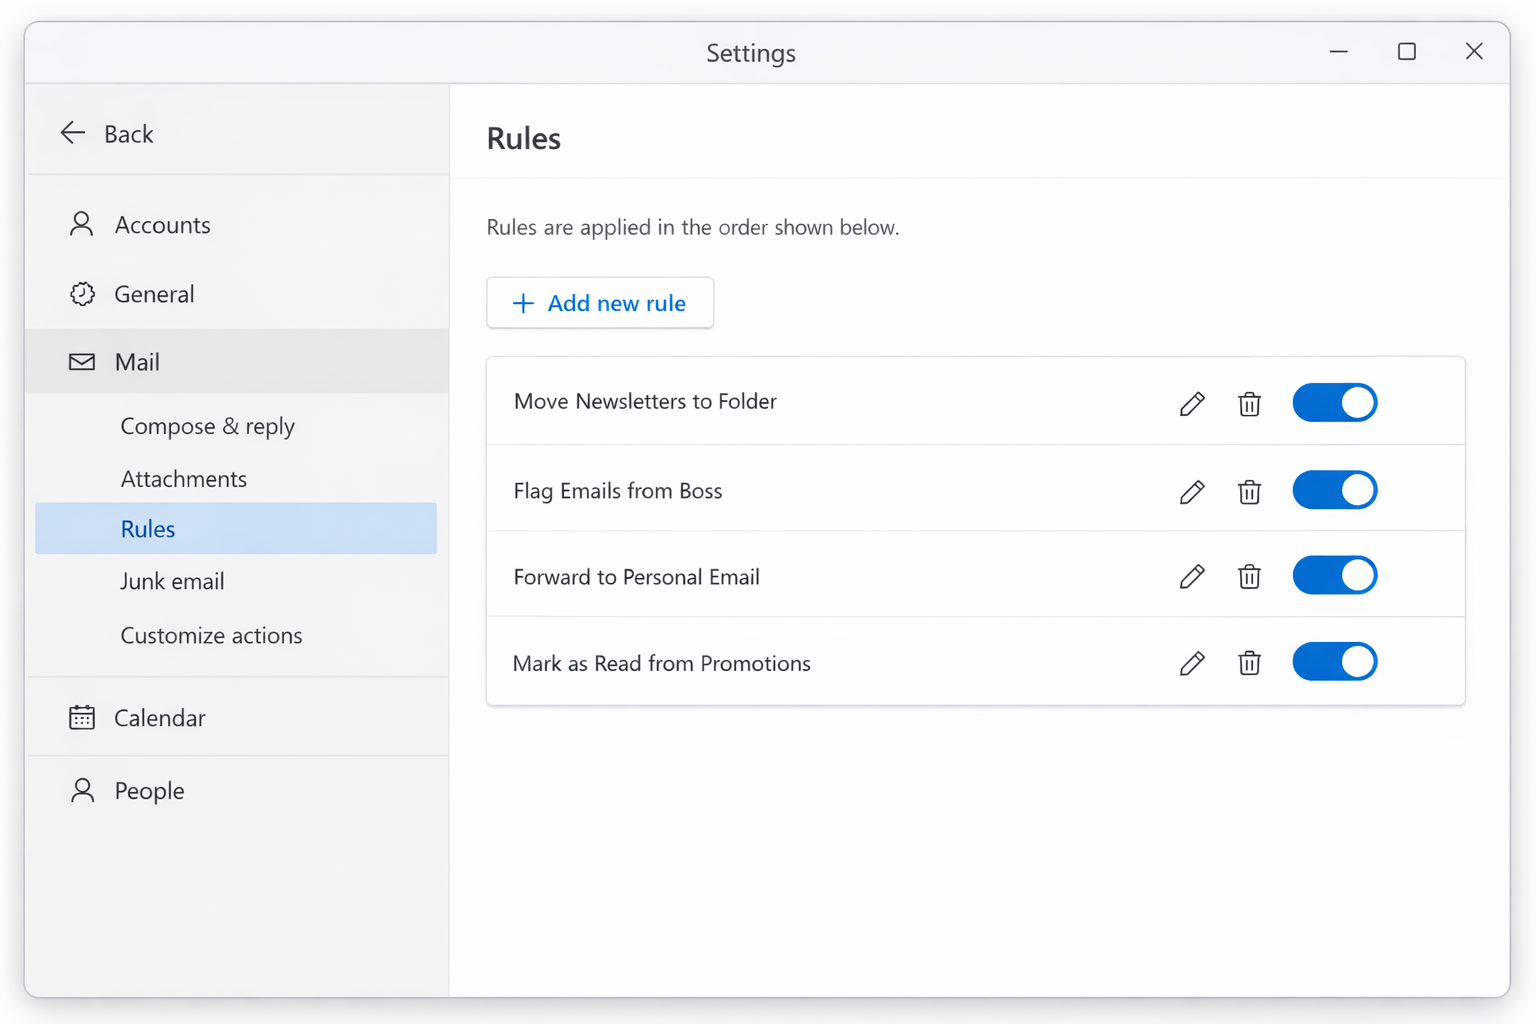
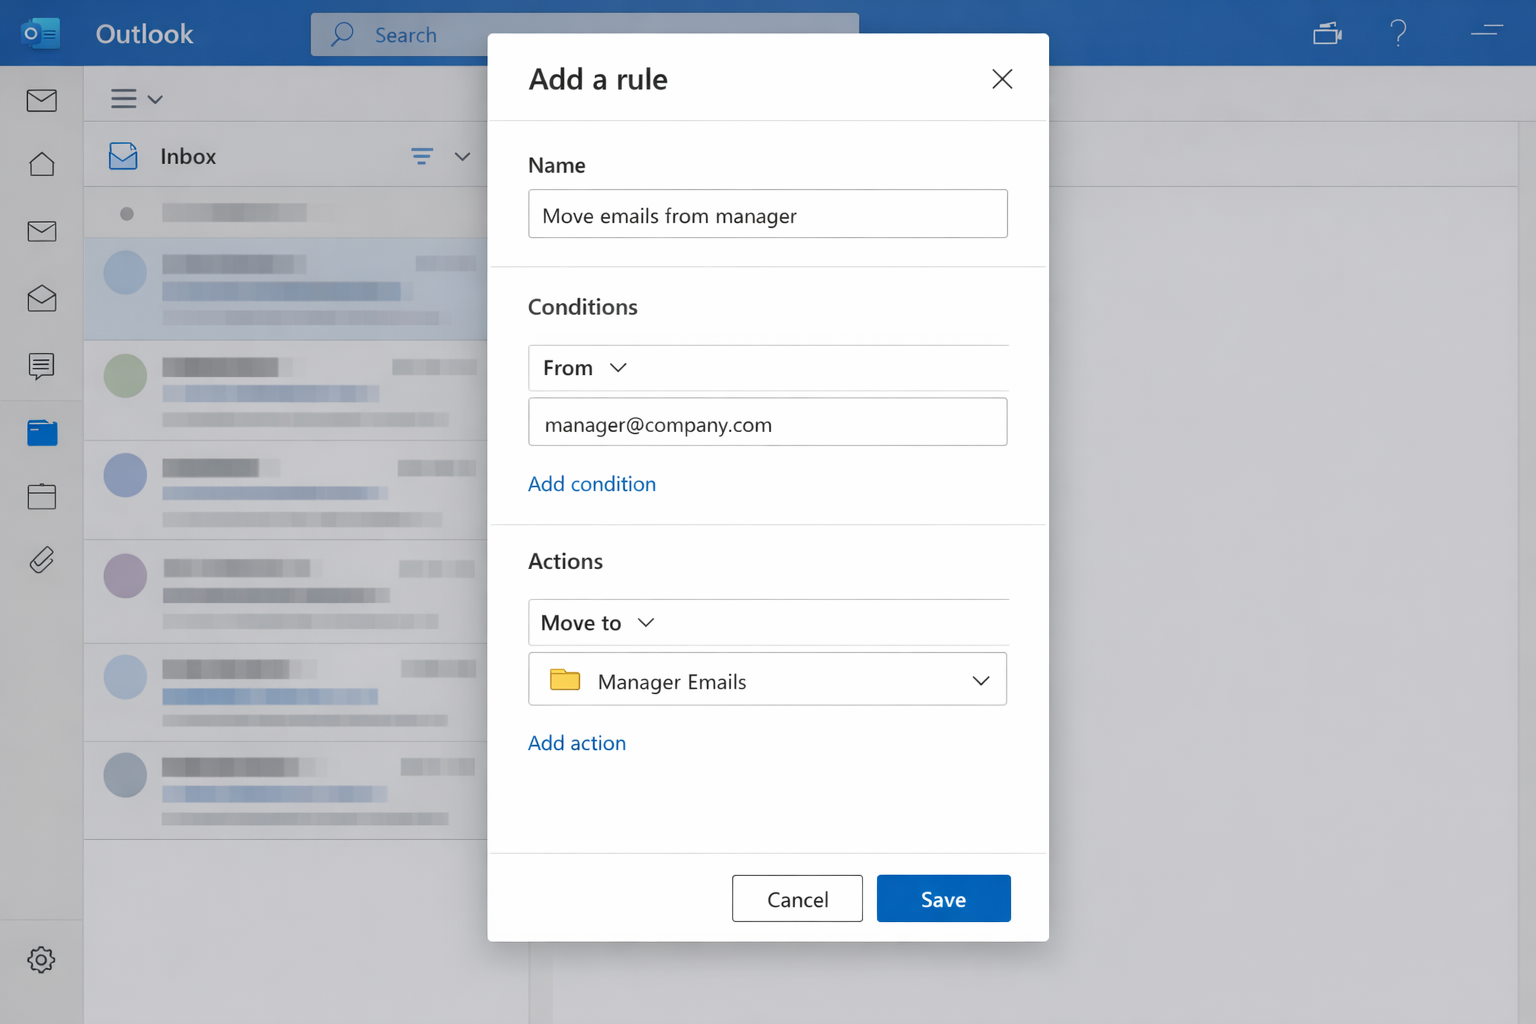
- Click Add new rule.
- Type a name for the rule in the Name field.
- Under Add a condition, choose your trigger. For example, From (sender’s address) or Subject includes.
- Fill in the condition value (e.g., the sender’s email address).
- Under Add an action, select Move to and choose your destination folder.
- Click Save.
The rule activates immediately and runs on the server — so it works even when Outlook isn’t open. Keep in mind: new Outlook rules only apply to Microsoft-hosted mailboxes. If you’ve added a Gmail or Yahoo account, you won’t be able to create rules for it here.
How to Set Up Rules in Outlook on the Web (OWA)
Fix #4: Create a rule in Outlook on the web
- Go to outlook.office.com and sign in.
- Click the Settings gear icon in the top-right corner.
- Select View all Outlook settings at the bottom of the Settings panel.
- Go to Mail > Rules.
- Click Add new rule, then fill in the name, conditions, and actions the same way as new Outlook above.
- Click Save.

Bonus: Create Rules with Microsoft 365 Copilot (Rolling Out in 2026)
If your Microsoft 365 subscription includes Copilot, you can create rules using plain English. In new Outlook, open the Copilot pane and type something like: “Move all emails from boss@company.com to my Projects folder.” Copilot sets up the rule for you – no clicking through menus required. This feature started rolling out in late January 2026 and should be available to most M365 subscribers by mid-2026.
Useful Rules to Create Right Now
Here are a few rules worth setting up immediately:
- Newsletter folder: Condition = subject includes “unsubscribe” → Move to Newsletters
- Bank statements: Condition = from your bank’s domain (e.g., @chase.com) → Move to Finance
- Work project emails: Condition = subject includes a project name or code → Move to that project’s folder
- Family emails: Condition = from specific family members’ addresses → Move to Family
Classic Outlook vs. New Outlook Rules — What’s Different
| Feature | Classic Outlook | New Outlook / OWA |
|---|---|---|
| Rules interface | File > Manage Rules & Alerts | Settings > Mail > Rules |
| Processing type | Client-side + server-side | Server-side only |
| Works when Outlook is closed | Server-side rules only | Always |
| Play a sound / run a macro | Yes | No |
| Non-Microsoft accounts (Gmail, Yahoo) | Yes (client-side) | No |
| Copilot natural language setup | No | Yes (rolling out 2026) |
Conclusion
For most people, Fix #1 (the Rules Wizard in classic Outlook) or Fix #3 (Settings > Mail > Rules in new Outlook) covers everything they need. If you’re on new Outlook and missing the old Rules Wizard, that’s by design as Microsoft removed it in favor of server-side-only rules, which are more reliable but less flexible. The one thing to watch: if you’re being nudged to switch from classic to new Outlook, export your rules first, because they don’t migrate automatically.