
Adding a network printer in Windows 11 is handled entirely through Settings as the old “Printers and Faxes” Control Panel is gone. Whether your printer is on a home workgroup, a corporate domain, or only reachable by IP address, the steps below cover all three scenarios.
Method #1: Automatic Discovery (Home or Office Network)
Windows 11 scans your local network automatically and installs most modern printers without any manual driver hunting. This works for Wi-Fi, Ethernet, and IPP-compatible printers.
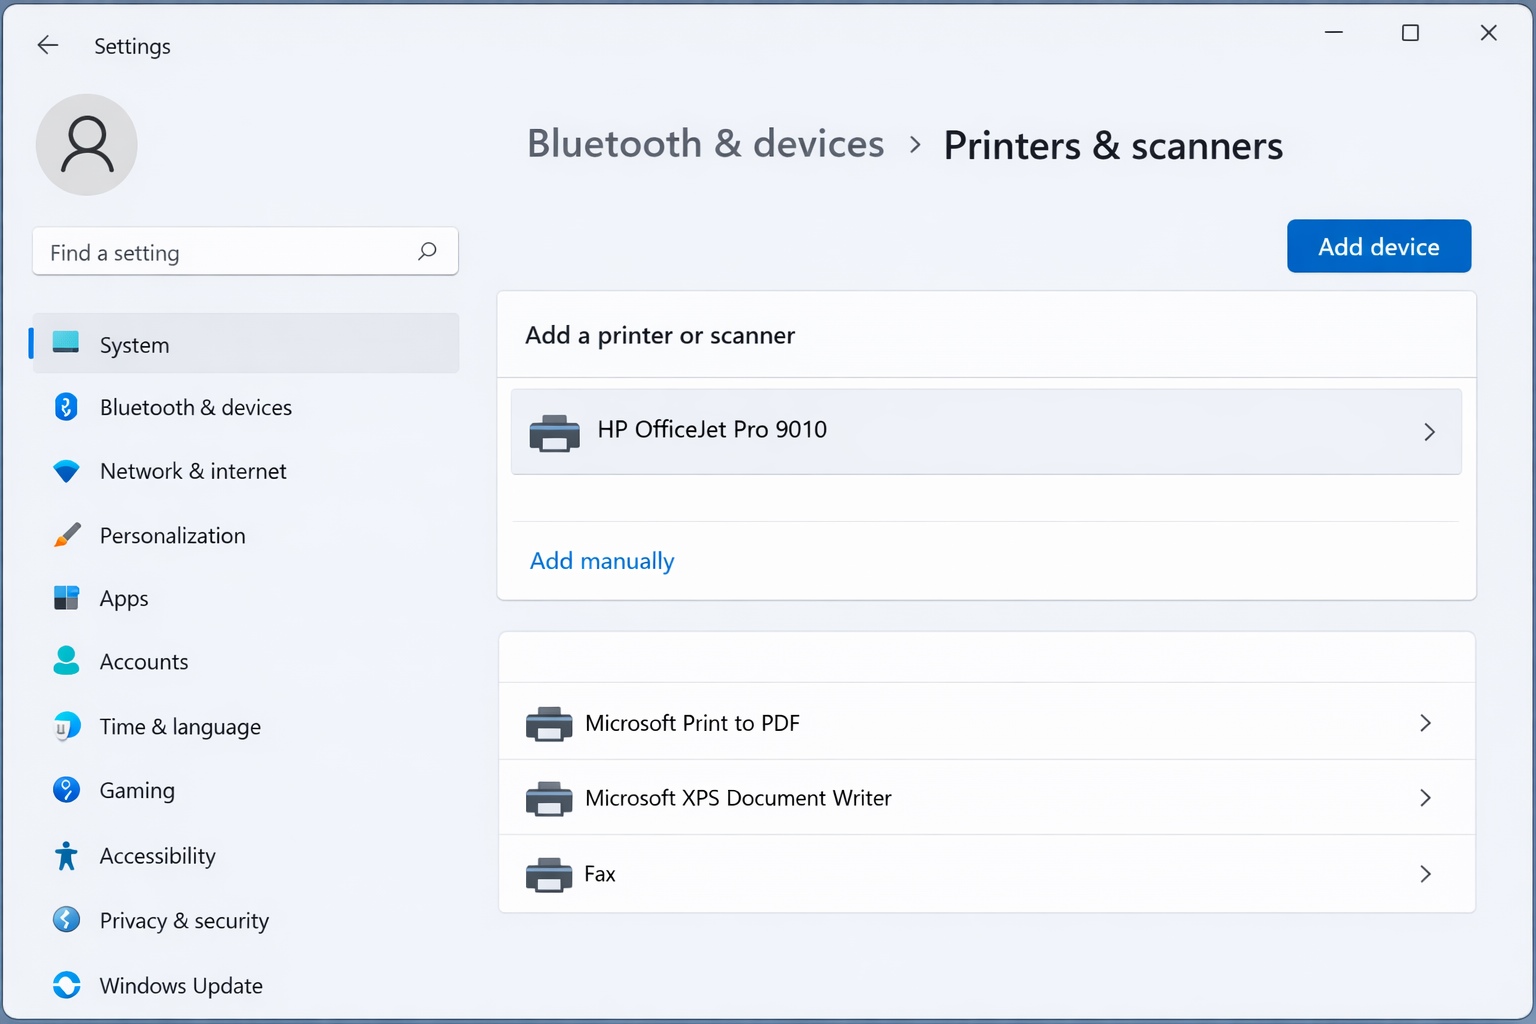
Step 1: Open Printers & scanners in Settings
- Press
Windows + Ito open Settings. - Select Bluetooth & devices from the left sidebar.
- Click Printers & scanners.
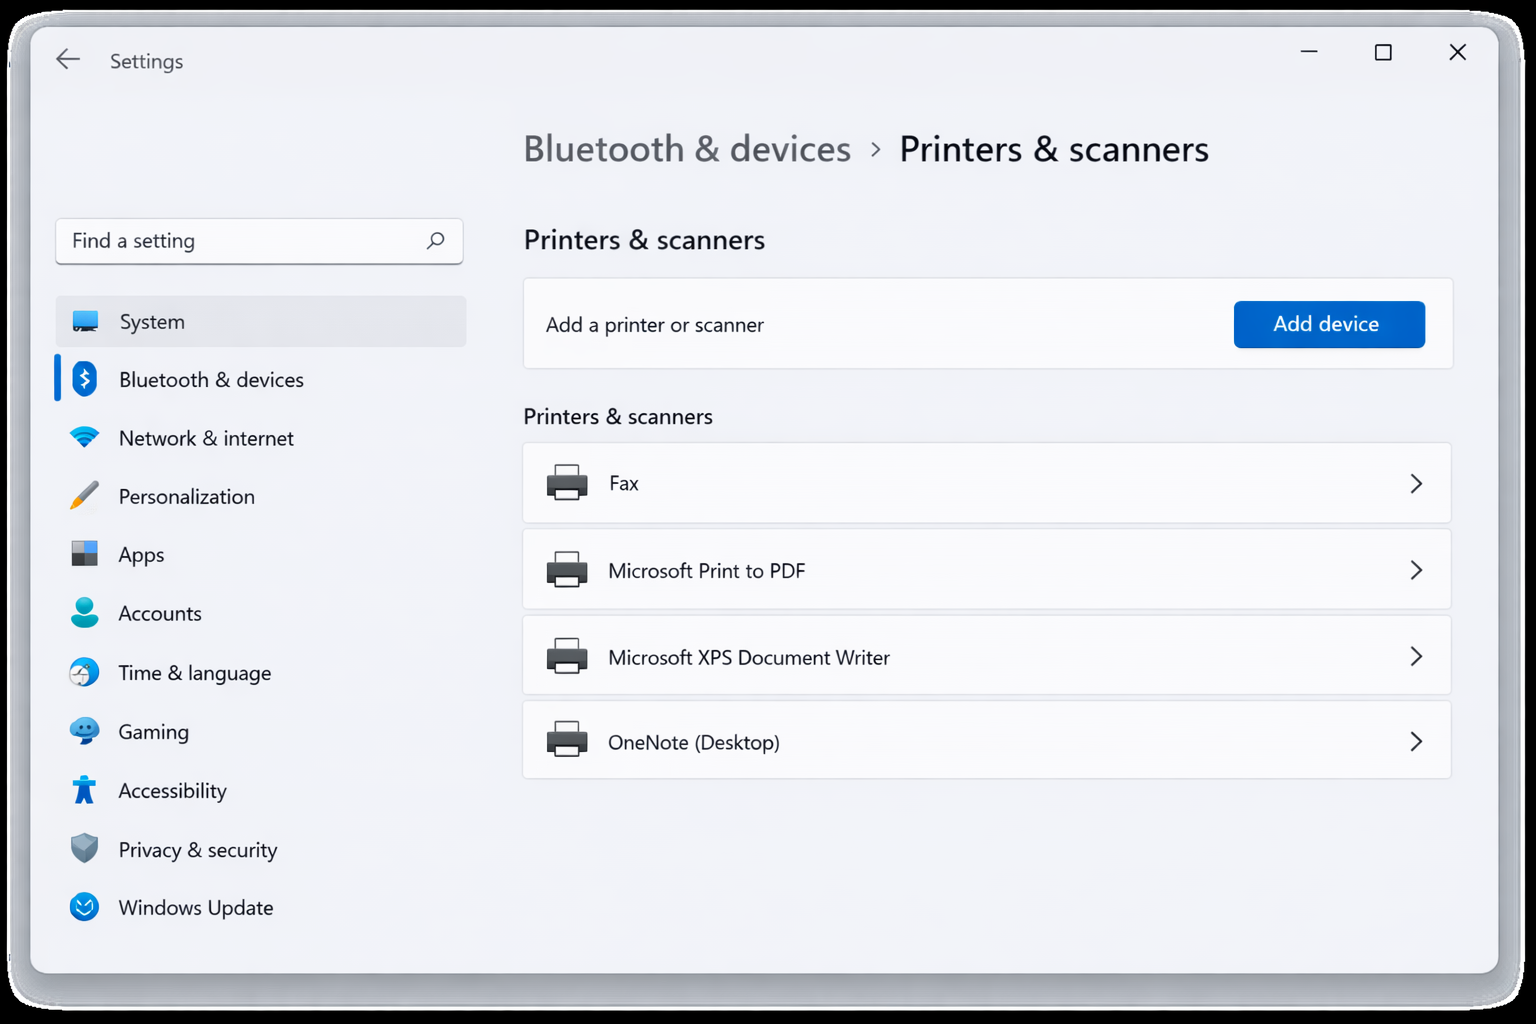
Step 2: Add the printer
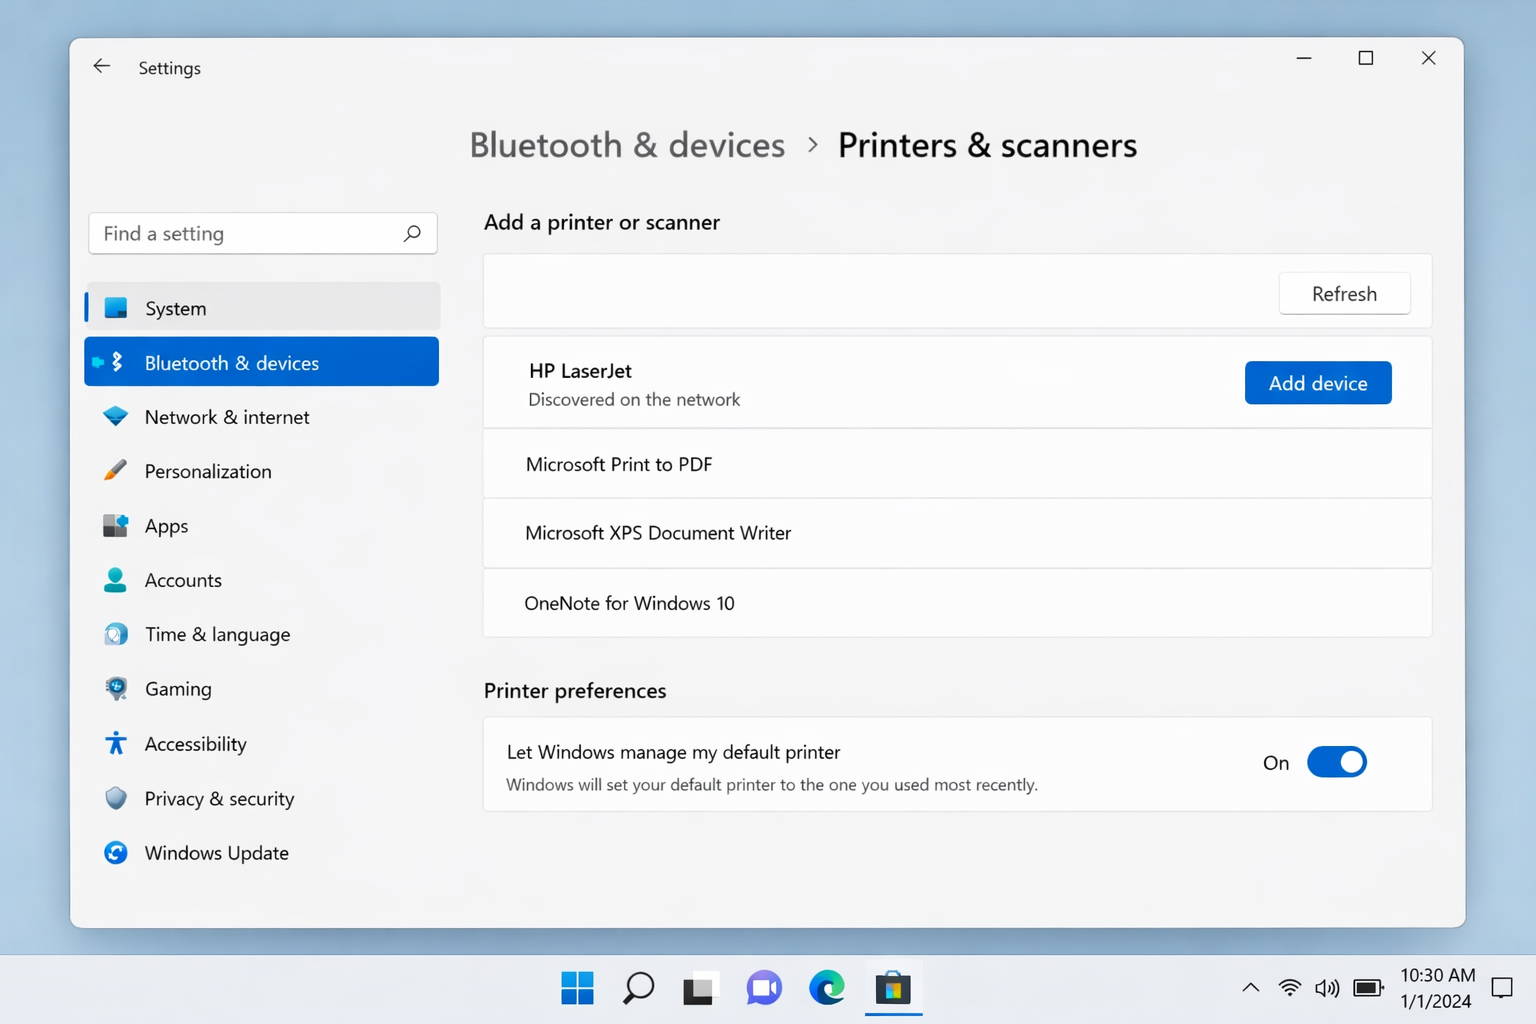
- Click Add device. Windows will scan the network for a few seconds.
- When your printer appears in the list, click Add device next to it.
- Windows downloads and installs the driver automatically.
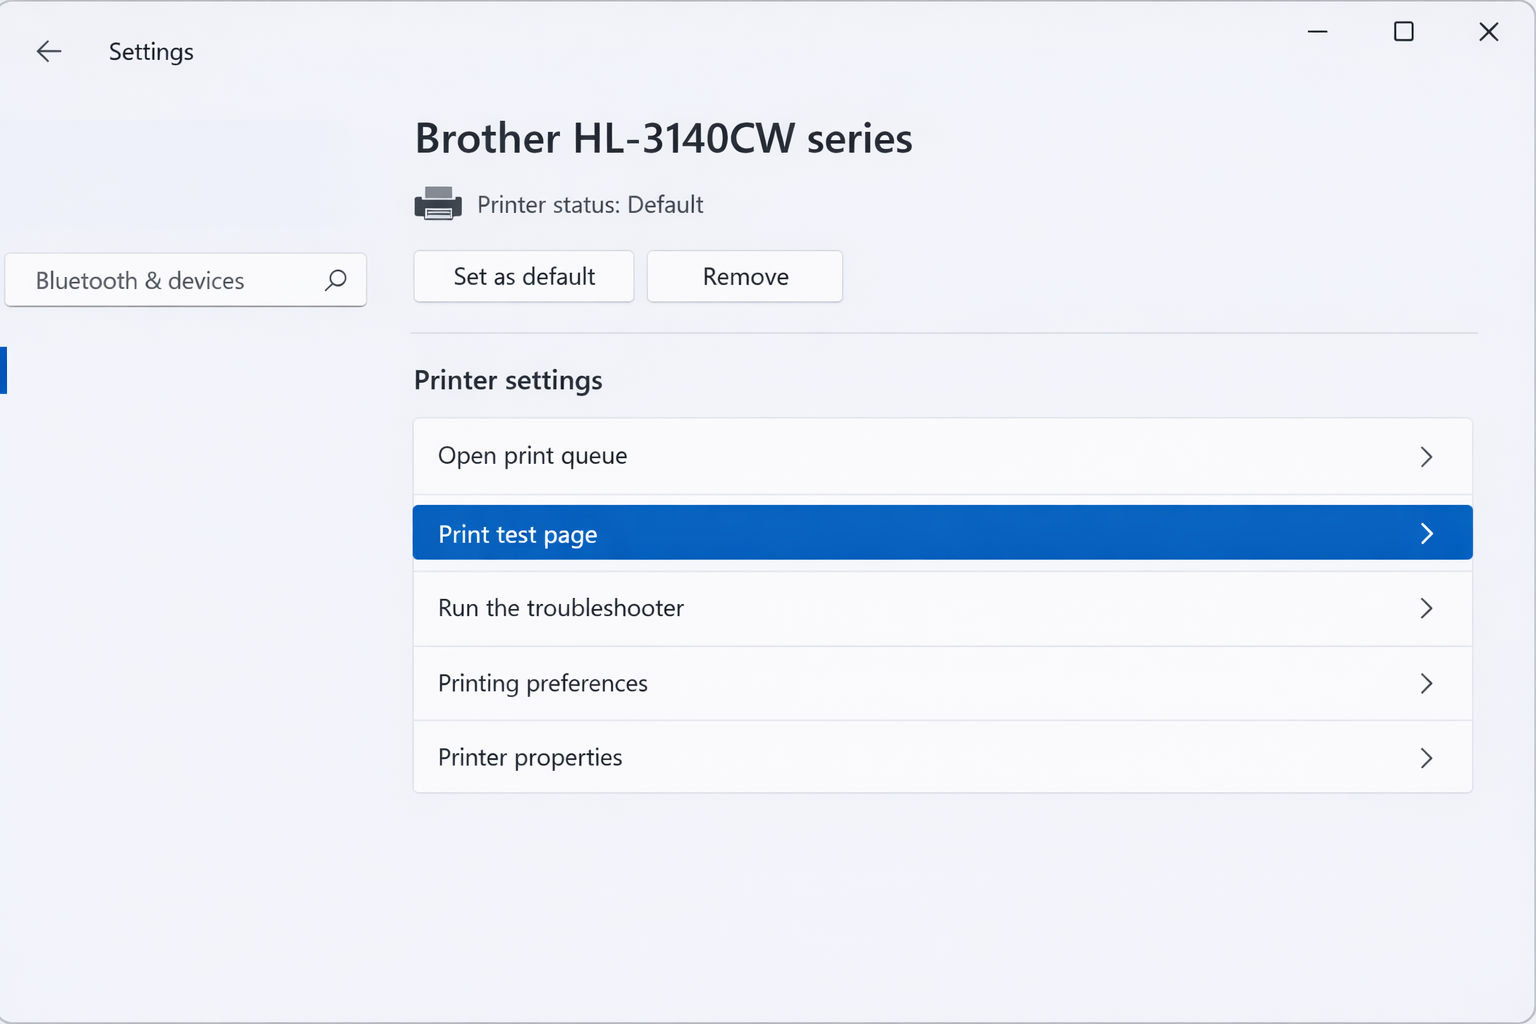
Step 3: Print a test page
- Once installed, click the printer’s name in Printers & scanners.
- Click Print test page to confirm it’s working.
Printer not showing up? Make sure your PC and printer are on the same subnet and that your network profile is set to Private, not Public. Go to Settings > Network & internet > your connection > set Network profile type to Private. Public networks block printer discovery by design.
Method #2: Add by IP Address or Hostname (Manual Setup)
Use this method when the printer doesn’t appear in the automatic scan. This is common with corporate printers on a different subnet, older printers, or printers with static IP addresses.
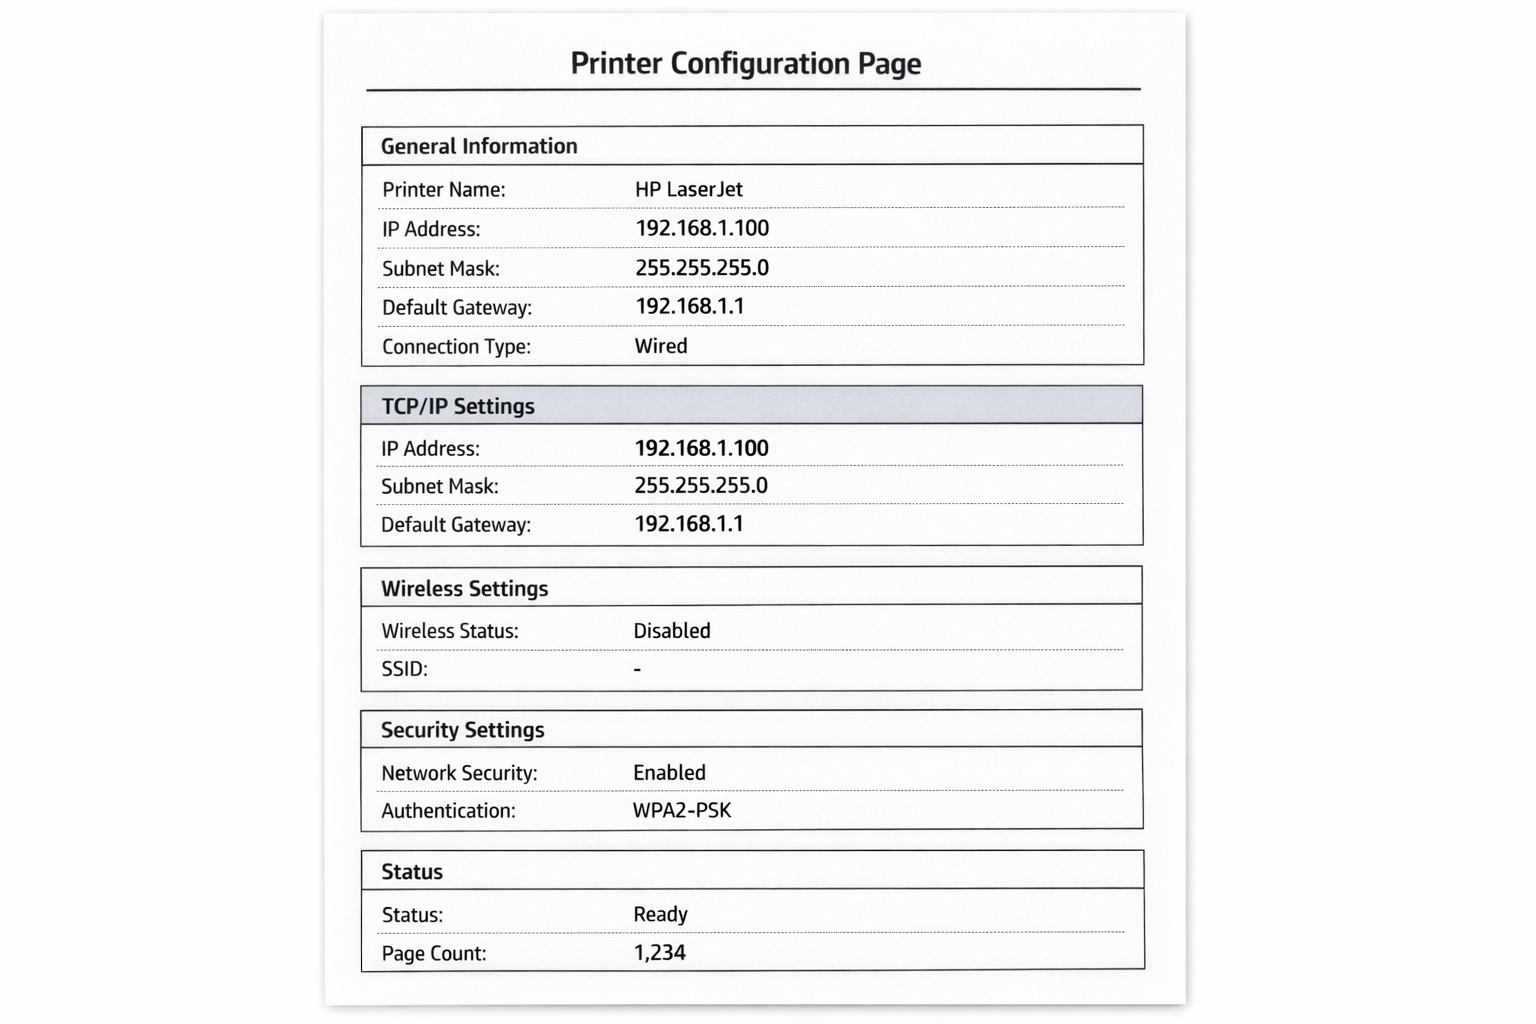
Step 1: Find the printer’s IP address
Print a configuration page directly from the printer (usually by holding the button on the printer itself, or through its front-panel menu). The network configuration section lists the IP address, for example, 192.168.1.100.
Step 2: Open Add manually in Settings
- Press
Windows + I> Bluetooth & devices > Printers & scanners. - Click Add device.
- Wait a few seconds for the scan to run, then click Add manually when it appears below the results.
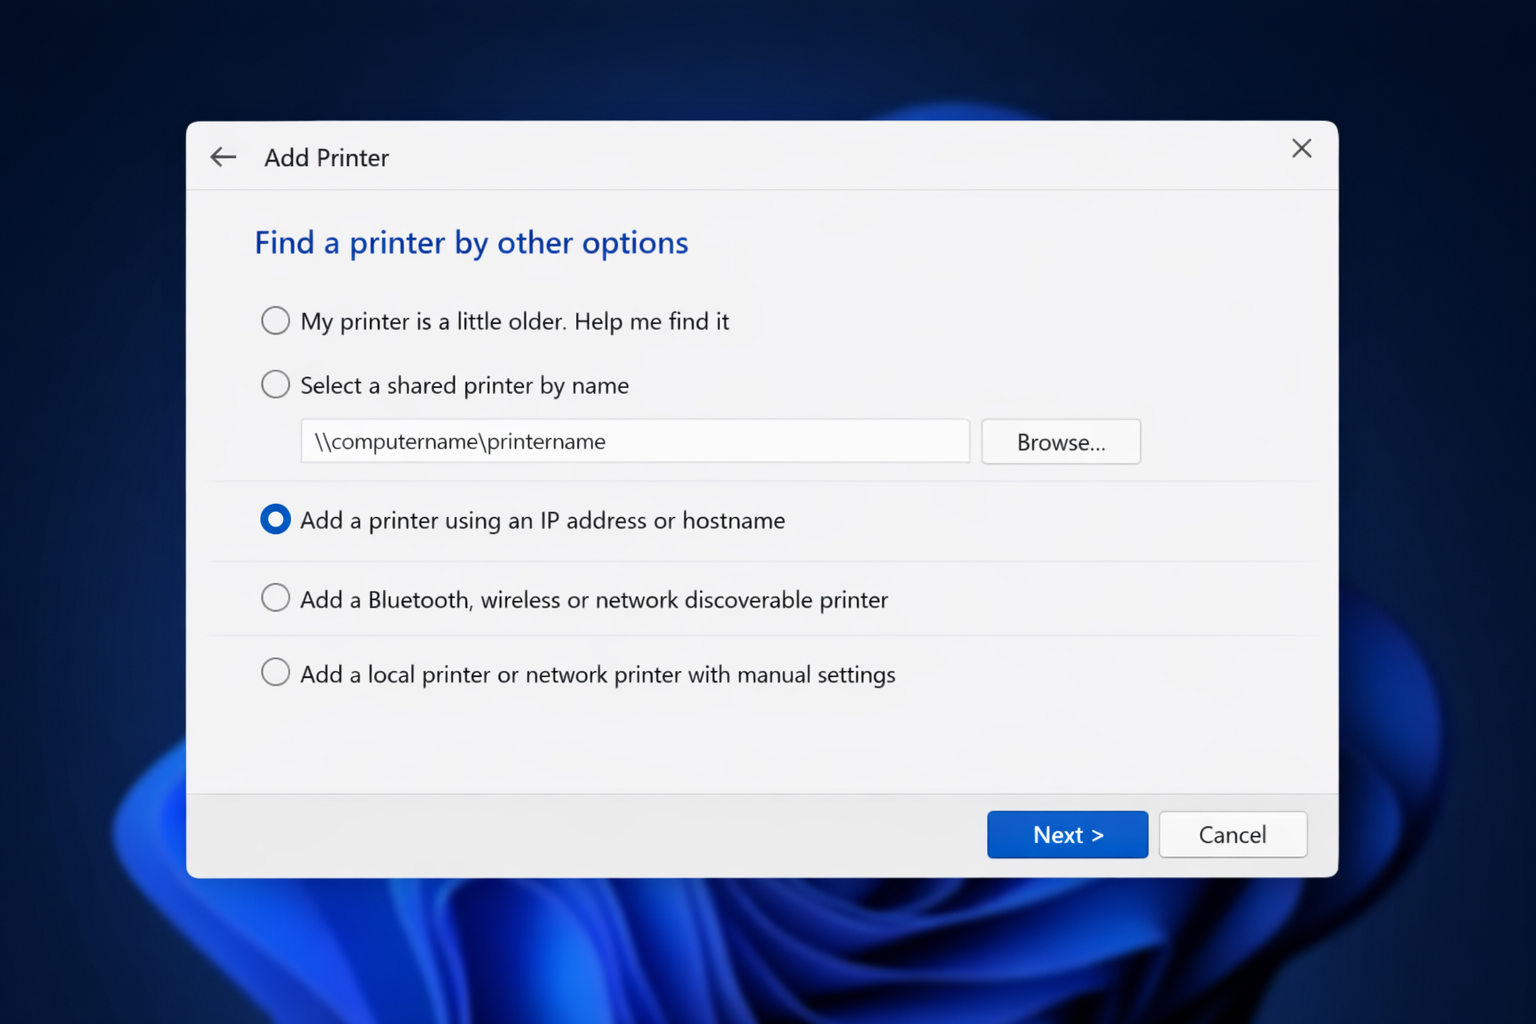
Step 3: Choose the IP/hostname option
- In the Add Printer dialog, select Add a printer using an IP address or hostname.
- Click Next.
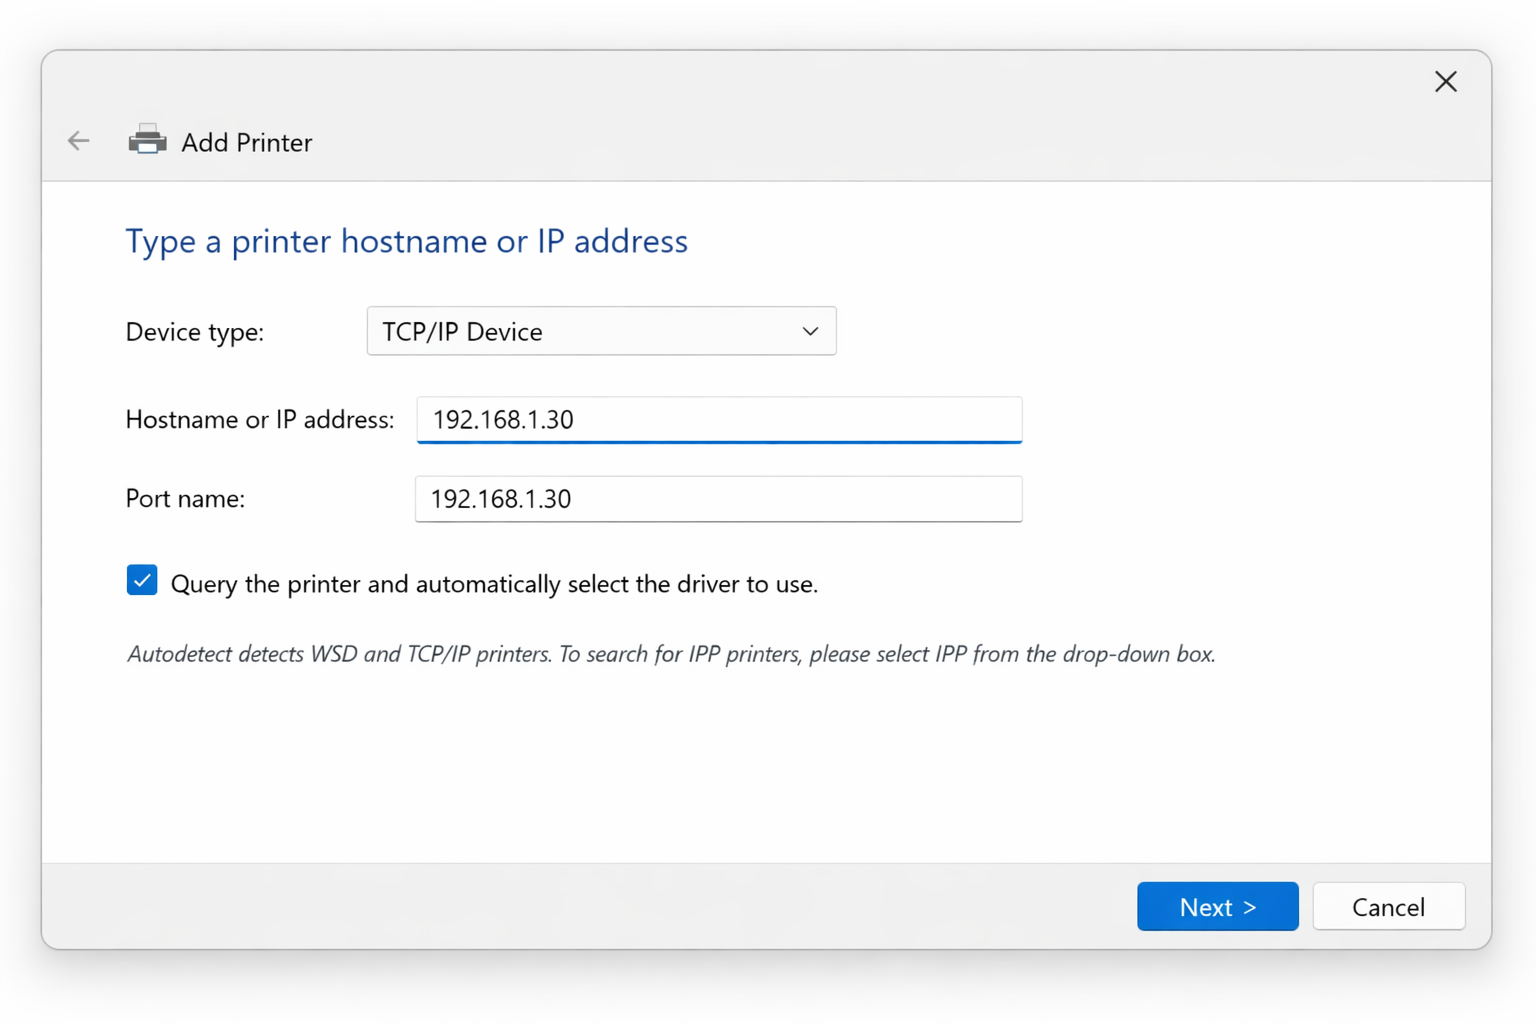
Step 4: Enter the printer’s IP address
- Set Device type to TCP/IP Device.
- Type the printer’s IP address (e.g.,
192.168.1.100) or hostname (e.g.,printername.domain.com) in the Hostname or IP address field. - Leave Query the printer and automatically select the driver checked.
- Click Next.
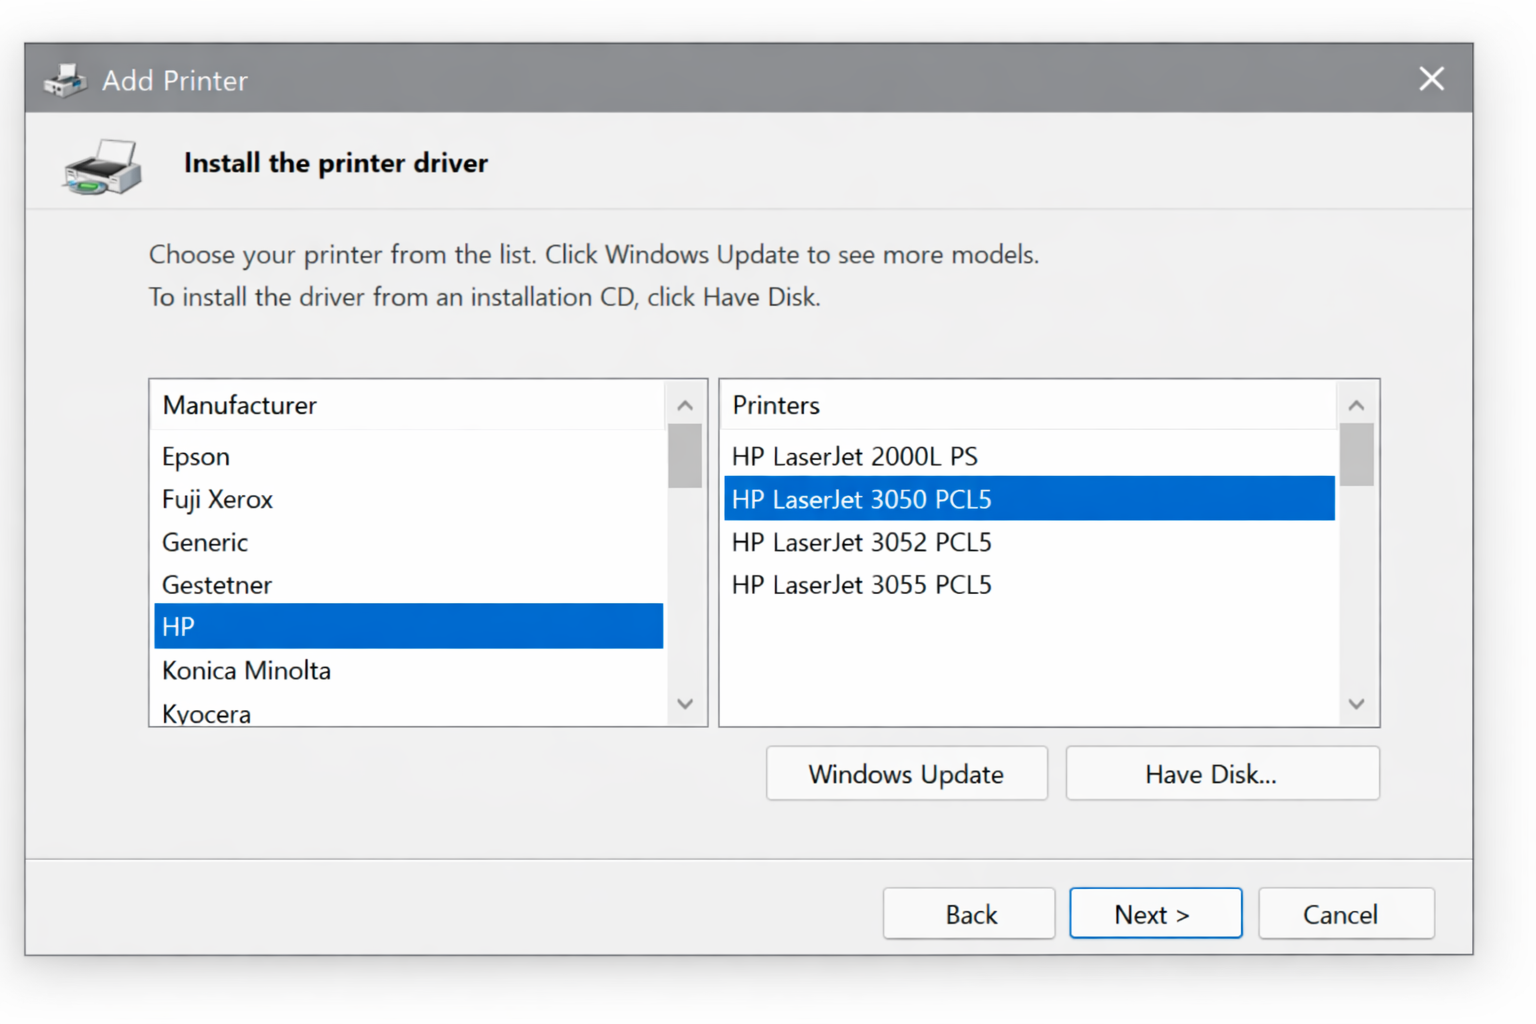
Step 5: Install the driver
- Windows attempts to detect the printer model and install the correct driver automatically.
- If Windows can’t find the driver, select your printer’s manufacturer and model from the list, or click Have Disk and point to a driver you downloaded from the manufacturer’s website.
- Click Next.
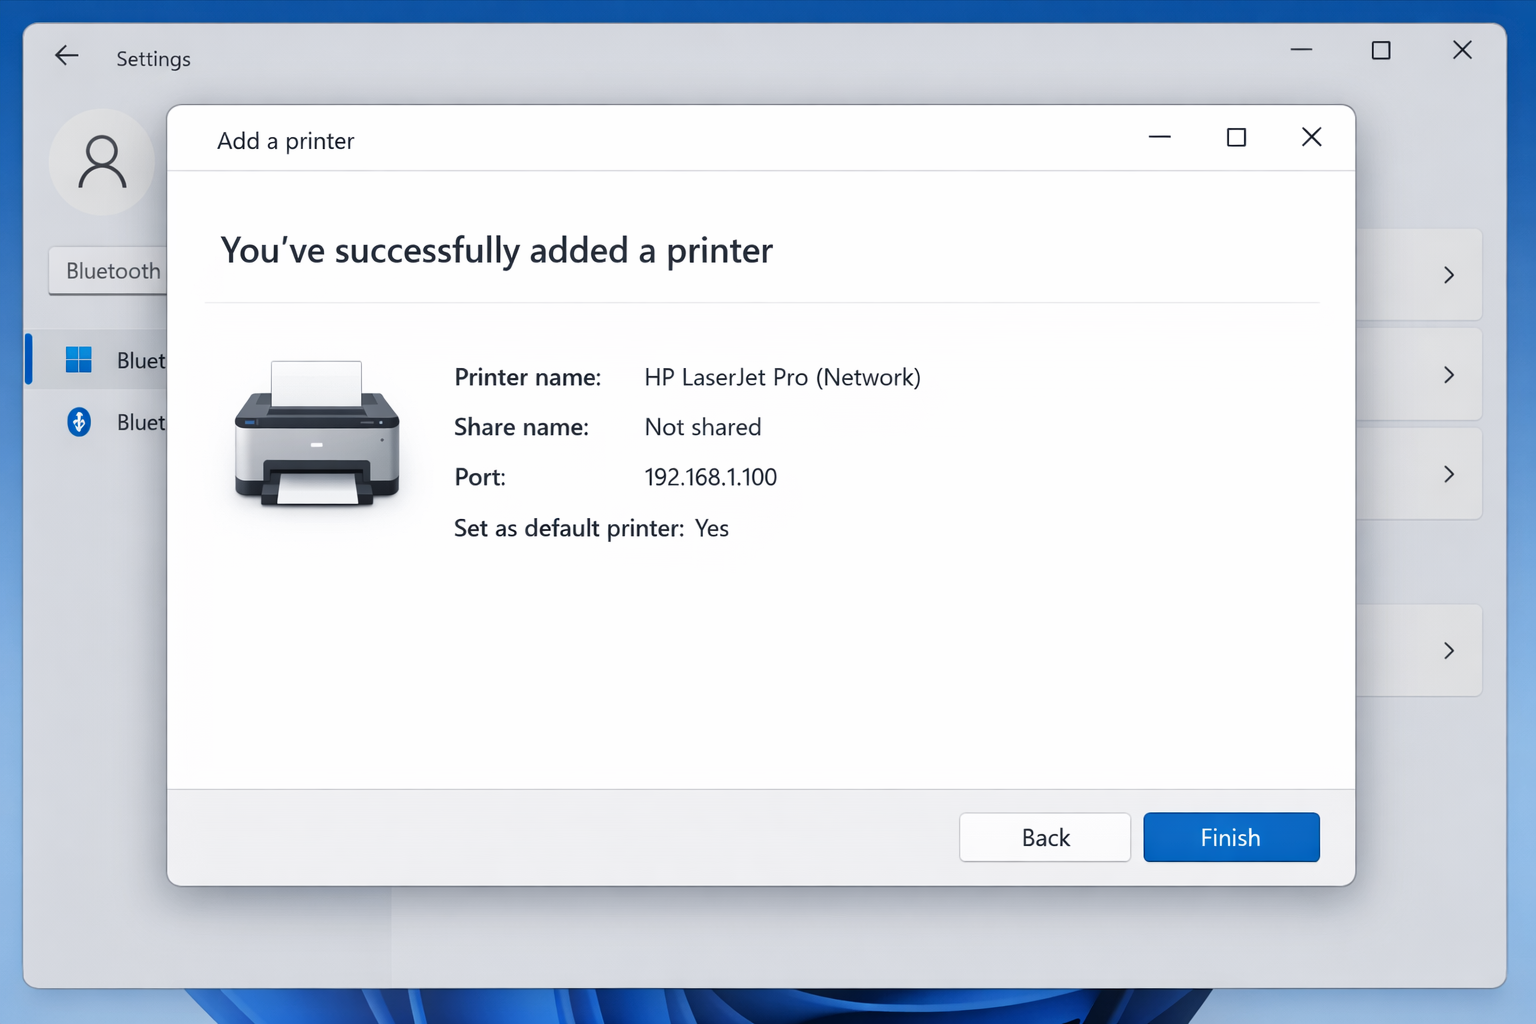
Step 6: Name the printer and finish
- Give the printer a name (or leave the default) and click Next.
- Choose whether to share the printer – select Do not share this printer for personal use.
- Click Finish. The printer now appears in Printers & scanners.
- Click the printer name and select Print test page to confirm the connection.
Method #3: Domain-Joined PCs (Active Directory)
If your PC is joined to a company domain, IT typically pushes printers to your machine automatically, they’ll just appear in Printers & scanners without any action on your part. If a specific printer isn’t showing up, use the steps below.
Step 1: Search for the printer via Settings
- Press
Windows + I> Bluetooth & devices > Printers & scanners. - Click Add device. Domain-published printers often appear in the scan results automatically.
- If your printer appears, click Add device next to it and Windows installs it.
Step 2: Add manually by hostname if it doesn’t appear
- Follow Method #2 above, but enter the printer’s hostname (e.g.,
\\printserver\PrinterNameorprintername.company.com) instead of an IP address. - Windows resolves the hostname via DNS and connects to the print queue.
Corporate firewall blocking discovery? IT may restrict ports 9100, 631 (IPP), or 445 (SMB) between subnets. Ask your IT admin to either push the printer via Group Policy or provide the exact hostname to use in the manual setup above.
How to Share a Printer with Other PCs on Your Network
If you want other computers on your home or office network to print through your PC, you need to share the printer and enable file and printer sharing.
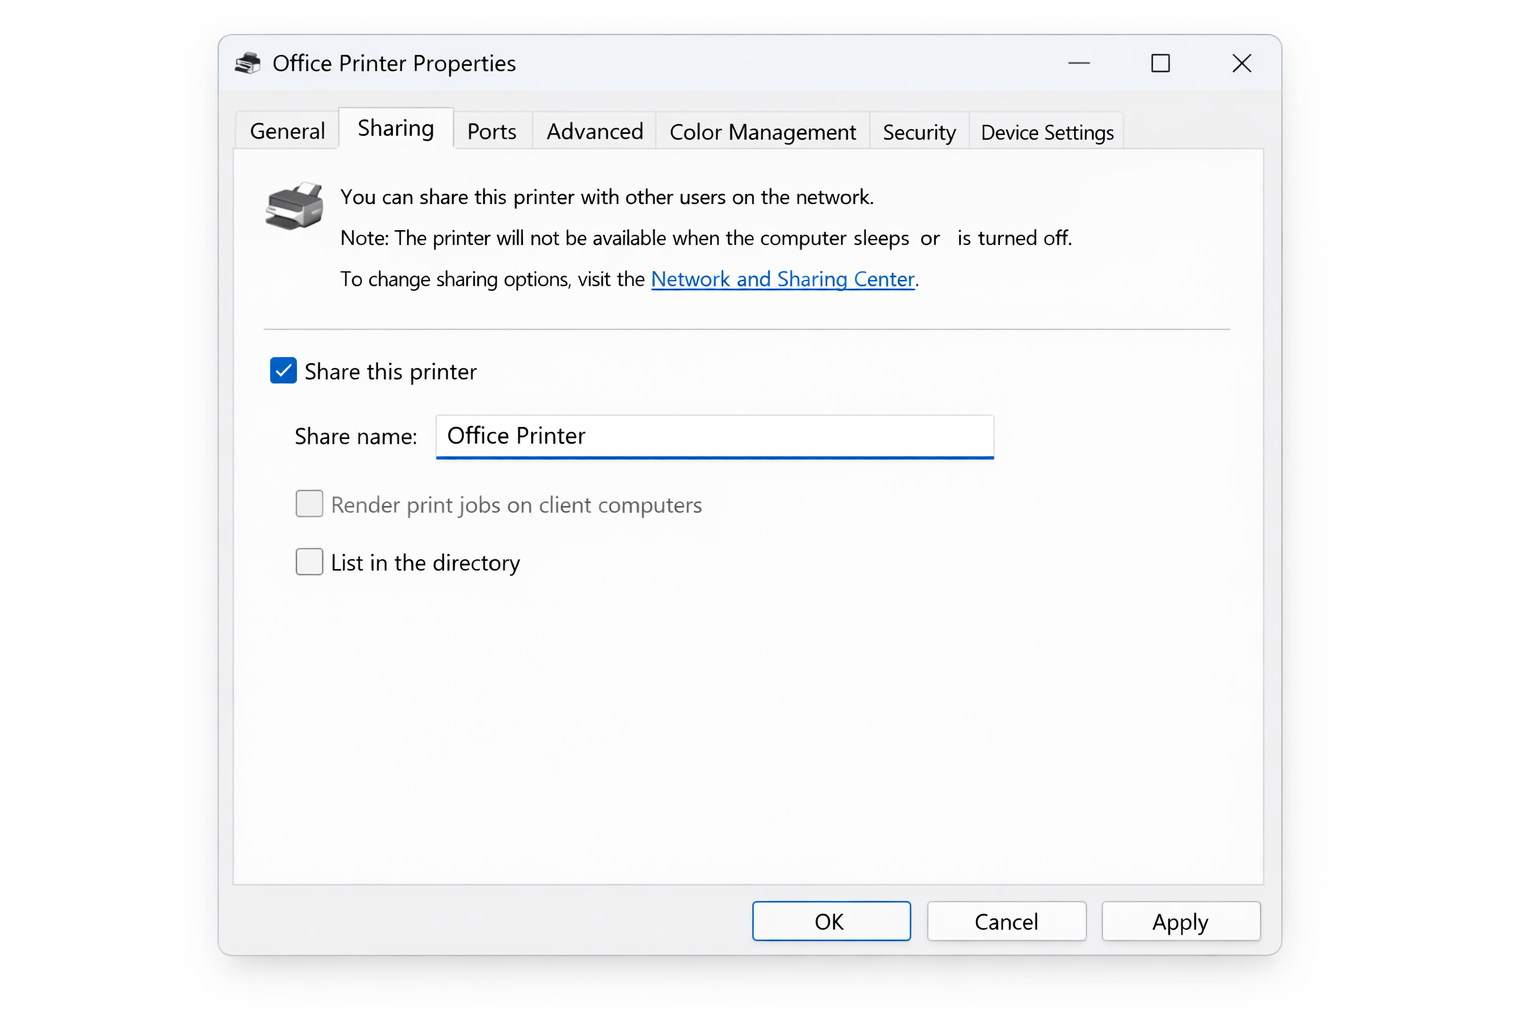
Step 1: Enable printer sharing
- Go to Settings > Bluetooth & devices > Printers & scanners.
- Click the printer you want to share.
- Click Printer properties.
- Go to the Sharing tab and check Share this printer.
- Give it a share name and click OK.
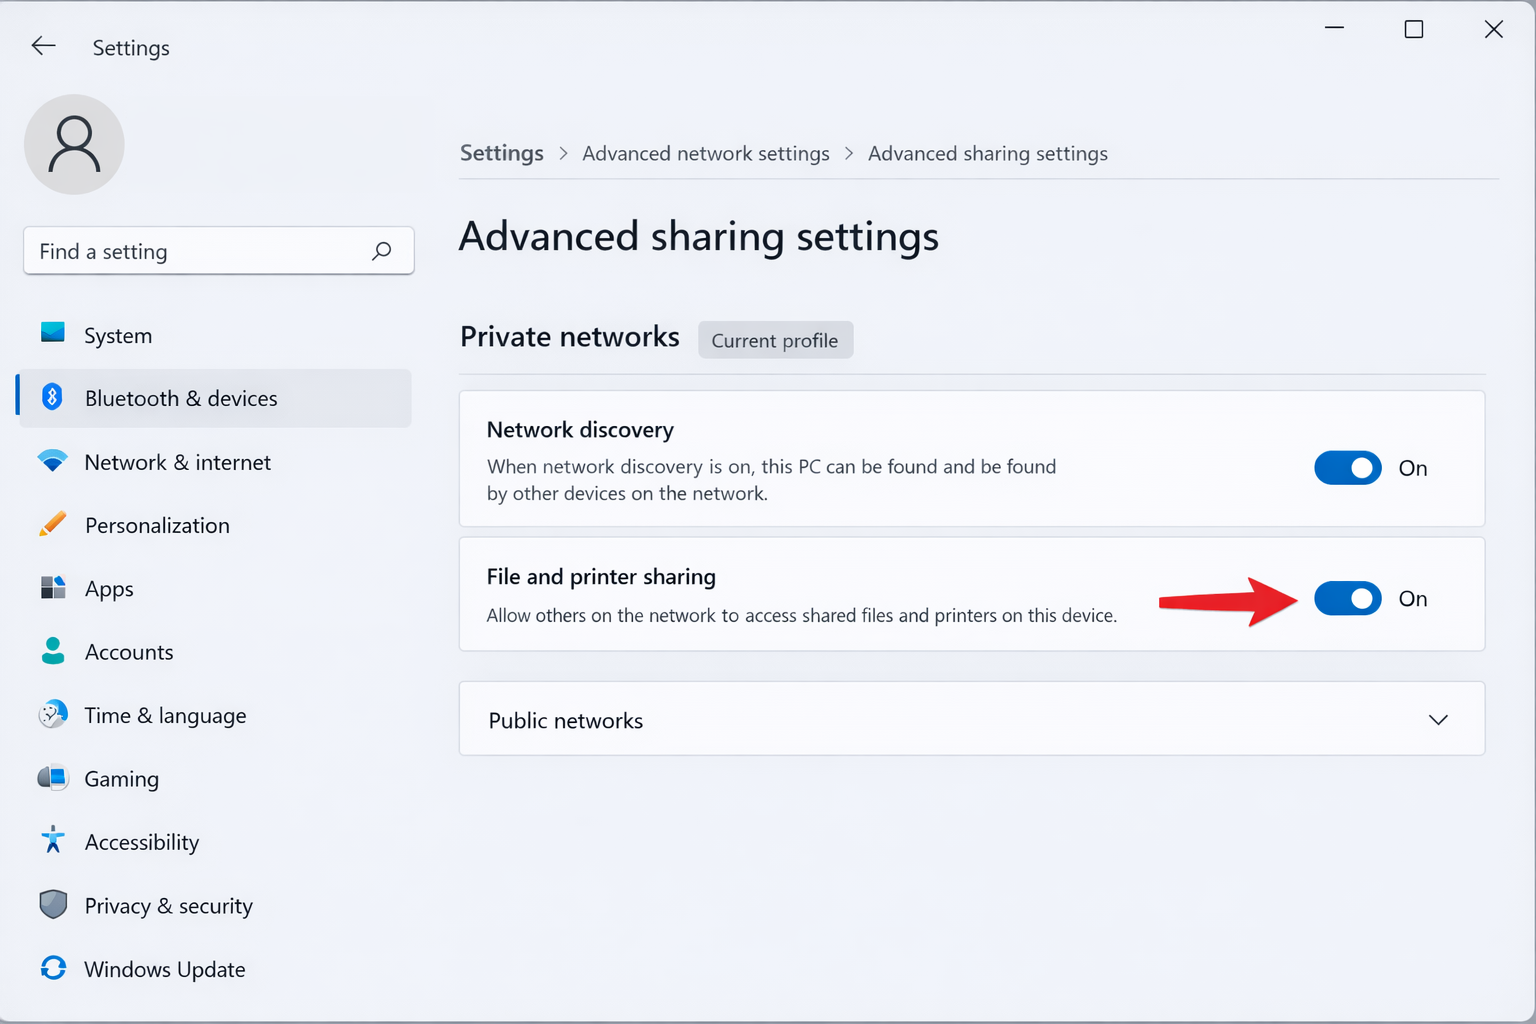
Step 2: Enable network discovery and file sharing
- Go to Settings > Network & internet > Advanced network settings > Advanced sharing settings.
- Under Private networks, turn on Network discovery and File and printer sharing.
- Click Save changes.
Troubleshooting: Printer Still Not Connecting
If none of the methods above get the printer installed, check these common blockers:
- Network profile is set to Public: Windows blocks printer discovery on Public networks. Switch to Private (see the note in Method #1).
- IP address changed: If the printer uses DHCP, its IP may have changed since you last connected. Print a fresh configuration page and re-add it with the new IP. Setting a static/reserved IP on the printer or your router prevents this from recurring.
- Driver won’t install: Search for your exact printer model on the manufacturer’s website (HP, Canon, Brother, Epson) and download the Windows 11 driver package. Avoid third-party driver sites. For HP printers specifically, see our guide on how to download and install HP printer drivers for Windows 11.
- Print jobs queue but don’t print: Restart the Print Spooler — press
Windows + R, typeservices.msc, find Print Spooler, right-click it, and select Restart. If jobs still won’t clear, check our guide on how to fix the “Error – Printing” status error in Windows. - USB hub interference: If connecting via USB, plug directly into a port on the PC rather than through a hub.
Wrapping Up
For most home and small-office setups, the automatic discovery in Method #1 handles everything in under a minute. If you’re dealing with a static-IP printer or a corporate network that doesn’t broadcast printer locations, Method #2 (manual IP entry) is the reliable fallback. If the printer keeps dropping off after IP changes, the permanent fix is reserving a static IP for it in your router’s DHCP settings.
If you’re also running into broader network visibility issues, our guide on how to fix the Network Discovery Is Turned Off error on Windows can help. For Windows 11-specific Wi-Fi connectivity problems, see Wi-Fi Option Not Showing Up in Windows 11 as well.