

The built-in Administrator account in Windows 10 and 11 is disabled by default. For most installs and repairs, right-clicking and selecting Run as administrator is all you actually need. If that isn’t enough, the methods below will enable the account so you can sign in as the built-in Administrator directly.
Method #1: Use “Run as administrator” instead (try this first)
Most programs that seem to require the built-in Administrator will work fine if you elevate your existing admin account through UAC. This is the safer route, as it keeps the well-known Administrator username disabled and off the radar for attackers.
- Right-click the program’s installer or shortcut.
- Select Run as administrator.
- Click Yes on the UAC prompt that appears.

A note on UAC and admin accounts: Even if Settings shows your account as “Administrator,” it still runs in Admin Approval Mode and triggers UAC prompts for elevation. The built-in Administrator account is different; it bypasses UAC by default. To check your account type, go to Start > Settings > Accounts > Your info; it will say Administrator or Standard user under your name.
If Run as administrator doesn’t solve the problem, continue with the methods below.
Method #2: Enable via Command Prompt (all editions)
This works on Windows 10 and 11 Home, Pro, Enterprise, and Education, no restrictions.
- Press
Windowsto open Start, typecmd, then pressCtrl + Shift + Enterto open Command Prompt as administrator. - Click Yes on the UAC prompt.
- Type the following command and press
Enter:
net user administrator /active:yesYou should see The command completed successfully. The built-in Administrator account is now enabled and will appear at the Windows login screen.
To disable it again when you’re finished (recommended), run:
net user administrator /active:noMethod #3: Enable via PowerShell (all editions)
This is the modern cmdlet equivalent of Method #2 and also works on all Windows 10 and 11 editions.
- Right-click Start and select Windows PowerShell (Admin) or Windows Terminal (Admin), whichever appears in your menu.
- Click Yes on the UAC prompt.
- Run the following cmdlet and press
Enter:
Enable-LocalUser -Name "Administrator"No output means it worked. To disable the account later:
Disable-LocalUser -Name "Administrator"Method #4: Enable via Local Users and Groups (Pro and Enterprise only)
This graphical option is only available on Windows 10 and 11 Pro, Enterprise, and Education. Home users should use Method #2 or Method #3 instead.
- Press
Windows + R, typelusrmgr.msc, and pressEnterto open Local Users and Groups. - In the left pane, click Users.
- In the center pane, double-click Administrator.
- On the General tab, uncheck Account is disabled.
- Click Apply, then OK.
To disable the account again, return to the same dialog and re-check Account is disabled.
Method #5: Enable via Local Security Policy (Pro and Enterprise only)
Best suited for domain-joined machines or managed environments where Group Policy controls account settings. Not available on Windows 10 or 11 Home.
- Press
Windows + R, typesecpol.msc, and pressEnterto open Local Security Policy. - In the left pane, expand Local Policies and click Security Options.
- Find Accounts: Administrator account status in the right pane and double-click it.
- Select Enabled and click OK.
How to sign in as the built-in Administrator
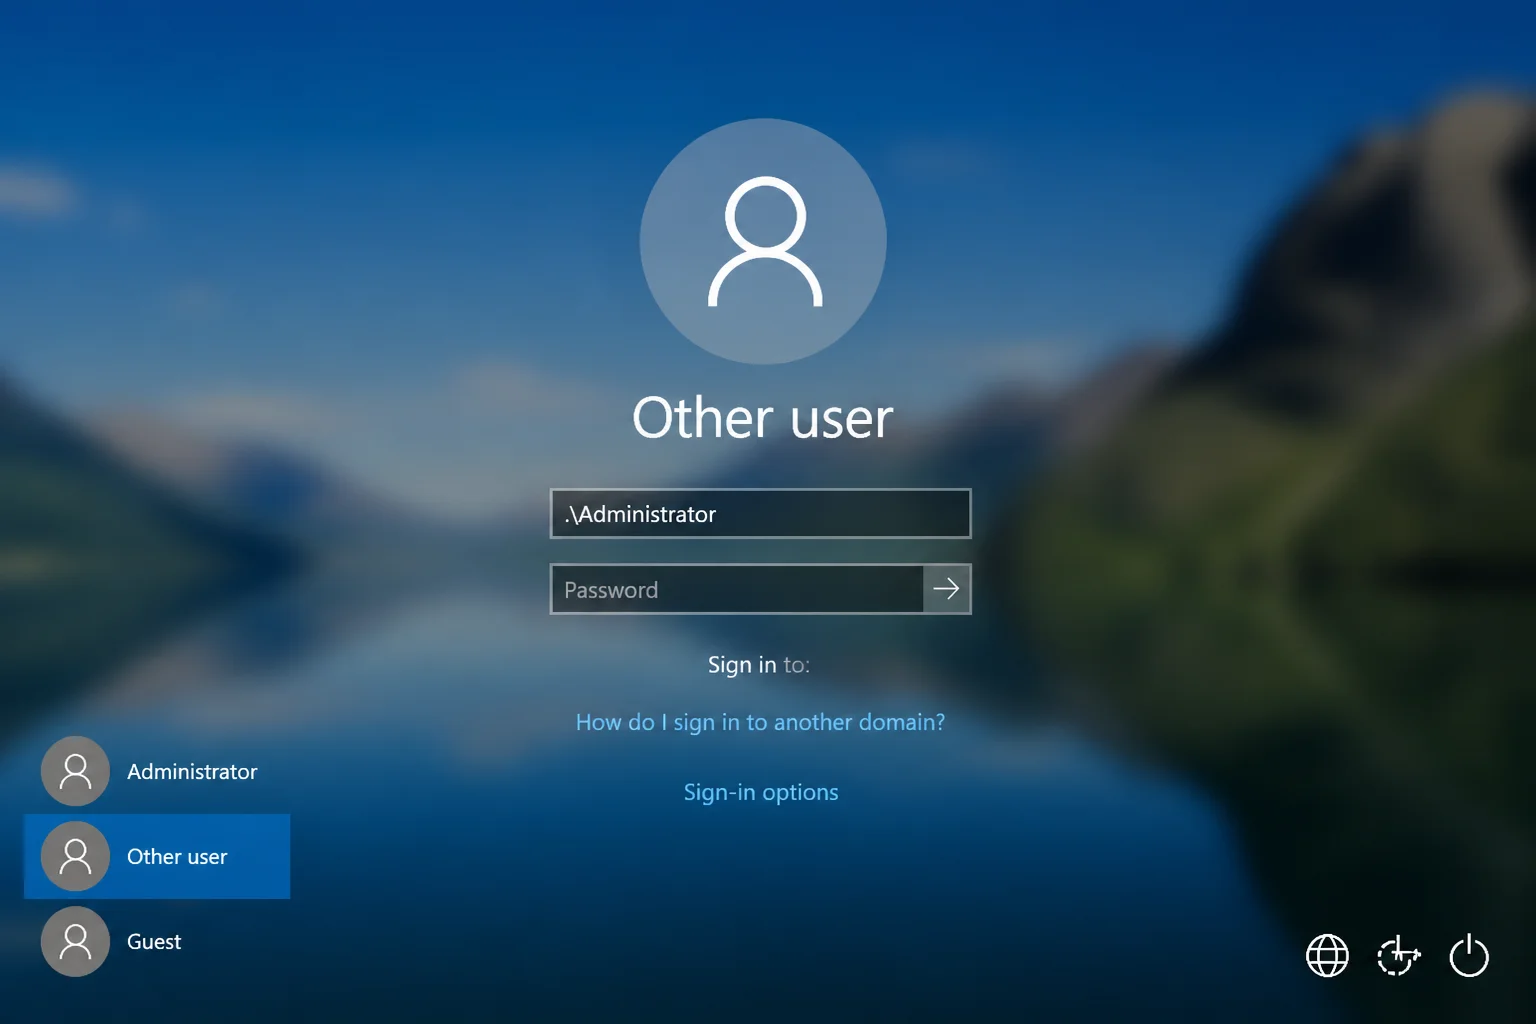
After enabling the account with any method above, sign in from the Windows login screen.
- Open Start, click your profile picture, and select Sign out or Switch user.
- At the login screen, look for Administrator in the list of accounts in the lower-left corner and click it.
- If Administrator doesn’t appear in the list, click Other user and type
.\Administratoras the username. - Enter the Administrator password and press
Enter. If no password has been set, Windows may log you in directly or prompt you to create one.
Set a password immediately. If the built-in Administrator account has no password, open an elevated Command Prompt and run net user administrator *. Windows will prompt you to enter and confirm a new password. Leaving it blank, even temporarily, is a serious security risk. You can find more information on signing in as administrator on Windows 10 or enabling the built-in administrator account on Windows 11.
If the account still doesn’t appear at the login screen after enabling it, open an elevated Command Prompt and run net user administrator to confirm the status reads Account active: Yes. If a Group Policy setting is overriding your change on a domain-joined machine, you’ll need to adjust it via Method #5 or contact your IT administrator.
Disable the account when you’re done
The built-in Administrator uses a well-known username that malware and attackers specifically target for brute-force attempts. Microsoft recommends keeping it disabled except for specific, temporary troubleshooting sessions. The moment you’re finished, disable it using one of these commands from an elevated prompt:
Command Prompt:
net user administrator /active:noPowerShell:
Disable-LocalUser -Name "Administrator"Conclusion
The Command Prompt method (Method #2) is the fastest option for most people: one command to enable, one to disable when you’re done. If you’re on Pro or Enterprise and prefer a visual interface, Local Users and Groups (Method #4) gives you the clearest view of what you’re changing. Either way, disable the account as soon as you’re finished. Leaving the built-in Administrator permanently enabled gives attackers a well-known username to target, with no real benefit for everyday use. For more information on enabling the built-in administrator account and its implications, you can visit ZDNet.