
If you’ve ever right-clicked query results in SQL Server Management Studio and chosen Save Results As, you already know the problem: the CSV comes out with no column headers, which is useless when you’re handing a 40-column spreadsheet to someone. The SQL Server Import and Export Wizard fixes that, and Excel’s built-in Power Query is even faster for anything you need to refresh regularly.
Method #1: Export via the SQL Server Import and Export Wizard (SSMS 20.x)
This is the most reliable method for a clean one-time export with headers intact. Works in SSMS 20.2 and any earlier version.
- Open SSMS and connect to your SQL Server instance.
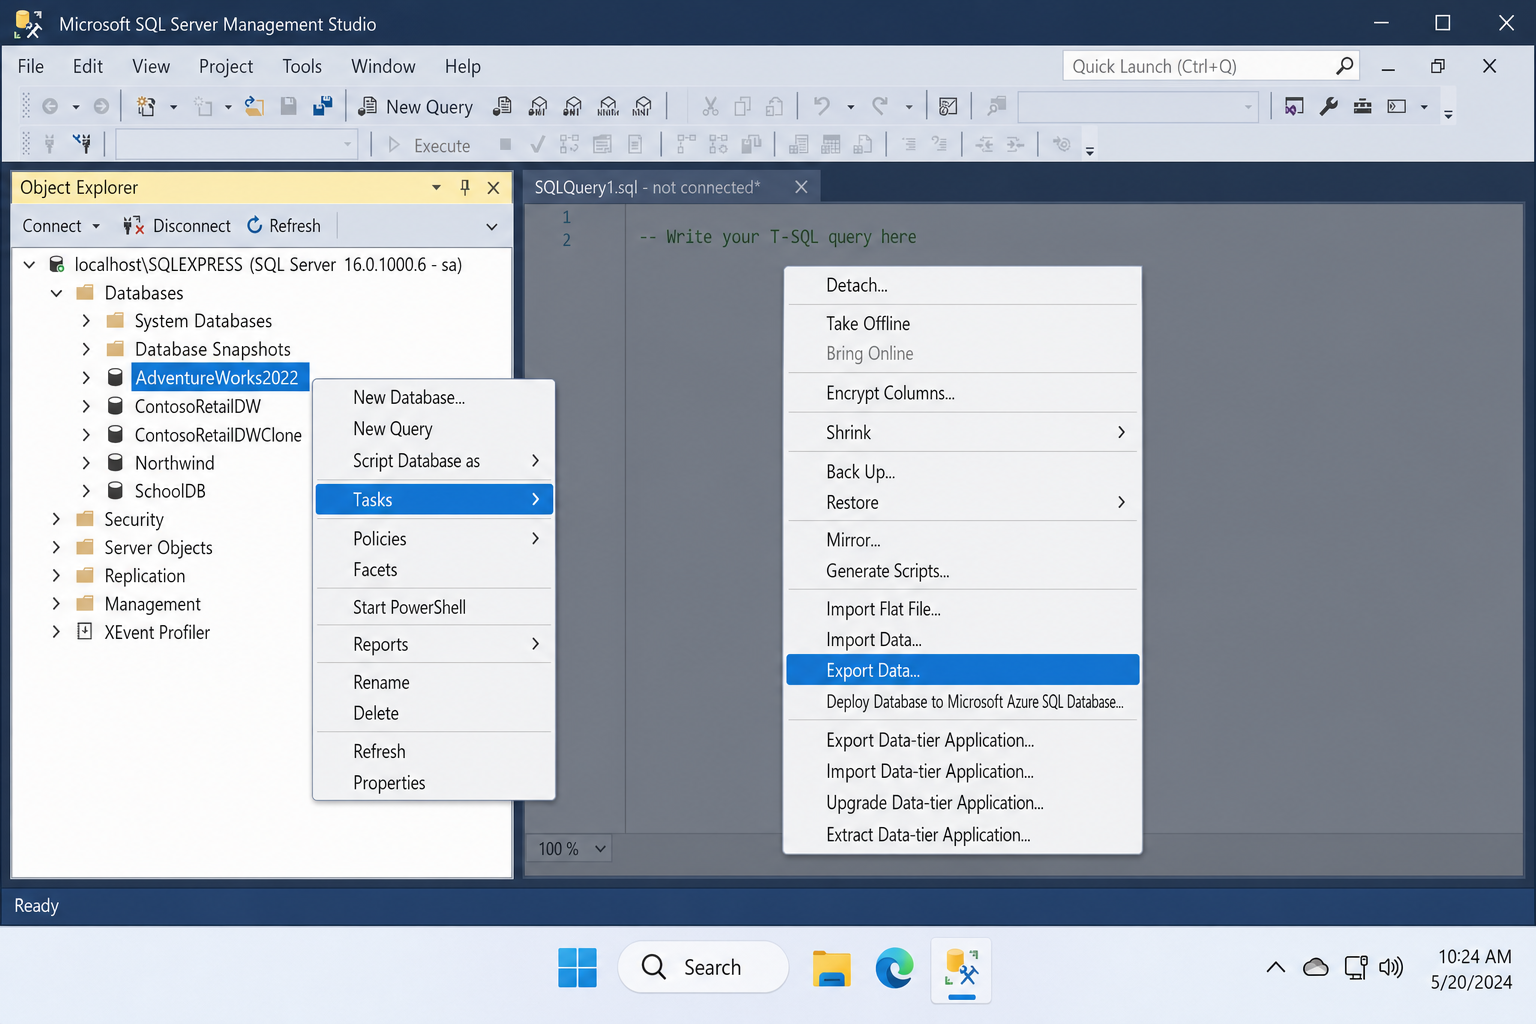
- In Object Explorer, right-click the database name — not a table, the database itself.
- Select Tasks > Export Data. The Import and Export Wizard opens.
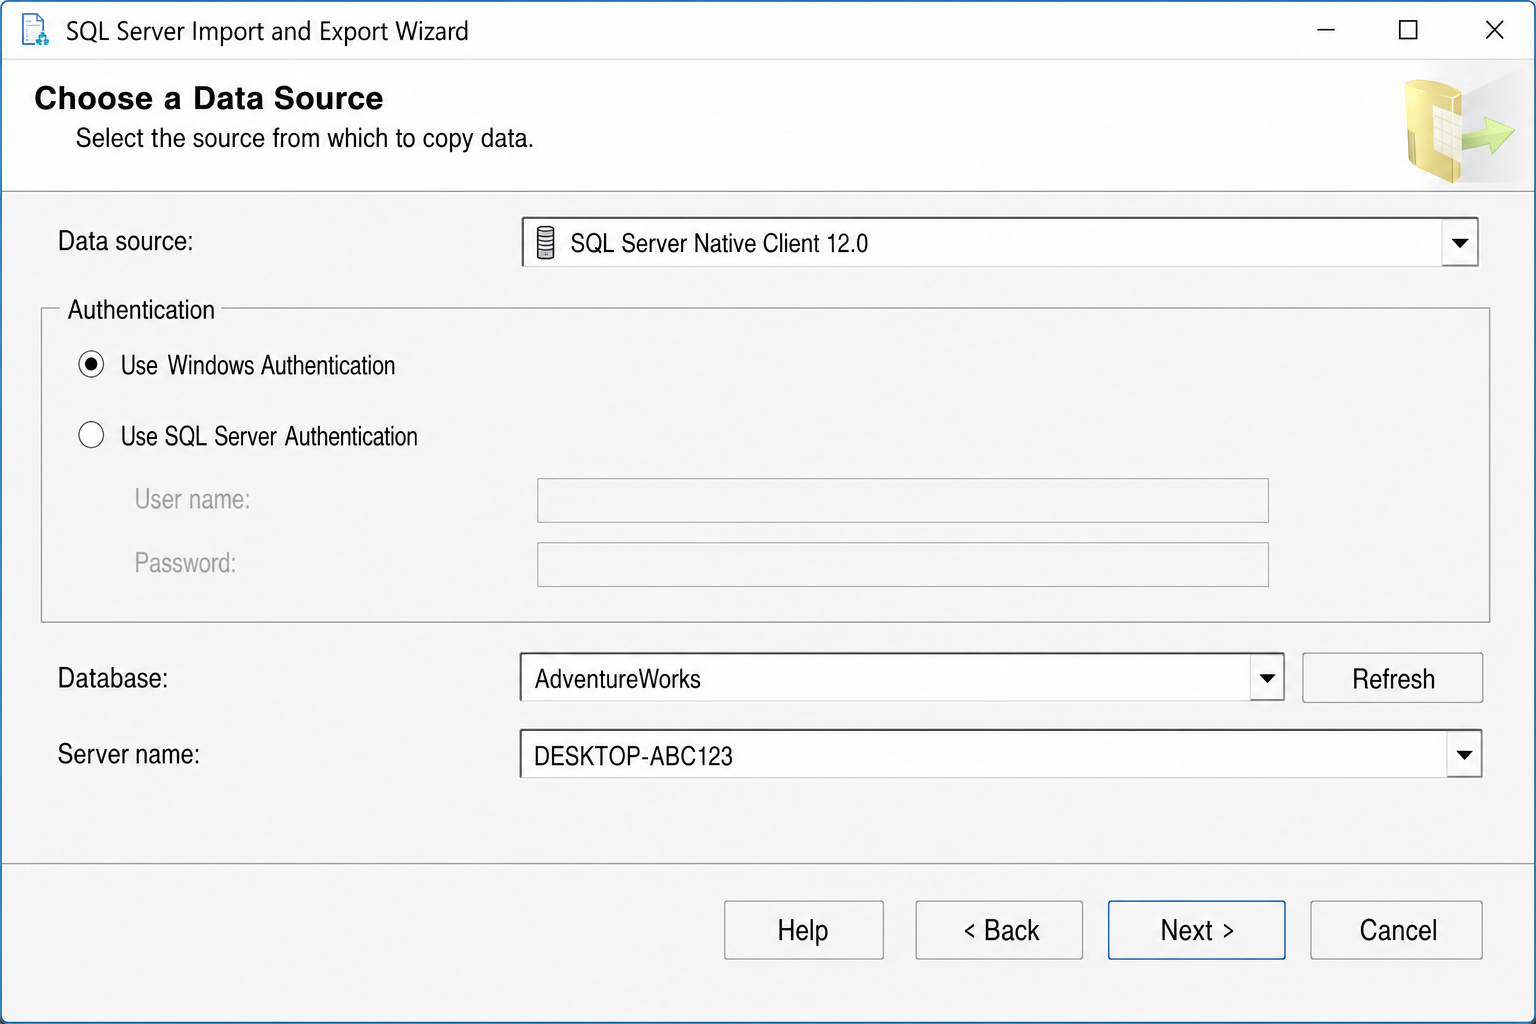
- On the Choose a Data Source screen, the server name and database should auto-populate if you right-clicked the correct database. Confirm the authentication method and click Next.
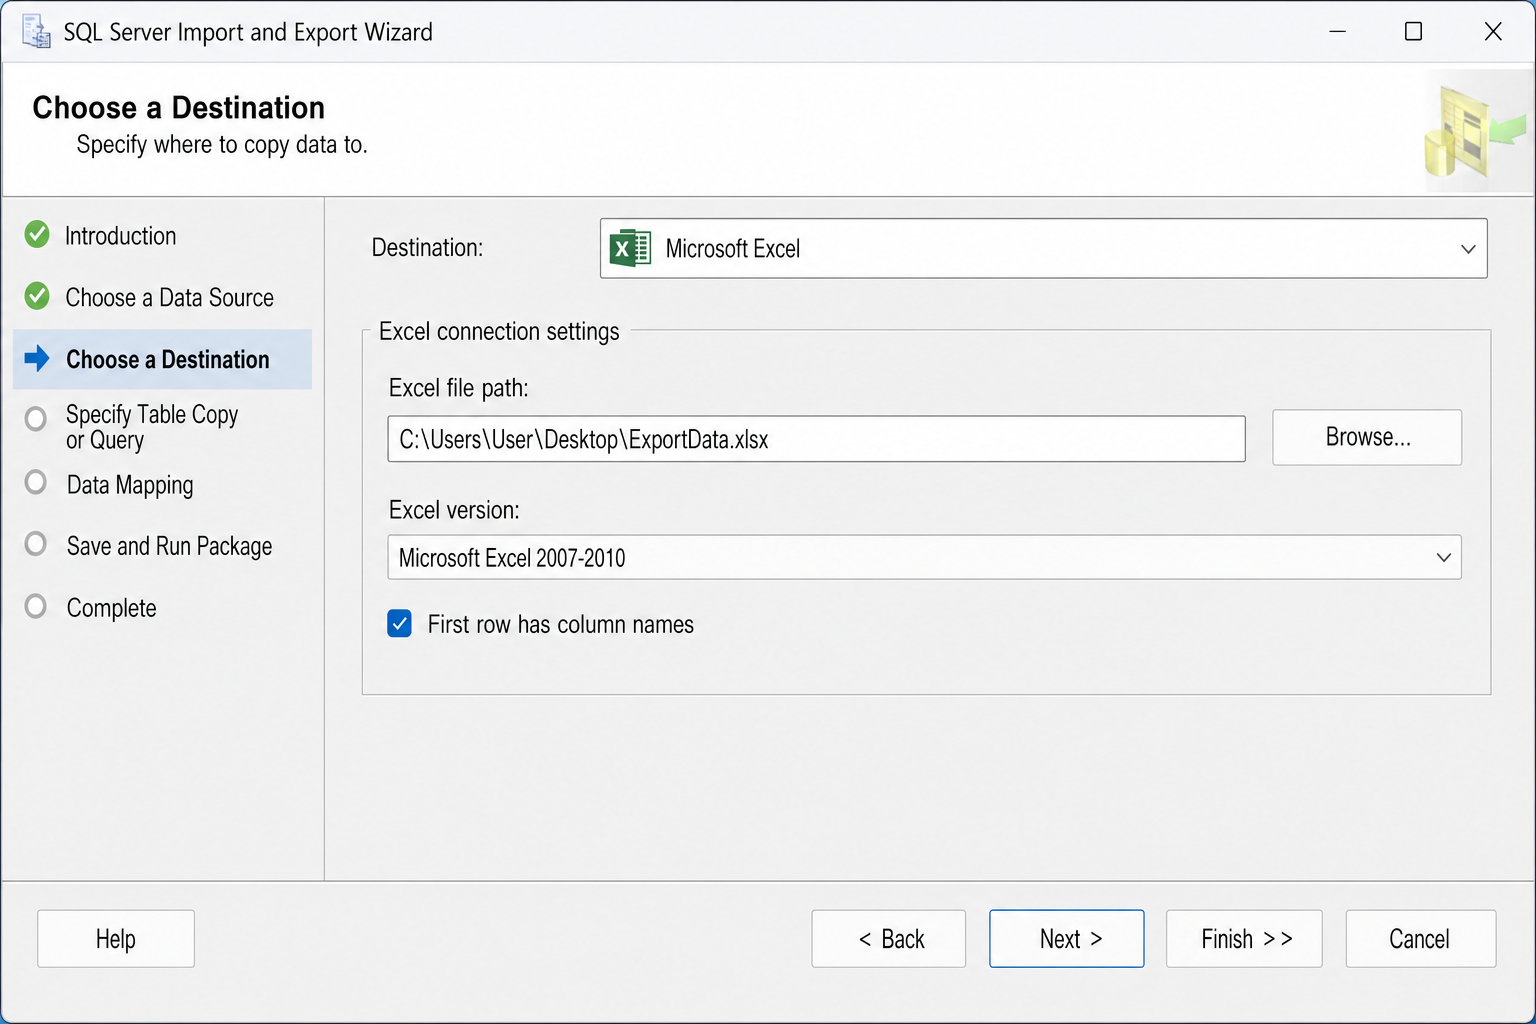
- On the Choose a Destination screen, open the Destination dropdown and select Microsoft Excel.
- Click Browse and choose where to save the output file. Select .xlsx as the format — avoid the older .xls format, which has a 65,000-row limit.
- Make sure First row has column names is checked. Click Next.
- On the Specify Table Copy or Query screen, select Write a query to specify the data to transfer if you want a custom result set, or Copy data from one or more tables or views for a full table dump. Click Next.
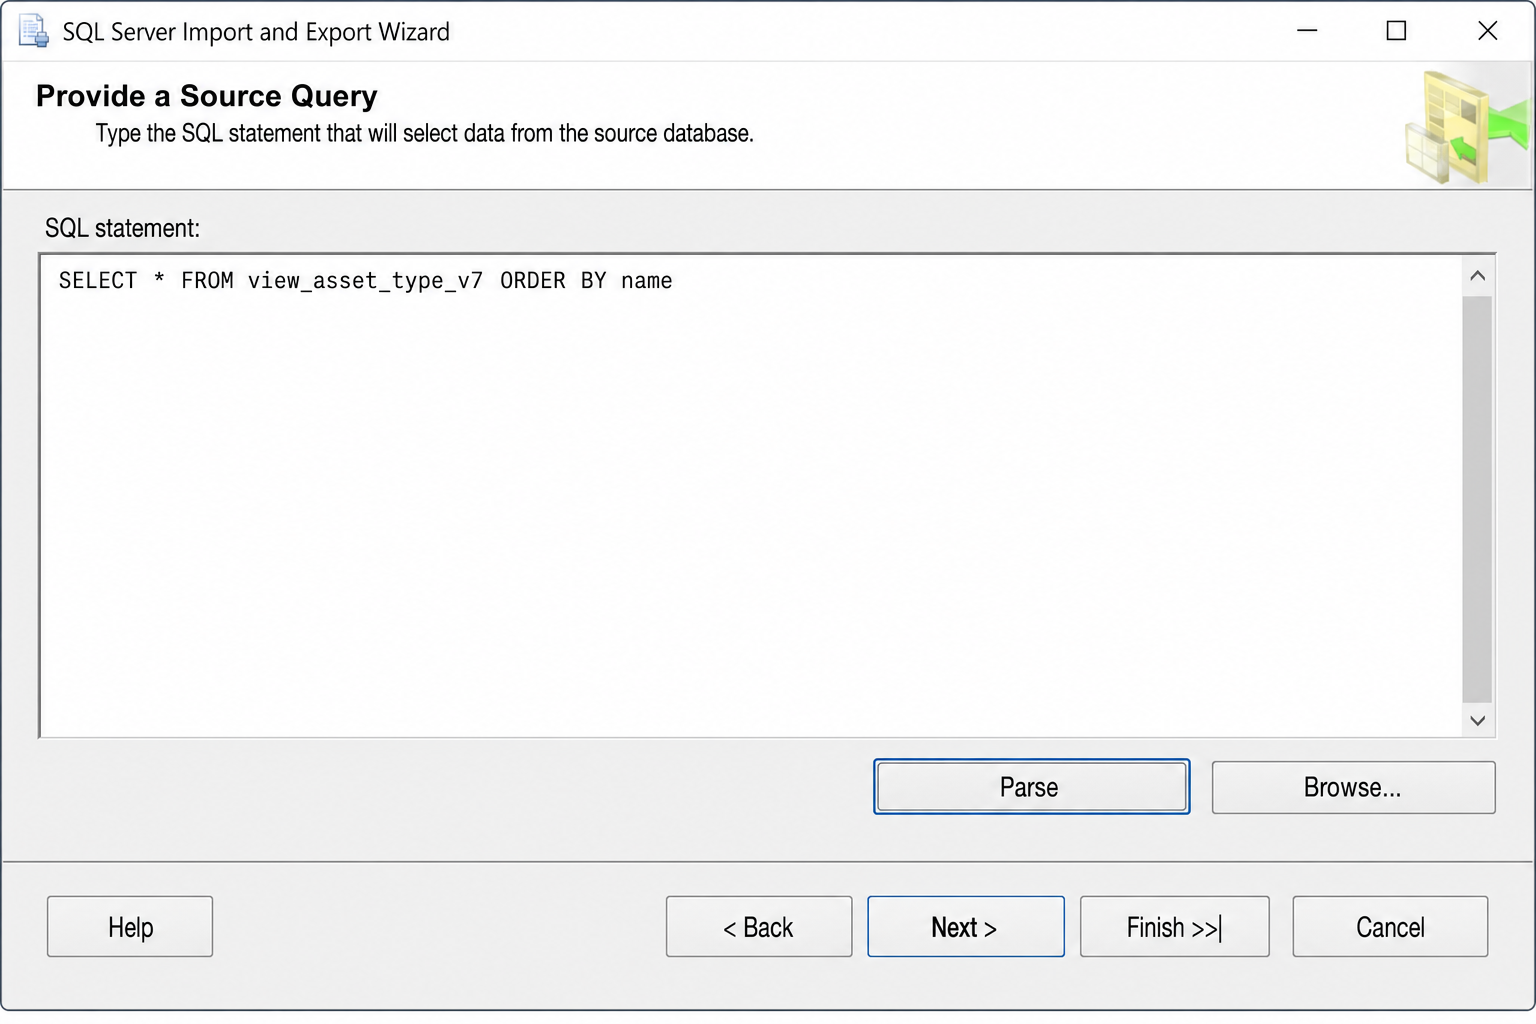
- If you chose the query option, type your SQL query in the box and click Parse to validate it before continuing.
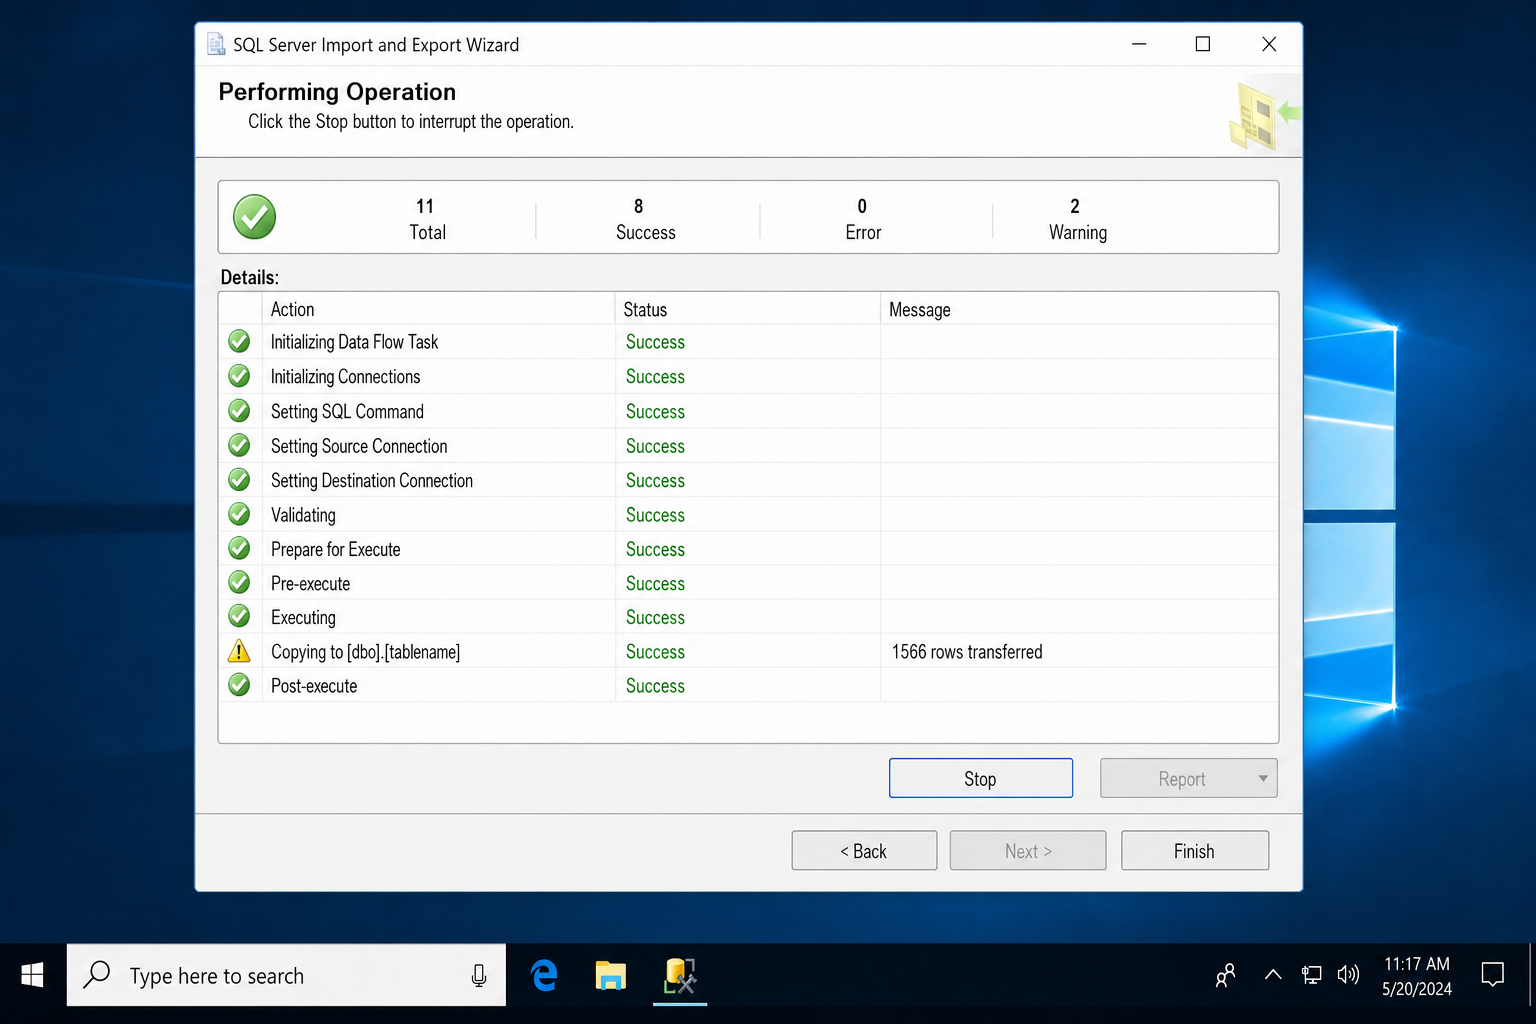
- Review the column mappings on the next screen. Headers should map automatically. Click Next, review the summary, and click Finish.
The wizard runs the export and reports success or any row-level errors. Open the output file – all column headers are in row 1.
Method #2: Use Excel Power Query (No SSMS Required)
Power Query connects Excel directly to SQL Server and pulls data with headers automatically. The real advantage: you can refresh the query any time without going back to SSMS. Requires Excel 2016 or Microsoft 365.
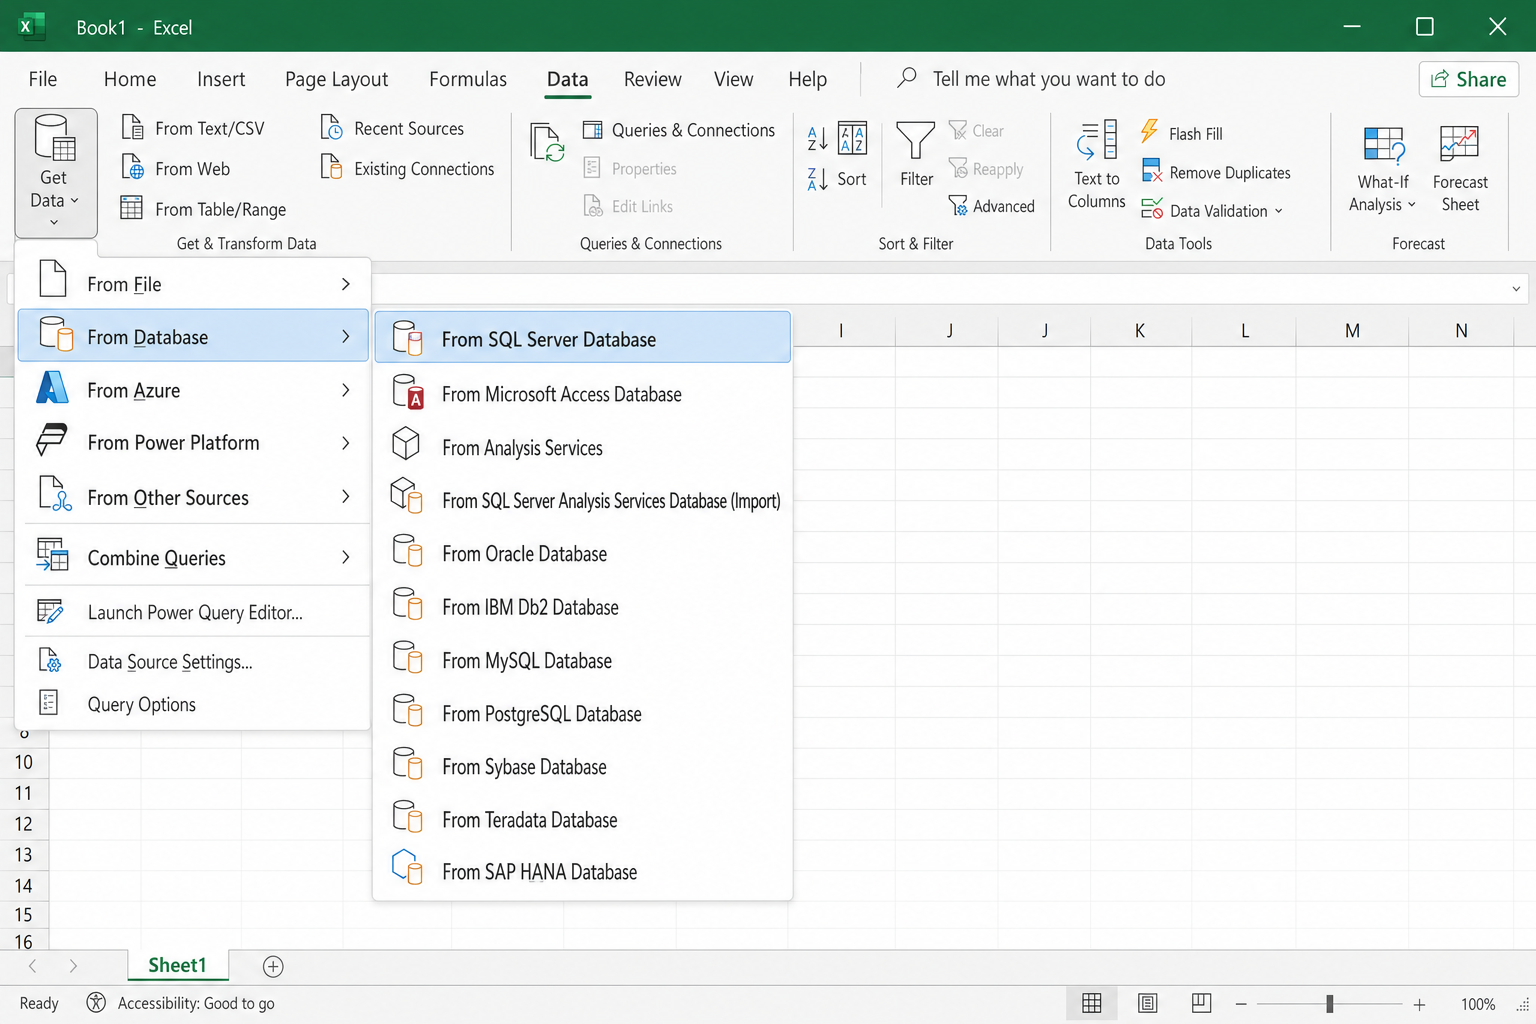
- Open Excel and click the Data tab.
- Click Get Data > From Database > From SQL Server Database.
- Enter your Server name. Optionally enter the Database name in the second field. Click OK.
- Choose your authentication method (Windows or Database credentials) and click Connect.
- In the Navigator pane, select the table or view you want, or click Transform Data to write a custom SQL query before loading.
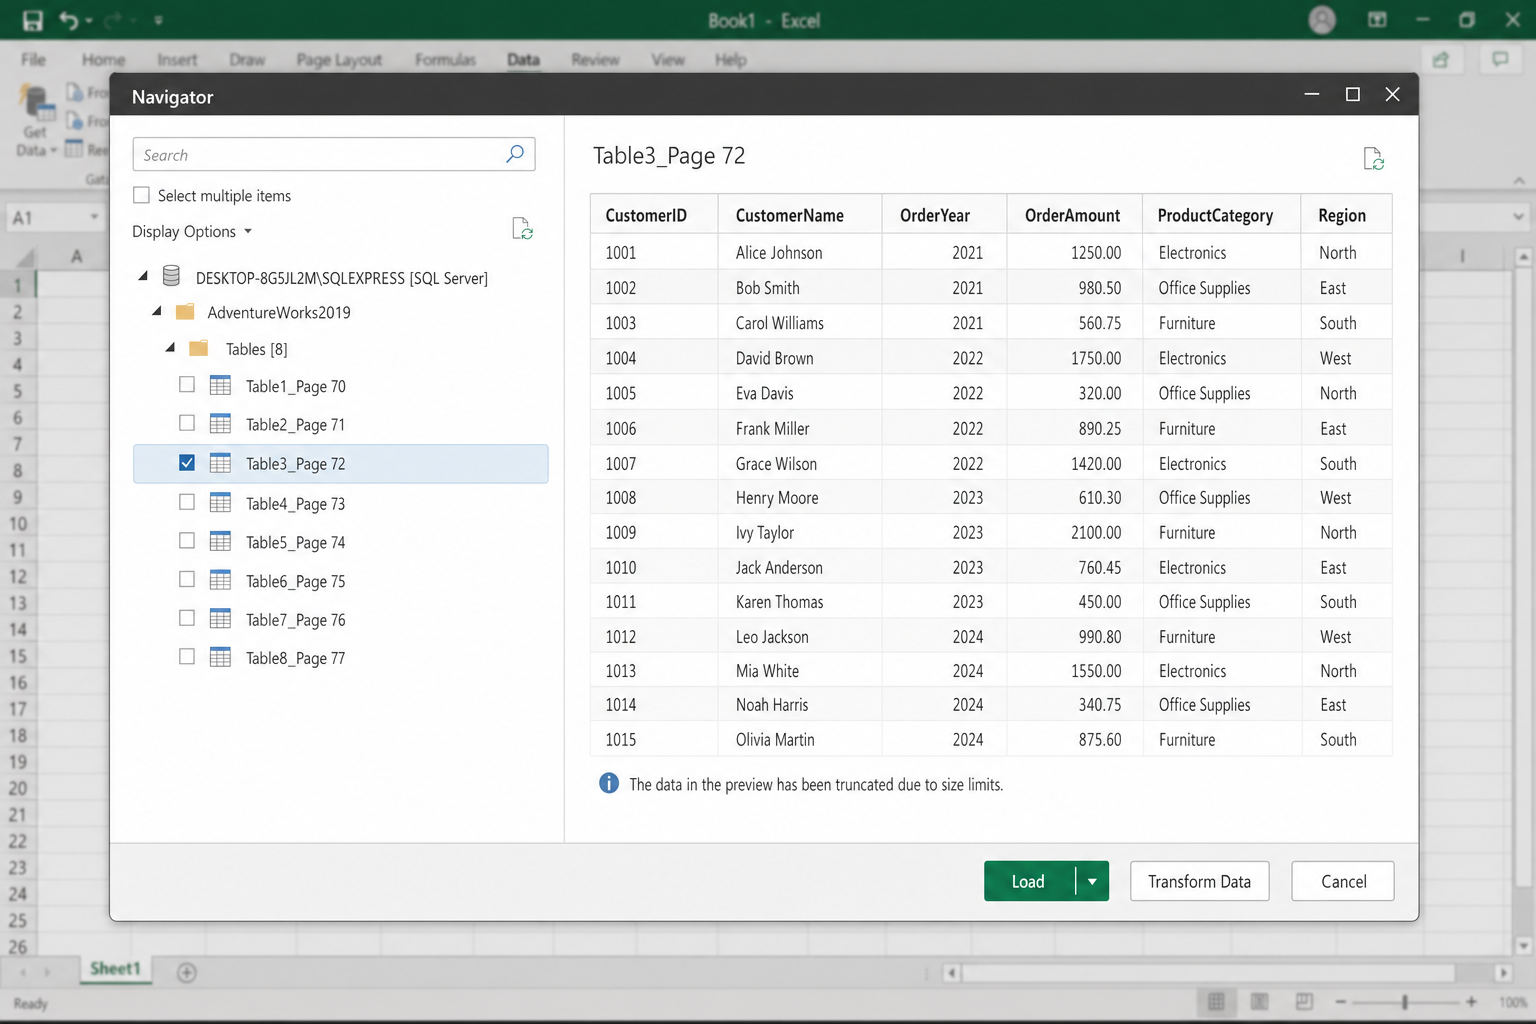
- Click Load to drop the data directly into a worksheet with headers in row 1, or Load To to choose a specific sheet or table format.
To refresh the data later, right-click anywhere in the result table and select Refresh, or go to Data > Refresh All.
Method #3: Copy with Headers from SSMS (Quick but Finicky)
This works for small, quick exports where you don’t want to run the wizard. The catch: Excel sometimes pastes everything into a single column instead of separate columns.
- Run your query in SSMS.
- Right-click anywhere in the results grid and select Copy with Headers.
- Switch to Excel, click a cell, and press
Ctrl + V.
If the data lands in one column instead of spreading across multiple columns, here’s the fix:
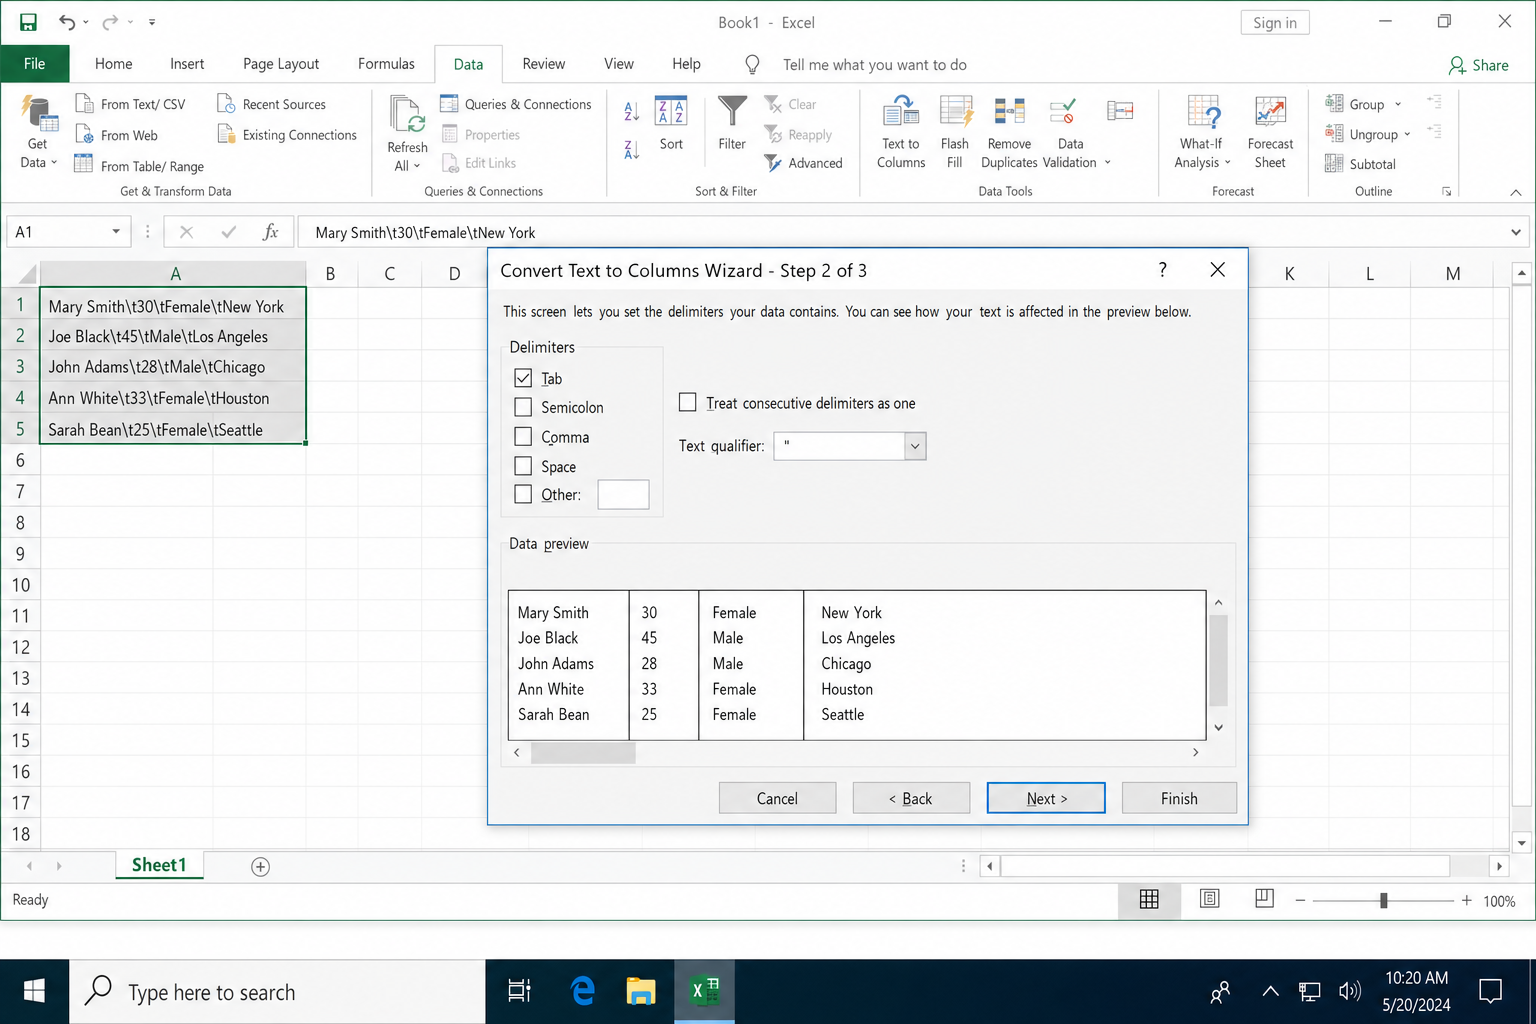
- In Excel, click any empty cell and type a few words separated by a tab character (copy-paste from Notepad if needed).
- Select that cell, go to Data > Text to Columns, choose Delimited > Tab, and finish the wizard. This resets Excel’s remembered delimiter to Tab.
- Now paste your SQL results again — they should split into columns correctly.
Troubleshooting Common Export Issues
| Problem | Cause | Fix |
|---|---|---|
| Headers missing in CSV from Save Results As | SSMS default behavior | Use the wizard or Copy with Headers instead |
| Copy with Headers pastes into one column | Excel’s delimiter memory set to comma | Reset to Tab via Text to Columns on dummy data |
| Wizard fails on Azure SQL with auth error | Azure AD auth not pre-configured | Set up the connection in SSMS before launching the wizard |
| Export crashes on large datasets | Excel’s ~1M row limit | Export to CSV via BCP utility, then open in Excel |
| Date columns show wrong format in Excel | SQL date type vs. Excel date type mismatch | Cast the column in your query: CONVERT(varchar, datecol, 103) |
Conclusion
The Import and Export Wizard is the most dependable option for a clean one-time export, it’s been the right answer since SSMS existed and nothing has changed there. If you’re pulling the same data more than once, Power Query is the smarter move: connect once, refresh whenever you need it, and never touch the wizard again. The “Copy with Headers” shortcut is fine for a dozen rows, but don’t rely on it for anything serious.