Google Chrome’s “dns_probe_started” error appears when your browser is experiencing Domain Name Server (DNS) problems. These issues are usually the result of a malfunctioning DNS. However, there could be other reasons, like your router not working as intended.
Fortunately, you have several methods to potentially fix this DNS problem in your web browser. Here are all the ways you can use to troubleshoot it.
Relaunch Google Chrome
Relaunching your Chrome browser helps you fix various issues in the browser, including the “dns_probe_started” error. It’s easy to use this method, and there’s no harm in performing it.
Make sure to save your unsaved work before you reopen the browser. Then, close the browser by selecting the X icon at the top-right corner.
Relaunch Chrome by double-clicking the browser icon on your toolbar or desktop. If you don’t have a shortcut, open the Start menu and search and launch the browser.
Enter your sites, and Chrome should open them without any issues.
Restart Your Router
Browser issues are also often linked to your router, and you should ensure your router is working as it should. If your router has minor glitches, you can reboot the device and potentially fix those problems.
You can reboot most routers by pressing the Power button on them. If yours doesn’t have that button, use the power socket switch to power the router off and on.
You can also reboot a few routers from the settings page. If you have one like that, access your router’s settings page in your web browser, head to the Maintenance or similar tab, and choose the Restart The Router option.
Use the Internet Connections Troubleshooter
Both Windows 10 and 11 are loaded with multiple troubleshooters to help you detect and fix issues on your computer. For example, when you experience a “dns_probe_started” error in Chrome, it’s worth using the Internet Connections troubleshooter to find and fix your issue.
These troubleshooters run on their own for the most part, so you don’t have to be tech-savvy to be able to use them.
- Launch Settings by pressing Windows + I keys at the same time.
- Choose Update & Security > Troubleshoot > Additional troubleshooters in Settings.
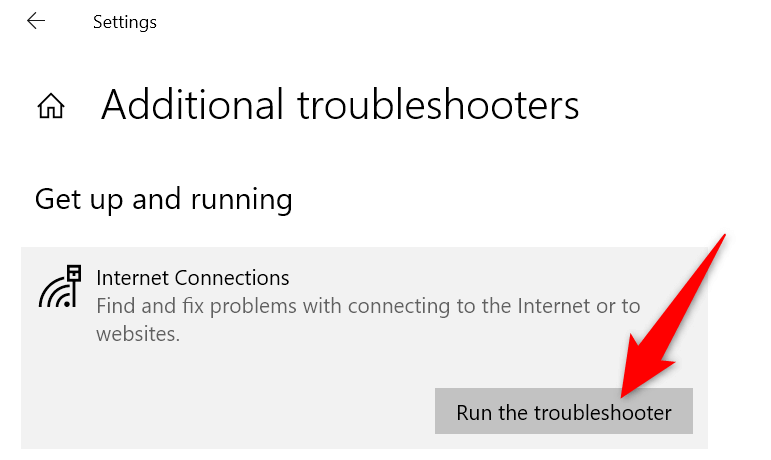
- Select Internet Connections, then choose Run the troubleshooter.
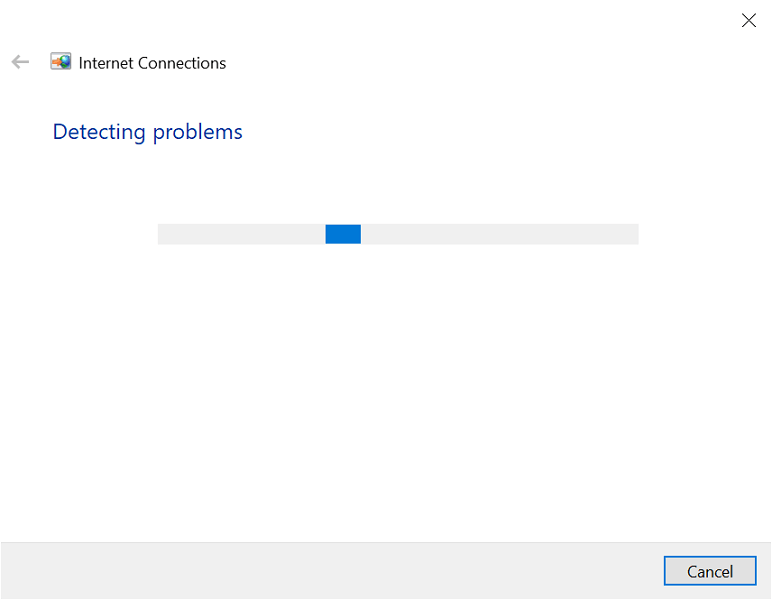
- Your troubleshooter will open and start finding issues with your internet connection.
- You’ll see your issues listed and get help from the troubleshooter on how to fix those issues.
Flush Your DNS Cache and Renew the IP Address
Your computer keeps a DNS cache library to quickly resolve your domains to IP addresses. Sometimes, this cache experiences issues and causes various problems with your web browsers, including “dns_probe_started.”
You can delete your DNS cache and acquire a new IP address without affecting your browsing history or personal data.
- Launch the Start menu, search for Command Prompt, and select the tool in the search results.
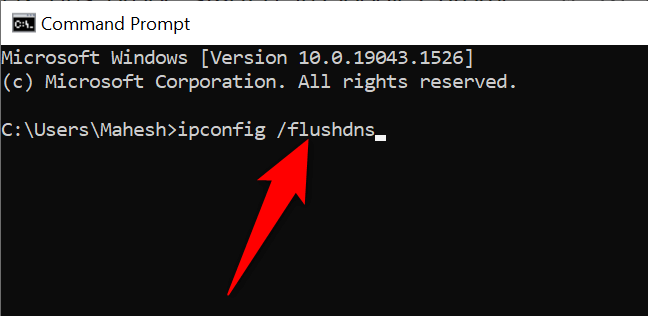
- Type the following command in Command Prompt and press Enter: ipconfig /flushdns
- When your DNS cache is cleared, release your IP address by entering the following command: ipconfig /release
- Acquire a new IP address by using this command: ipconfig /renew
- Launch Chrome and see if you can access your sites.
Change Your PC’s DNS Server
Your web browsers (including Chrome) use your DNS server to reach your sites’ IP addresses. If your DNS server ever experiences issues, your browsers can’t resolve domain names and thus display errors.
You can fix the “dns_probe_started” error in Chrome by changing your DNS server. There are many good alternative options to choose from, some of which come from large companies like Google and Cloudflare.
- Open Settings and choose Network & Internet > Change adapter options.
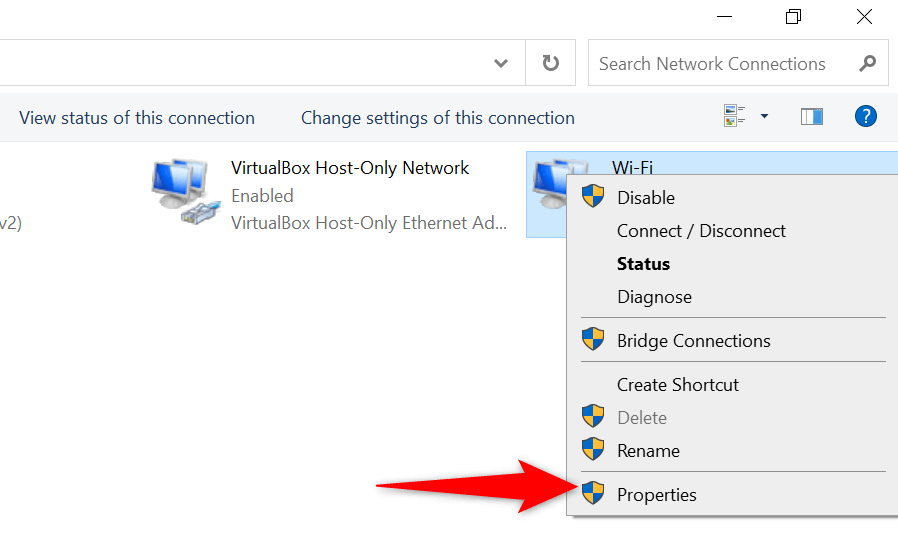
- Right-click your network adapter and select Properties from the menu.
- Choose Internet Protocol Version 4 and select Properties.
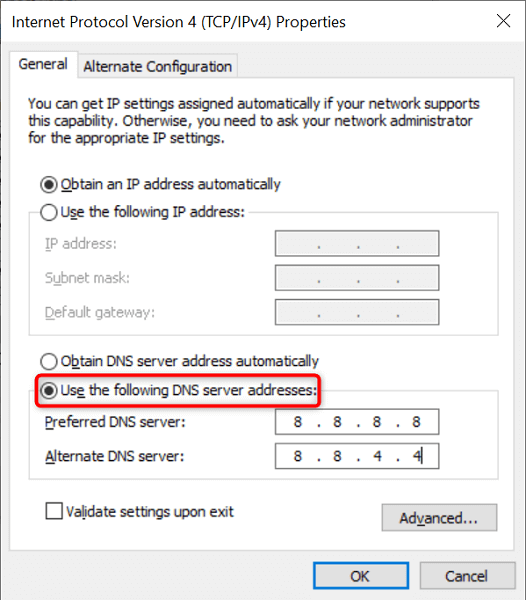
- Turn on the Use the following DNS server addresses option.
- To use Google’s Public DNS, enter 8.8.8.8 in the Preferred DNS server field and 8.8.4.4 in the Alternate DNS server field.
- To use Cloudflare’s DNS, type 1.1.1.1 in the Preferred DNS server field and 1.0.0.1 in the Alternate DNS server field.
- Save your changes by selecting OK at the bottom.
Disable Your Antivirus and Firewall
Sometimes, Chrome displays a “dns_probe_started” error if your antivirus or firewall blocks your site. In this case, turn off your antivirus and firewall and see if your site then opens.
Here’s how to disable Windows’ built-in antivirus and firewall:
- Open the Start menu, search for Windows Security, and select that option in the search results.
- Select Virus & threat protection on the left and Manage settings on the right.
- Turn off the Real-time protection option.
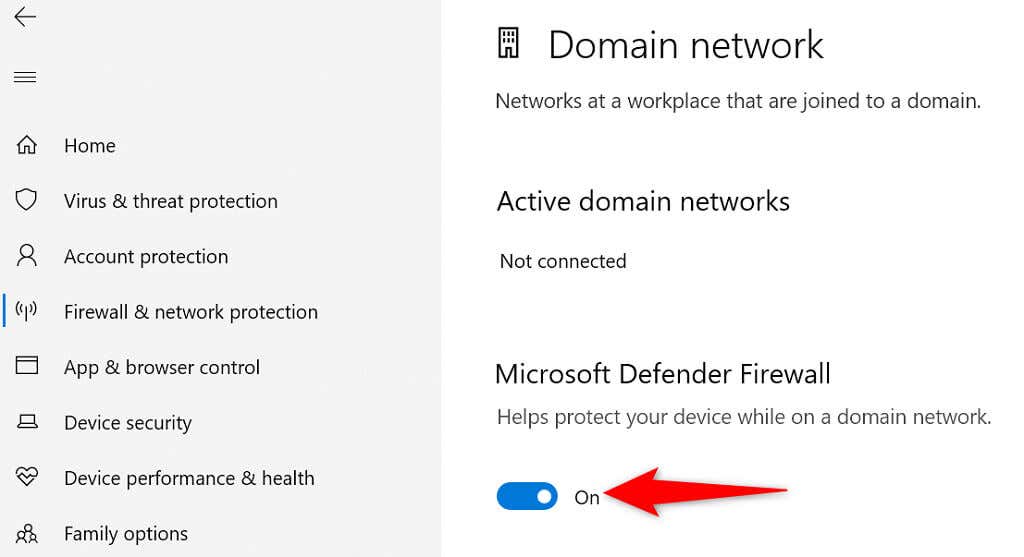
- Choose Firewall & network protection in the left sidebar.
- Select Domain network and disable the Microsoft Defender Firewall option. Repeat this step for both Private network and Public network options.
- Open Chrome and load your sites.
Update the Network Adapter Driver
Updating your network adapter drivers is as important as for your other hardware components. New driver updates bring bug fixes, new features, and general improvements that help reduce various errors.
Windows automates the whole driver update process, so there’s no reason you shouldn’t use this method to fix the “dns_probe_started” problem.
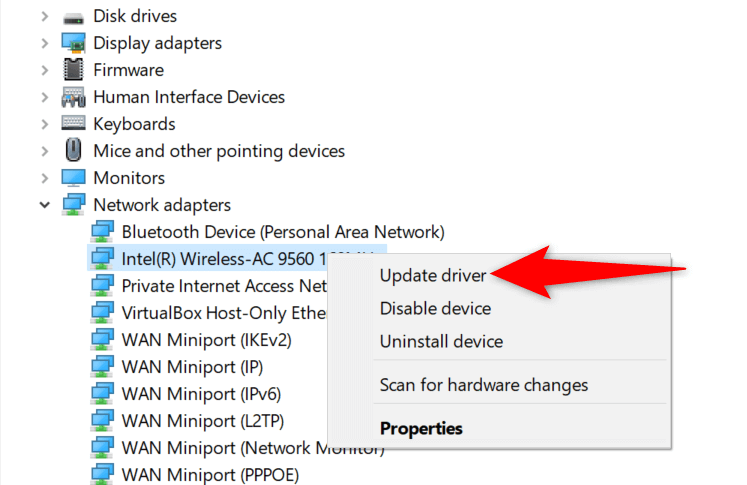
- Right-click the Start menu icon and choose Device Manager.
- Select Network adapters, right-click your network adapter on the list and choose Update driver.
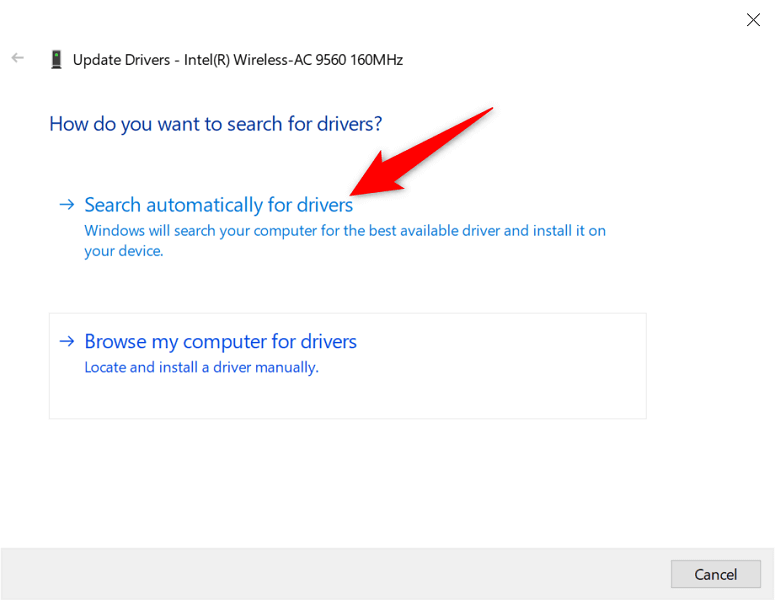
- Choose Search automatically for drivers and let Windows install the appropriate drivers for you.
Fix dns_probe_started With a Few Easy Clicks in Chrome
Chrome’s “dns_probe_started” error isn’t permanent or linked to a critical system issue. Because of that, you can get around the error by changing a few DNS-related options on your system. Once that’s done, your browser will be up and running, like before.
Related Posts
Mahesh has been obsessed with technology since he got his first gadget a decade or so ago. Over the last few years, he’s written a number of tech articles on various online publications including but not limited to MakeTechEasier and Android AppStorm. Read Mahesh’s Full Bio


