Razer Synapse is the software app that, when paired with Razer peripherals, helps you manage, customize and use them to their fullest potential. However, sometimes the software doesn’t detect your Razer gaming keyboard, mouse, or headset. Making it work can be frustrating, especially if you previously set up a custom profile you want to use.
The issue of Razer Synapse not recognizing peripherals most often happens with the mouse and keyboard. But it can happen to any peripheral such as a headset, microphone, or any other hardware Synapse typically works with. This article will show you how to fix the problem of Razer Synapse 3 and Razer Synapse 2 not recognizing peripherals.
1. Perform Hardware Troubleshooting
There are several ways you can troubleshoot your hardware, especially when it comes to peripherals such as mouse and keyboard. You can plug them out of your computer and try them on another device with Razer Synapse software installed to see if they can be detected.
If you don’t have another PC handy, you can simply plug your peripherals into a different USB port. Make sure it’s plugged directly into your PC without using intermediary USB hubs. Also, you should check the device’s cables and USB ports for any physical damage.
Finally, Windows 10 and 11 have a hardware troubleshooter that you can use to see if there is a problem with your devices. Hardware and Devices troubleshooter is not visible from Settings. You’ll have to use the Command Prompt. Here’s how:
- Make sure the Razer devices you are testing are connected to your PC.
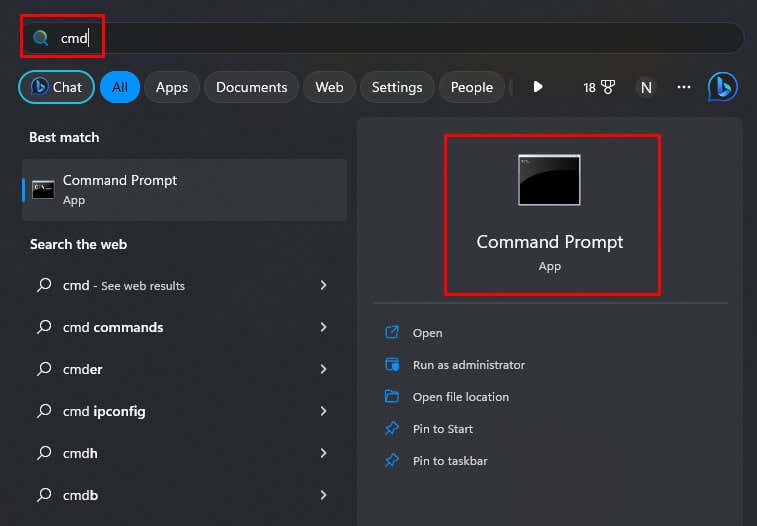
- Click a magnifying glass on your Windows 10/11 taskbar. This will open the search bar. Type cmd and select Command Prompt.
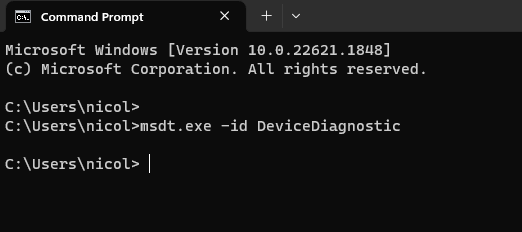
- Type the troubleshooter command: msdt.exe -id DeviceDiagnostic.
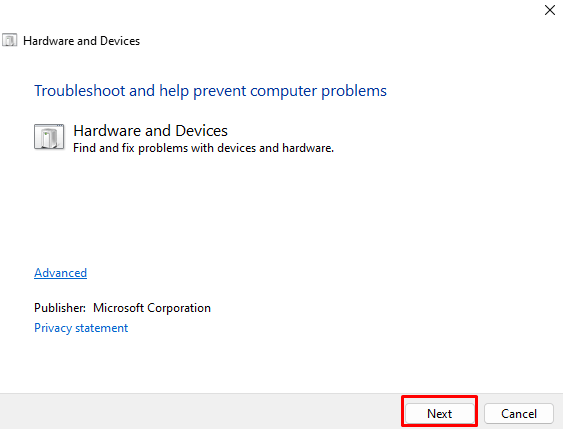
- This will open Hardware and Devices troubleshooter. Click Next.
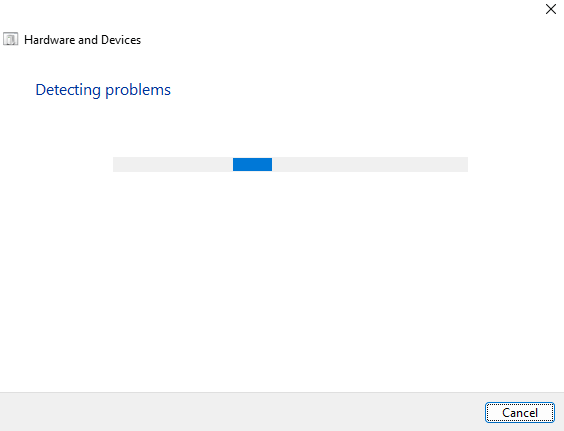
- Wait for the troubleshooter to detect problems.
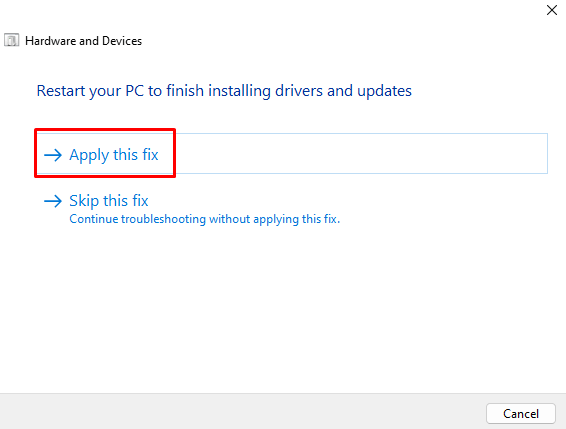
- If the troubleshooter suggests any resolutions, select Apply this fix to execute it.
2. Reinstall Device Drivers
Another fix that reportedly works is reinstalling all Razer HID-compliant devices. This can help resolve any problems your mouse and keyboard drivers might have.
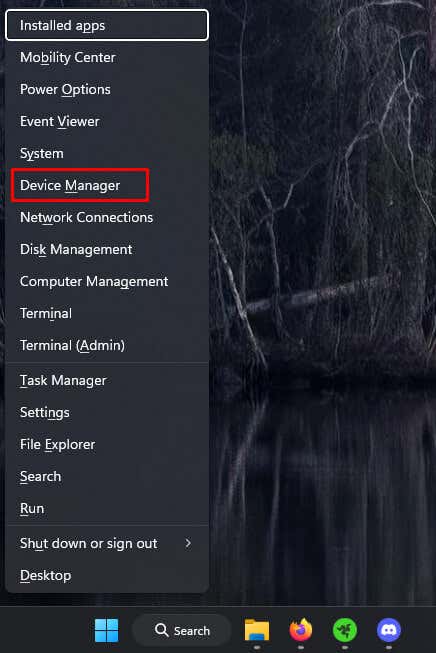
- Press Win + X on your keyboard to bring up the Power User menu.
- Select Device Manager from the menu.
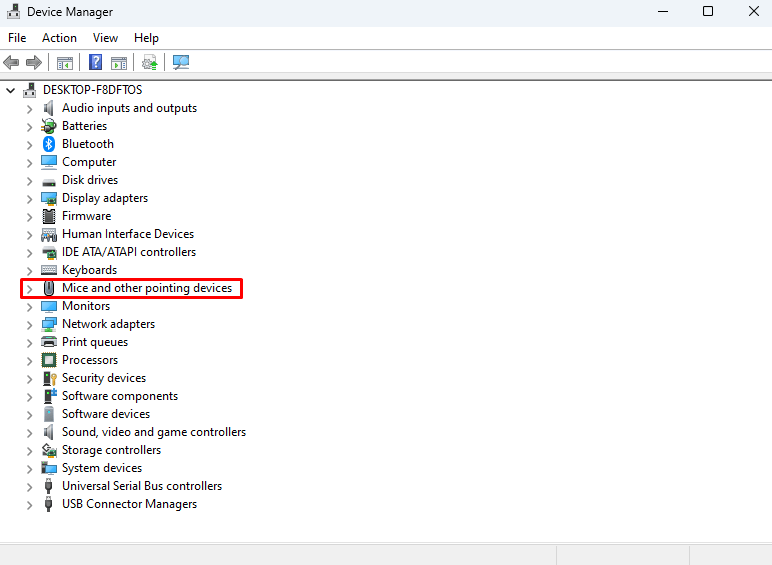
- Double-click Mice and other pointing devices to view the peripheral devices.
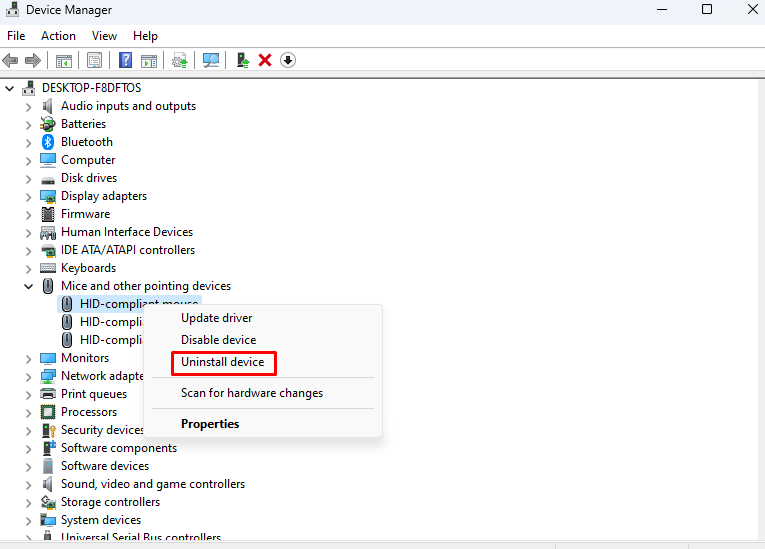
- Right-click the Razer mouse and select Uninstall device.
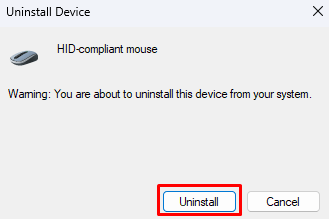
- Confirm by selecting Uninstall when prompted.
Restart your PC, and Windows will automatically reinstall the Razer device drivers you uninstalled. Any corrupted drivers that were causing problems will be replaced.
3. Update Razer Device Drivers
Perhaps your device drivers are not corrupted but simply outdated. If this is the case, you can download the latest version directly from the Razer official website or use a third-party app, such as Easy Pro, to automatically update drivers on your PC.
Here’s how to update your Razer mouse drivers from the official website:
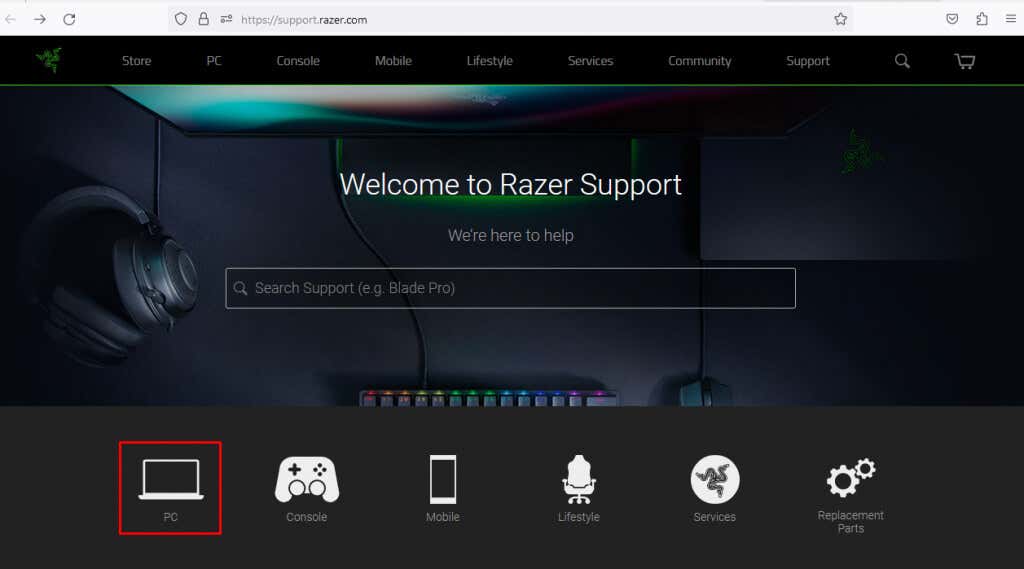
- Go to the Razer Support page and select PC.
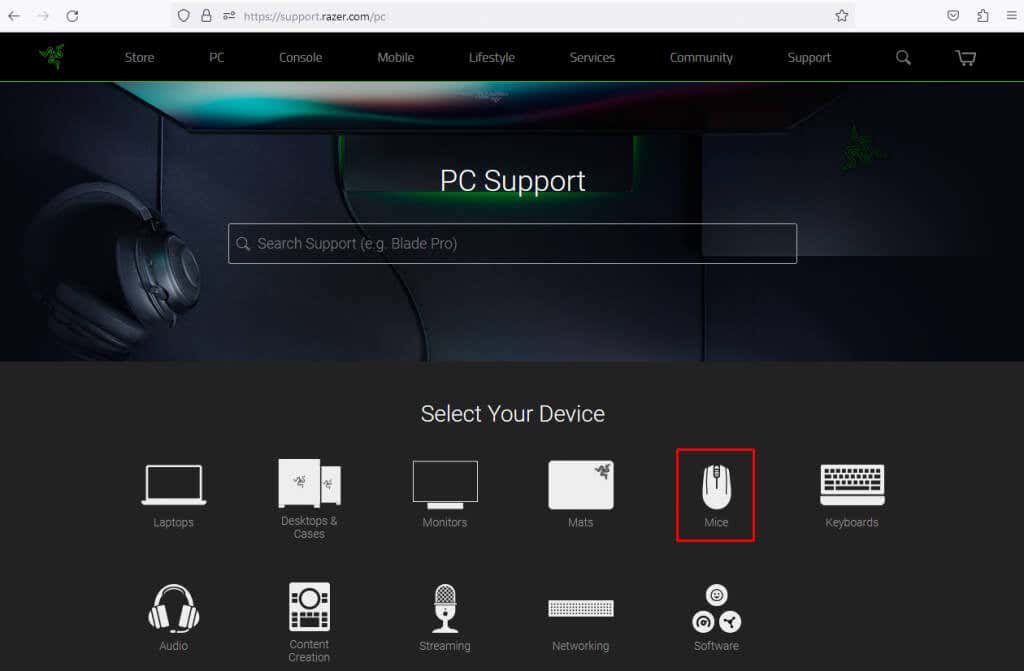
- Select Mice (or another peripheral you want to update) on the next page.
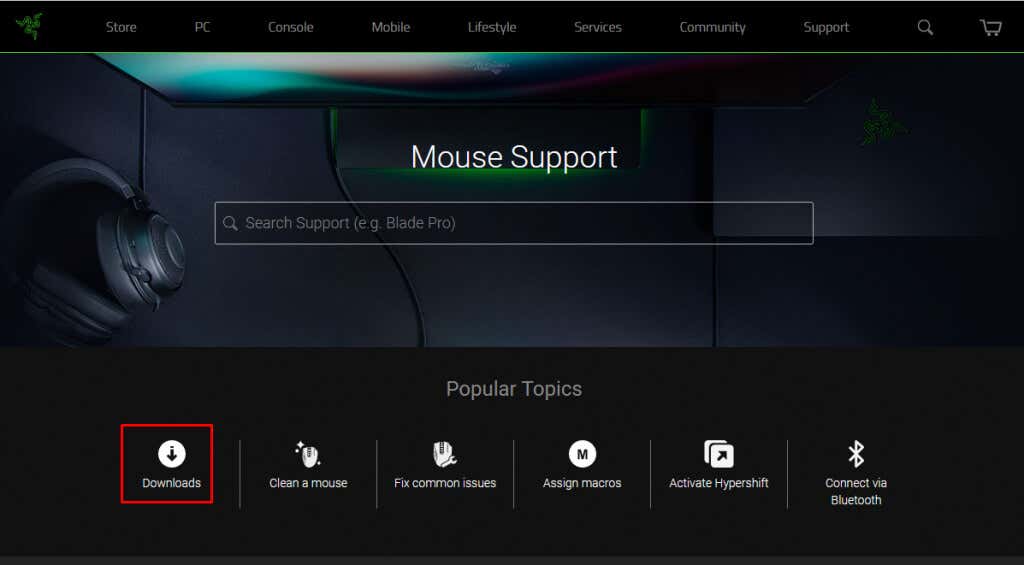
- On the Mouse Support page, select Downloads.
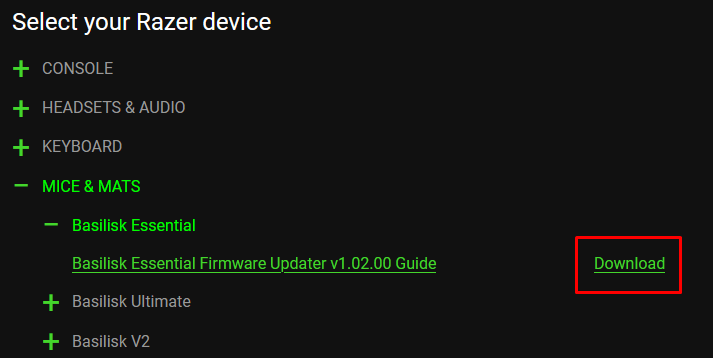
- Click on a green plus symbol next to the Mice and Mats (or any other peripheral you want the latest drivers for).
- Find your device on the list and click Download next to it.
- Once downloaded, click the .exe driver file to install it on your PC. Follow the on-screen instructions (if any) to complete the process.
4. Turn off the Antivirus
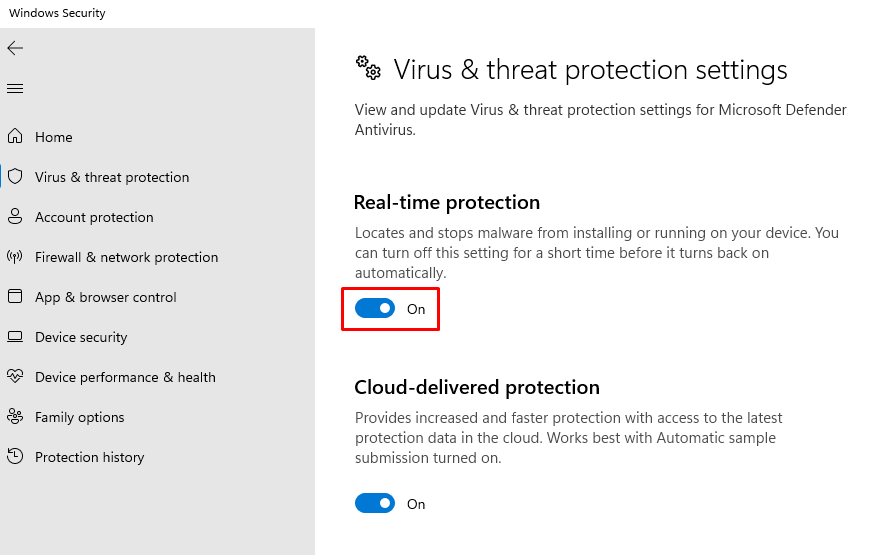
Some antivirus programs can prevent Razer Synapse from detecting peripherals. Windows Defender, and some third-party antivirus apps, need to be temporarily disabled to fix this issue.
Go to Settings > Privacy & Security > Windows Security > Virus & threat protection to temporarily disable Windows Defender.
After disabling the antivirus, launch Razer Synapse to see if it detects your keyboard and mouse. If this works, add Razer Synapse to the exclusion list in Windows Security (or alternative software you might be using). This will allow you to turn the antivirus back on without blocking the Synapse software.
5. Use Synapse’s Repair Option
You can try Synapse’s repair option to fix the software not detecting devices. Lots of users reported this is how they managed to resolve the issue.
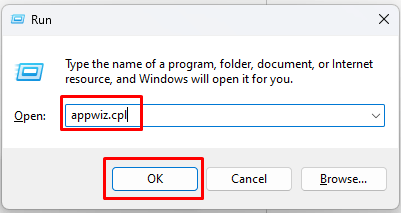
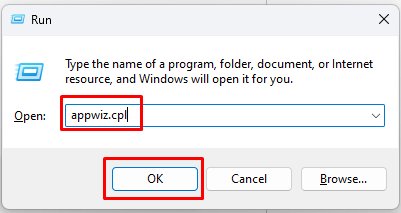
- Open the Run box by pressing the Windows key + R on your keyboard.
- Type appwiz.cpl and click OK.
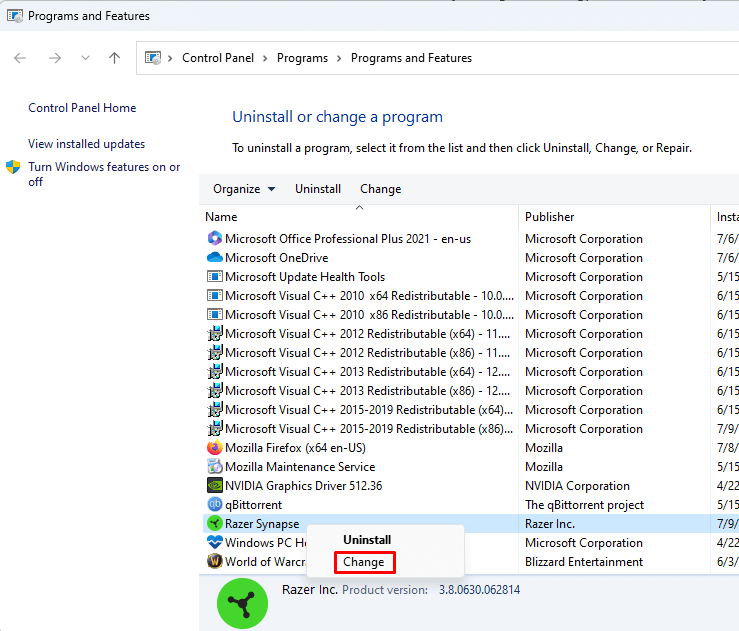
- Find Razer Synapse on the list of programs, and right-click it. Select Change.
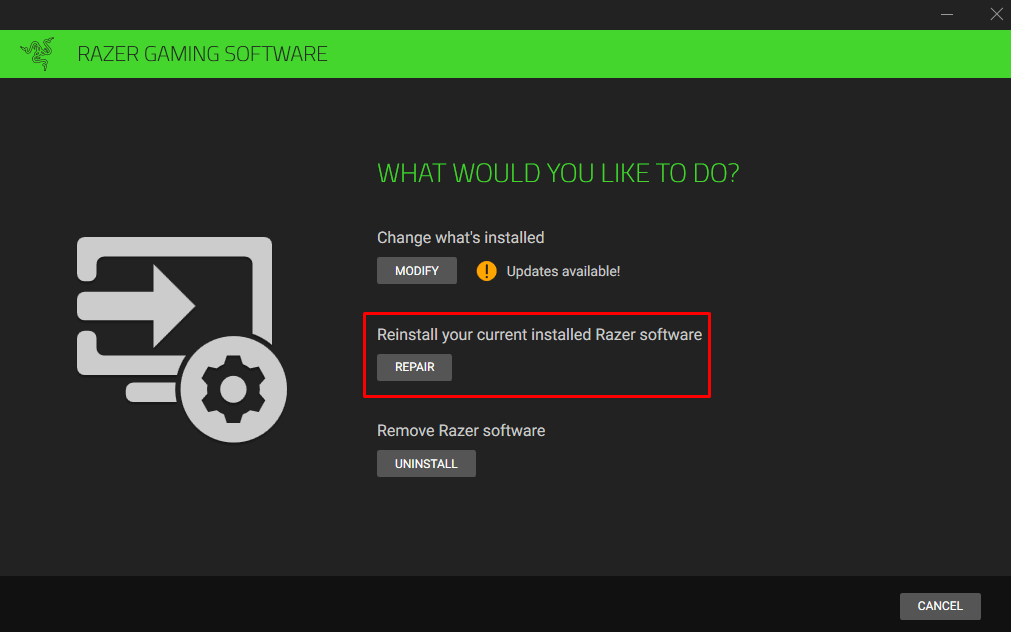
- When the Razer window opens, select the Repair option.
- Be patient while Synapse finds and repairs any potential issues. This might involve downloading and reinstalling missing or corrupted modules.
When it’s finished, launch Synapse and log into your account. See if it now detects your mouse and keyboard.
6. Uninstall Razer Synapse and Reinstall It
Corrupted files are not specific only to drivers. They can show up anywhere, even in the Synapse modules and files. This can potentially lead to Synapse failing to detect Razer peripherals. The solution to this problem would be thoroughly uninstalling and reinstalling Razer Synapse software. Make sure to do it properly so that no leftover data could be corrupted and influence how Synapse works.
Follow these steps to reinstall Razer Synapse:
- Press the Windows key + R on your keyboard to bring up the run box.
- Type appwiz.cpl and click the OK button. This will bring up Programs and Features.
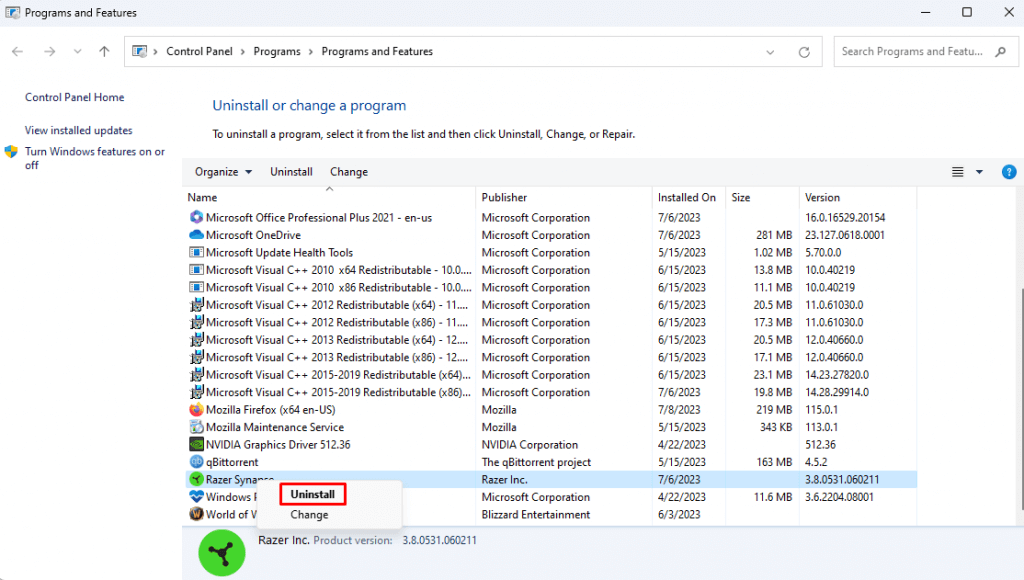
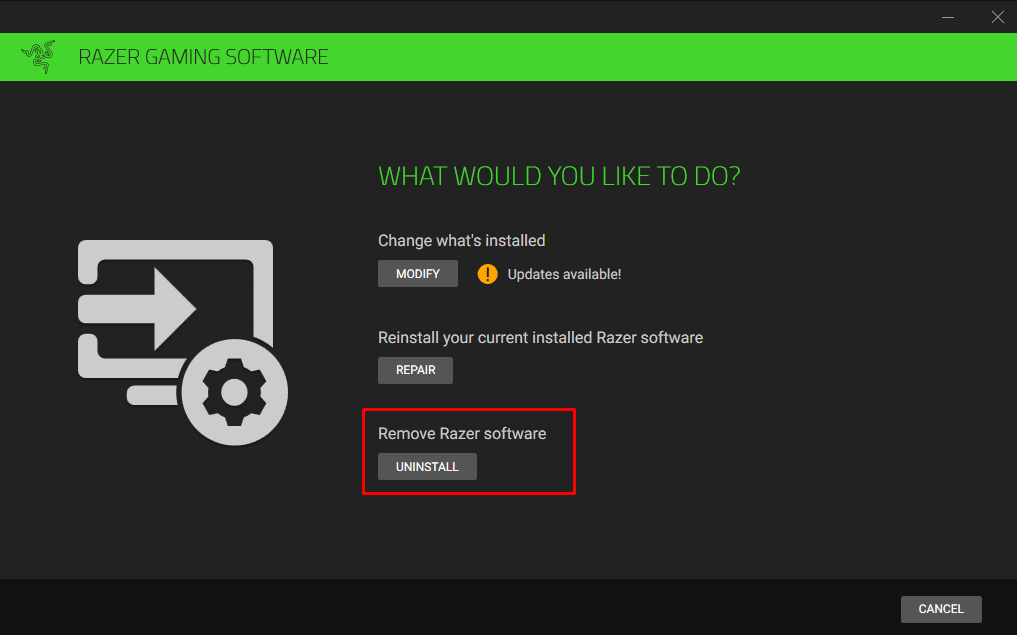
- Find Razer Synapse in the list of programs and right-click it. Select Uninstall.
- When prompted by Razer, select Uninstall.
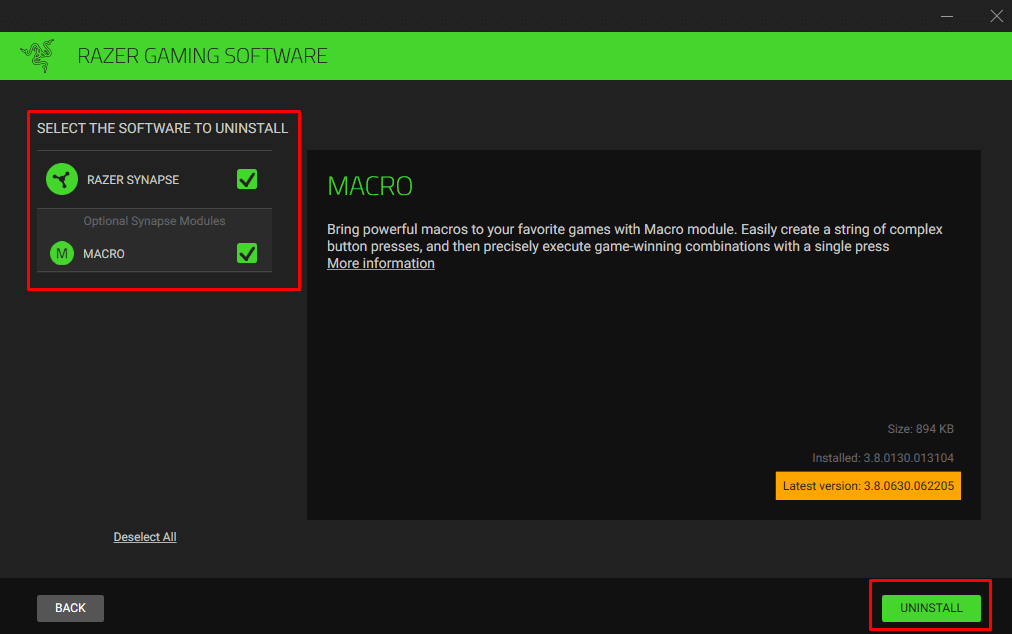
- Select all Razer software and click the Uninstall button in the lower right corner.
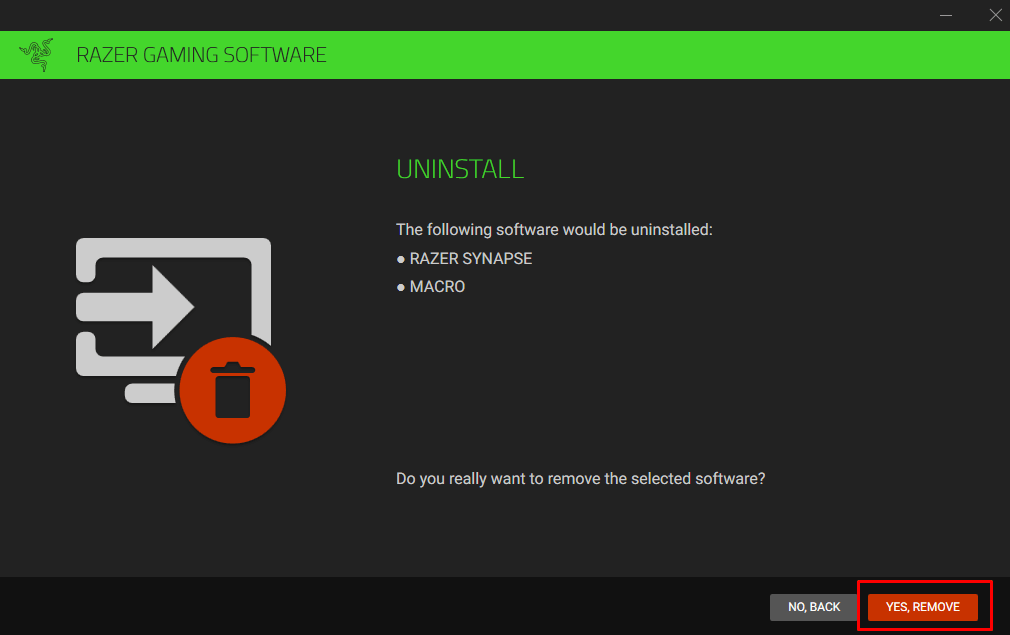
- Razer will ask you if you really want to remove their software. Select Yes, Remove.
Even after you complete uninstalling Razer Synapse, you’ll have to make sure to delete all the remaining files that might be hidden. Here’s how:
- Go to C:\Program Files (x86)\Razer.
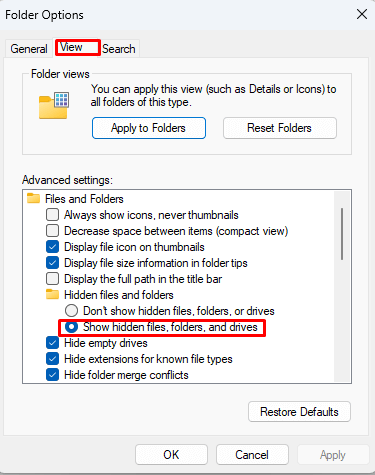
- Click Hidden items in the ribbon to ensure all the files are displayed. If you are a Windows 11 user, click the three dots, then go to Options > View > Check Show hidden files, folders, and drives.
- Delete all the files in the Razer folder. Select them with your mouse, and press the DEL button on your keyboard.
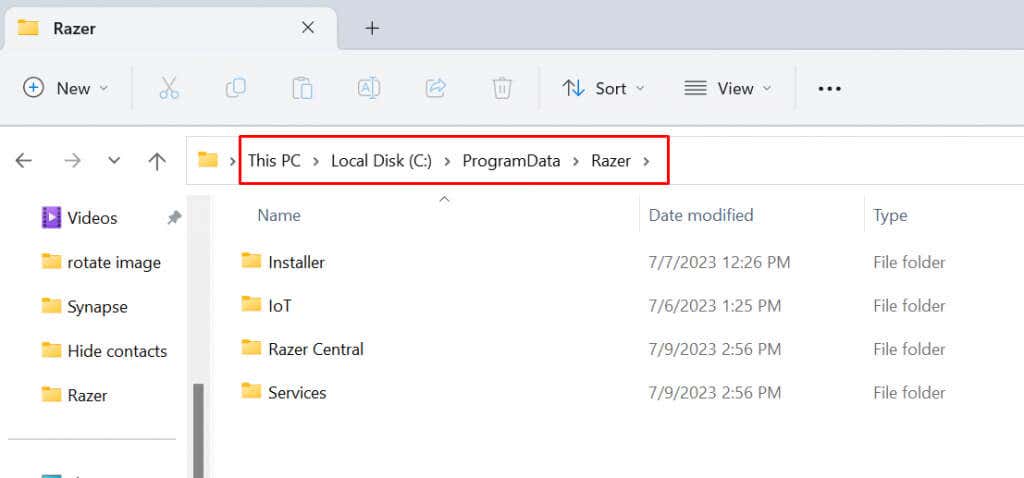
- Go to C:\ProgramData\Razer and ensure the Hidden items option in the ribbon is checked.
- Delete all the files in this Razer folder too.
- Reboot your computer.
Now you can install Razer Synapse from the official website, just like you did the first time. After the installation, see if the software detects your Razer products.
Does your Razer device show up in Razer Synapse after applying any of these fixes? If you’re still having issues, read our detailed guide on how to fix a USB device not recognized in Windows.
Related Posts
Nicolae is a Jack of all trades technology writer with a focus on hardware, programming languages, and AI image-processing software. Over the last five years, he has ghostwritten numerous tech how-to guides and books on a variety of topics ranging from Linux to C# programming and game development. Nicolae loves everything that has to do with technology and his goal is to share his knowledge and experience with others. Read Nicolae’s Full Bio
