
The “Stop: 0x000000F4” blue screen, also called CRITICAL_OBJECT_TERMINATION, crashes Windows when a critical kernel process terminates unexpectedly. It’s most often triggered by a failing drive, corrupted system files, a bad driver, or (less obviously) a dead CMOS battery after new hardware is installed.
Fix #1: Run System File Checker and DISM
Corrupted system files are the most common software cause. These two commands find and repair them without touching your personal files.
- Press
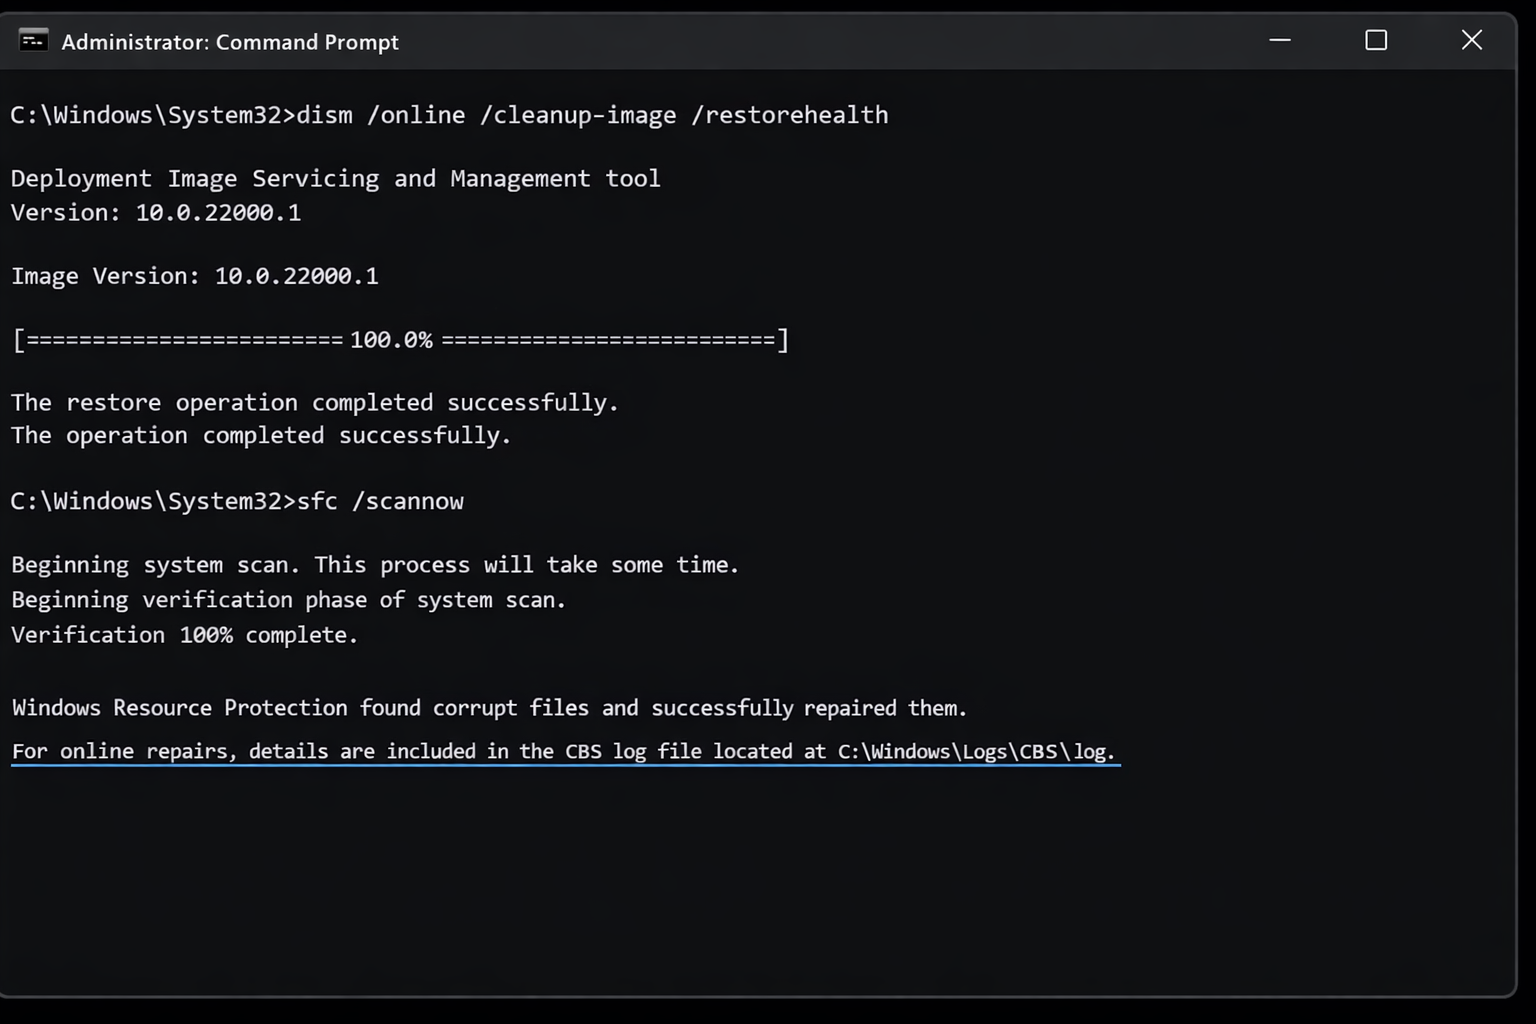
Windows + S, type cmd, right-click Command Prompt, and select Run as administrator. - Type the following and press Enter:
sfc /scannow - Wait for the scan to finish — it can take 10–15 minutes. Do not close the window.
- Once complete, run this second command:
DISM /Online /Cleanup-Image /RestoreHealth - Restart your PC when DISM finishes.
If SFC reports it repaired files, that was likely the culprit. Test your PC normally and watch for the BSOD returning.
Fix #2: Check the Drive for Errors (CHKDSK)
A failing or error-ridden hard drive or SSD is one of the top hardware causes of 0x000000F4. CHKDSK scans the drive and marks bad sectors so Windows stops trying to use them.
- Open Command Prompt as administrator (same as Fix #1).
- Type the following and press Enter:
chkdsk C: /f /r - If Windows says the drive is in use and asks to schedule the scan, type Y and press Enter.
- Restart your PC. The scan will run automatically before Windows loads — let it complete.

If CHKDSK finds and fixes errors, back up your important files immediately — a drive that’s developing bad sectors is usually on its way out.
Fix #3: Update or Roll Back Drivers
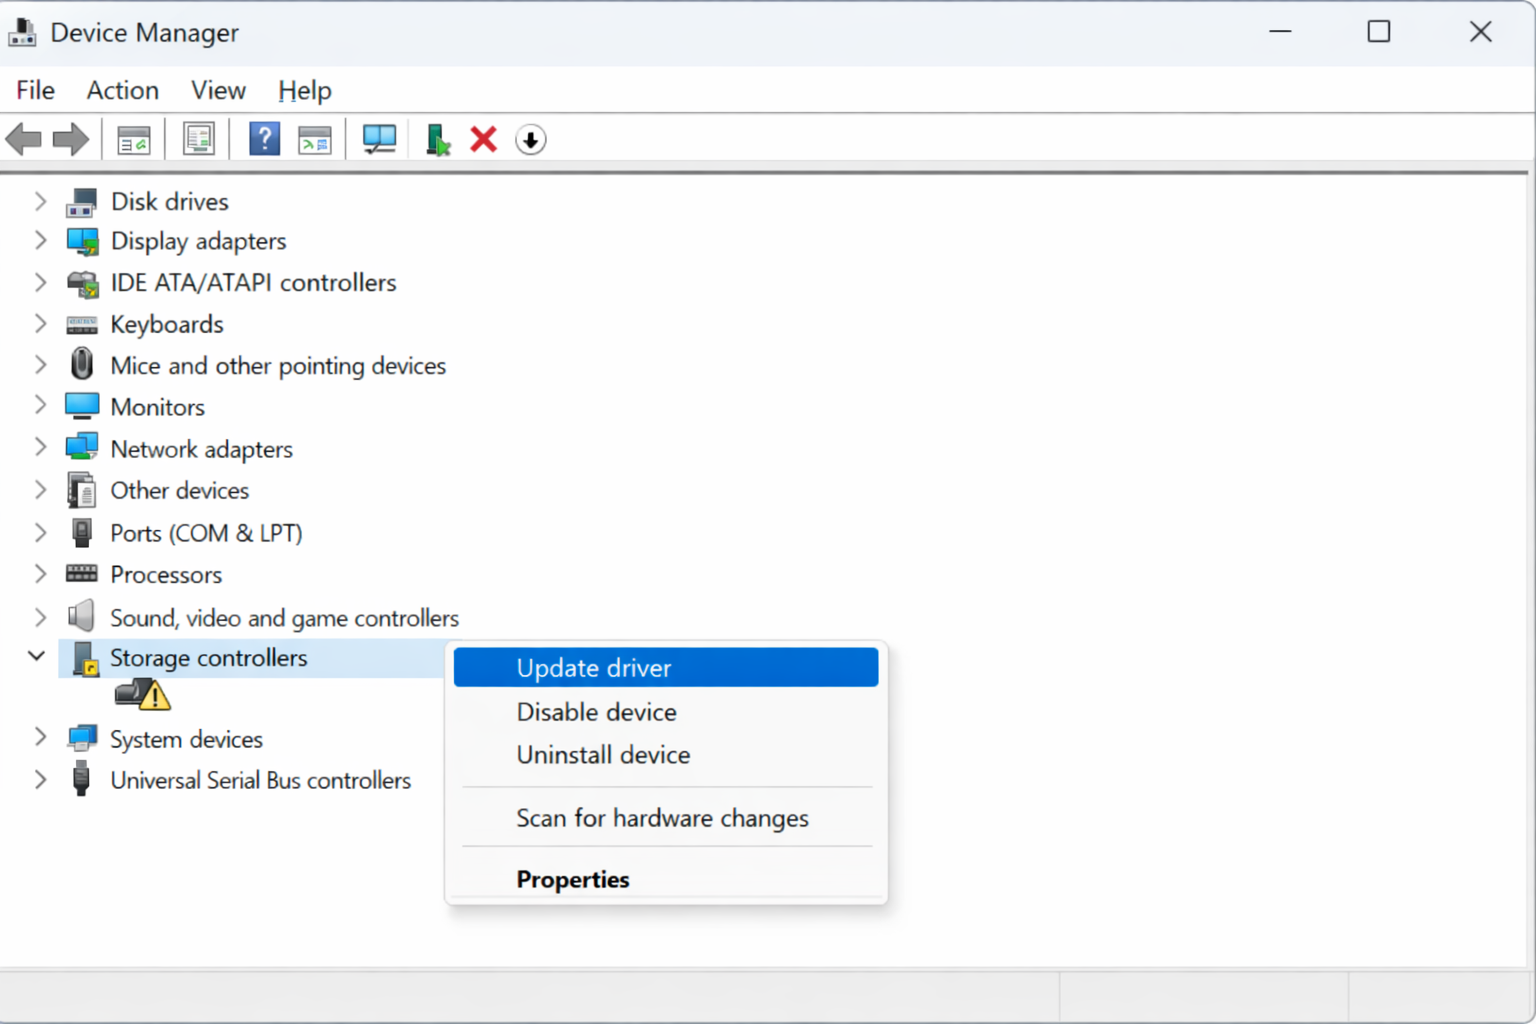
A bad driver, especially for storage controllers, chipsets, or recently added hardware, can terminate a critical kernel object and trigger this exact BSOD. Check Device Manager for anything flagged with a yellow warning icon first.
- Press
Windows + Xand select Device Manager. - Look for any device with a yellow exclamation mark. If you find one, right-click it and select Update driver > Search automatically for drivers.
- If you recently updated a driver and the BSOD started afterward, right-click the device, select Properties > Driver tab > Roll Back Driver.
- Restart your PC after any driver change.
Fix #4: Run Windows Memory Diagnostic
Faulty RAM can cause kernel crashes that look identical to disk or driver problems. Windows has a built-in memory tester that’s faster and easier than third-party tools.
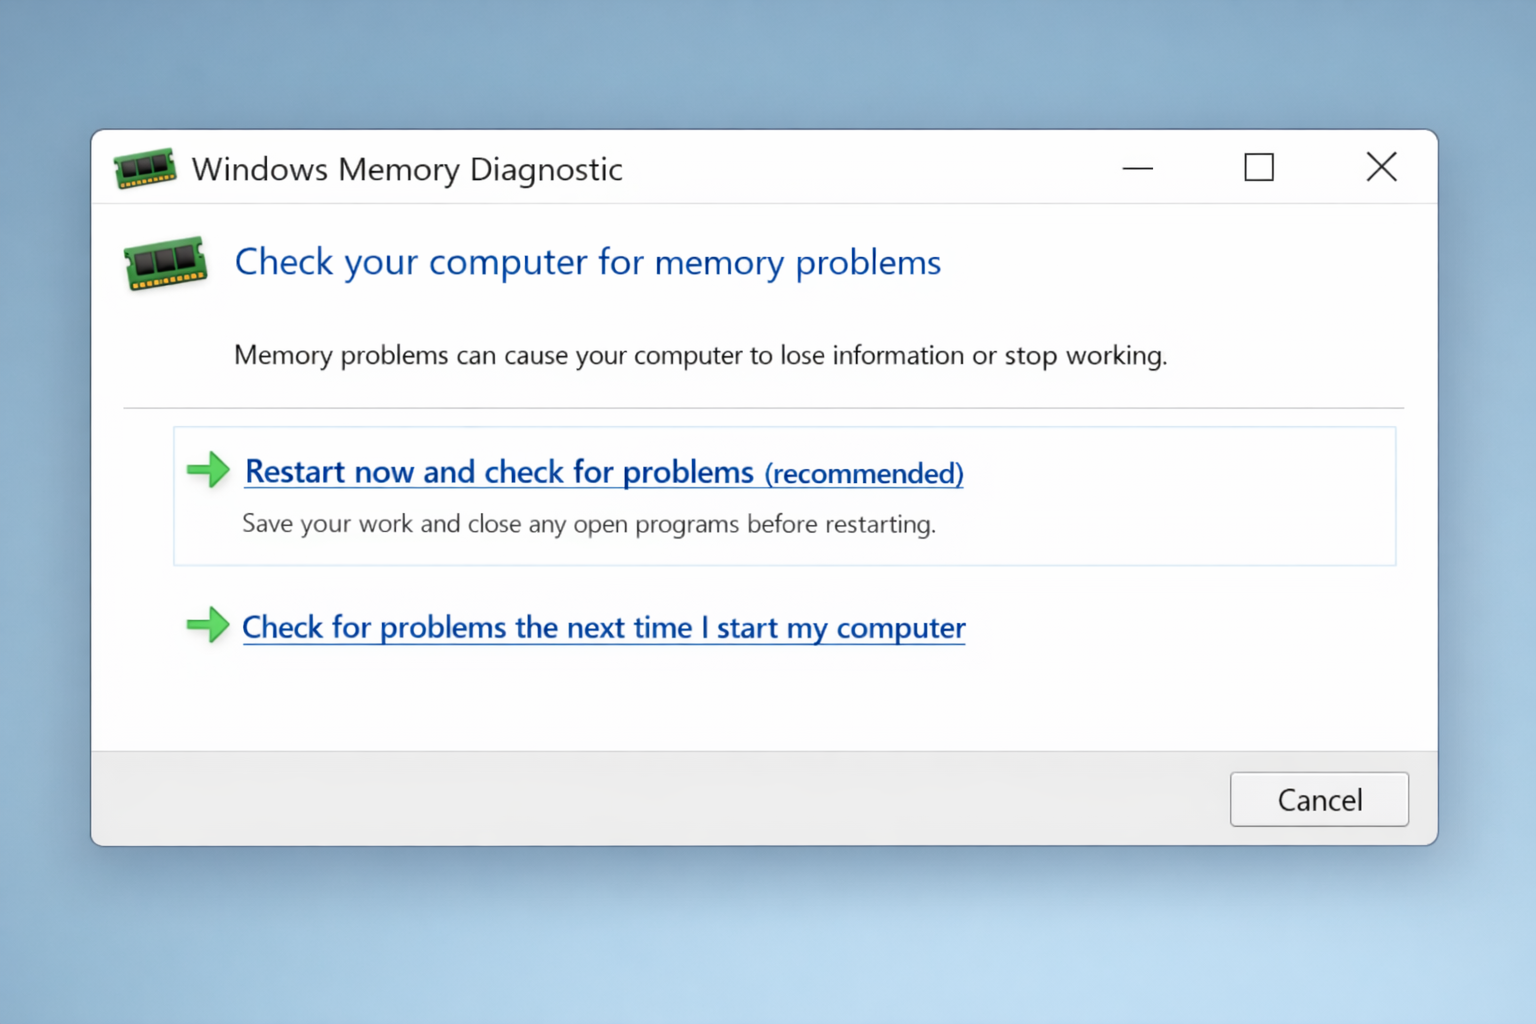
- Press
Windows + Sand search for Windows Memory Diagnostic. - Click Restart now and check for problems.
- Your PC will reboot and run the memory test — it takes a few minutes.
- After Windows restarts, search for Event Viewer, then navigate to Windows Logs > System and look for a MemoryDiagnostics-Results entry to see the outcome.
If the test finds errors, your RAM is likely failing. Try reseating the sticks first — remove them and firmly push them back in. If errors persist, the RAM needs replacing.
Fix #5: Use System Restore
If the BSOD started after a Windows update, driver installation, or software change, System Restore can roll your PC back to a point before the problem started, without affecting your personal files.
- Press
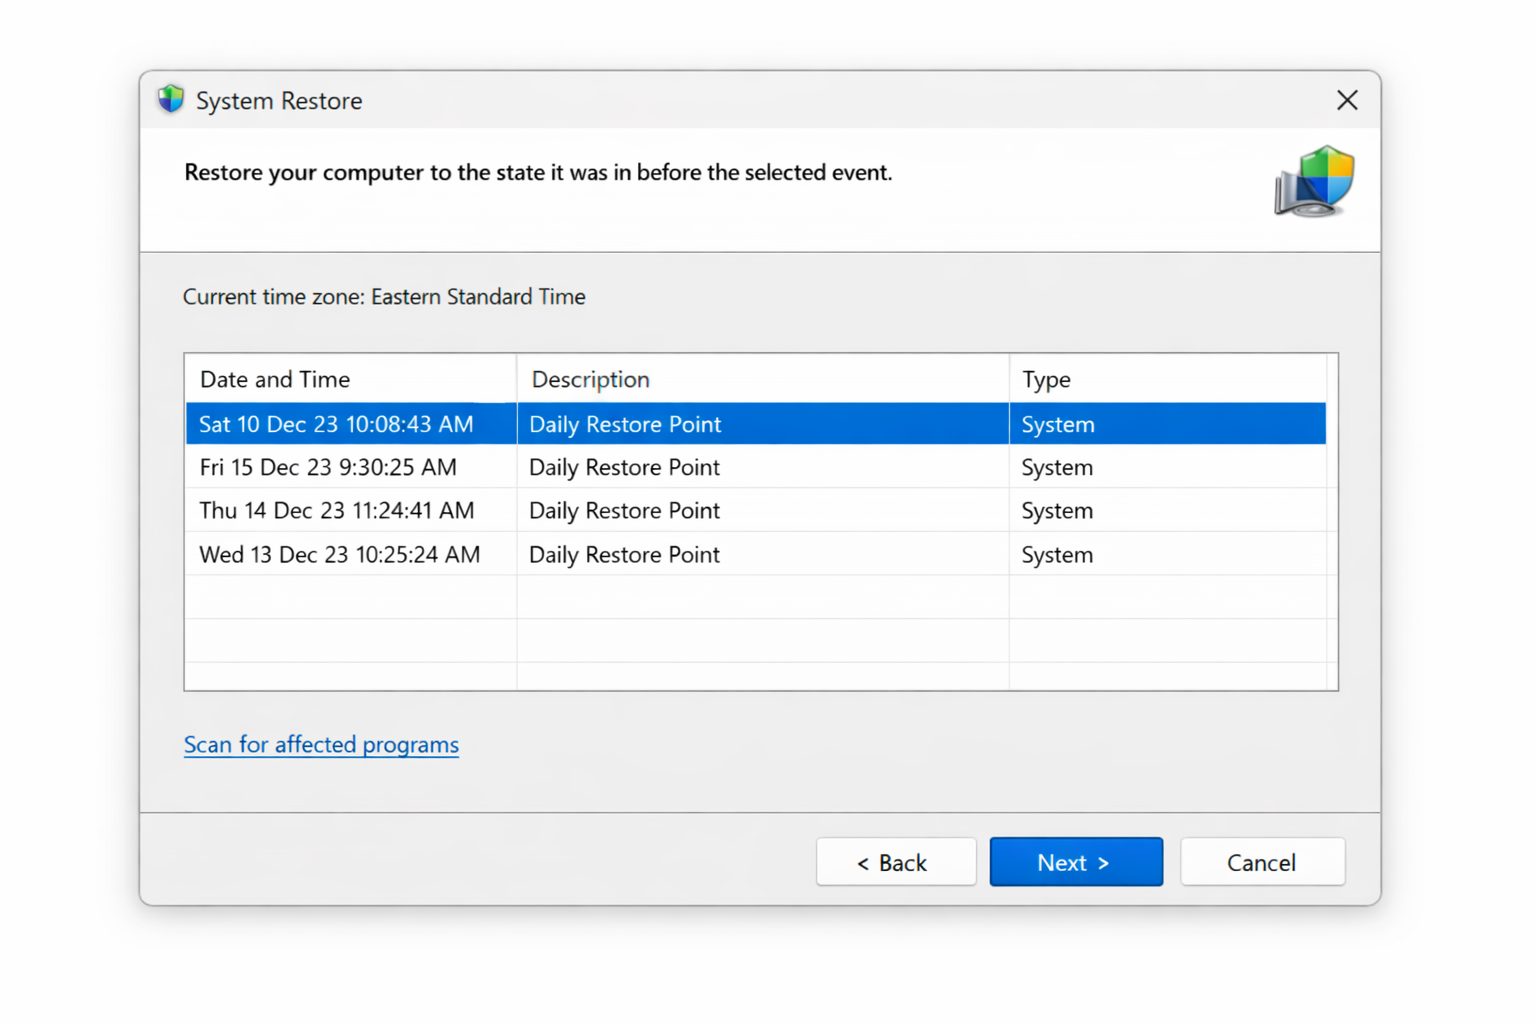
Windows + Sand search for Create a restore point. Click the result. - In the System Properties window, click System Restore.
- Click Next, select a restore point dated before the BSOD started, and click Next again.
- Click Finish to confirm. Your PC will restart and apply the restore.
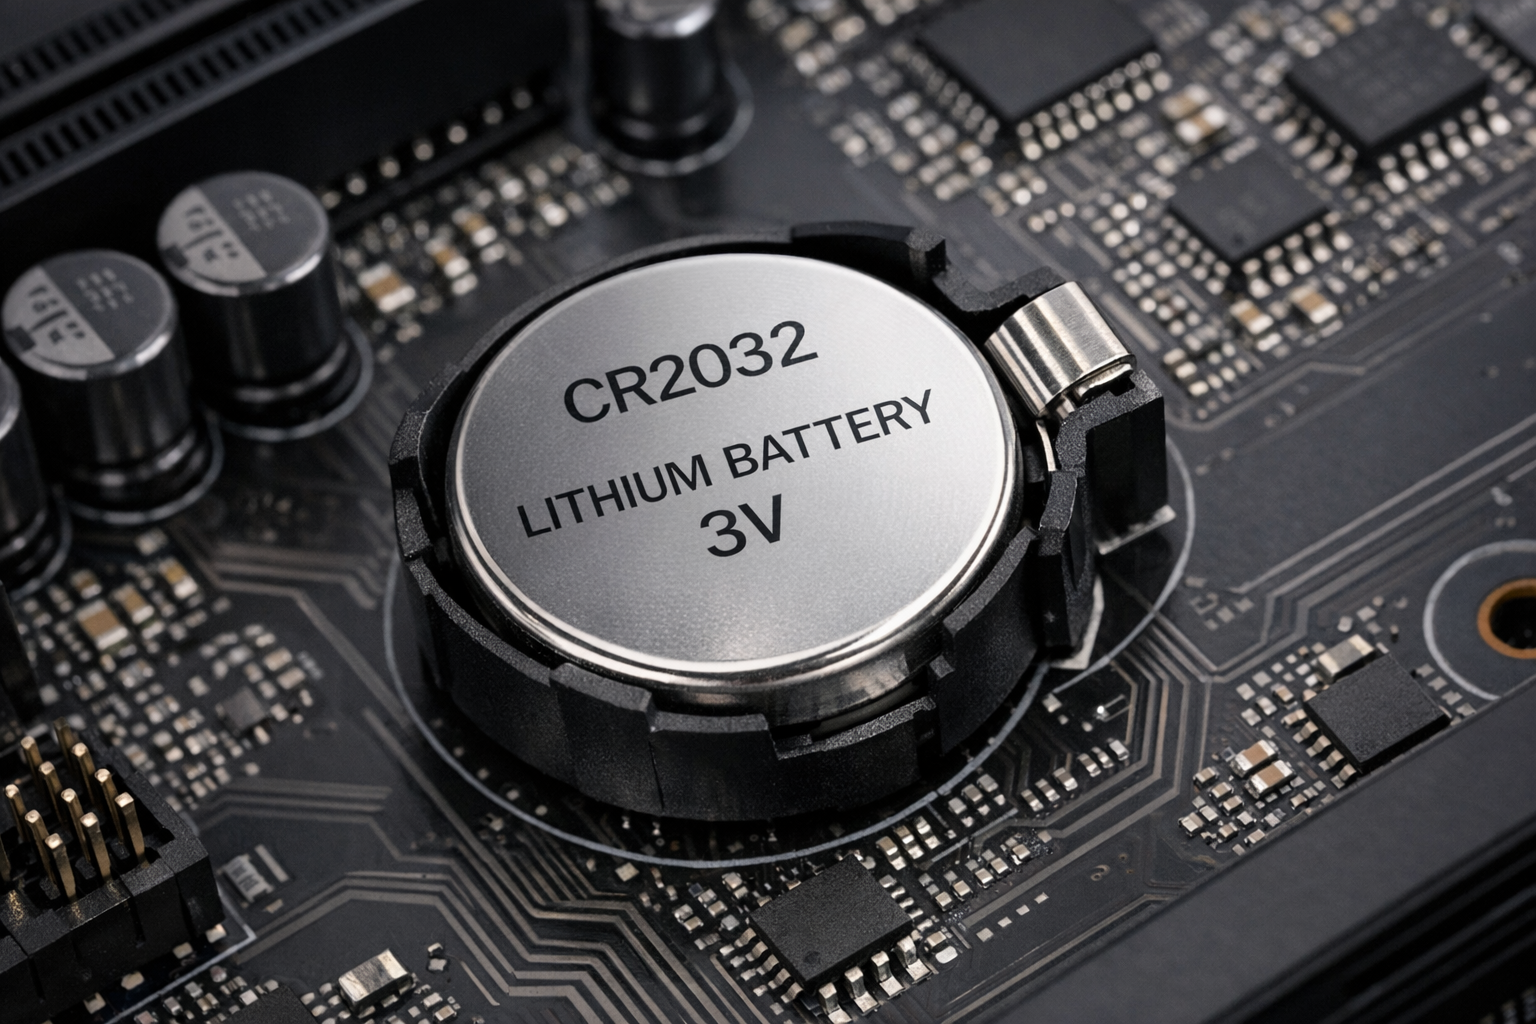
Fix #6: Reset the CMOS Battery
This fix sounds obscure, but it’s surprisingly effective, especially if the BSOD started after you installed new hardware. The CMOS battery is a small coin-cell battery on your motherboard that stores BIOS settings. If it’s dead or its settings got corrupted during a hardware change, it can cause 0x000000F4.
Note: This requires opening your PC case. If your PC is under warranty, check whether opening it voids coverage before proceeding.
- Shut down your PC completely and unplug it from the wall.
- Open the side panel of your desktop case. (Laptop users: this is more involved — look up your specific model’s CMOS reset procedure.)
- Locate the small round silver battery on your motherboard — it looks like a large watch battery.
- Gently press the release clip and slide the battery out.
- Wait 30 seconds, then reinsert the battery.
- Close the case, plug the PC back in, and power it on.
Your BIOS clock and some settings will reset after this, so you may need to re-enter the date and time. That’s normal.
Fix #7: Analyze the Minidump File
Every BSOD writes a minidump file that records exactly which driver or process caused the crash. Reading it tells you precisely what to fix instead of guessing.
- Download BlueScreenView from NirSoft (free, no install required).
- Run BlueScreenView.exe. It automatically finds and loads your minidump files from
C:\Windows\Minidump. - Look at the Caused By Driver column in the top pane. The file listed there is your culprit.
- Search the driver filename online to identify which hardware or software it belongs to, then update, roll back, or uninstall that driver.
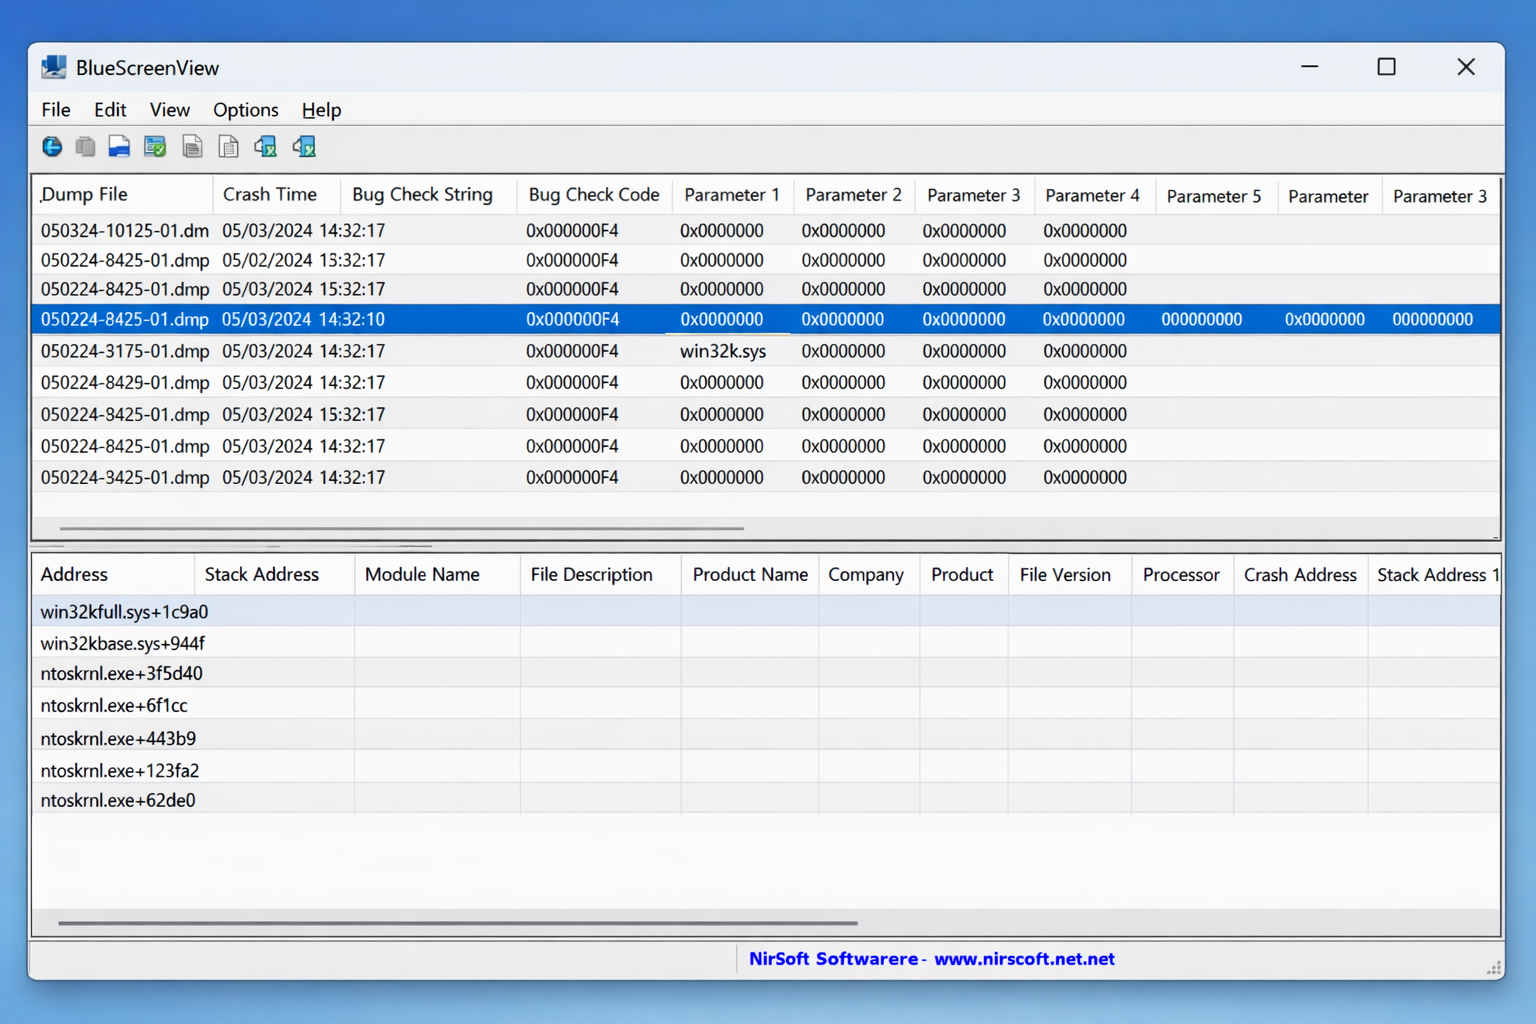
This is the most targeted fix on the list. If you’ve tried everything else and the BSOD keeps coming back, the minidump will tell you exactly where to look.
If None of These Fixes Work
If all seven fixes fail, the most likely culprit is a physically dying hard drive or SSD. Back up your data immediately using another PC or an external drive, then replace the drive. You can also try Settings > System > Recovery > Reset this PC (choose Keep my files) as a non-destructive last resort before replacing hardware. If the BSOD happens during the reset, the drive is almost certainly the problem.
Conclusion
Fix #1 (SFC + DISM) and Fix #2 (CHKDSK) solve this for most people as corrupted files and bad drive sectors are by far the most common causes. If your BSOD started right after installing new hardware, go straight to Fix #6 (the CMOS reset) – it’s a fast five-minute fix that’s easy to overlook. A recurring 0x000000F4 after all of these is a strong sign your drive is failing and needs to be replaced before it takes your data with it.