

Facebook privacy is something that many Facebook users fail to consider. However, knowing how to make photos private on your Facebook account is important to keep pictures of your children, home, and other sensitive personal images out of the prying eyes of the general public.
There are scammers regularly searching every social media platform for enough information about you so that they can customize things like phishing emails or cold calls to fool you. In some cases, local thieves might even review your public photos for security vulnerabilities around your home.
Facebook offers different levels of privacy for your Facebook page. You can apply Facebook privacy settings to hide photos, your profile picture, or entire Facebook albums. It’s also possible to set the privacy for all of the future photos you upload to Facebook.
How to Make Photos Private on Facebook
To make individual photos or photo albums private on Facebook, you just need to adjust the privacy settings for those items.
Note: If you make your cover photo (your Facebook profile photo) private using the steps below, your profile image will appear as a default gray profile to anyone on Facebook who isn’t a friend.
How to Make Albums Private on Browser
If you want to leave most of your photos public but keep one of your albums private, you can do this easily.
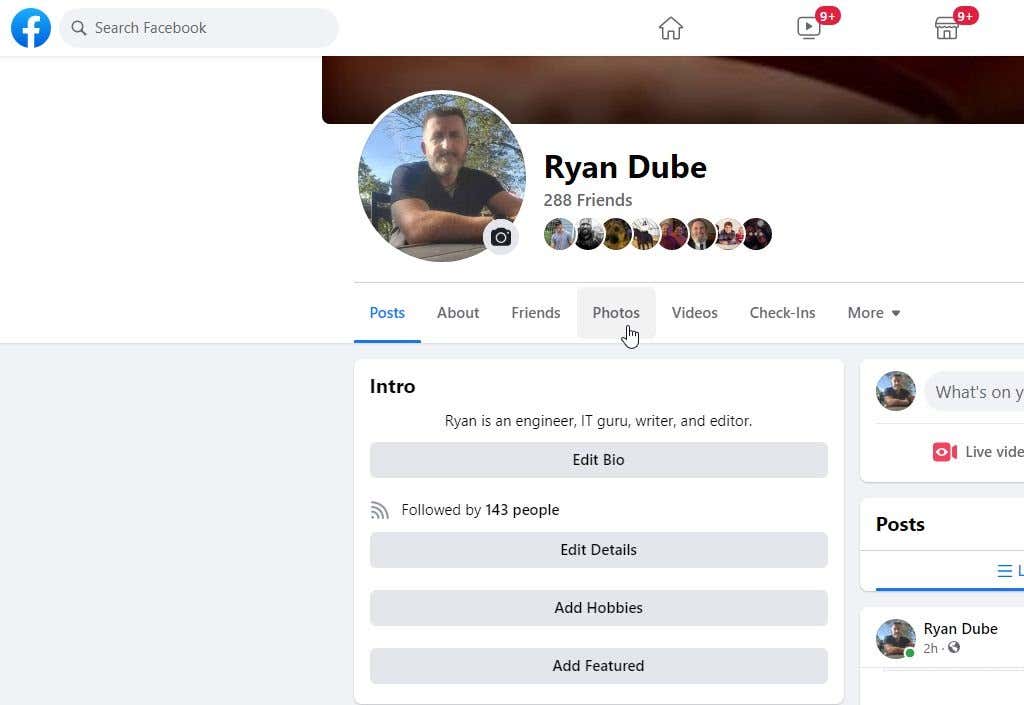
- Open Facebook and go to your Facebook profile page. Select the Photos tab.
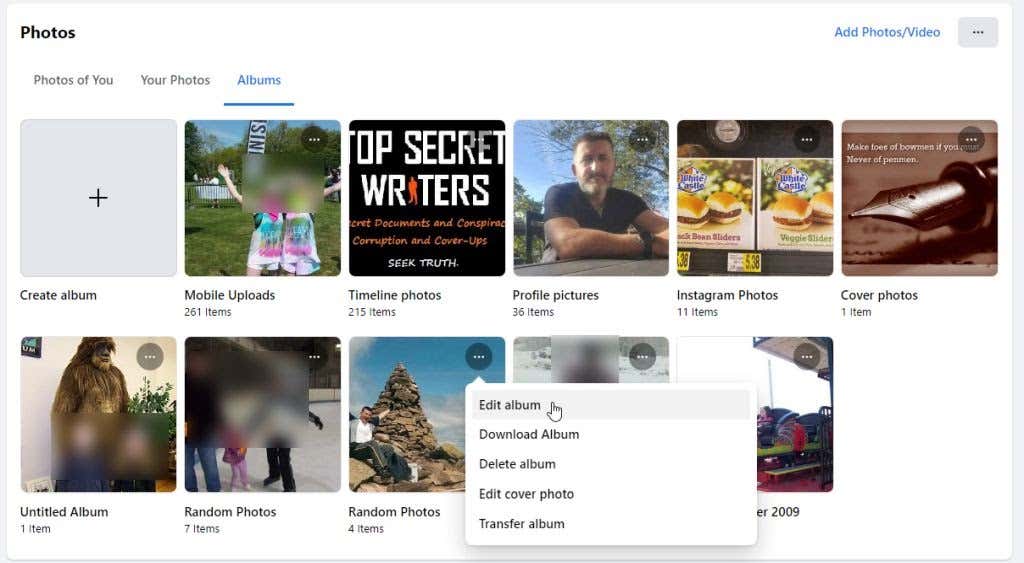
- Find the album you want to change privacy options for and select the three dots at the top right corner. Select Edit album.
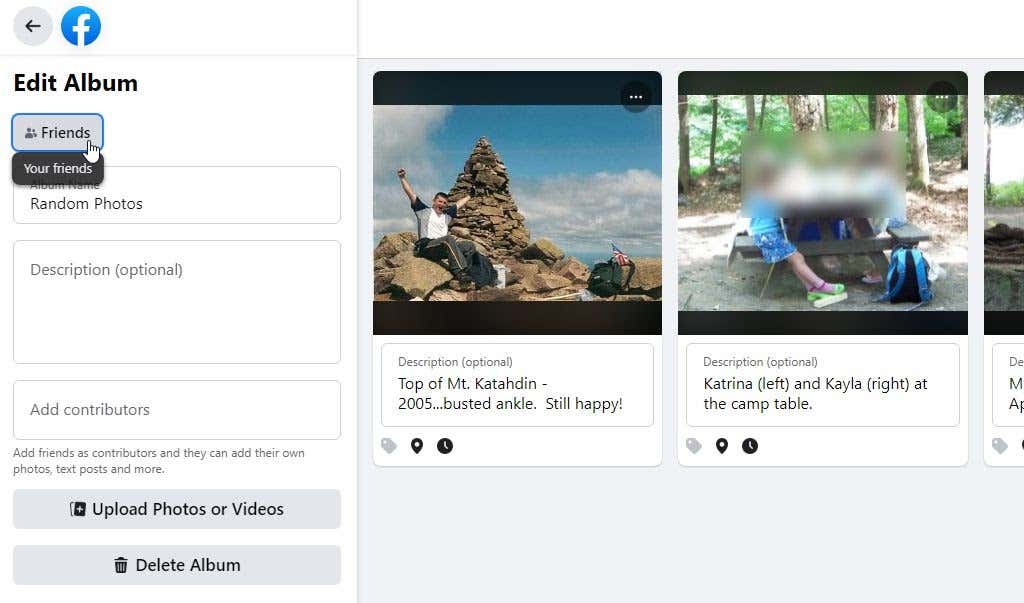
- On the Edit Album page, you’ll see the current privacy settings at the upper left. This button may say Friends, Public, or something else. To change the privacy of the entire album (and all photos in it), select that button.
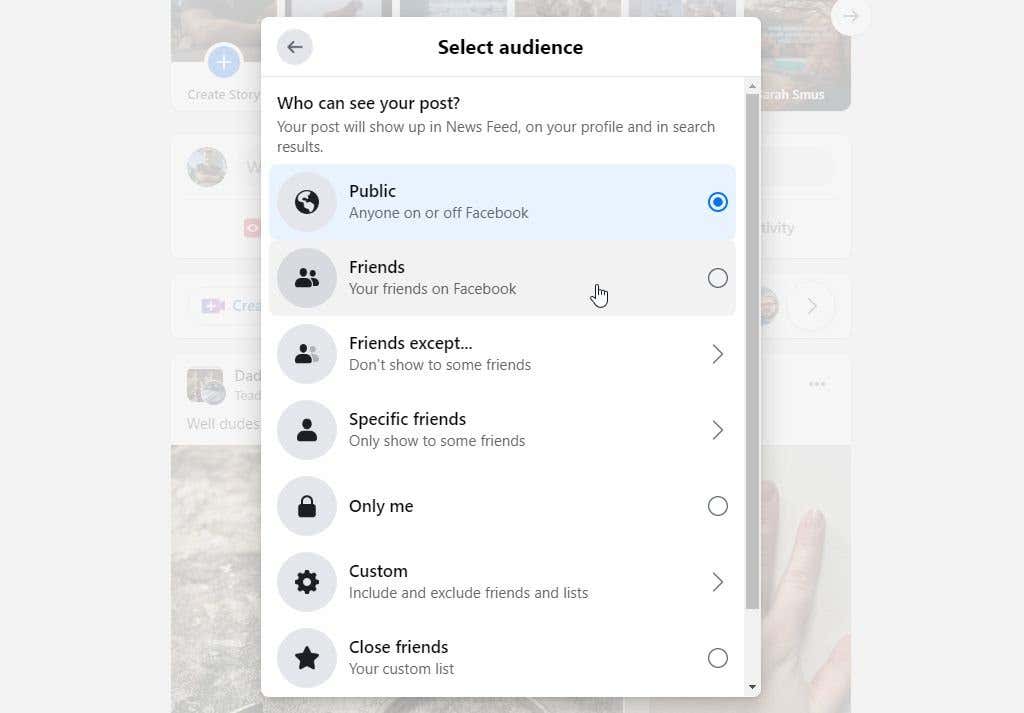
- This will open the audience selector window. This is where you can change the album privacy. To make the album private, set this to anything other than Public.
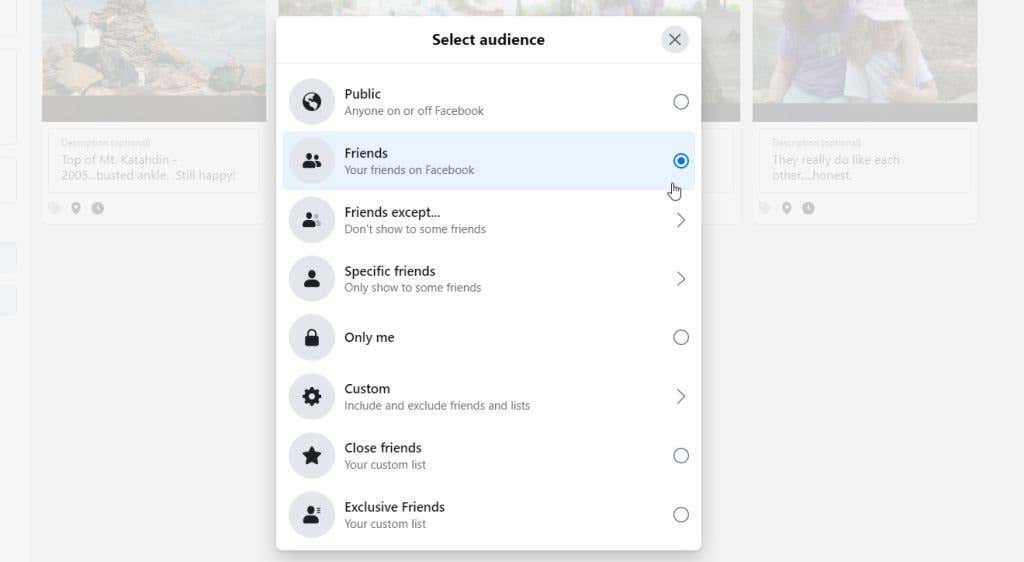
The following privacy settings are available:
- Only me: This will make the album completely private so that only you can see any of the photos in that album.
- Friends, Friends except, or Specific Friends: Allow all or only some of your friends to see the album and all photos in it.
- Custom, Close friends, or Exclusive Friends: Customized lists where you can choose exactly who from your friends list gets to see the album and its photos.
Once you make this change, the entire album will be private. It will not be viewable when anyone who isn’t your friend (public Facebook users) reviews your Facebook profile or your Facebook news feed.
How to Make Albums Private on Android or iPhone
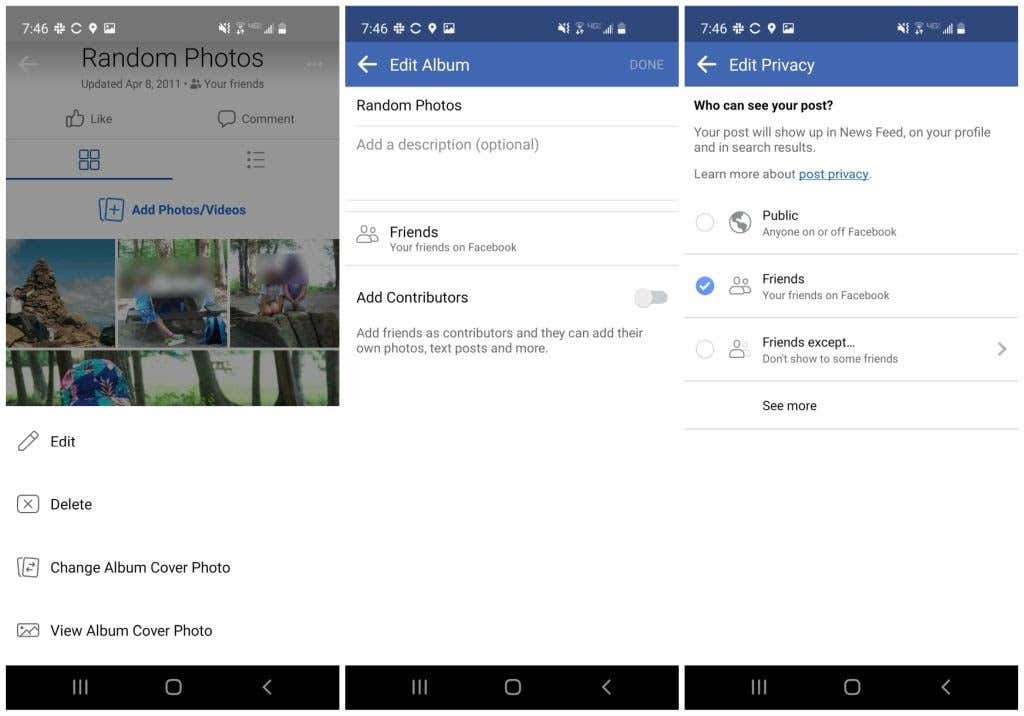
To make an album private on the Facebook app:
- On your profile, select the Photos button.
- Select the Albums tab.
- Select the album you want to edit. Select the three dots at the upper right.
- In the menu that opens at the bottom of the screen, select Edit.
- In the Edit Album window, select the privacy section (will likely currently be set to either Public or Friends).
- In the Edit Privacy window, set the privacy to anything other than Public.
How to Make Individual Photos Private
To make a single photo private on Facebook, you’ll just need to open the photo and adjust its privacy settings.
How to Make Photos Private on Browser
- Go to your Facebook profile and select Photos. Select Photos of You or Your Photos in the Photos section. Find the photo you want to make private and click on it.
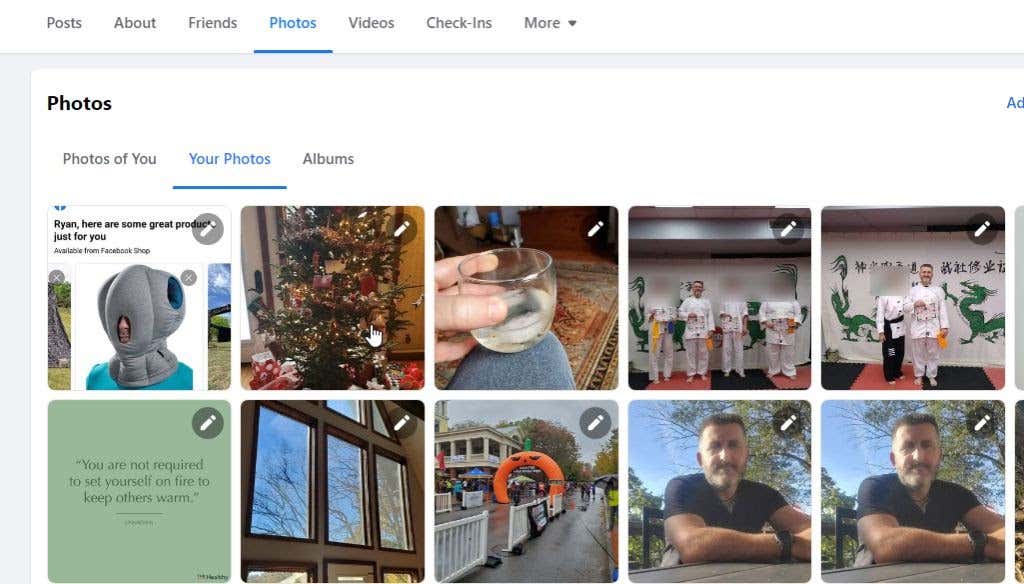
- With the photo open, select the privacy icon at the upper right of that photo post.

- Select anything other than Public in the list of audience options to make the photo private.
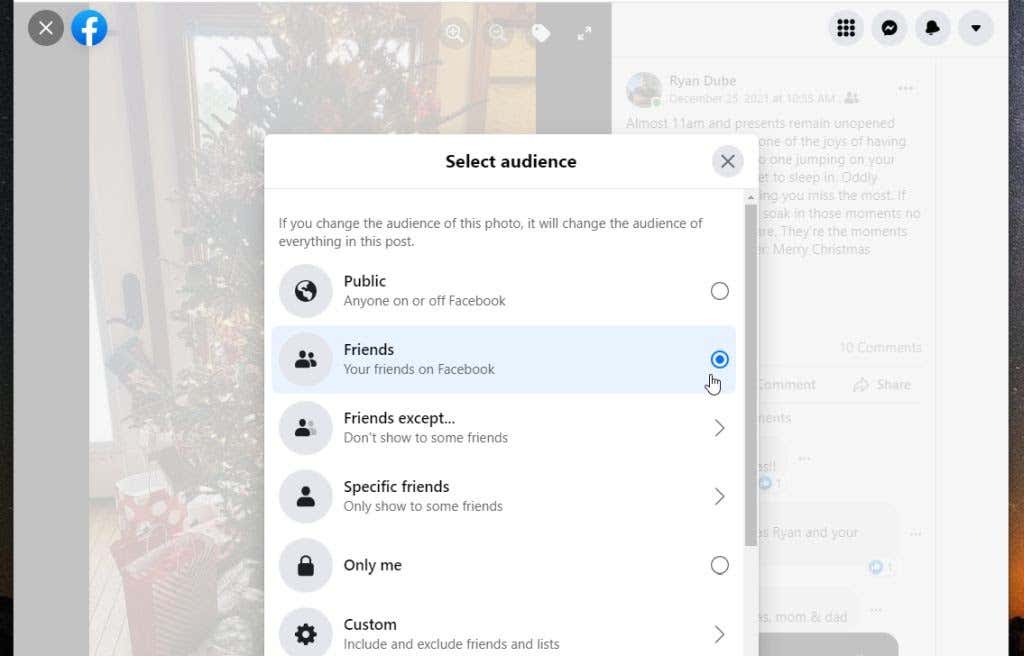
The privacy settings available here are the same as with albums. You can adjust it to only yourself, all or only certain Facebook friends, or any customized list you like.
How to Make Photos Private on Facebook Mobile App

To make a photo private using the Facebook mobile app:
- On your profile, select the Photos button.
- Select the Photos of You or Uploads tab.
- Select the photo you want to edit.
- Select the three dots at the upper right and select Edit post privacy in the menu.
- In the Edit Privacy window, set the privacy to anything other than Public.
How to Set Photos to Private by Default
If you’d rather not have to make photos private on Facebook every time you post them on your Facebook timeline, you can have Facebook set photos to private by default instead.
To do this:
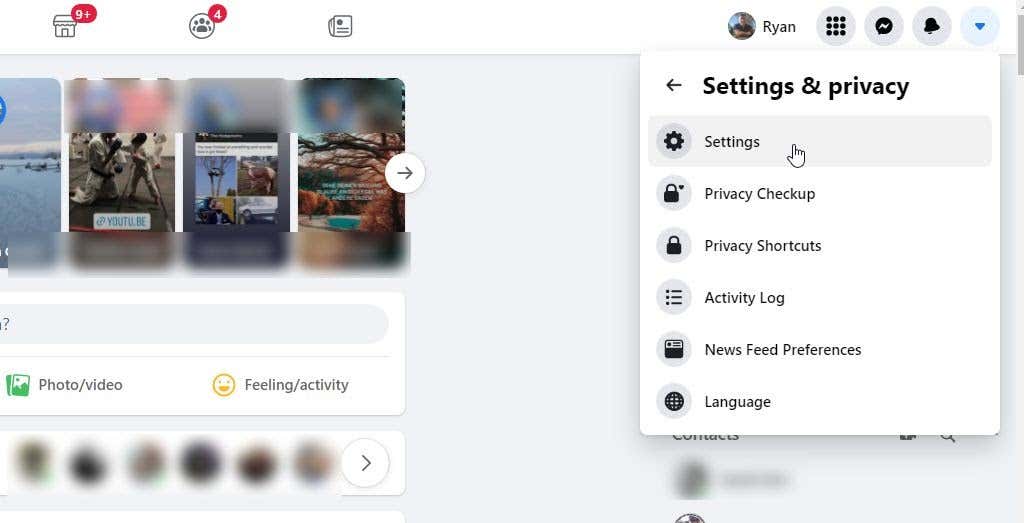
- Log into Facebook using the browser and select the dropdown arrow at the far right at the top of the page. Select Settings & privacy.
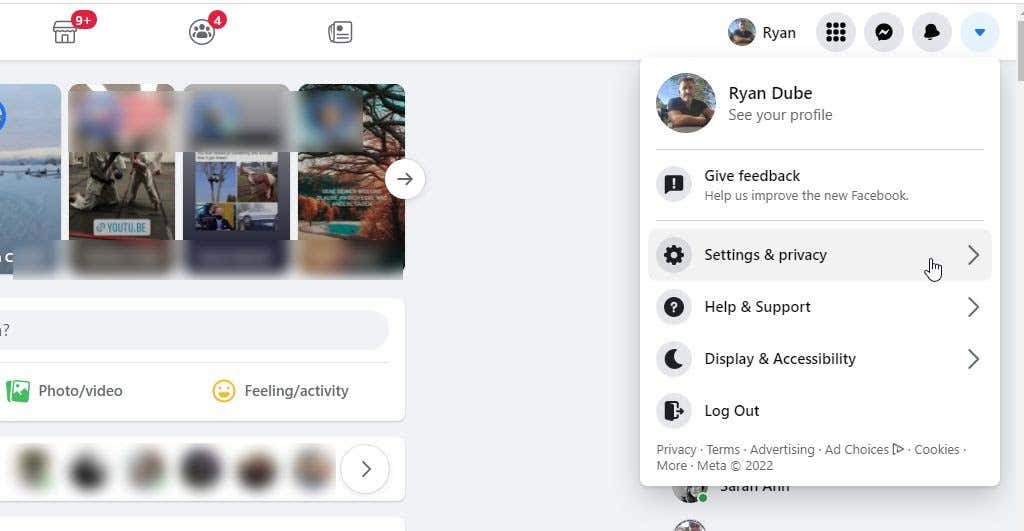
- On the next drop-down menu, select Settings.
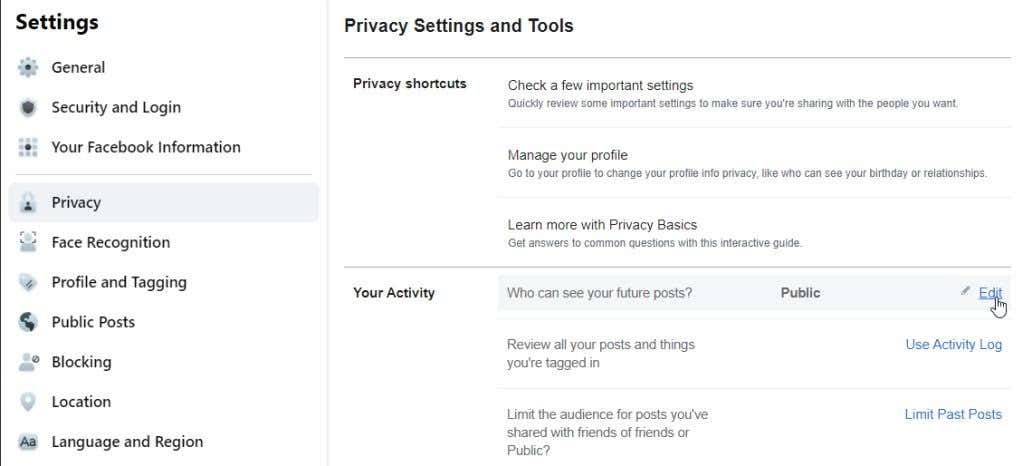
- On the privacy settings page, select Privacy in the left navigation pane. Find the Your Activity section on the right, and select Edit to the right of Who can see your future posts.
- You’ll see this section open and a privacy dropdown will appear. Select this dropdown button and change the default privacy of your posts to anything other than Public.
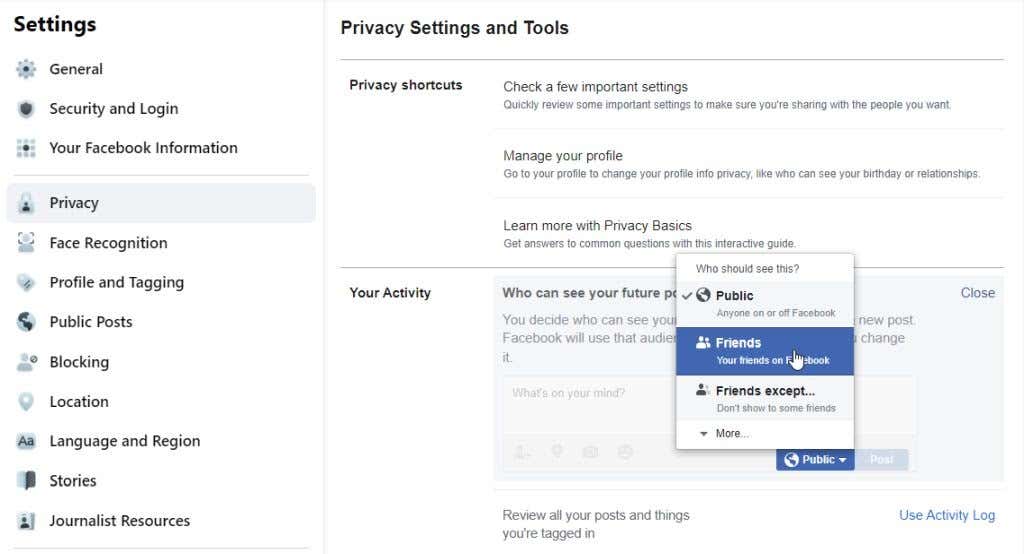
Once you make this change, all future posts you make on Facebook will have this non-Public setting for its privacy. This way, if you actually don’t want the post or photo you’re posting to be private, you can change it to Public after the fact.
This is much easier than making every post or photo private individually. Especially if most of the time you want your photos to be available only to your friends or a customized list of specific friends.
If you prefer to leave the default to public, you can make photos and posts private after making an individual post. Just do this by selecting the privacy dropdown that has the “Public” setting.
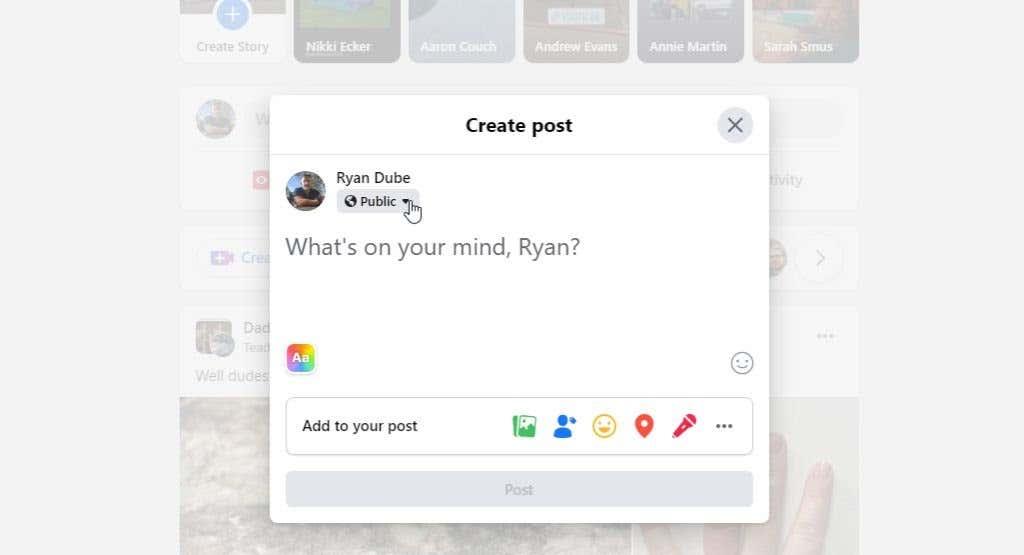
Change this to anything other than Public and that post or photo will be private and only visible to those you’ve set the privacy setting to.
Since most people prefer keeping their Facebook posts and photos non-public, it makes more sense to set your default privacy for photos to Friends. However, regardless of your default setting, there are plenty of other options to make photos private on Facebook if you prefer those instead.
