Staying private on Facebook is important. It’s the biggest social media site around, and billions of people worldwide have access to your information if it’s public.
If you’re not sure how to navigate the privacy settings or what they all mean, accidentally posting something you wanted to remain hidden, or sharing the wrong item, becomes way too easy.
Below are several tips and reminders that you can take advantage of to stay private on Facebook and regain control over what the internet knows about you.

Review Your Activity Log
Activity Log is an area of Facebook that shows all the different things you’ve been doing recently. What you liked, which images you uploaded, the events you engaged in, your comments, etc. This is a central hub that you should monitor frequently if you want a recap of what others are seeing about you.
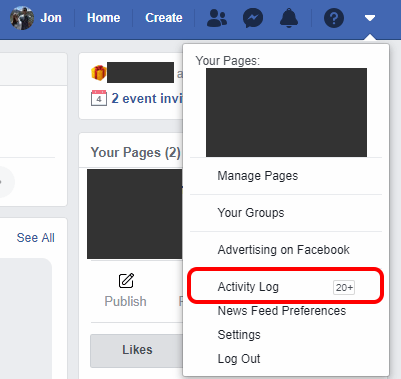
To get there, select the arrow at the very top right corner of Facebook, and choose Activity Log.
Post to Specific Friends Only
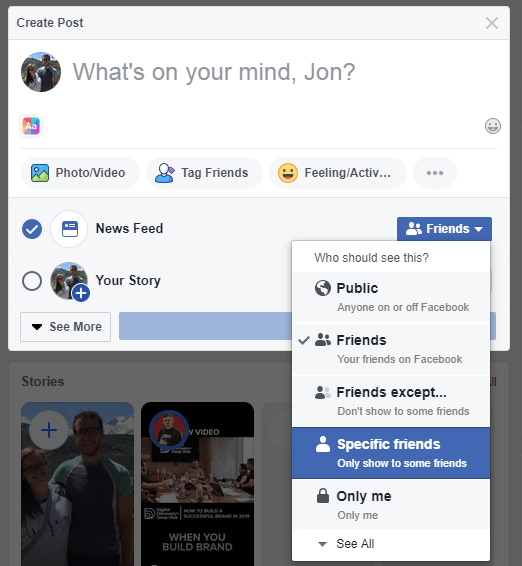
Be aware of who you share things with on Facebook. When you post something, don’t just choose the public option unless you’re absolutely sure that you want literally anyone who stumbles on your profile to see the post.
Instead, choose Friends or Specific friends to limit the post’s visibility. You can hide your Facebook post from certain people by selecting the button under the text box; it’s most likely called Friends.
Hide Your Online Status
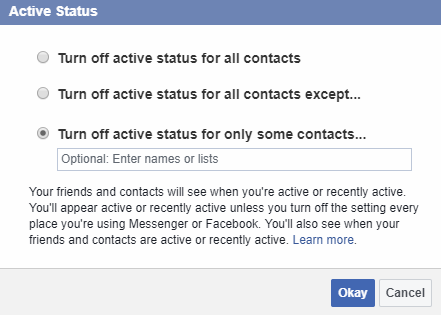
Chat is built-in to Facebook, and can let all your friends know whether you’re online. In fact, it’s an easy way for anyone to see when you’re on your computer or phone at any given time, because let’s face it, you’re probably on Facebook, too.
If you don’t like others knowing when you’re browsing Facebook, hide your Facebook online status by restricting it to just certain friends or going invisible to everyone. You can manage your visibility in Facebook chat from the sidebar; select the gear icon and then choose Turn Off Active Status.
Restrict Who Can See Your Friends List
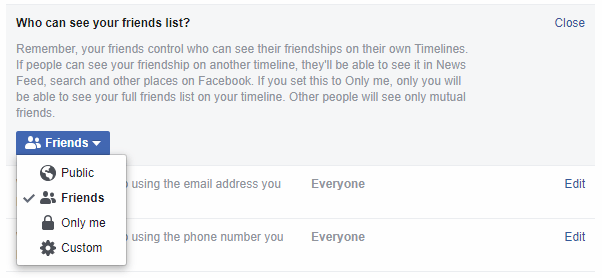
Your friends might not mind being publicly visible on your Facebook profile, but if you like to stay private on Facebook, they’re the first that should go. Fortunately, you don’t have to delete your Facebook friends just to hide them.
Go to Privacy in the settings of your account to find the option to change who can see your list of friends. Change it to certain people only or limit its visibility to just you. Now, anyone who visits your profile, whether they’re a Facebook friend or not, won’t be able to snoop through who you’ve added on Facebook.
Disable Reverse Email and Number Searches
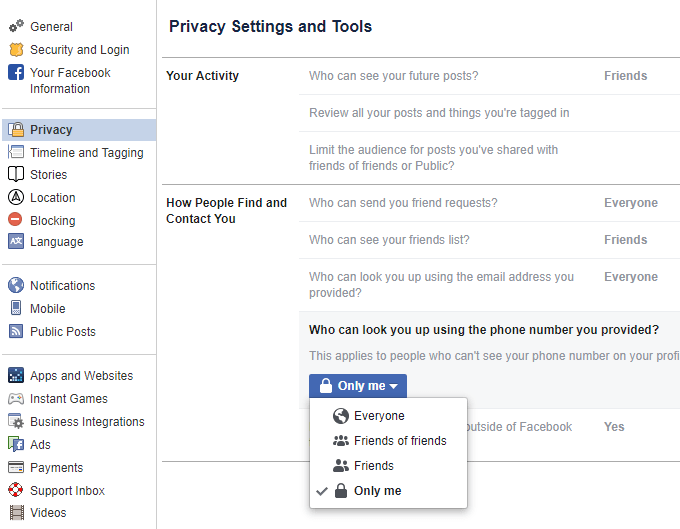
If someone knows your email address or phone number that you signed up for Facebook with, they can find your profile through a simple Facebook search. This is true even if your phone number and email address aren’t even visible on Facebook!
To disable these functions, open Privacy from settings and hit the Edit link to the right of both of these items: Who can look you up using the email address you provided? and Who can look you up using the phone number you provided?. Change them to Only me or pick select friends that you trust so that only they can do this kind of search.
Stop Search Engines From Listing Your Profile
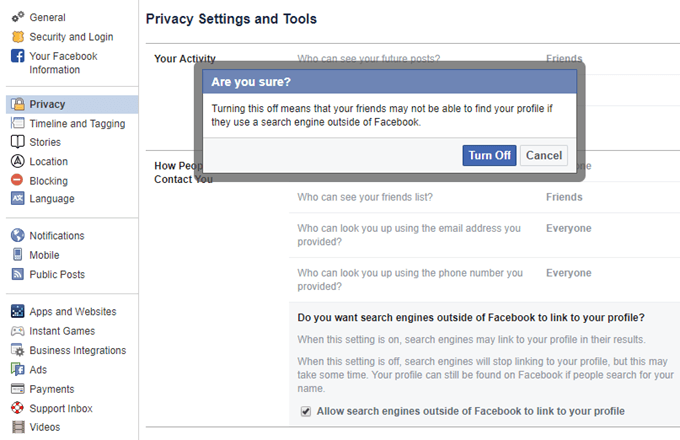
Anyone looking up your name and location on Google or another search engine can most likely find your Facebook profile. It really doesn’t take much. Fortunately, you can prevent your Facebook profile from showing up in search engines with a single change in the settings.
In Privacy, select Edit next to Do you want search engines outside of Facebook to link to your profile?, and then uncheck the box. Confirm with the Turn Off button.
Limit Tags That Other Friends Can See
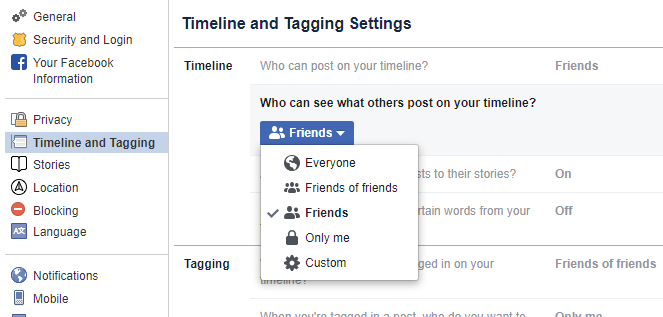
Facebook is all about being social, but you still have lots of control over how social you want to be. One example is the option to restrict who can see what other people post on your page.
Some people like to send private messages directly onto public timelines. If you don’t like your other friends seeing such posts, you can disable that function from Timeline and Tagging. Edit the Who can see what others post on your timeline? option to set up a limit.
Stop Letting Anyone Add Things to Your Timeline
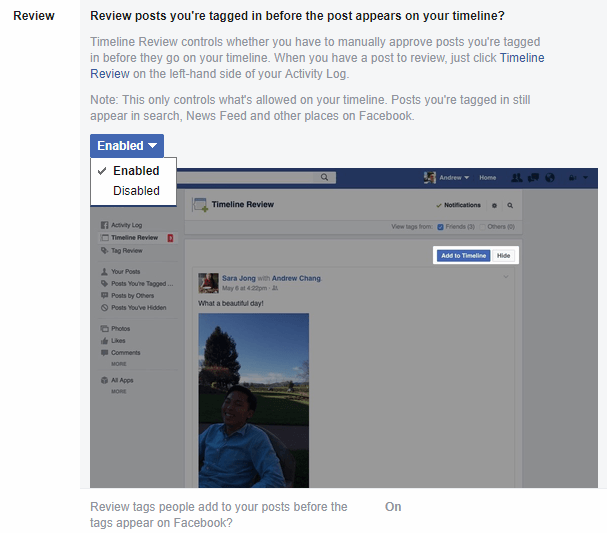
One really annoying thing that you might have happening on Facebook is that your friends can clutter up your timeline by tagging you in all sorts of things, maybe even pictures or videos you don’t want others to associate with you.
The way around this is to force Facebook to make you review each and every post before they get added to your timeline. In Timeline and Tagging, edit the item called Review posts you’re tagged in before the post appears on your timeline?. Choose Enabled.
Delete Your Facebook Location History
If your mobile device is set up to give Facebook access to your location, you might be shocked to find out that you can actually go back in time to see where you were based on that information. Facebook uses your location for things like ads, finding Wi-Fi, locating nearby friends, etc.
Although all of this information is private, it’s still a bit unsettling to know that Facebook has retained it all. To delete your location data off of Facebook, open the Location History View page, press the three-dotted menu on the upper-right side, and select Delete all location history.
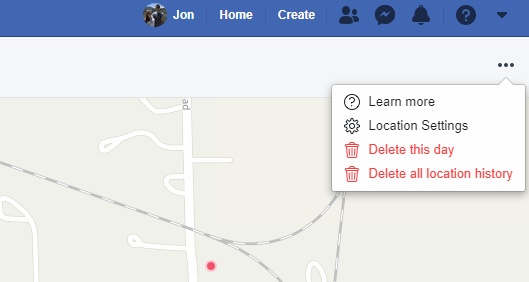
It might take a while to finish, but once the page reloads, your location data will no longer be available and will restart from today onward.