Can’t see the local music files you’ve added to Spotify on your Windows PC? If so, chances are good that the option that displays these files is disabled. We’ll show you how to enable that option as well as other ways to fix the problem.
Other reasons your local files don’t show up in Spotify include your files aren’t in a supported file format, Spotify’s cache has been corrupted, your firewall is blocking the app’s access to your files, and more.
Enable the Spotify Local Files Option
The most common reason Spotify doesn’t display your local music files is that you’ve turned off the option that helps the app recognize your files. Once you enable the option, Spotify will locate and list all your files on the app interface.
- Open the Spotify desktop app on your Windows PC.
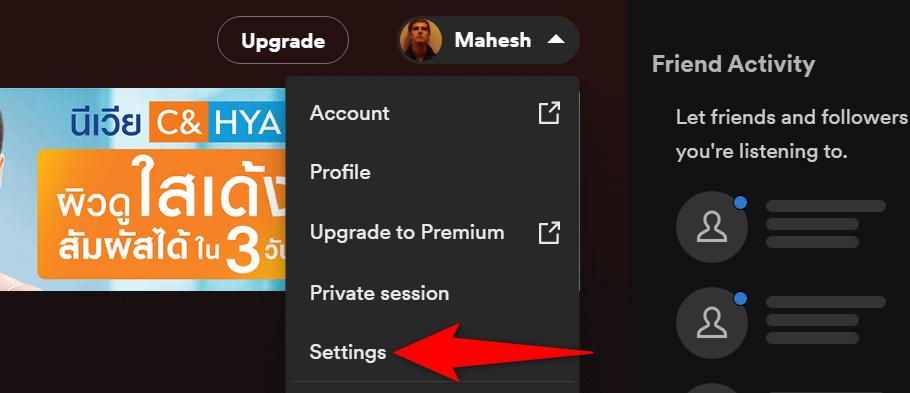
- Select your profile icon in the top-right corner and choose Settings.
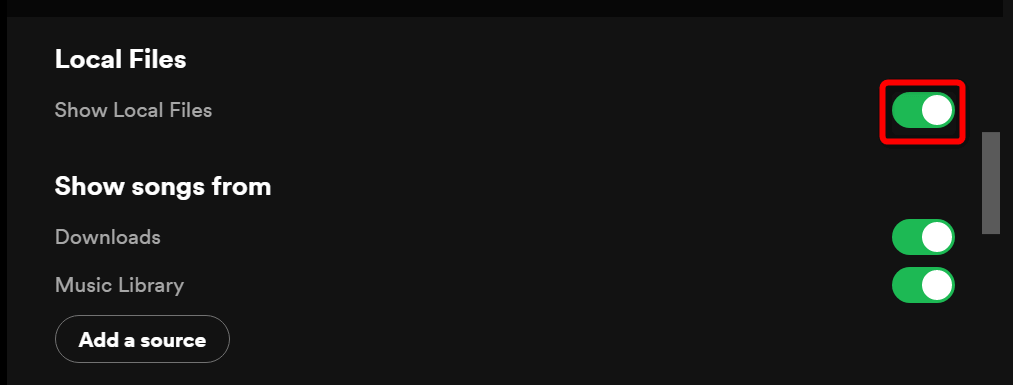
- Scroll down to the Local Files section in Settings. Then, toggle on the Show Local Files option.
- Ensure the displayed folders are where your music files are located. If that’s not the case, add your source music folder by selecting Add a source.
Make Sure Your Files Are in a Spotify-Supported Format
Spotify only supports a few file formats, and your audio files must be in one of these formats to appear in the app. The supported formats are MP3, MP4, and M4A.
If your files aren’t in one of these formats, you’ll have to convert them to a supported format before they appear in the app. There are a few ways you can change your music files’ format on your Windows PC.
Once you’ve converted your files to a supported format, place these resulting files in Spotify’s local music folder, and your files will appear in the app.
Clear the Spotify App Cache
Spotify stores and uses cache files to improve your overall experience with the app. If these files become corrupt, it can cause the app to malfunction. Your local files not showing in the app may be the result of a corrupt Spotify cache.
In this case, you can clear the app’s cache and resolve your problem. Doing so doesn’t delete your personal data, such as the music library, stored with the app.
- Open Spotify on your PC.
- Select your profile icon at the top-right corner and choose Settings.
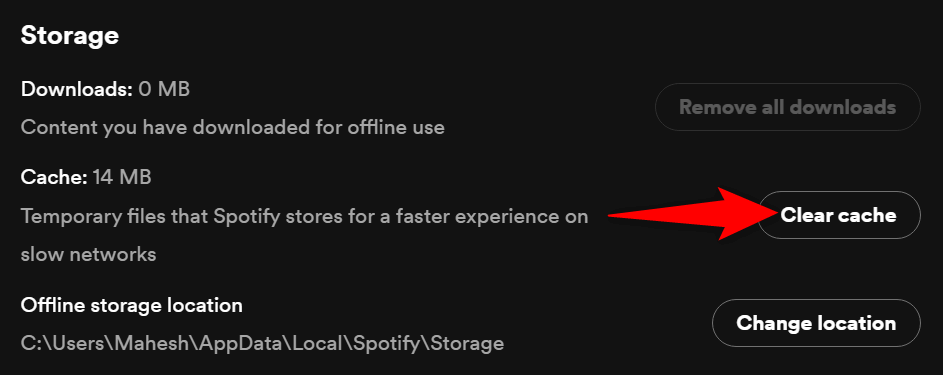
- Scroll down to the Storage section in Settings. Then, select the Clear cache button.
- Choose Clear cache in the prompt.
- Close and reopen Spotify.
Re-add Your Files to Spotify’s Local Music Folder
One reason you don’t see your local files in Spotify is that the app has minor glitches, making it difficult to recognize your files. In this case, you can remove all local audio files from the local music folder, and then re-add those files there.
- Open the folder containing your local music files in a File Explorer window.
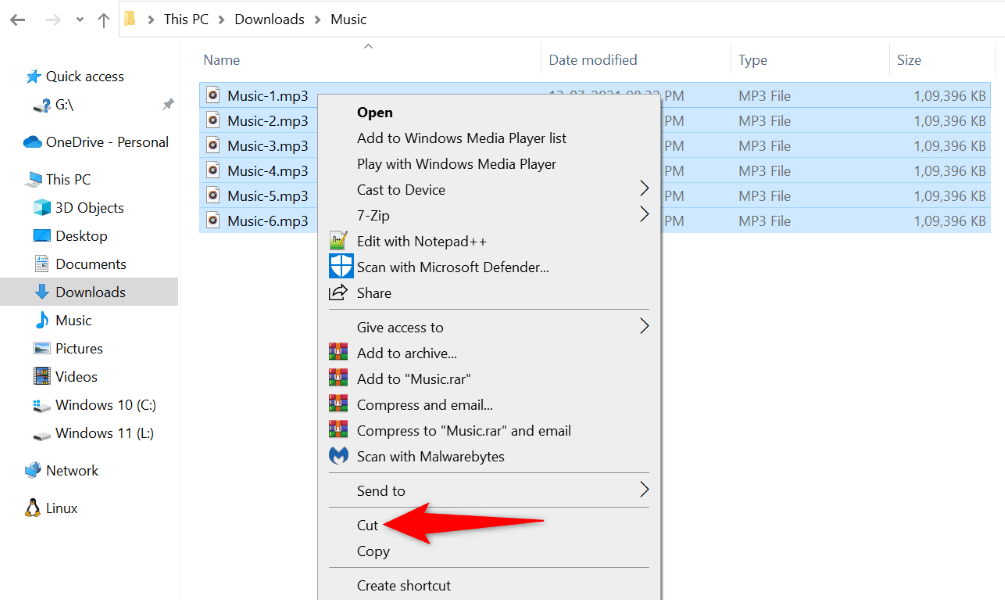
- Select all your files, right-click any one file, and choose Cut.
- Access any other folder on your storage, right-click anywhere blank, and choose Paste. You’re storing your music files temporarily in this folder.
- Launch Spotify, wait for 10 seconds, and quit the app.
- Open the folder where you pasted your music files, select all files, right-click any one file, and choose Cut.
- Go to Spotify’s local music folder, right-click anywhere blank, and choose Paste.
- Open Spotify, and you should see your local music.
Modify Your Firewall Settings to Add Spotify to the Exception List
Your PC’s Microsoft Defender Firewall (also known as Windows Defender Firewall) may be preventing Spotify’s access to your local files. This can cause your files to not appear in the app. The firewall usually does that to ensure your app isn’t accessing the content it shouldn’t.
One way to deal with this situation is to add Spotify to your firewall’s whitelist. Doing so will ensure Spotify can access all the paths it needs.
- Open the Start menu, search for Windows Security, and launch the app.
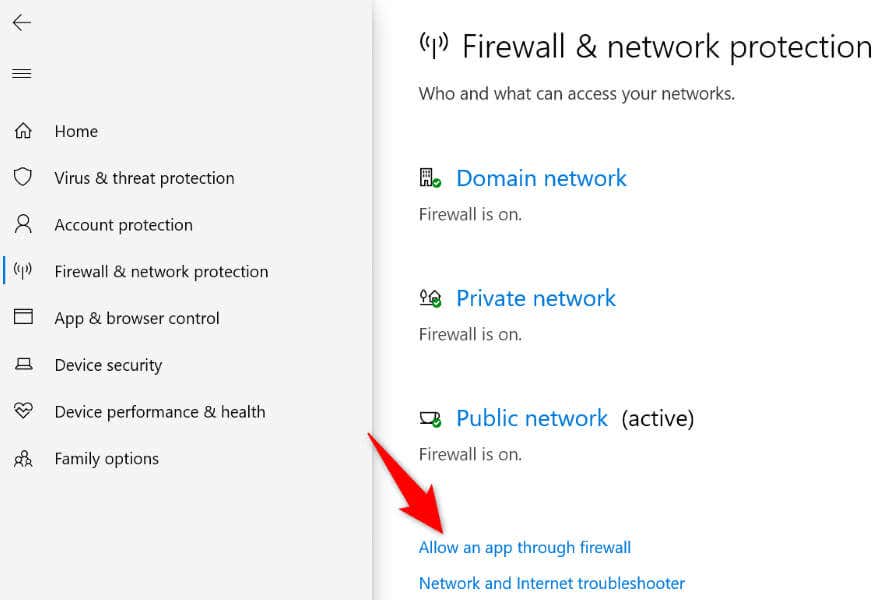
- Select Firewall & network protection in the app.
- Choose Allow an app through firewall.
- Select Change settings at the top.
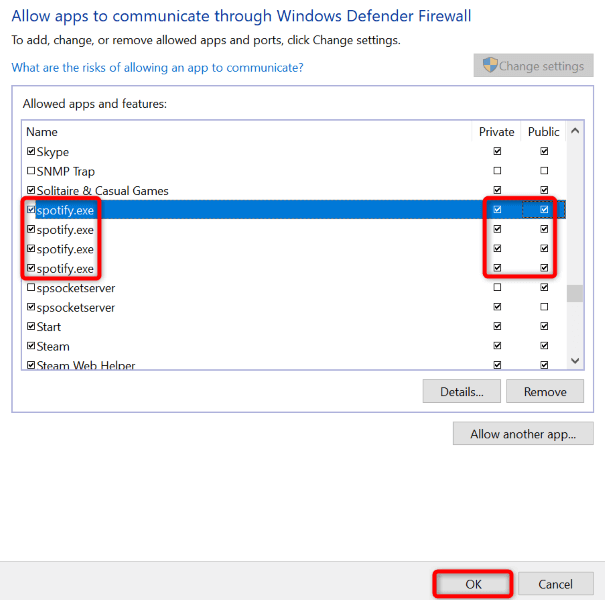
- Enable the box beside all instances of Spotify. Also, activate both Private and Public checkboxes for all Spotify instances.
- Select OK at the bottom to save your settings.
Fix Spotify’s Local Files Issue by Updating the App
You may be using an old version of Spotify on your PC. Old app versions often have issues that are patched in newer versions. In this case, you can resolve your local files issue by updating your Spotify app to the latest version.
Updating the app is as easy as selecting an option within your current app.
- Open Spotify on your machine.
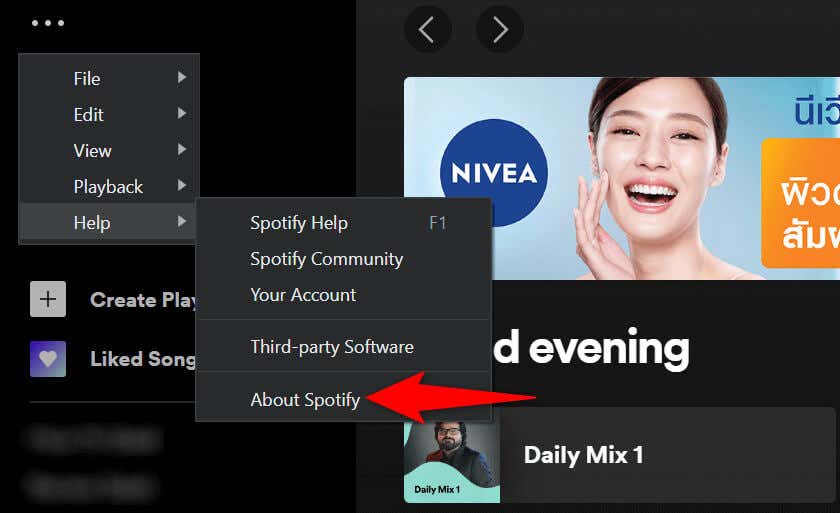
- Select File > Help > About Spotify in the app’s menu bar.
- Choose Click here to download if an update is available.
- Relaunch Spotify after you’ve downloaded and installed the available updates.
Uninstall and Reinstall Spotify on Your PC
If your local music files still won’t show up in Spotify, your last resort is to remove and reinstall the Spotify app on your computer. Doing so deletes all the app files from your storage, removing any faulty files that may be causing the issue.
You’ll need to log back into your Spotify account when you reinstall the app, so keep your login details handy.
- Open Windows Settings by pressing Windows + I.
- Select Apps in Settings.
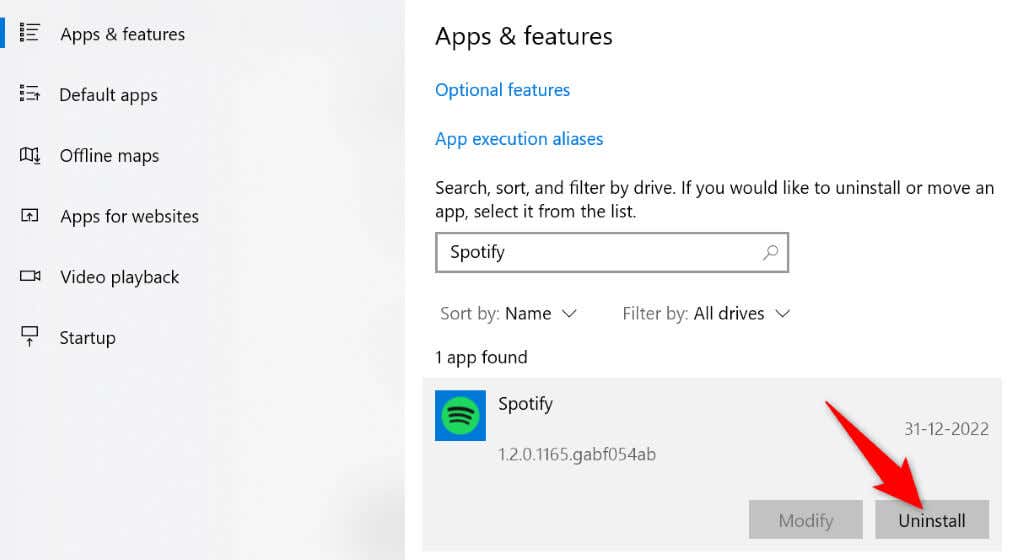
- Find and choose the Spotify application on the list. Then, select Uninstall.
- Select Uninstall in the prompt.
- Reboot your PC.
- Launch your preferred web browser, head to Spotify’s download page, and download the latest app version to your PC.
- Run the downloaded file to install the app.
Get Spotify to Show Your Local Music Files on Your Windows Machine
Many users use Spotify as both a streaming app and a local media player. If you’re one of these Spotify users, and the app simply stops displaying your own music files, you’ll be more than frustrated.
Luckily, the issue won’t stay for too long if you follow the methods outlined above. Once you’ve fixed the item causing the problem, your local files will start showing on your Spotify interface, and you’ll be able to enjoy both online and offline music playback on your computer. Happy streaming!
Related Posts
- How to Fix Spotify “Error Code: Auth 74” in Windows
- Preparing for Windows 10 End of Support: Upgrading to Windows 11
- How to Fix a “This file does not have an app associated with it” Error on Windows
- How to Fix an Update Error 0x800705b4 on Windows
- How to Resolve “A JavaScript error occured in the main process” Error on Windows
