Whether you’re interested in a career in cybersecurity, or just want to learn more about Linux and computers, Kali is a good Linux distribution to use. It’s free, comes from a reputable cybersecurity company, Offensive Security, and is pre-loaded with most of the security research tools a person needs. Let’s learn how to install and use Kali Linux.
Kali Linux installs on ARM devices like Raspberry Pi, virtual machine hosts like VMWare and VirtualBox, or directly onto hardware like a laptop or PC. Installation is roughly the same for Kali Linux on VMWare, VirtualBox, Raspberry Pi, or as the main operating system of your laptop or desktop computer.
Installing Kali Linux On a Laptop or Desktop Computer
An ISO is a file that is a copy of the data you would find on an installation DVD, including the filesystem. So, if you had a disk to install Kali Linux and made a copy that you could use to install it, that copy would be an ISO file.
There are a few ways that you can install Kali from an ISO. You could make a bootable USB drive or DVD and then install it on hardware like a laptop or PC. Use our article How to Create, Mount, and Burn ISO Image Files for Free to help. Or you could use it to create a virtual machine (VM).
- Go to Offensive Security’s Kali Linux Downloads page and select the right download for you. We’ll be using the Kali Linux 64-Bit Installer. You can do a direct download or use their Torrent links.
Use the ISO to create a bootable USB drive or DVD or use it as the install disk for a VM.
- Start the device you’re installing Kali Linux on. If you made a bootable USB or DVD, make sure that’s inserted first. In a few moments, the Kali Linux Installer appears. For first timers, select Graphical install.
What looks like a failure error message may appear. Let it continue.
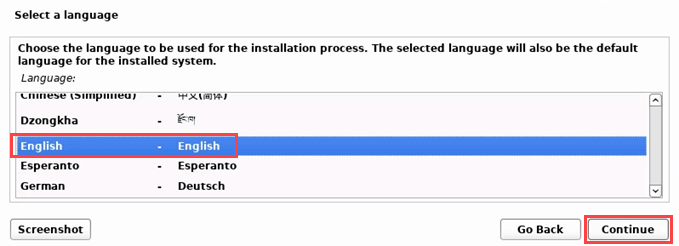
- Select a language, then Continue.
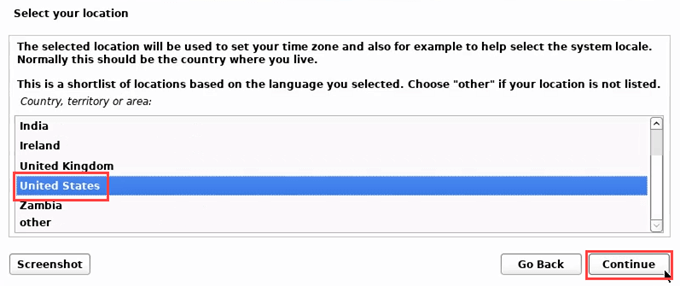
- Select your location. If the time zone you want to use isn’t in that location, don’t select it. It’s common for Canadians to just use the United States. If they do that, they’ll miss out on some time zones, like the Atlantic (UTC -4). Select Continue.
- Select a keymap to use with the keyboard, there are plenty to choose from.
Select Continue and it will detect and mount the ISO. Once it finds it, it will do some automatic procedures.
- To put the Kali Linux machine on the network, set a hostname.
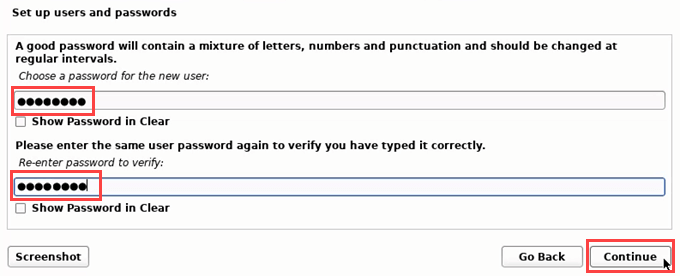
- Now set up users and passwords. These are not for administrative users, but for normal users.
- Create a secure password.
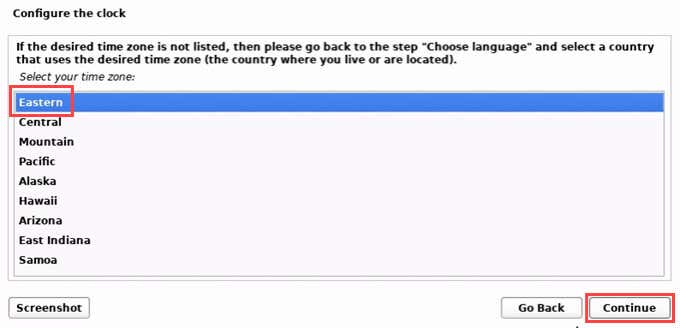
- Choose your time zone.
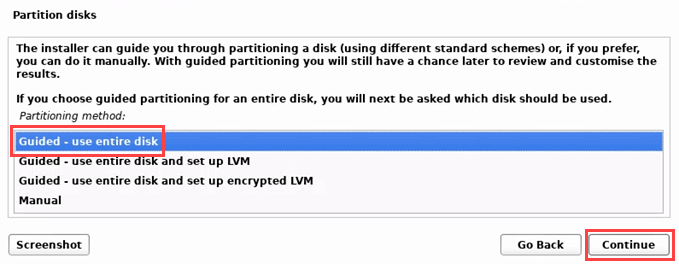
- Now the Linux Kali installation will take you through disk partitioning. If you’re using the device only for Kali, choose Guided – use the entire disk.
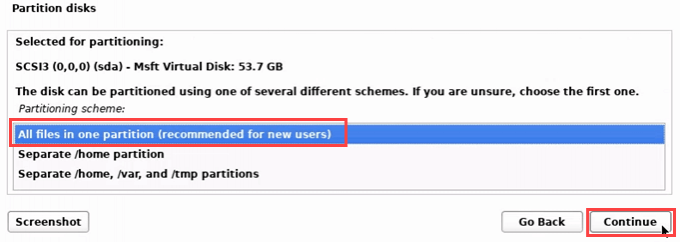
- The disk can be partitioned, but a basic install doesn’t require that.
- Choose the partition type. For new users, choose All files in one partition.
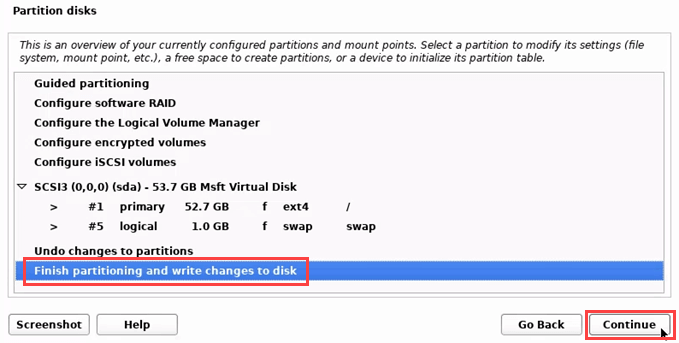
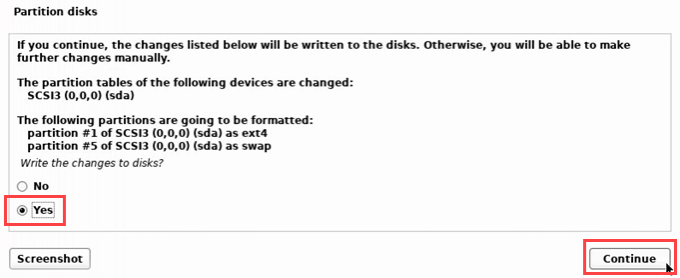
- Since it’s not being partitioned, choose Finish partitioning and write changes to disk.
- It will ask if you’re sure. Select Yes and Continue.
Linux Kali will install now.
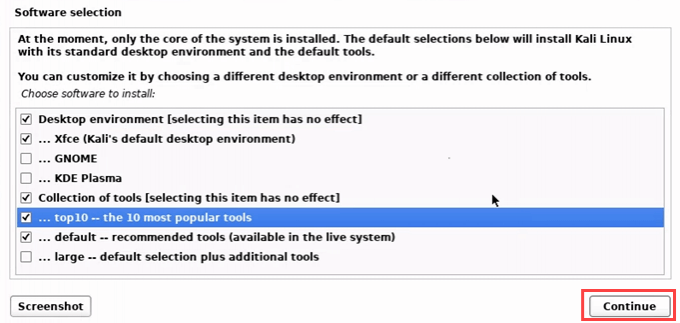
- Now you can choose what tools to install. If you’re not sure, go with the defaults. That will give you an excellent selection of tools to learn.
The tools will install.
- Now Kali Linux will ask to install the GRUB bootloader or not. Yes is the default.
It will ask what device to install GRUB on. There’s only one, so select that.
- Once the installation completes, make sure to eject the USB drive or DVD. Select Continue to finish it.
The installation will start finishing. Yes, the wording is strange in the install.
Some white text on a black background may scroll by. Just wait.
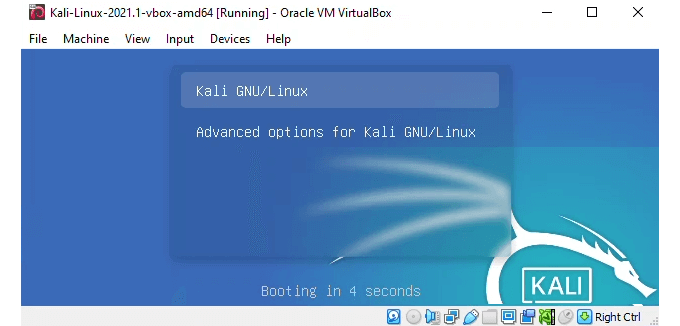
Kali Linux will boot and give the option to boot into Kali GNU/Linux or Advanced options for Kali GNU/Linux. The first is the default and will auto select if you don’t choose.
- Login to Kali Linux and enjoy.
Installing Kali Linux As a Virtual Machine
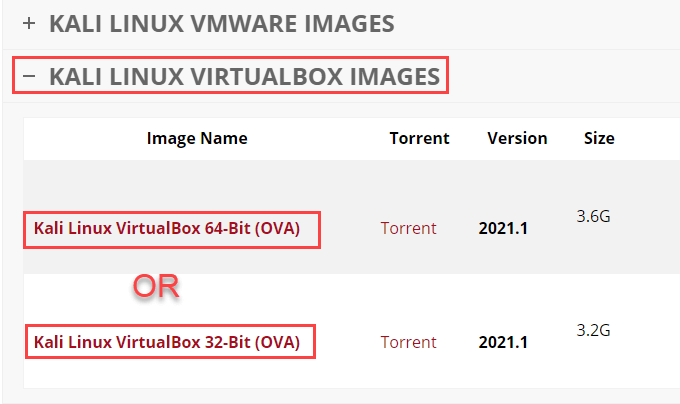
A custom VM image is the fastest way to create a Kali Linux virtual machine. Offensive Security provides images to use on VirtualBox or VMWare. We’ll be using VirtualBox for this installation and we’ll assume you have VirtualBox already installed.
Prepare by downloading the Kali Linux image from Offensive Security’s site. Note that all images have the username kali and the password kali already set. Change that when you log in for the first time.
- In Oracle VM VirtualBox Manager, select Import.
- Source defaults to Local File System. Leave it as it is. Select the yellow folder icon to navigate to the downloaded image. Then select Next.
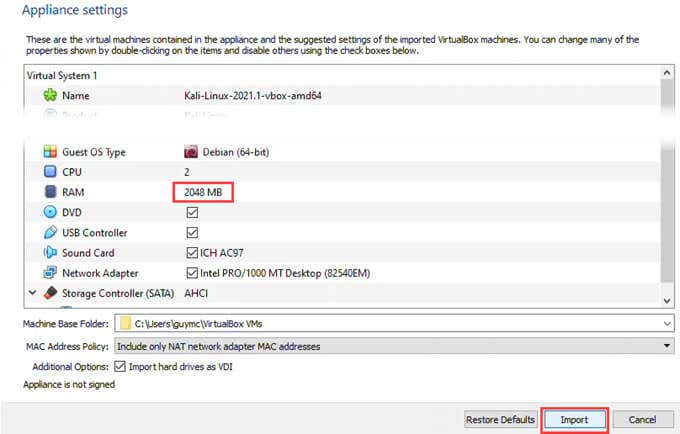
- The default Appliance settings will work, barely. Increase the RAM and CPU if you can. Select Import.
- After you’ve read the Software License Agreement, select Agree to continue.
Importing will begin. This could finish in under 10 minutes.
- Once the import finishes, you’ll see the Kali Linux install listed in VirtualBox. Select it and then select Start.
- It will briefly give you the option to boot into Kali Gnu/Linux or Advanced options for Kali Gnu/Linux. It will default to the first option.
Log in to your new Kali Linux VM using the username kali and password kali. Remember to change them immediately.
What Can You Do With Kali Linux?
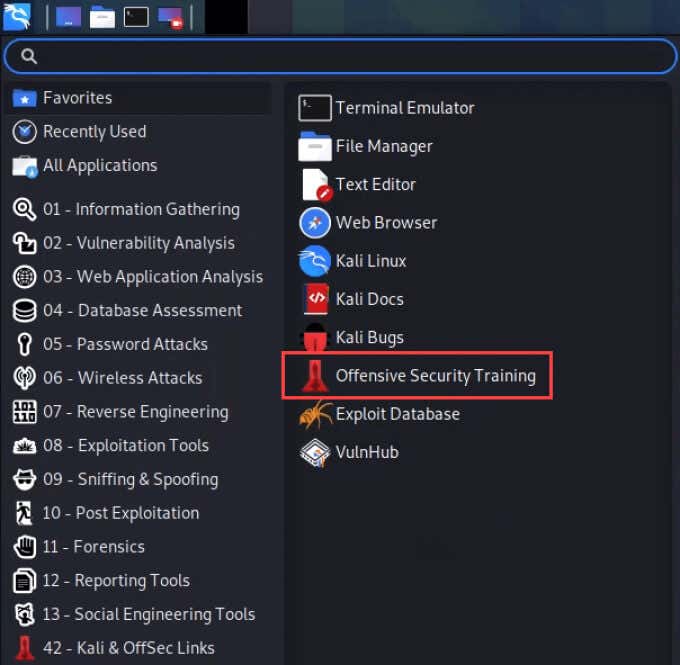
Kali is essentially ordinary Linux with a bunch of security tools already installed and ready to go. You can also add more tools to Kali easily. Some are free and fully featured, while some require a paid upgrade to get all the functions. All have their place in security research. In the Applications menu, notice how the tools are grouped by function.
Also, notice there is a link to Offensive Security’s training. These are tools, not toys and will require serious study. Let’s look at a few of the most popular tools in Kali Linux.
Wireshark
If you want to work in IT, learn to use Wireshark. It’s the best-known network analyzer. Use Wireshark to see what’s happening on a network, and knowing Wireshark looks good on a resume.
You can capture packets to analyze the contents and figure out how the network functions and the data traveling on it, like usernames and passwords. Wireshark has great built-in documentation and the Wireshark community is large and helpful.
Aircrack-ng
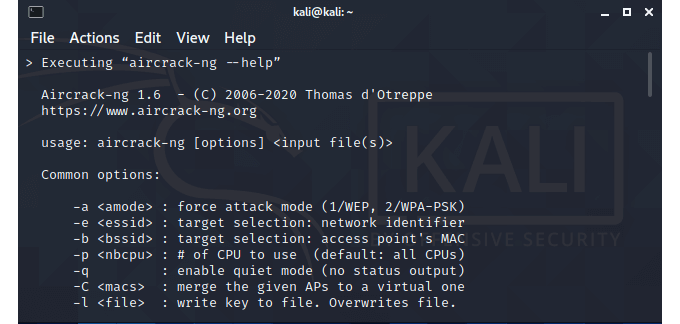
As the name suggests, Aircrack-ng can gather Wi-Fi data that’s flying around and help crack the security keys being transmitted. This helps you get into a network without being in the building.
Metasploit
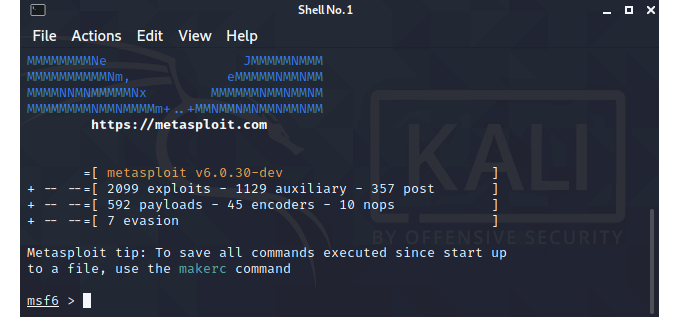
It’s not a single tool, but more a framework or platform to help you find and validate vulnerabilities. It can discover devices, collect evidence, gain access and take control of systems. The free version is great for most pen-testing beginners, but you’ll want to upgrade when you go pro. Pen testers rely heavily on Metasploit.
Burp Suite
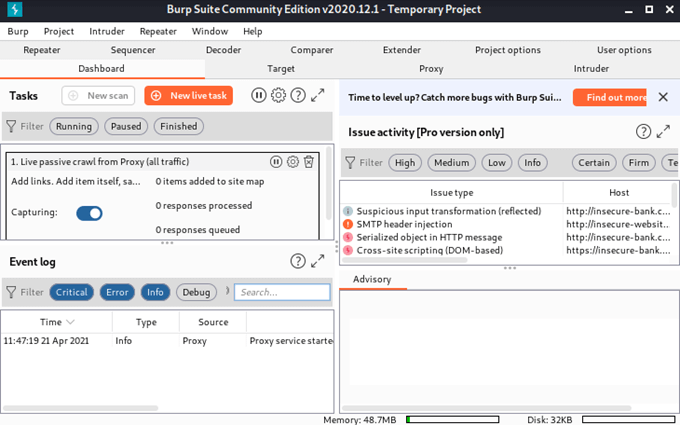
This tool has been around for a long time, and for good reason. It’s the go-to tool for testing web application security. If you develop web apps, learn Burp Suite and use it to make sure your end project is watertight.
John the Ripper
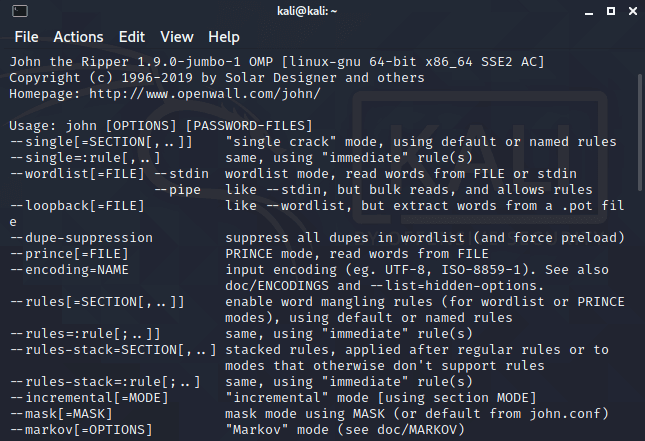
Cracking passwords is what gets most of us into things like Kali Linux. You can use John the Ripper to test passwords that people have and let them know to make better passwords.
It can also be used to recover forgotten passwords for things like Excel. It does this by deciphering hashed passwords stored by your system. You can see how this is valuable to computer forensics and security professionals.
What Will You Do With Kali Linux?
Whether it’s for securing your network, penetration testing, white-hat hacking, computer forensics, or becoming a security professional, Kali Linux is the ultimate multi-tool. The price is right, and you can be up and running in minutes. What will you do with Kali Linux?
Related Posts
Guy has been published online and in print newspapers, nominated for writing awards, and cited in scholarly papers due to his ability to speak tech to anyone, but still prefers analog watches. Read Guy’s Full Bio
