
Windows Disk Management often can’t grow your C: drive, especially when there isn’t contiguous unallocated space immediately to the right, and quietly refuses operations that GParted handles without complaint. GParted is a free, open-source partition editor that runs from a bootable USB, requires no installation, and supports NTFS, ext2/3/4, FAT16/32, btrfs, HFS+, XFS, and more.
What is GParted?
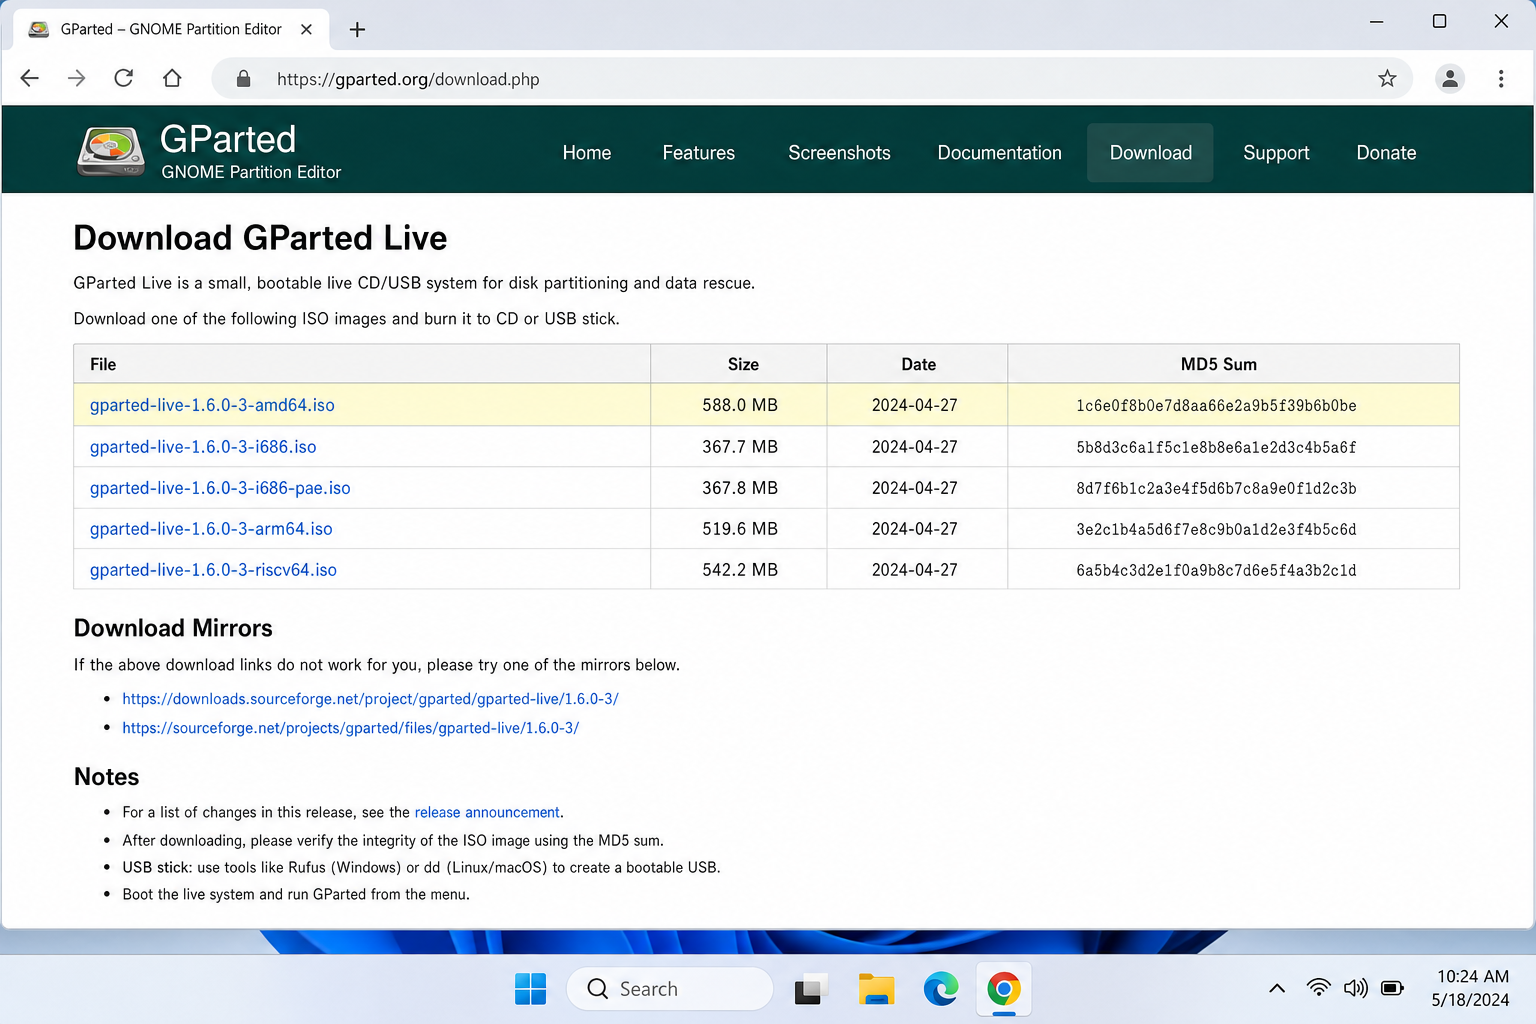
GParted (GNOME Partition Editor) is a Linux-based graphical partition tool distributed as a bootable ISO called GParted Live. You write it to a USB drive, boot from it on any x86-64 PC, and get a full GUI for resizing, creating, deleting, copying, and flagging partitions, all without touching your Windows installation. Always download the latest GParted Live ISO directly from the official GParted download page to ensure you have the most current stable release.
Key things to know before you start:
- GParted does not run inside Windows, you must boot from USB
- GParted Live is available for both 64-bit (amd64) and 32-bit (i686) PCs. Choose amd64 for any modern system; requires at least 1 GB RAM
- Always back up your data before resizing or moving partitions
- GParted supports manual partition copying but has no one-click cloning wizard. If cloning a disk is your main goal, a dedicated tool like AOMEI Backupper or MiniTool is safer and simpler
Step 1: Download GParted Live and Create a Bootable USB
Step 1a: Download the ISO
- Go to gparted.org/download.php.
- Download the latest amd64 ISO for any modern 64-bit PC (an i686 ISO is also available for older 32-bit systems).
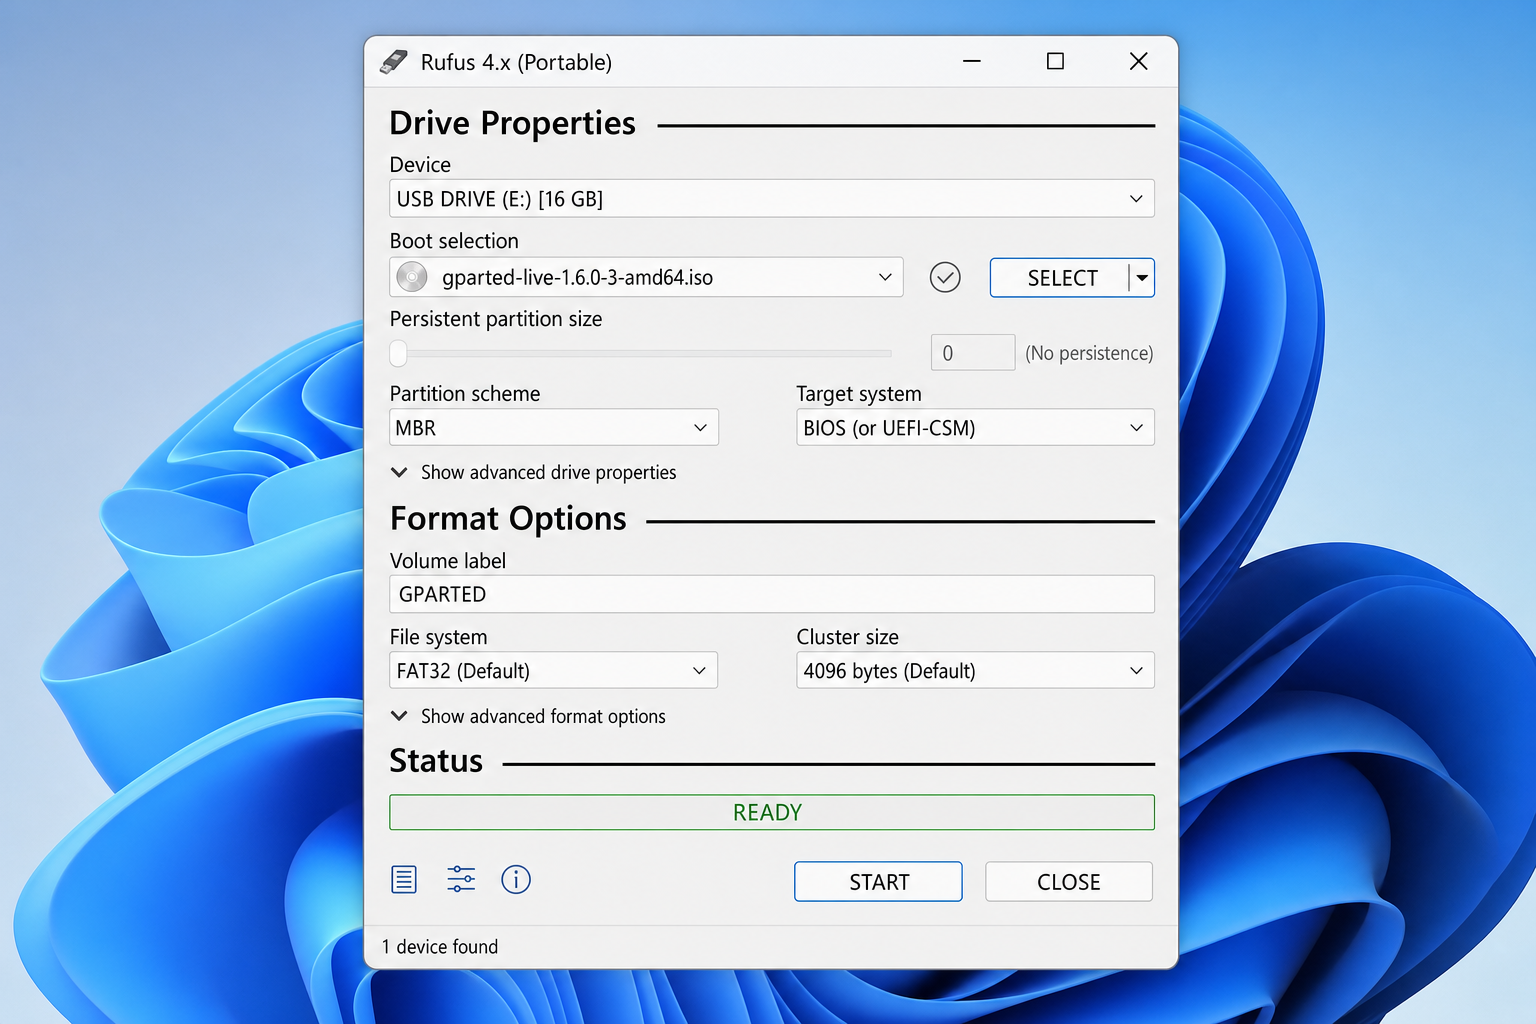
Step 1b: Write the ISO to a USB drive with Rufus
- Download Rufus (free and portable, no install needed) and run it.
- Plug in a USB drive (16 GB or larger recommended). Everything on it will be erased.
- Under Device, select your USB drive.
- Under Boot selection, click SELECT and browse to the GParted ISO you downloaded.
- Leave all other settings at their defaults and click START.
- When Rufus finishes, click CLOSE.
Step 2: Boot into GParted Live
- Insert the USB drive and restart your PC.
- As the PC powers on, press the key to enter your BIOS/UEFI, typically
F2,F12,Del, orEscdepending on your motherboard. The key is usually shown briefly on the POST screen. - In the BIOS boot menu, set your USB drive as the first boot device and save.
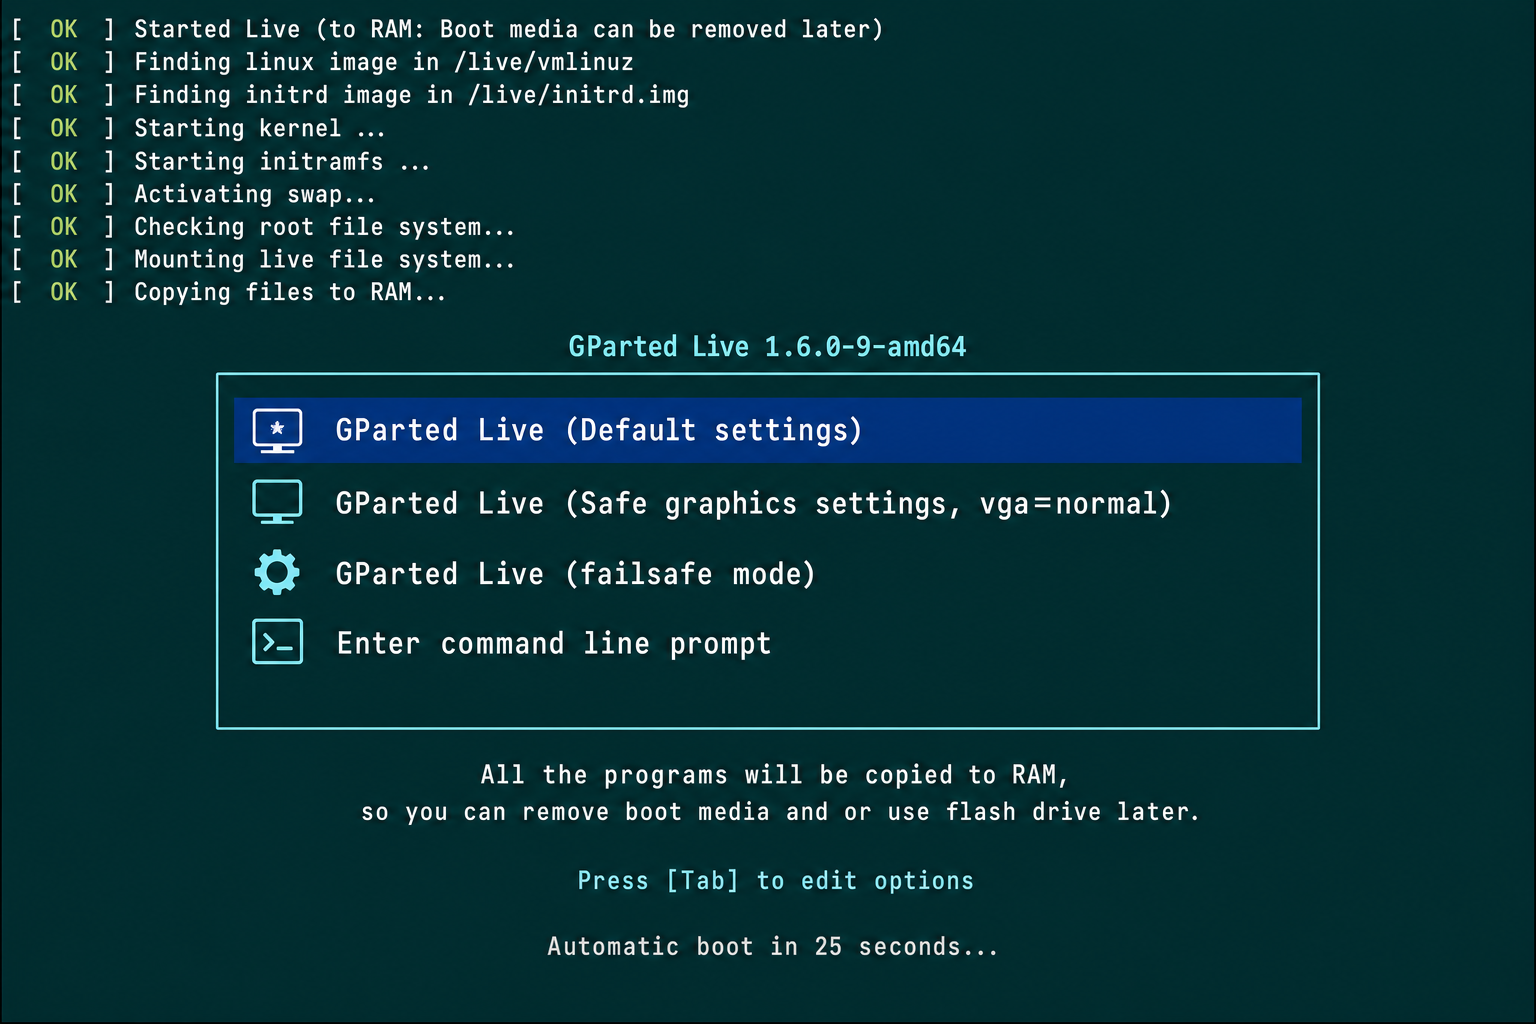
- Your PC will reboot into the GParted Live boot menu.
UEFI & Secure Boot note: On most modern Windows 10/11 systems, you may need to temporarily disable Secure Boot in your UEFI firmware settings before GParted Live will boot. Also make sure Rufus created the USB in UEFI (GPT) mode, if you see a “Secure Boot violation” or the USB simply doesn’t appear as a boot option, this is the most likely cause.
Once you’re done with GParted, re-enable Secure Boot. Additionally, if your disk uses GPT (common on UEFI systems), be careful not to delete or resize the EFI System Partition (ESP), doing so will prevent Windows from booting.
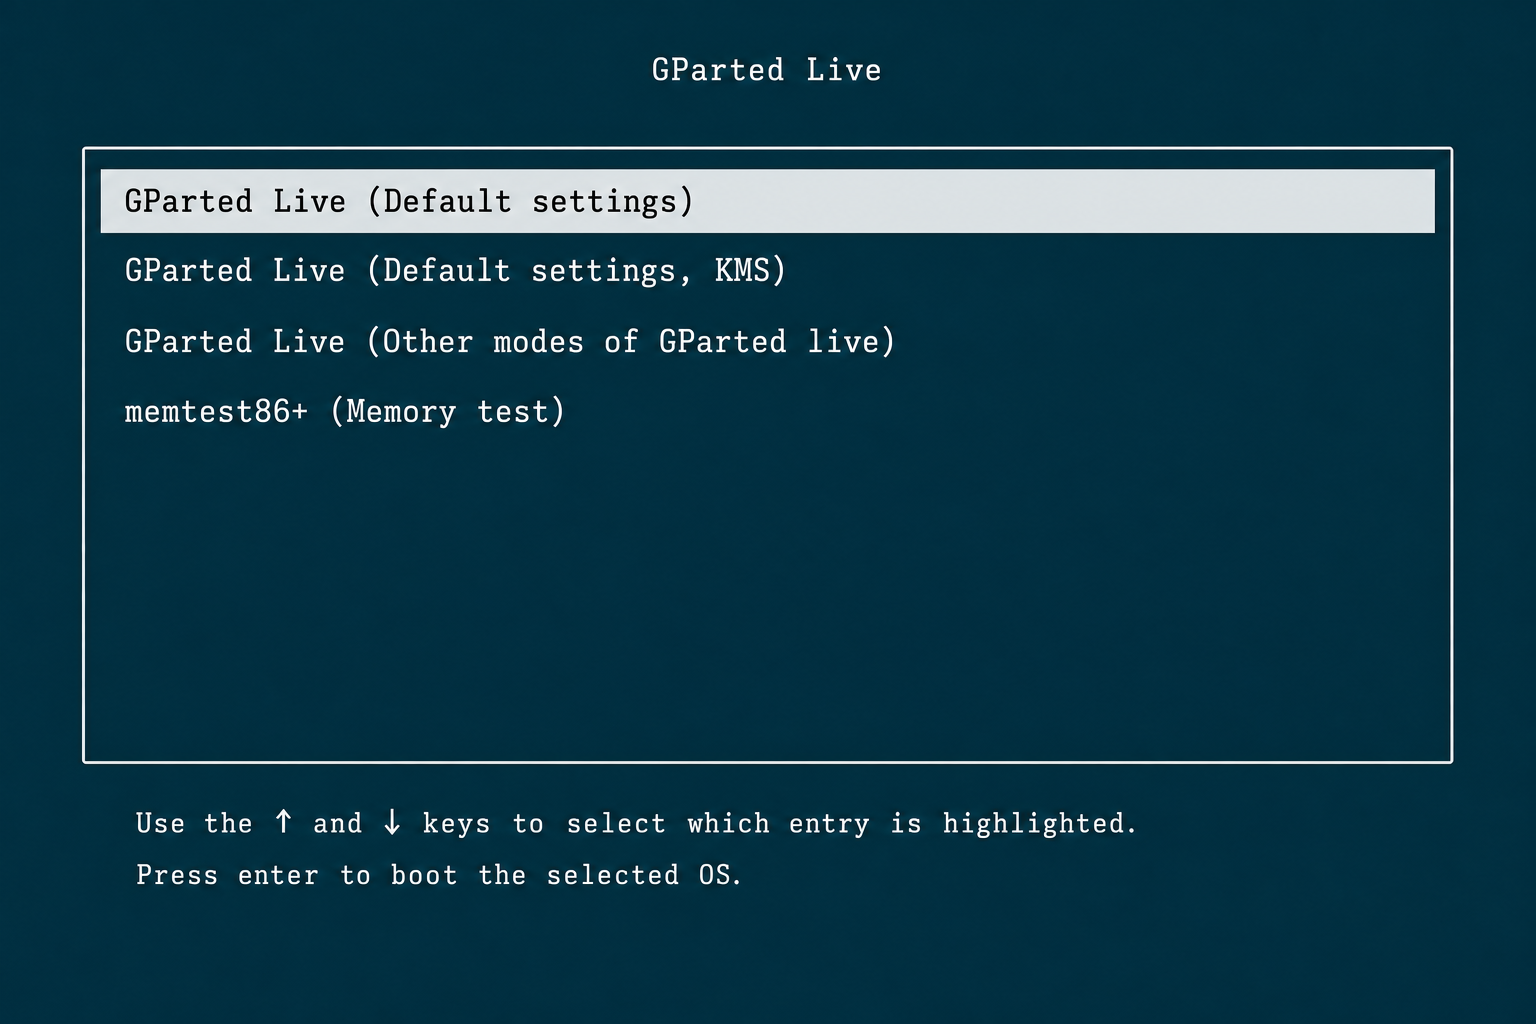
- Select GParted Live (Default settings) and press
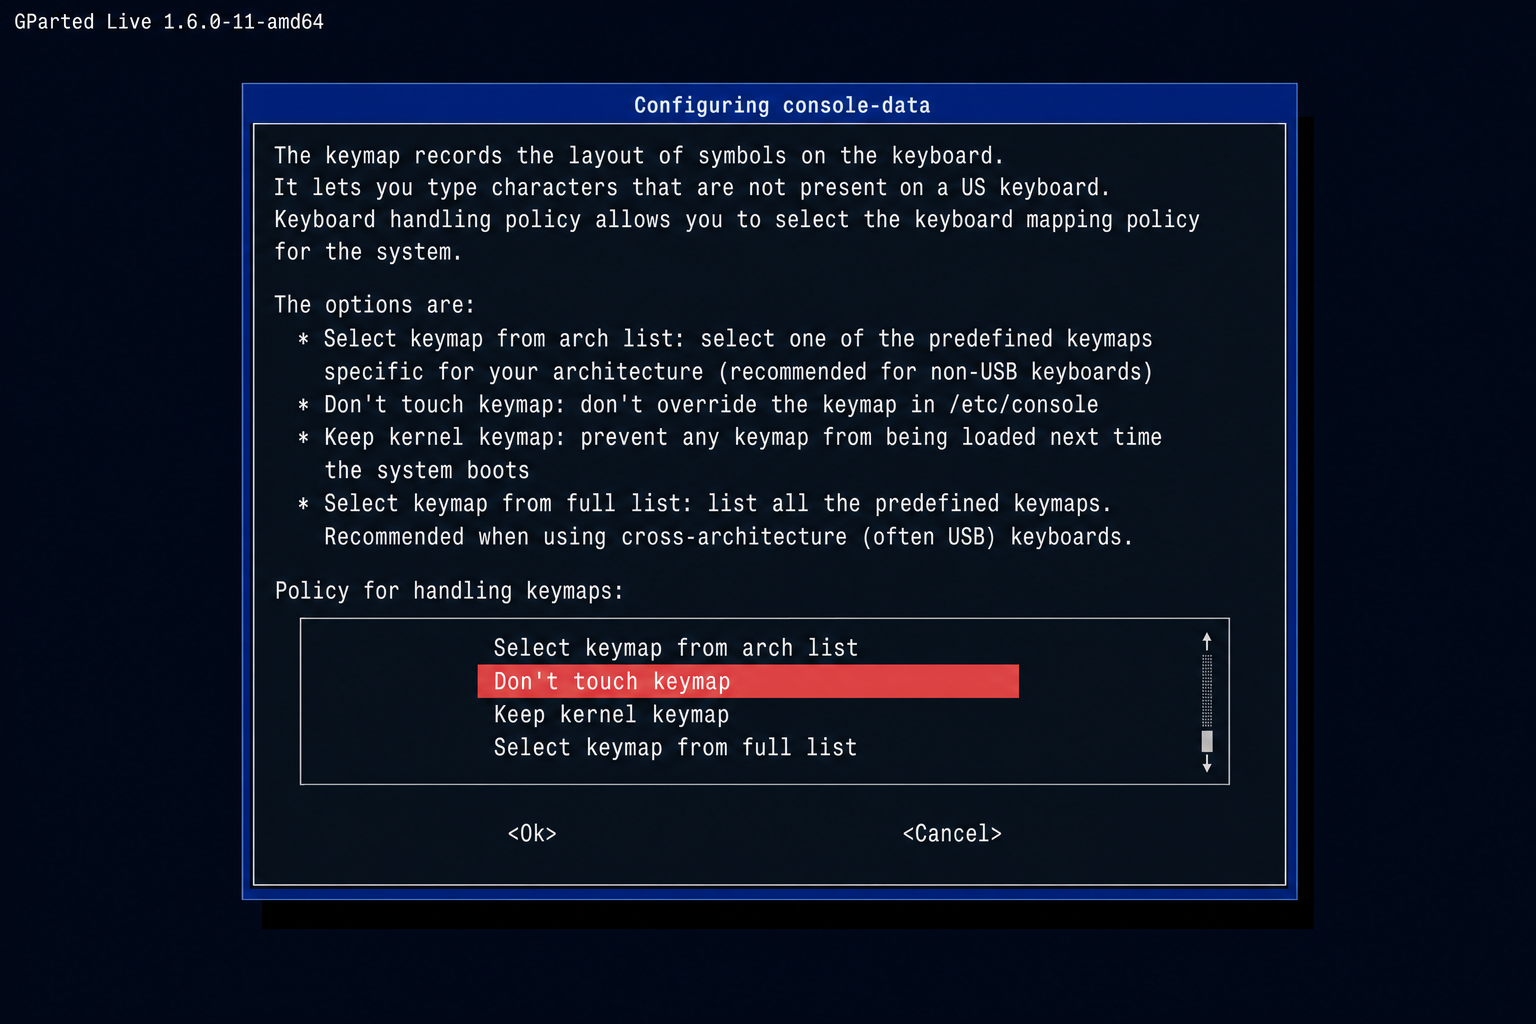
Enter. If the display doesn’t load correctly, reboot and choose Other modes > GParted Live (Safe graphics, vga-normal) instead. - At the keymap screen, select Don’t touch keymap and press
Enter.
- At the language screen, press
Enterto accept the default (English). - At the mode screen, press
Enteragain to boot into the graphical desktop.
GParted will launch automatically once the desktop loads.
Step 3: Read Your Partition Layout
The main GParted window shows every partition on the selected disk as a horizontal bar, with a table below listing the file system, size, used space, unused space, and any flags (like boot).
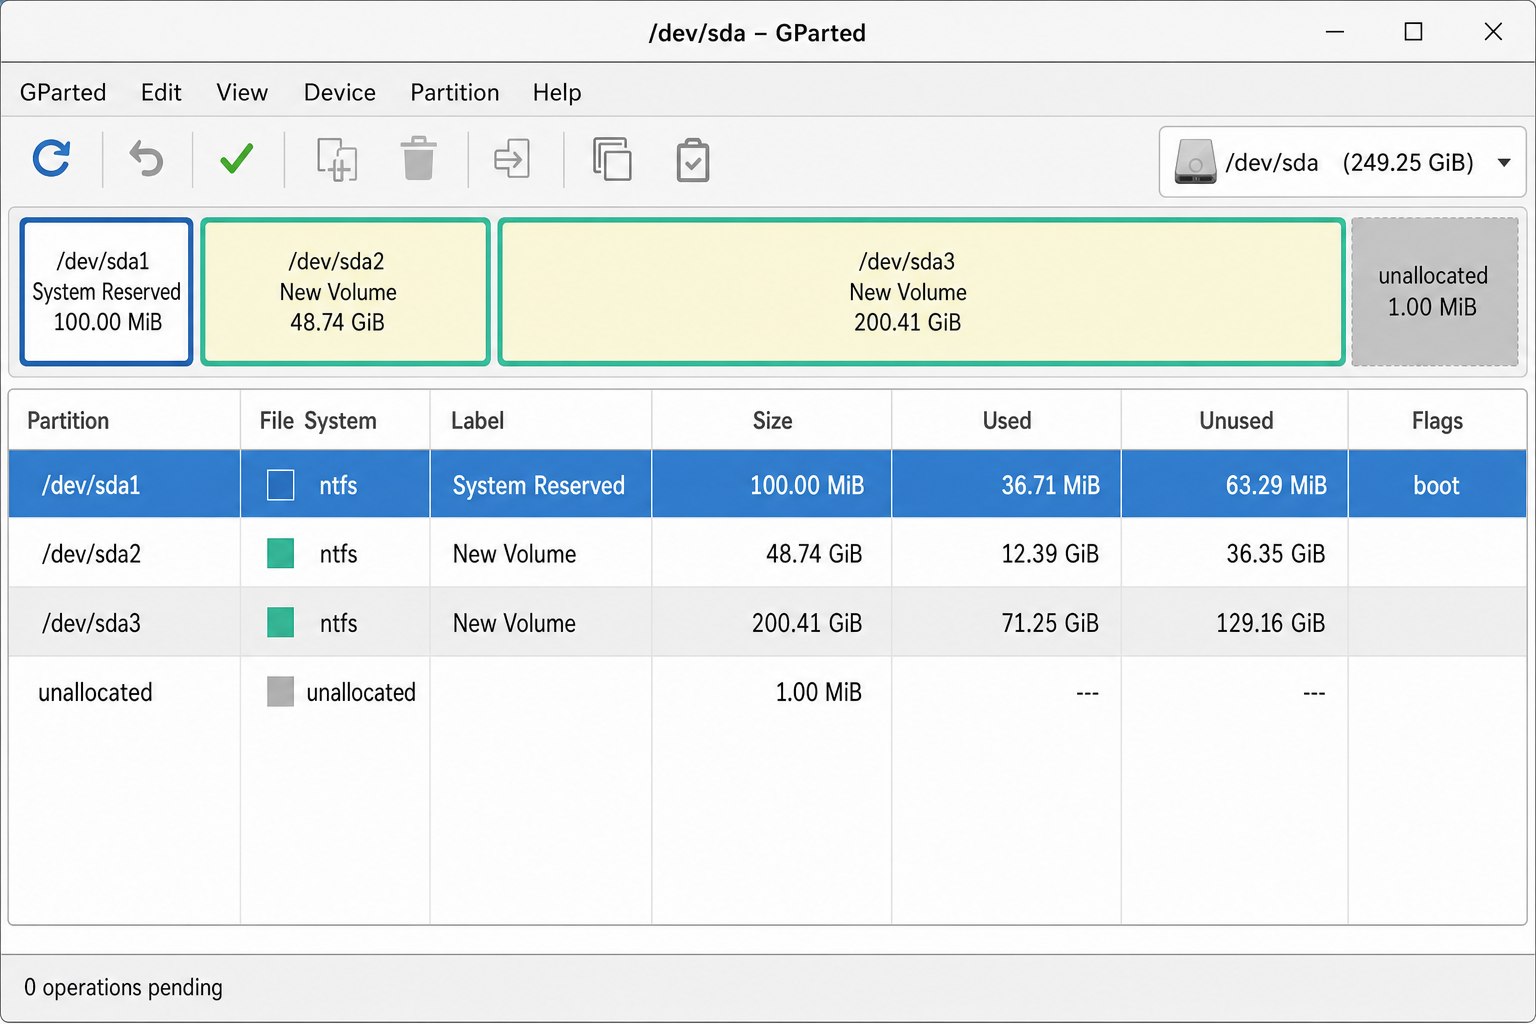
- Use the dropdown in the top-right corner to switch between disks (e.g.,
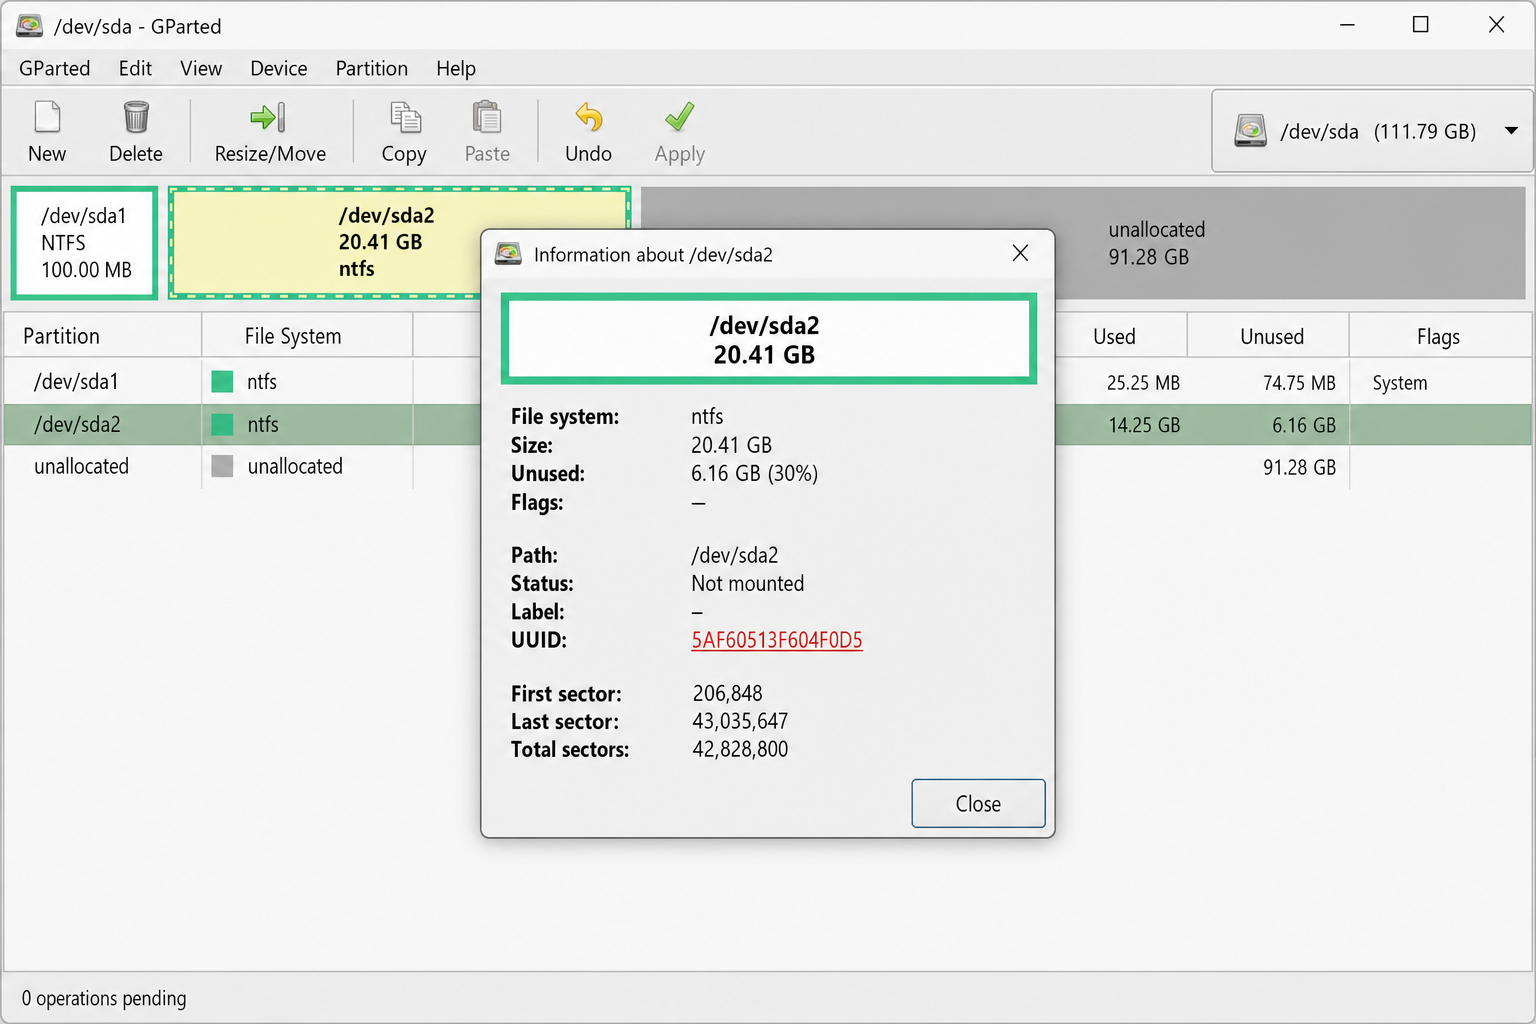
/dev/sda,/dev/sdb). Make sure you’re looking at the right disk before making any changes. - Right-click any partition and choose Information to see full details including UUID, mount point, and label.
OEM & Recovery partition warning: Many Windows laptops and branded desktops include small, vendor-created partitions labeled Recovery, OEM, DIAGS, or similar. These partitions power your manufacturer’s factory-reset and hardware-diagnostic features.
Do not resize, move, or delete them unless you fully understand the consequences. Removing them will permanently break your system’s built-in recovery options. If you’re unsure whether a partition is safe to touch, leave it alone and only work on the partitions you can clearly identify (such as your main Windows NTFS volume or a data drive).
Step 4: Resize a Partition
This is GParted’s most-used feature, particularly for shrinking or growing NTFS partitions that Windows Disk Management won’t touch.
BitLocker warning: If the partition you plan to resize is protected by BitLocker (or any third-party disk encryption), you must suspend or fully turn off BitLocker before proceeding. Resizing an encrypted partition without doing so can corrupt the volume or make it unrecoverable.
In Windows, go to Control Panel > BitLocker Drive Encryption and choose Suspend protection (or Turn off BitLocker) for the relevant drive. After GParted is done and you’ve confirmed Windows boots correctly, you can re-enable BitLocker.
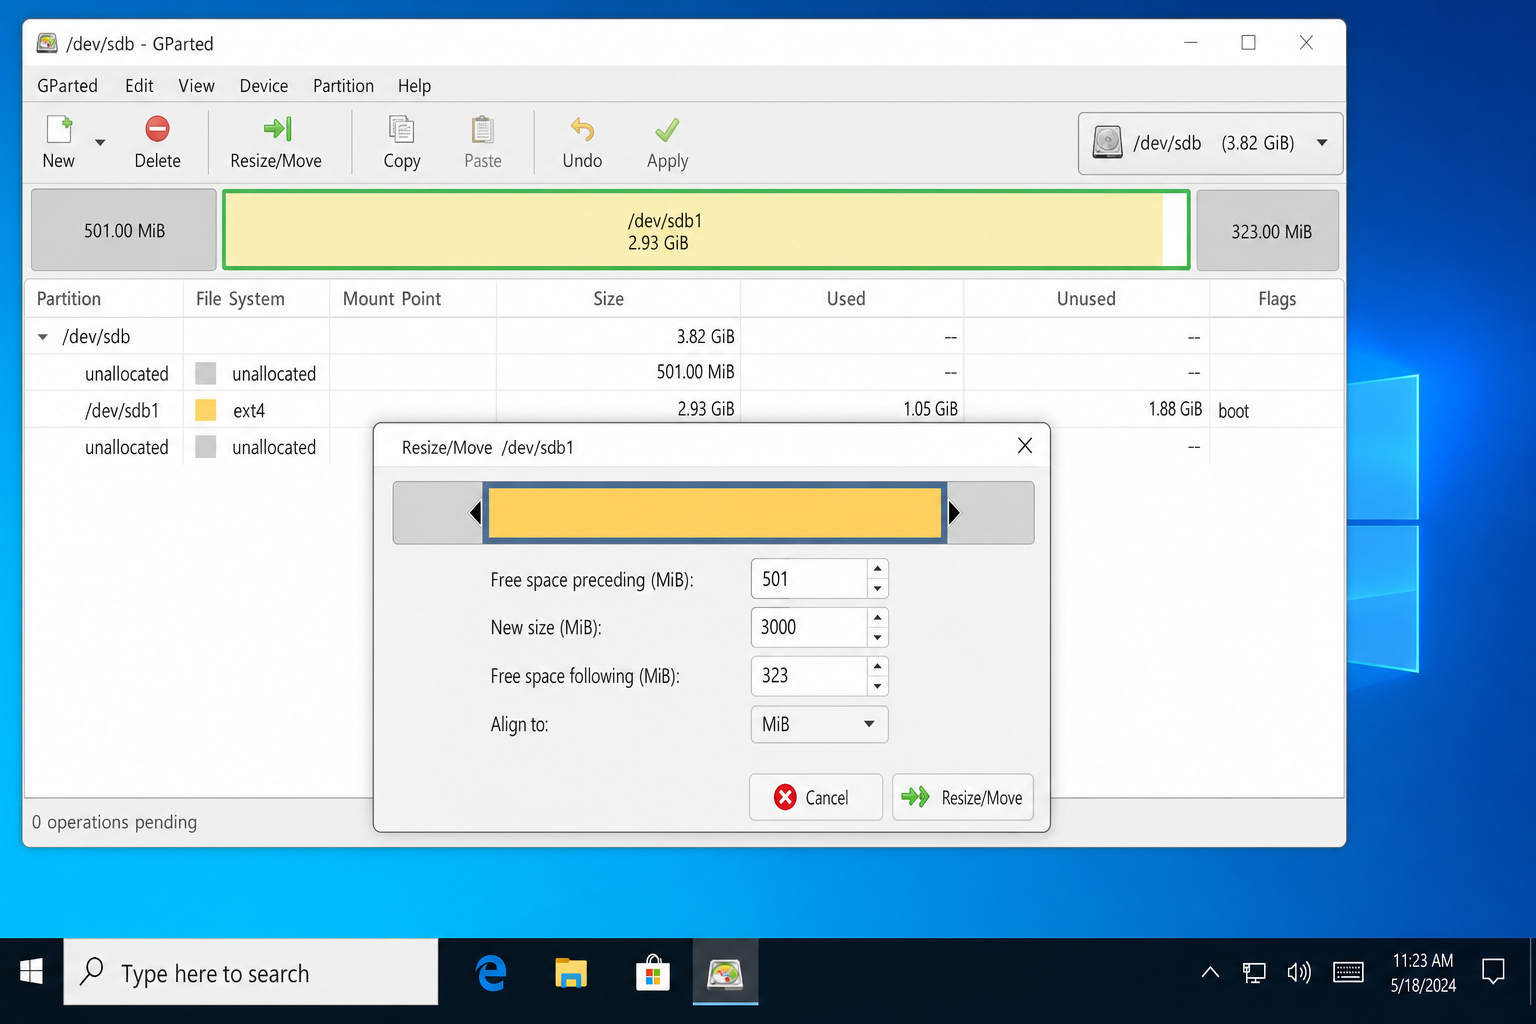
- Right-click the partition you want to resize and choose Resize/Move.
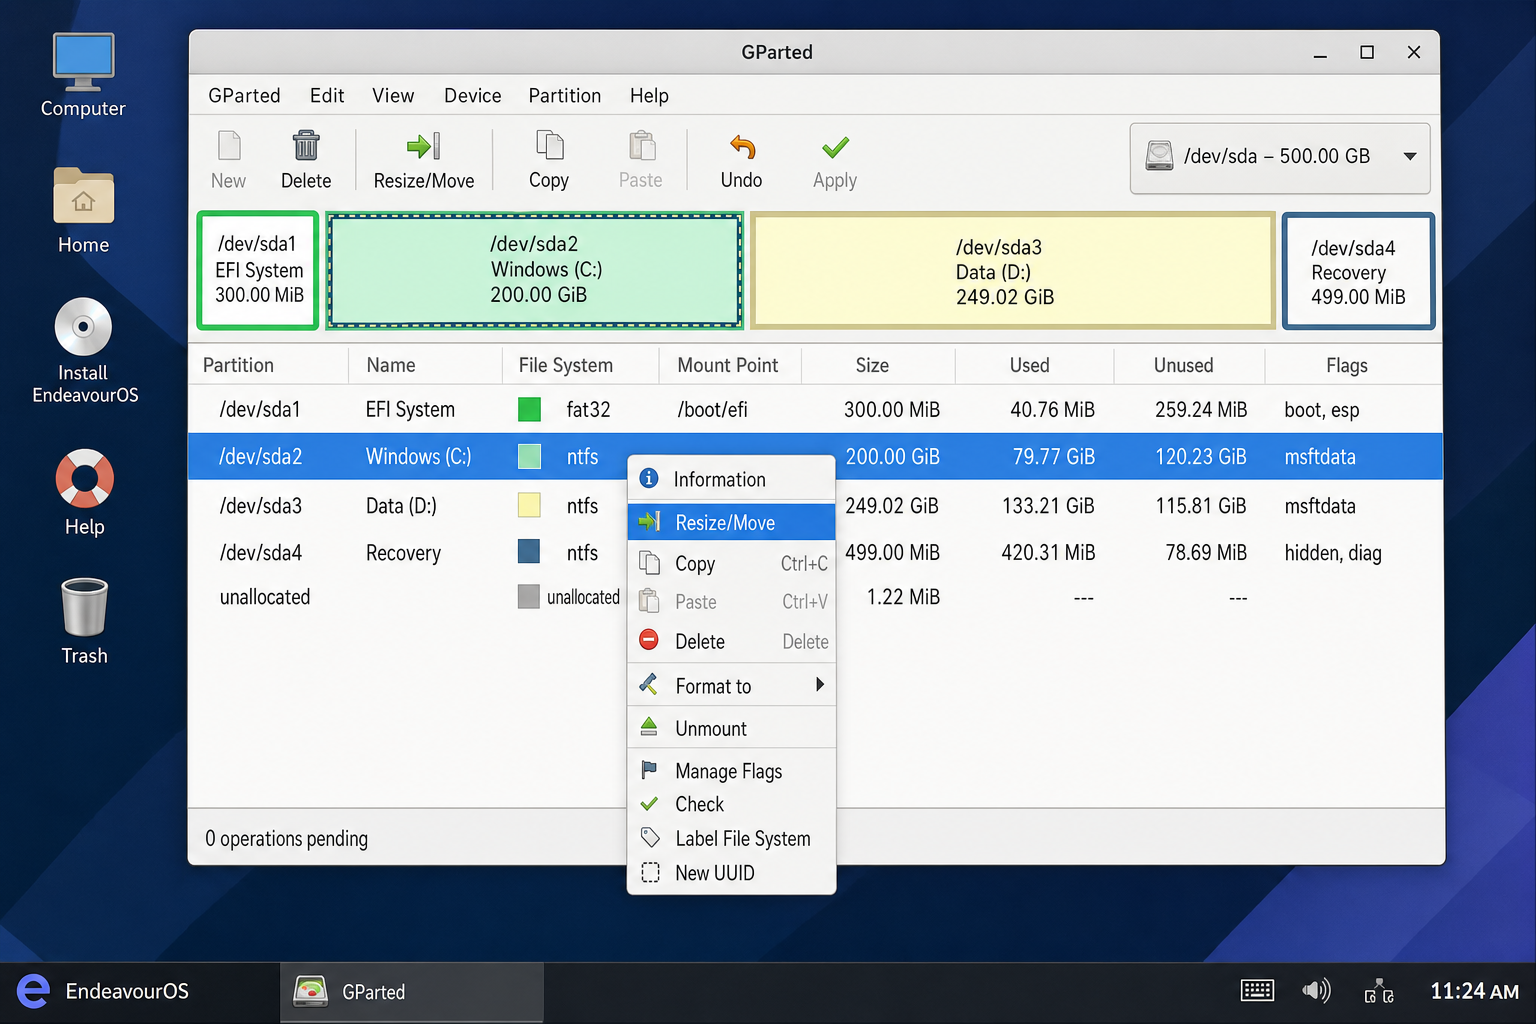
- In the Resize/Move dialog, drag the left or right edge of the partition bar, or type a value directly into the New size (MiB) field.
- Click Resize/Move to queue the operation.
- Click the green checkmark (Apply All Operations) in the toolbar to commit the change. GParted will warn you that this cannot be undone. Click Apply to proceed.
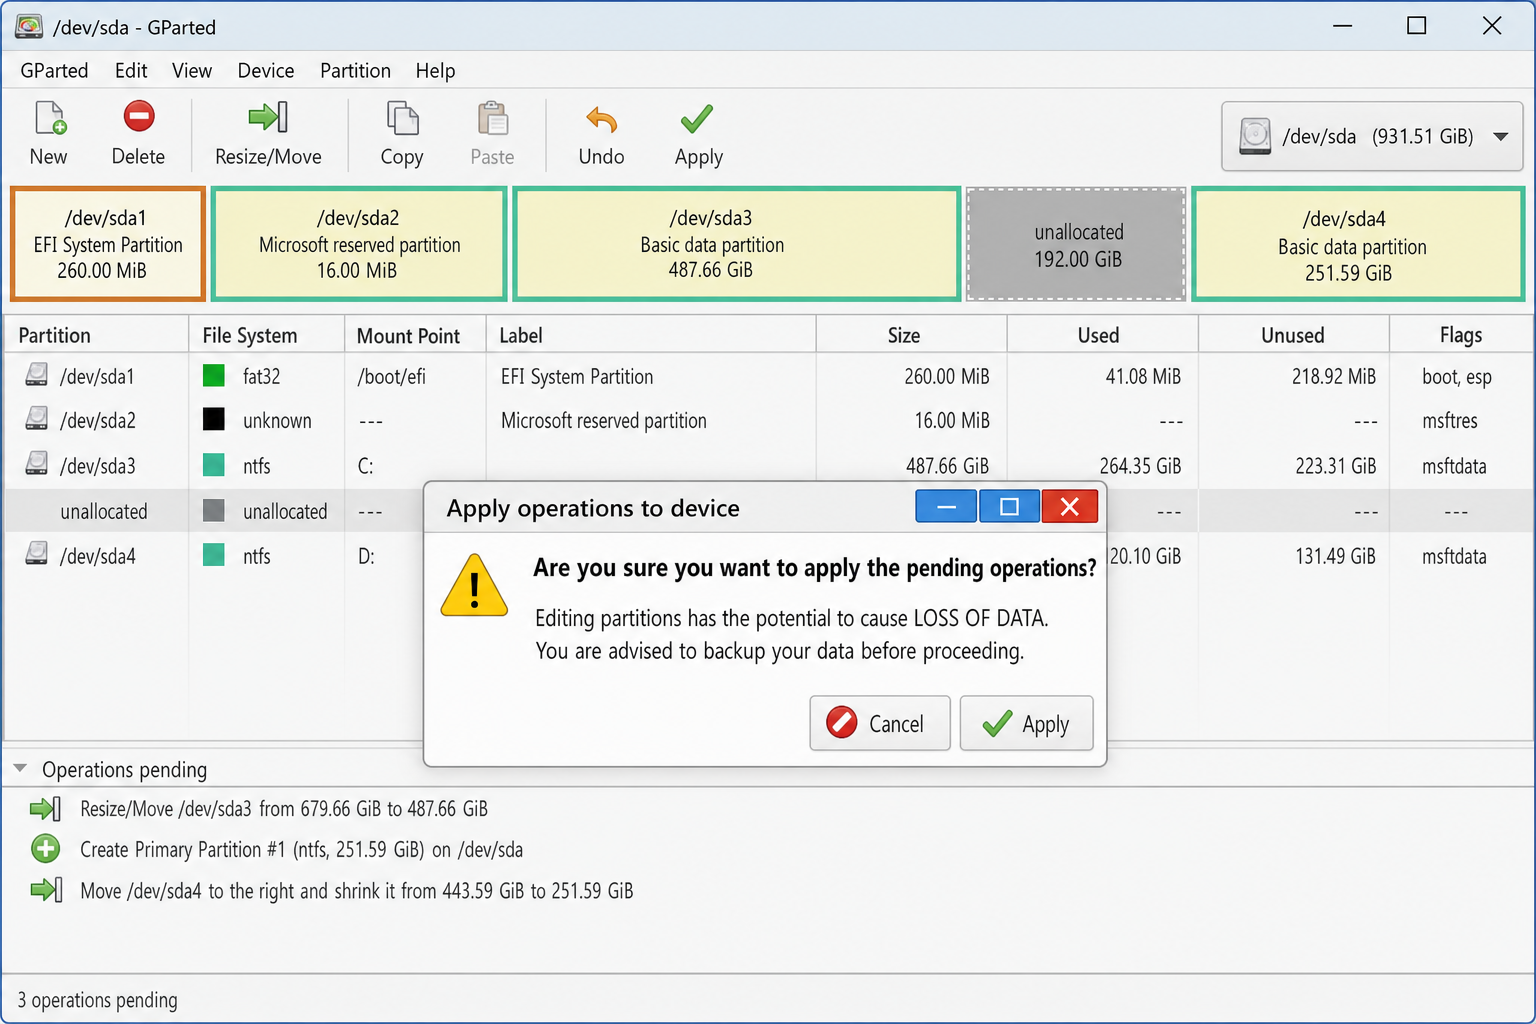
A progress dialog will show each operation as it runs. When it finishes, click Close.
Step 5: Create a New Partition
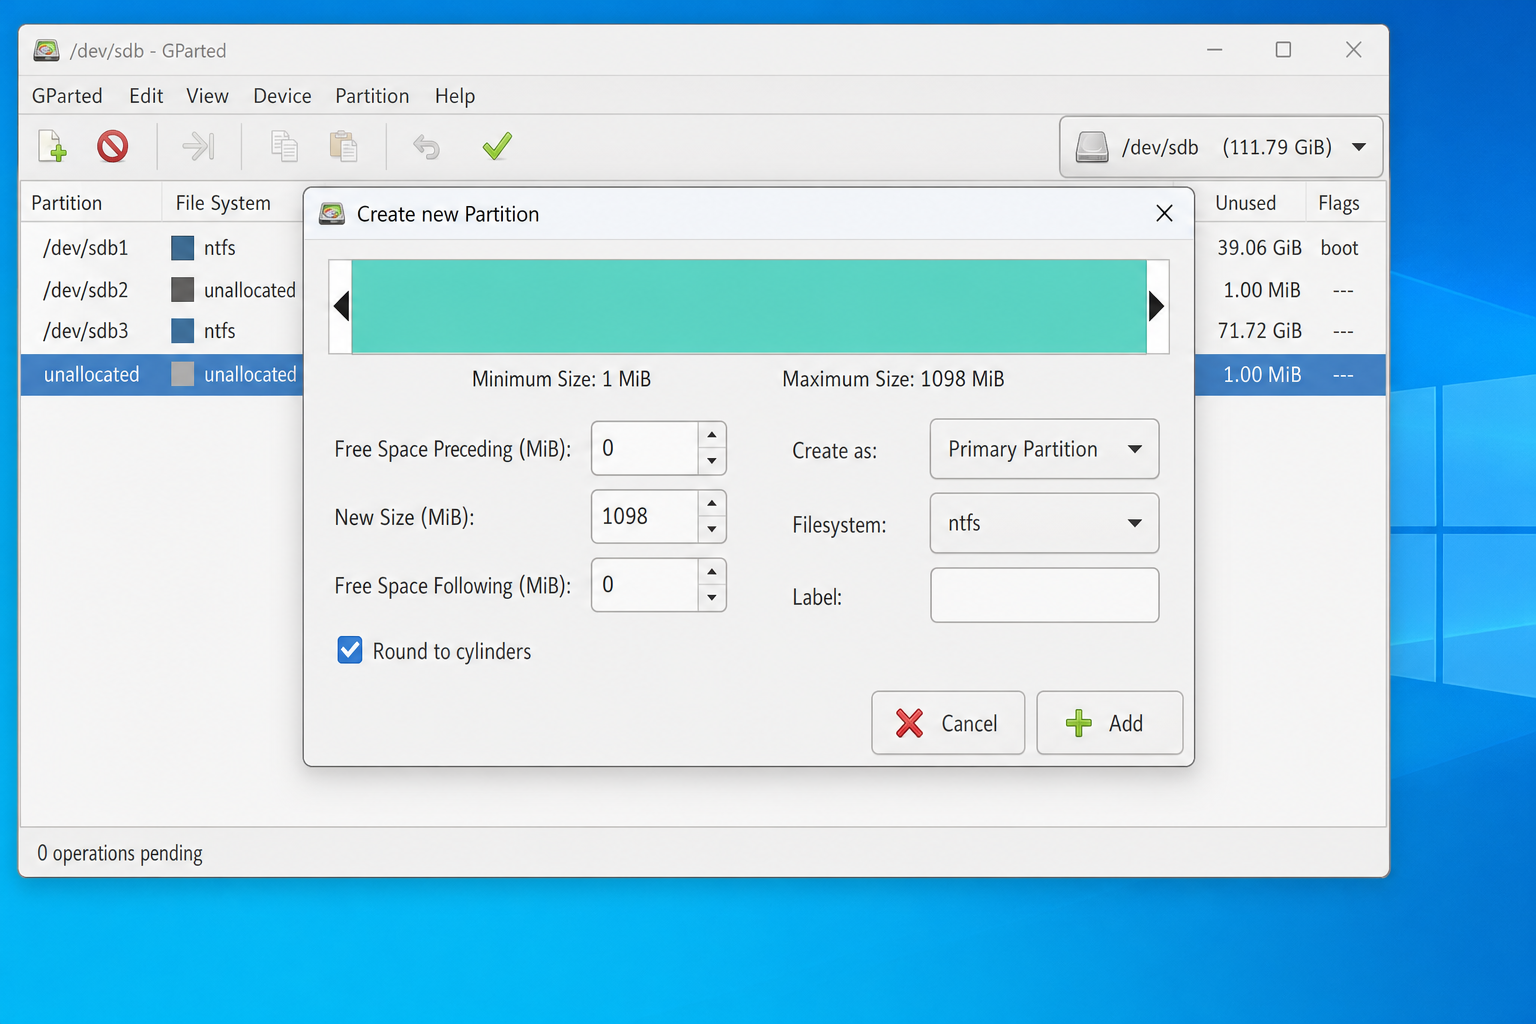
- If there’s unallocated space on the disk, right-click it and choose New.
- In the Create new Partition dialog, set the partition size, choose the file system (e.g., ntfs for Windows drives), and select Primary Partition or Logical Partition as needed.
- Add a label if you want (optional).
- Click Add to queue the operation, then click the green checkmark to apply.
Step 6: Exit GParted and Boot Back Into Windows
- Close GParted when you’re done.
- Click the desktop menu and choose Exit > Restart.
- Remove the USB drive when prompted so the PC boots from your hard drive.
If Windows fails to boot after resizing a system partition, boot from a Windows recovery USB and run bootrec /fixmbr and bootrec /fixboot from the recovery command prompt to repair the bootloader. Note that on UEFI/GPT systems these commands may not apply, and you may instead need bcdboot C:\Windows or the Startup Repair option in the Windows Recovery Environment.
GParted vs. Windows Built-In Tools
GParted isn’t always the right tool for the job. Here’s when to use it versus the alternatives:
| Tool | Best for | Limitations |
|---|---|---|
| GParted | Resizing system partitions, advanced partition work, free | Requires bootable USB; no one-click cloning wizard (manual copy is possible but error-prone) |
| Disk Management (diskmgmt.msc) | Simple shrink/extend on non-system NTFS volumes | Often can’t grow C: drive without contiguous unallocated space; limited resize options |
| diskpart | Boot fixes, scripted partition work, assigning drive letters | Command-line only; easy to make mistakes |
| MiniTool Partition Wizard / EaseUS | GParted-like GUI that runs inside Windows | Free tiers are limited; paid for full features |
| AOMEI Backupper | One-click disk/partition cloning and OS migration | Free version limited; better for cloning than resizing |
Wrapping Up
For most Windows users who need to resize a system partition or recover unallocated space that Disk Management won’t touch, the bootable GParted Live USB is the cleanest free solution available in 2026. If you find the “Extend Volume” option grayed out in Windows, GParted is often the fix. If cloning a disk to a new SSD is your actual goal, AOMEI Backupper or MiniTool handle that more safely with one-click workflows. While GParted does support manual partition copying, the multi-step process leaves more room for error than a purpose-built cloning tool. Either way, back up first.