A very common task, add both dynamic and fixed
You can easily change the format of any cell in an Excel worksheet to let the application know what type of data to expect. Two often used formats are the date and time.
In fact, inserting the date and time into Excel is so common, Microsoft built in a few shortcuts and functions to help you add these types of data into your worksheet. Learn how to add both fixed and dynamic date and time stamps quickly into Excel.
Fixed Dates and Time
Many people often use Excel to keep track of inventory, invoices, income/expenses, and a variety of other uses that require statically recording the date and time. Excel has some built in shortcuts to make adding the current date and time a quick chore.
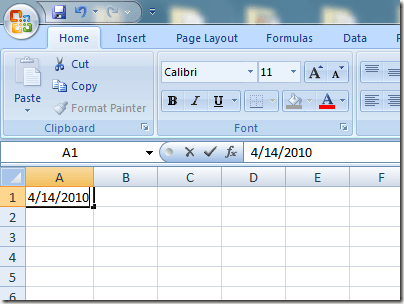
Suppose you have a new Excel worksheet open and you want to start adding some data that is tied to today’s date. Rather than typing it in, you can use these shortcuts. To add the current date to a cell, begin by clicking on the cell where you want to date to be in your worksheet. Hold down the Ctrl key and hit the ; (semicolon) key. That will place the current date into any active cell.
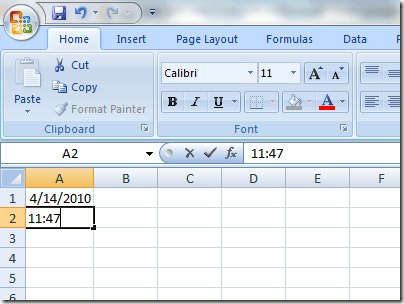
To insert the current time, click on the cell where you want to store the current time. Hold down both the Ctrl and Shift keys and press the ; (semicolon) key. That will place the current time into the cell.
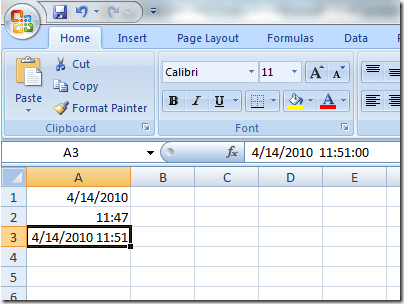
To insert both the current date and the current time into the same cell, click on the cell where you want the date and time to be in your worksheet. Hold down the Ctrl key and press the ; key. Now, hit the space bar and hold down the Ctrl and Shift keys and press the ; key.
Note that although you inserted both the current date and time into the cells, these values will never change. To insert dynamic dates, you need to use Excel’s built-in functions.
Dynamic Date and Time
Dynamic dates and times may appear to be static, but actually change to the current date and time whenever the Excel file is either opened or when formulas in the worksheet are calculated. There are several reasons why you may need a dynamic rather than a static date or time.
First, if any of your formulas are dependent on the current date or time, using a dynamic function helps you avoid having to insert updated information every time you open the file or run a new calculation. Second, by placing a dynamic date or time next to another cell that contains a calculation, you can instantly know the last time the calculation was made.
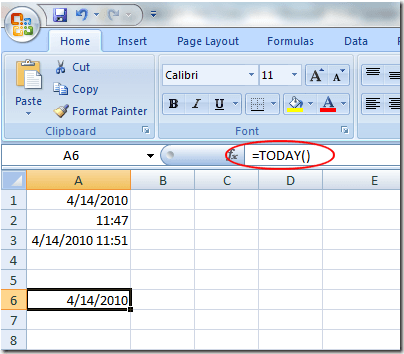
To insert a dynamic date stamp into Excel, enter the following formula into any cell:
=TODAY()
Excel will instantly put the current date into that cell. Every time you open the workbook or make a new calculation, Excel will update the cell to the current date.
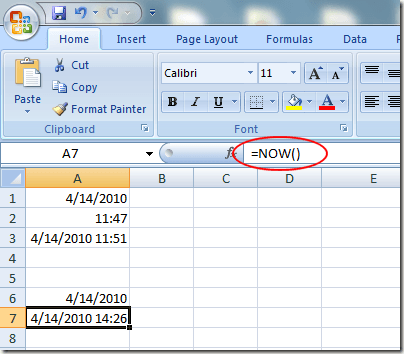
To insert a dynamic date and time stamp into Excel, enter the following formula into any cell:
=NOW()
Excel will instantly put the current date and time into that cell. Every time you open the workbook or a new calculation is made in the worksheet, Excel will update the cell with the current date and time.
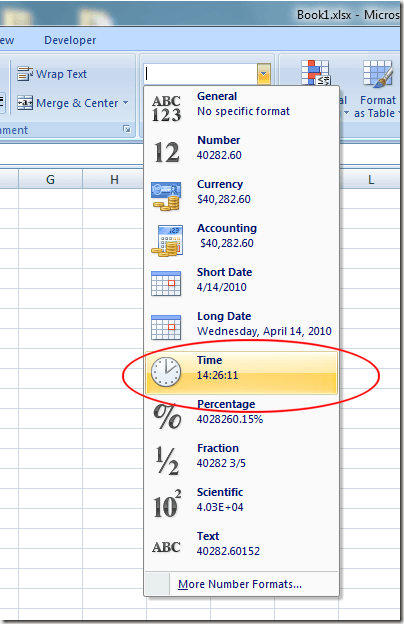
Unfortunately, there is no function to insert only a dynamic time stamp into Excel. However, you can change the formatting of the cell to make the NOW function display only the time. Click the Home tab on the Ribbon and locate the section labeled Number. Click on the drop-down menu and select Time from the menu options.
Depending on your needs, you can insert either static or dynamic date and time stamps into Excel to assist you in making calculations or to keep track of the last time a calculation was made. Make sure you choose the right one so you don’t inadvertently make incorrect calculations with Excel’s built in and custom formulas. Enjoy!


