When going on vacation, a wise trick is to not have access to your work email. This way, you won’t be stressed out thinking about too many work-related stuff.
The problem? Not having email access might cause you to miss something important.
What if your opinion is needed in order to proceed with a big sale? What if a client desperately needs you?

The workaround is to set up email forwarding in Microsoft Outlook. By configuring auto-forwarding, you can be at ease knowing that all mails sent to your work email account will be automatically forwarded to another email address.
In this post, we’ll walk through the process on how to automatically forward email in Outlook 2019.
For Windows
Go to File.

Select Rules and Alerts.
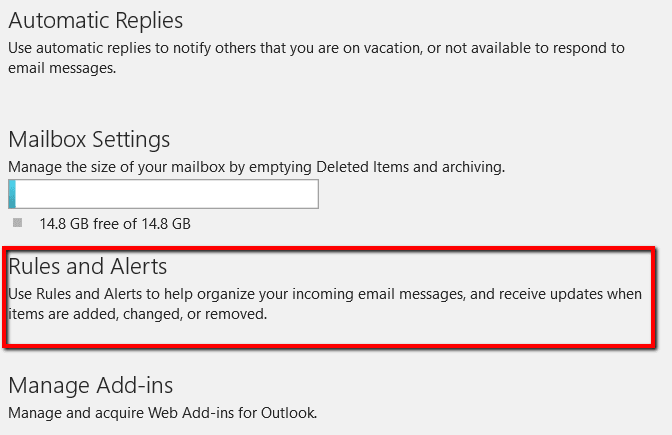
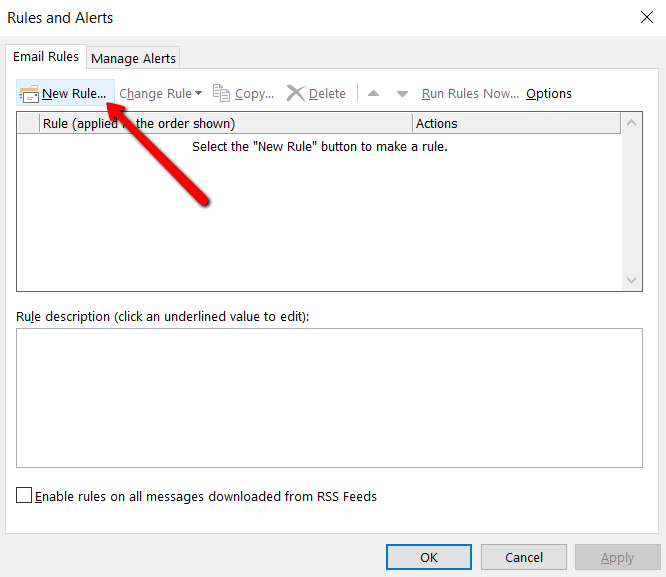
In the pop-up window, select the Email Rules tab and make New Rule.
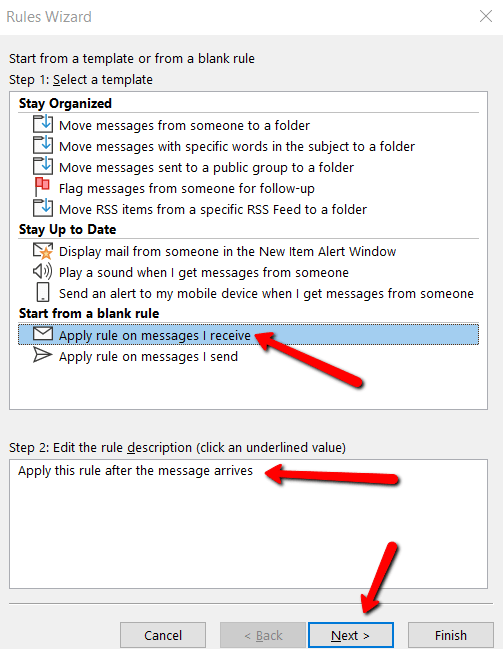
Then a Rules Wizard will appear.
The first step is to select a template. So go to the Start from a blank rule section and select Apply rule on messages I receive.
Under Step 2, make sure the rule description says Apply this rule after the message arrives and hit Next.
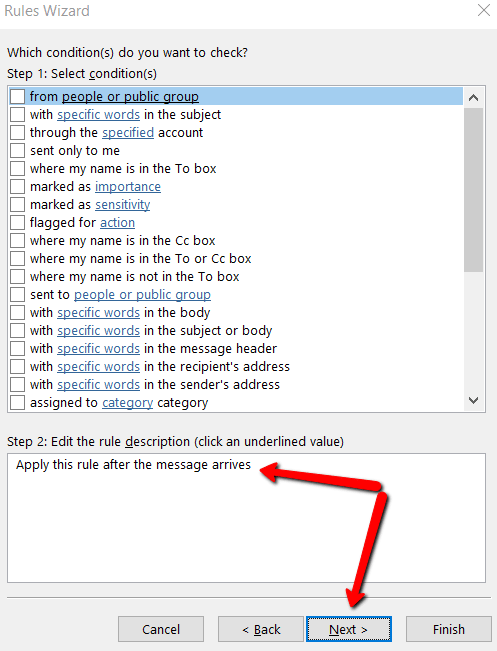
Then you will be prompted to select the conditions for the messages that get forwarded. As to the specific conditions you select, it’s totally up to you.
But if you want all of your messages to be diverted to another email address, you should leave every condition unchecked.
Under Step 2, make sure the field also says Apply this rule after the message arrives. Then hit Next.
You will receive a message that says: This rule will be applied to every message you receive. Is this correct? Select Yes.

Next, you will be asked what you want to do with the message. Tick the box that says to forward it to people or public group.
Under Step 2, make sure it also says to forward it to people or public group. Then click the underlined portion of this text.
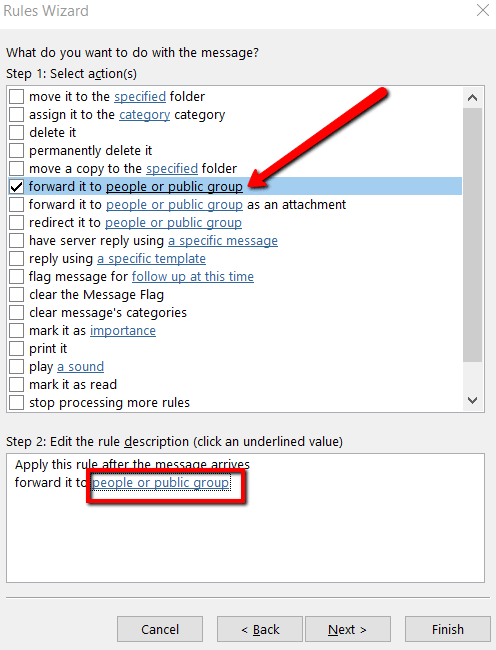
This will open a Rule Address window. Here, you can access an address book that you can easily select an email address as the receiving of the auto-forwarded emails.
You can also type the email address in the To section. Once you specified an email address, hit Okay.
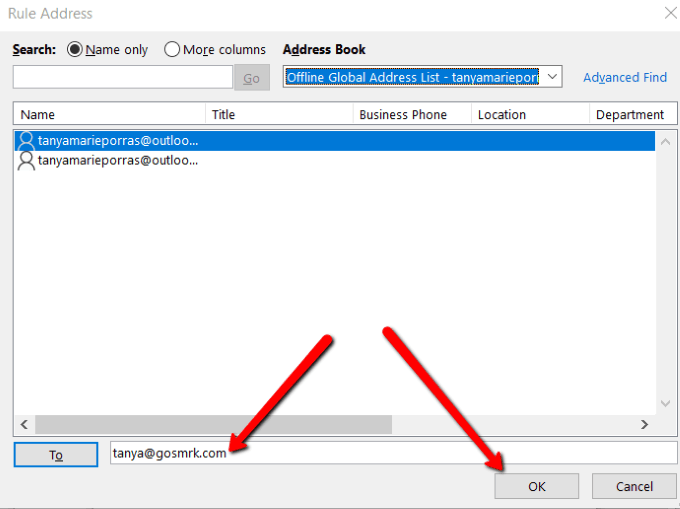
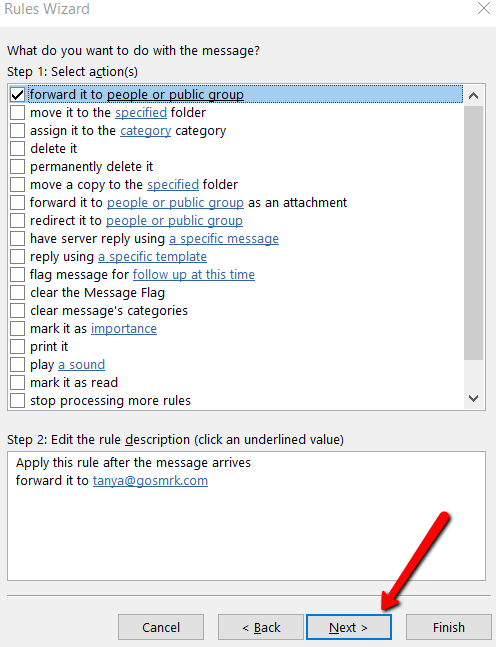
Once this window closes, you will be redirected back to the Rules Wizard. Now, hit Next.
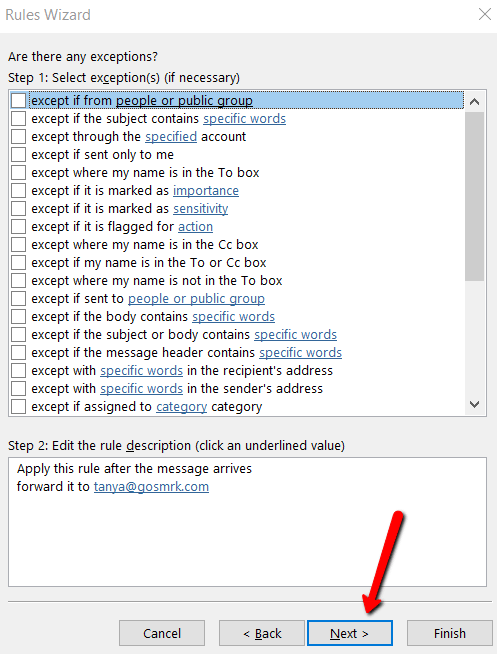
You will then be prompted to set any exceptions. Like most users do, it’s best to leave everything unchecked.
Finish up by specifying a name for your rule. What you choose is your call. A tip is to make it straightforward so you can recognize it easily.
Tick the box that says Turn on this rule. Once you review the rule description in Step 3, you’re good to go. It’s time to click Finish.

For Mac (OS)
If you’re using a Mac, you have nothing to worry about. After all, the concept of setting up auto-forwarding is the same in Windows and Mac.
What you need to do is go to Home. Then choose Rules and Edit Rules. Then select a client (IMAP, Exchange, Outgoing, or POP3).
Next is to hit the + sign. And finish up by providing a name for rule and setting conditions.
Related Posts
Christopher Jan Benitez is a freelance writer for hire who provides actionable and useful web content to small businesses and startups. In his spare time, he religiously watches professional wrestling and finds solace in listening to ’80s speed metal. Read Christopher’s Full Bio
