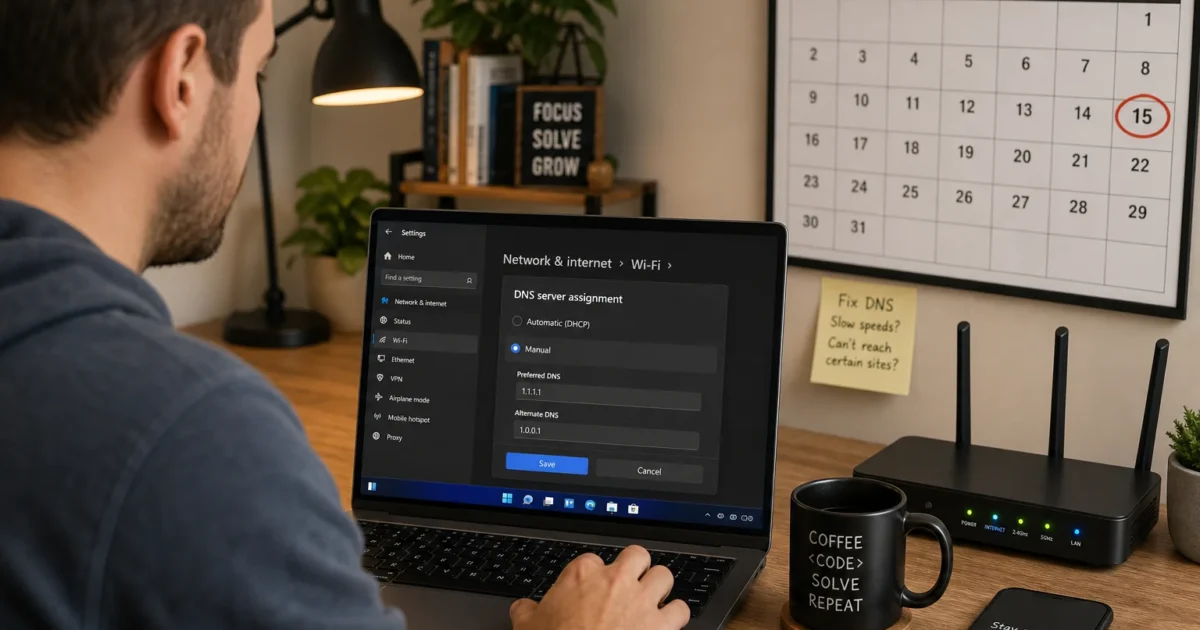
Changing DNS servers in Windows 11 or 10 can improve slow or unreliable website lookups, but a bad address may cut off browsing completely. Start with Windows Settings; its built-in controls are the safest option and support encrypted DNS in Windows 11, which can be configured by following the steps outlined in the guide to changing DNS servers on Windows 11 and Windows 10.
Fix #1: Change DNS servers through Windows Settings
Windows 11 lets you assign DNS servers to each Wi-Fi or Ethernet connection. It can also encrypt requests with DNS over HTTPS, or DoH, when the provider supports it, similar to the Cloudflare DNS setup guide for Windows.
- Press
Windows + Ito open Settings. - Select Network & internet.
- Select Wi-Fi or Ethernet, depending on your connection.
- Open your active network’s properties.
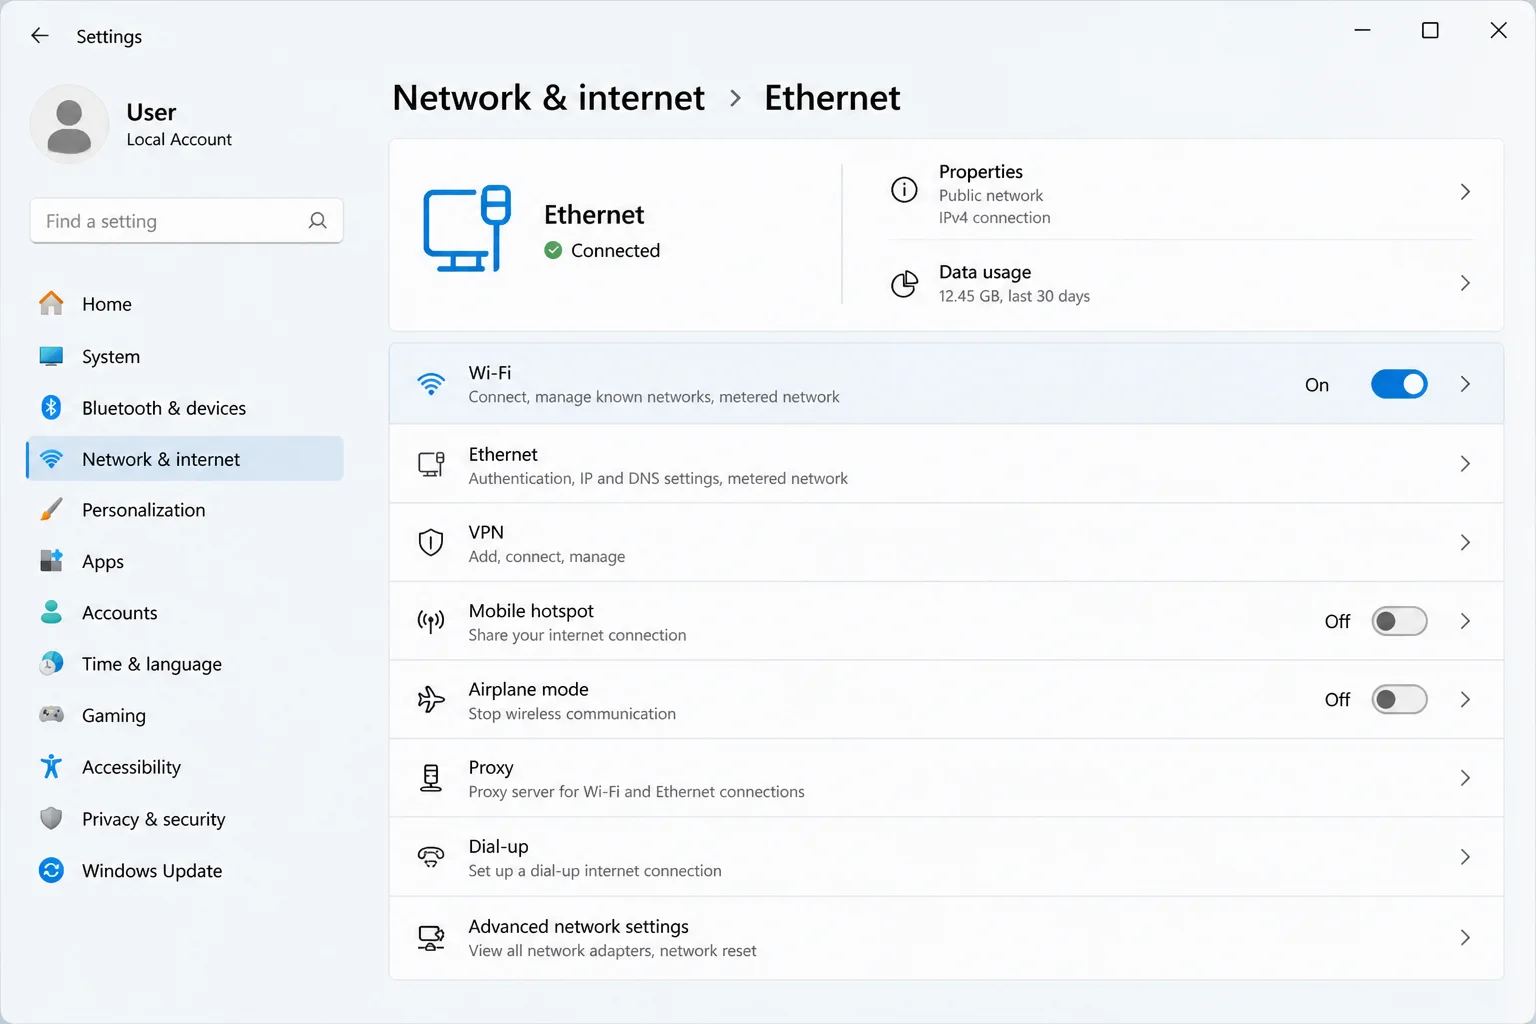
- Find DNS server assignment and select Edit.
- Change Automatic (DHCP) to Manual.
- Turn on IPv4.
- Enter one of these DNS pairs:
| Provider | Preferred DNS | Alternate DNS | Best for |
|---|---|---|---|
| Cloudflare | 1.1.1.1 | 1.0.0.1 | Privacy and low latency |
| Google Public DNS | 8.8.8.8 | 8.8.4.4 | Reliability |
| Quad9 | 9.9.9.9 | 149.112.112.112 | Blocking known malicious domains |
- Set DNS over HTTPS to an encrypted option if Windows recognizes the provider, as explained in the guide to disabling taskbar thumbnail previews in Windows 10/11, which also touches on DNS settings.
- Select Save.
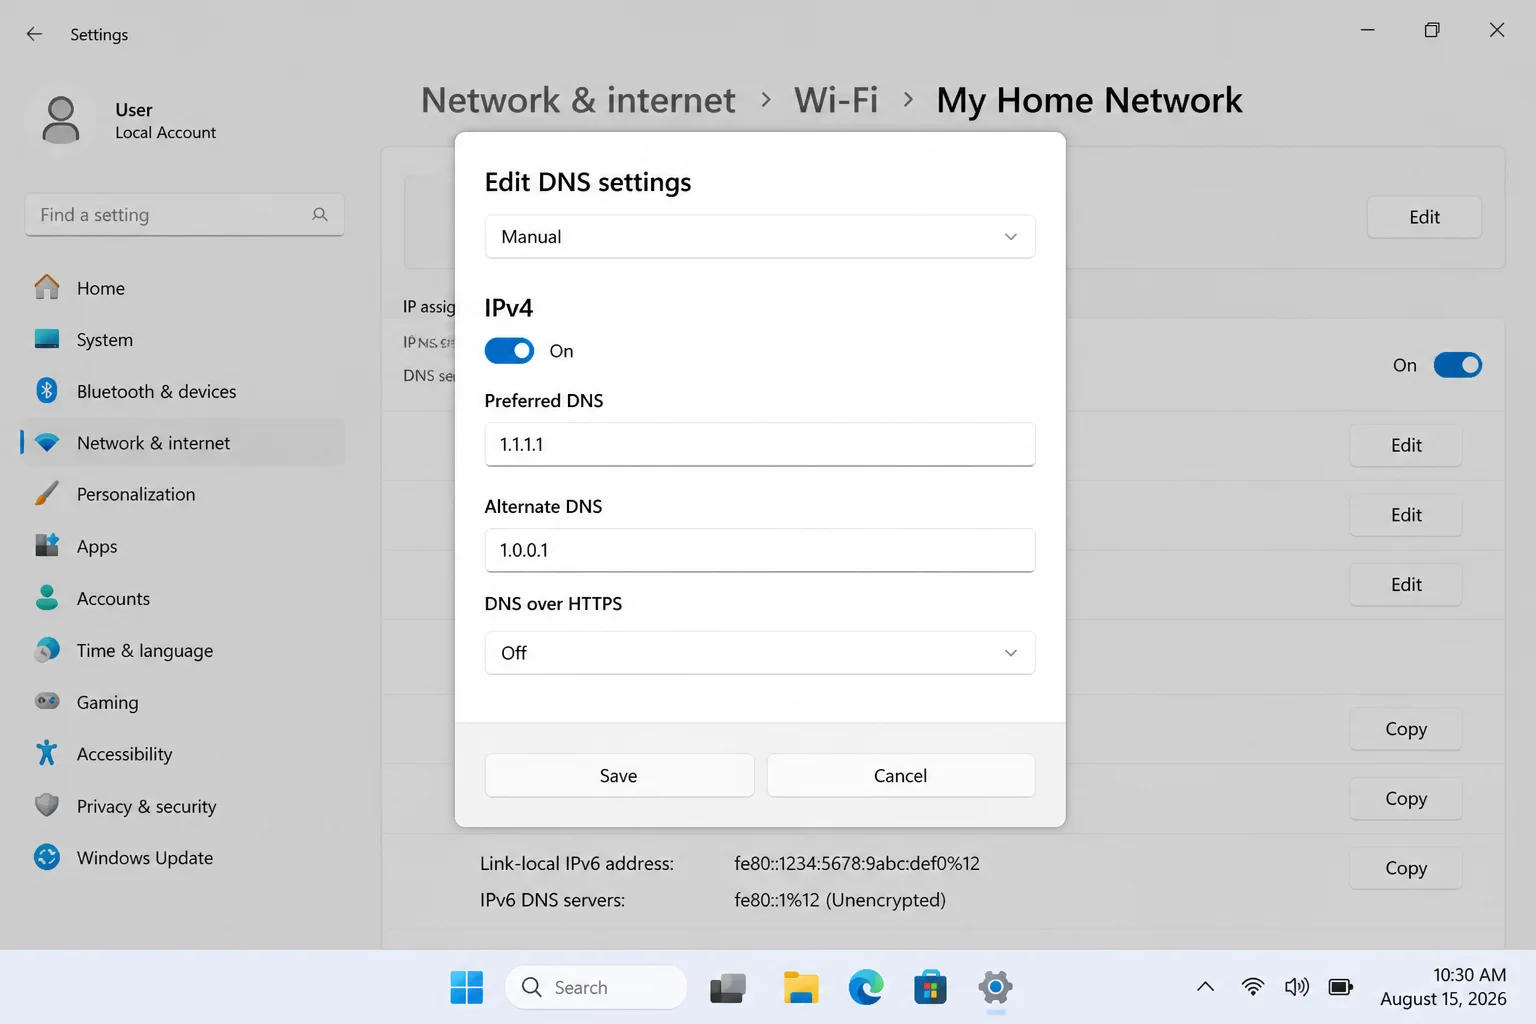
The connection properties should now list your chosen addresses under DNS servers. Open a website to confirm name resolution is working. For more information on configuring Cloudflare DNS on Windows 10 and your router, you can refer to the Windows Central guide.
Use Control Panel in Windows 10
The Control Panel route works in Windows 10 and Windows 11. It doesn’t provide a simple DoH control, but it’s dependable for plain DNS, similar to the method described in the guide to fixing the “Windows cannot connect to this network” error in Windows 11.
- Open Start, type
Control Panel, and open the matching result. - Select Network and Internet.
- Select Network and Sharing Center.
- Select Change adapter settings.
- Right-click your active Wi-Fi or Ethernet adapter.
- Select Properties.
- Select Internet Protocol Version 4 (TCP/IPv4).
- Select Properties.
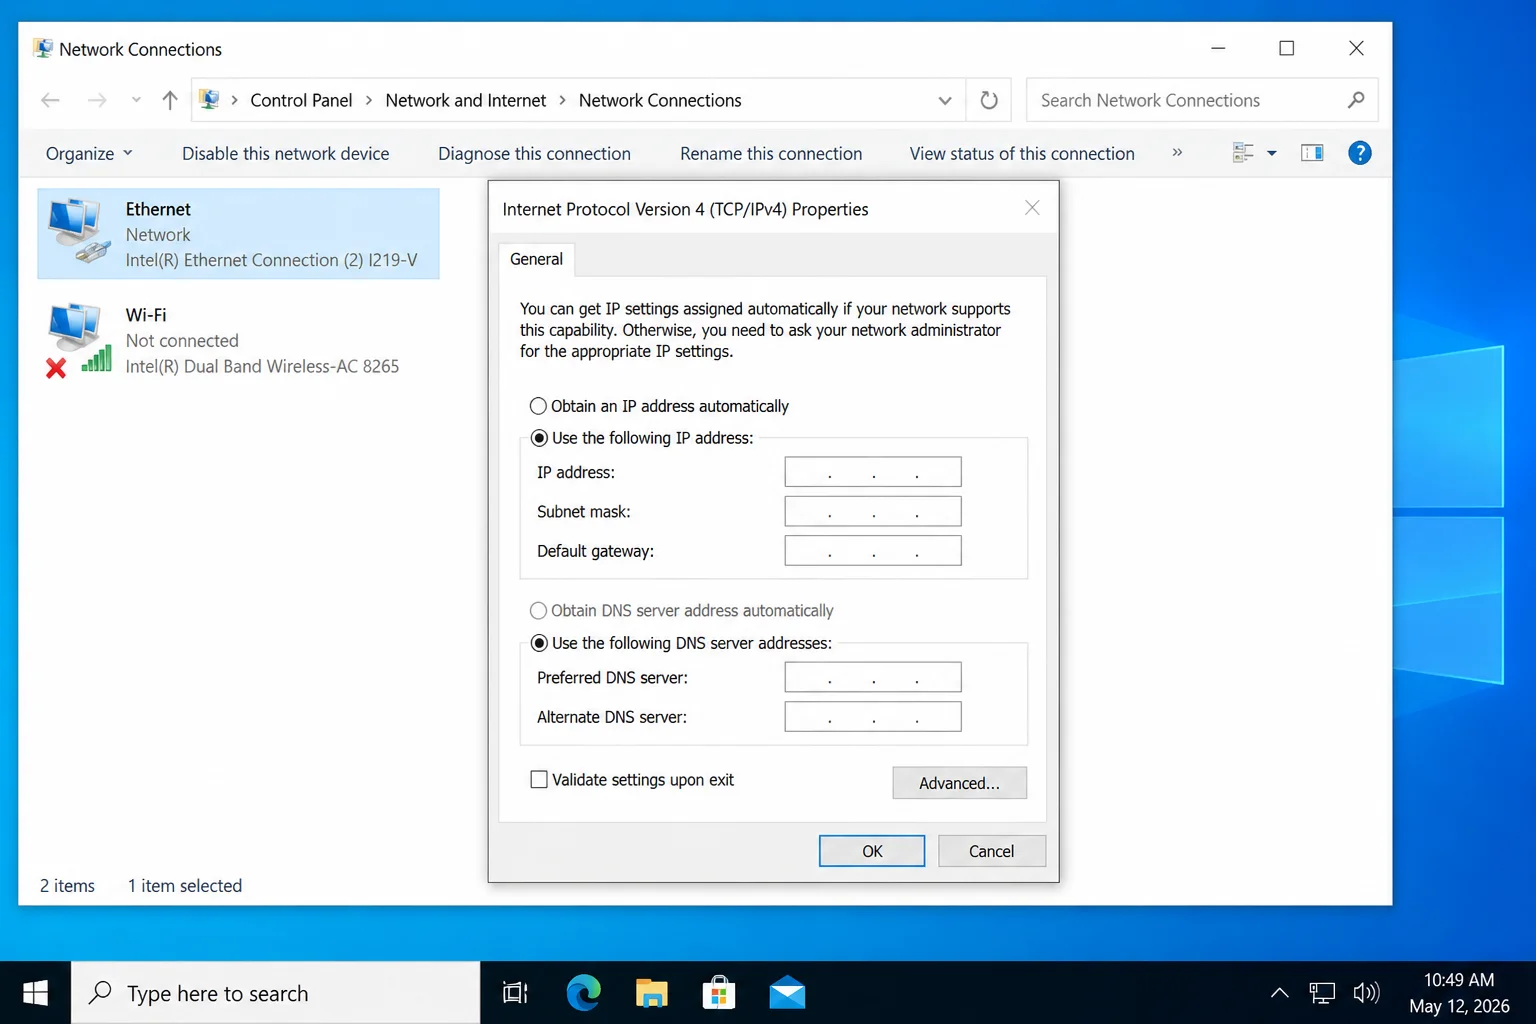
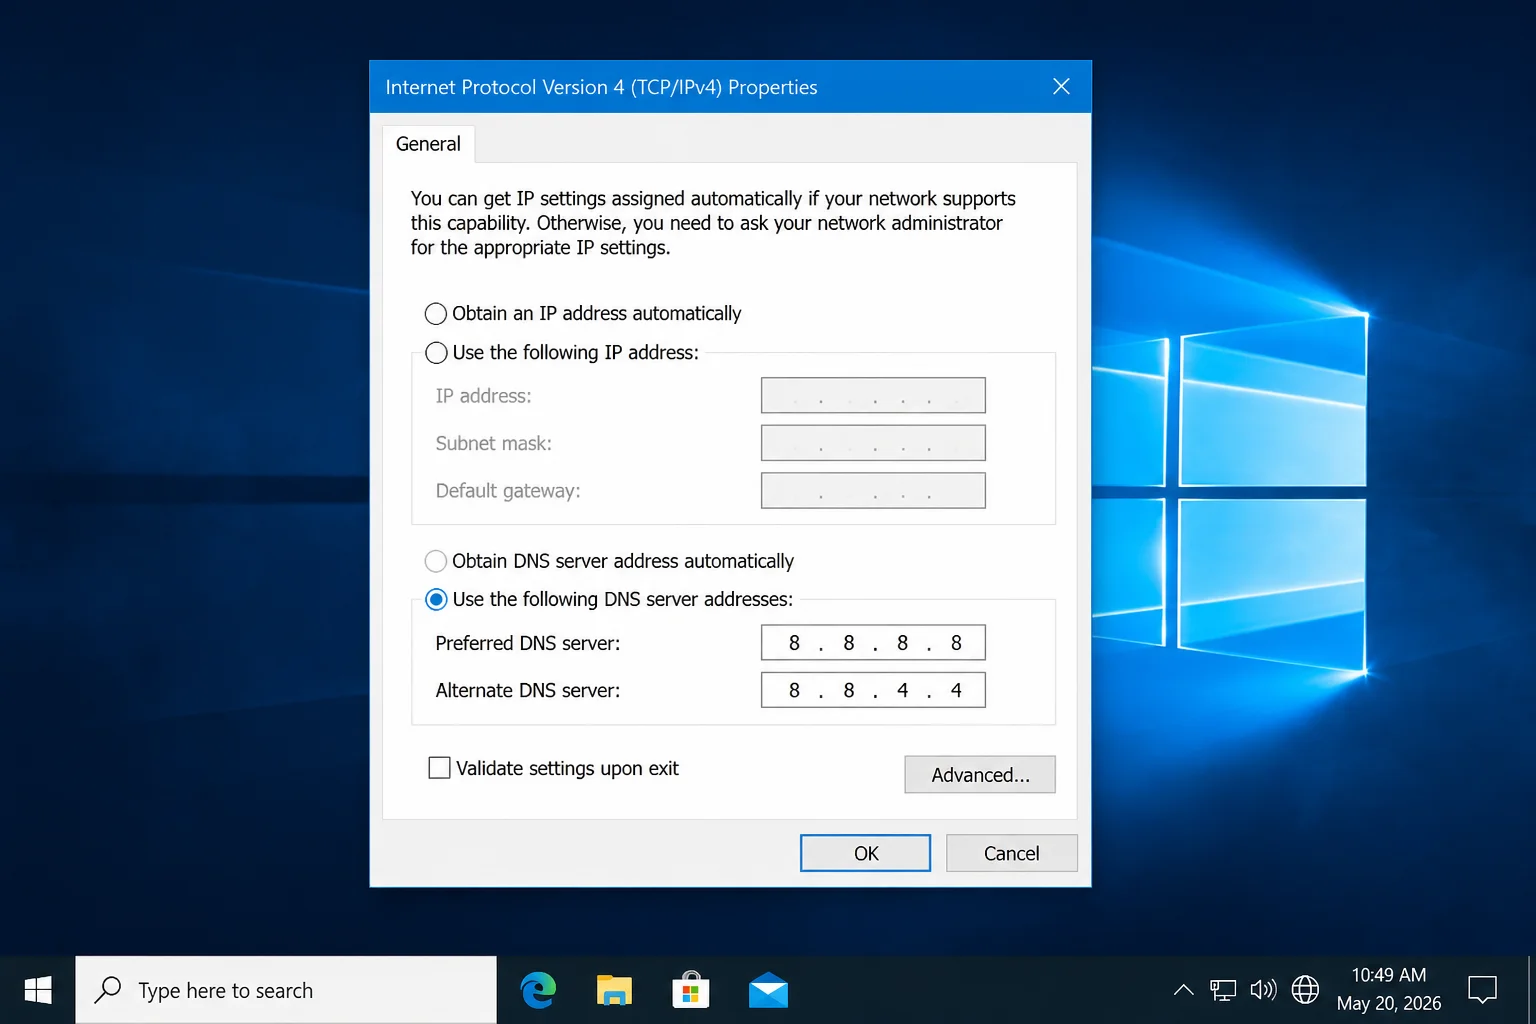
- Select Use the following DNS server addresses.
- Enter the preferred and alternate addresses from the table above.
- Select OK.
- Select Close.
Windows should begin using the new servers immediately. If websites stop loading, return to this dialog and select Obtain DNS server address automatically. You can also refer to the How-To Geek guide to enabling DNS over HTTPS on Windows 11 for more information.
Fix #2: Switch DNS profiles with DNS Jumper
DNS Jumper remains a useful portable option when you change providers often. It can test server response times, apply a custom address, flush the DNS cache, and restore your previous configuration, similar to the features offered by DNS Jumper alternatives.
- Download DNS Jumper from the developer’s website.
- Extract the downloaded archive.
- Right-click the executable and select Run as administrator.
- Choose your active network adapter from the adapter list.
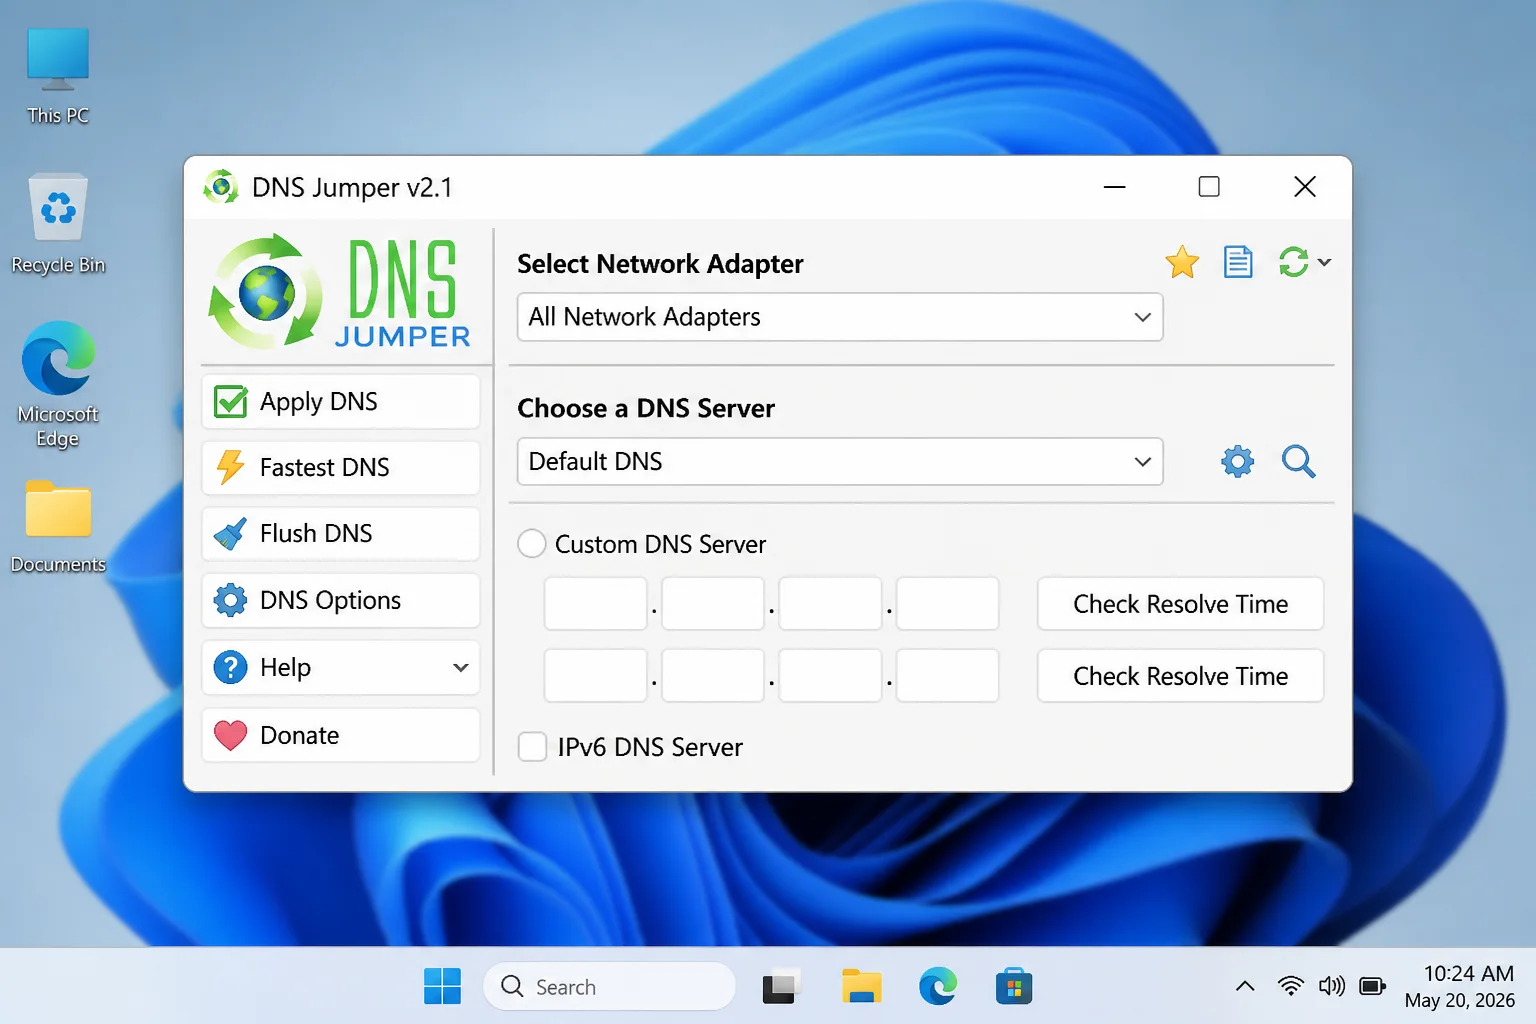
- Open the DNS provider list.
- Select Cloudflare, Google Public DNS, Quad9, or another provider you trust.
- Use the speed-test option if you want to compare response times.
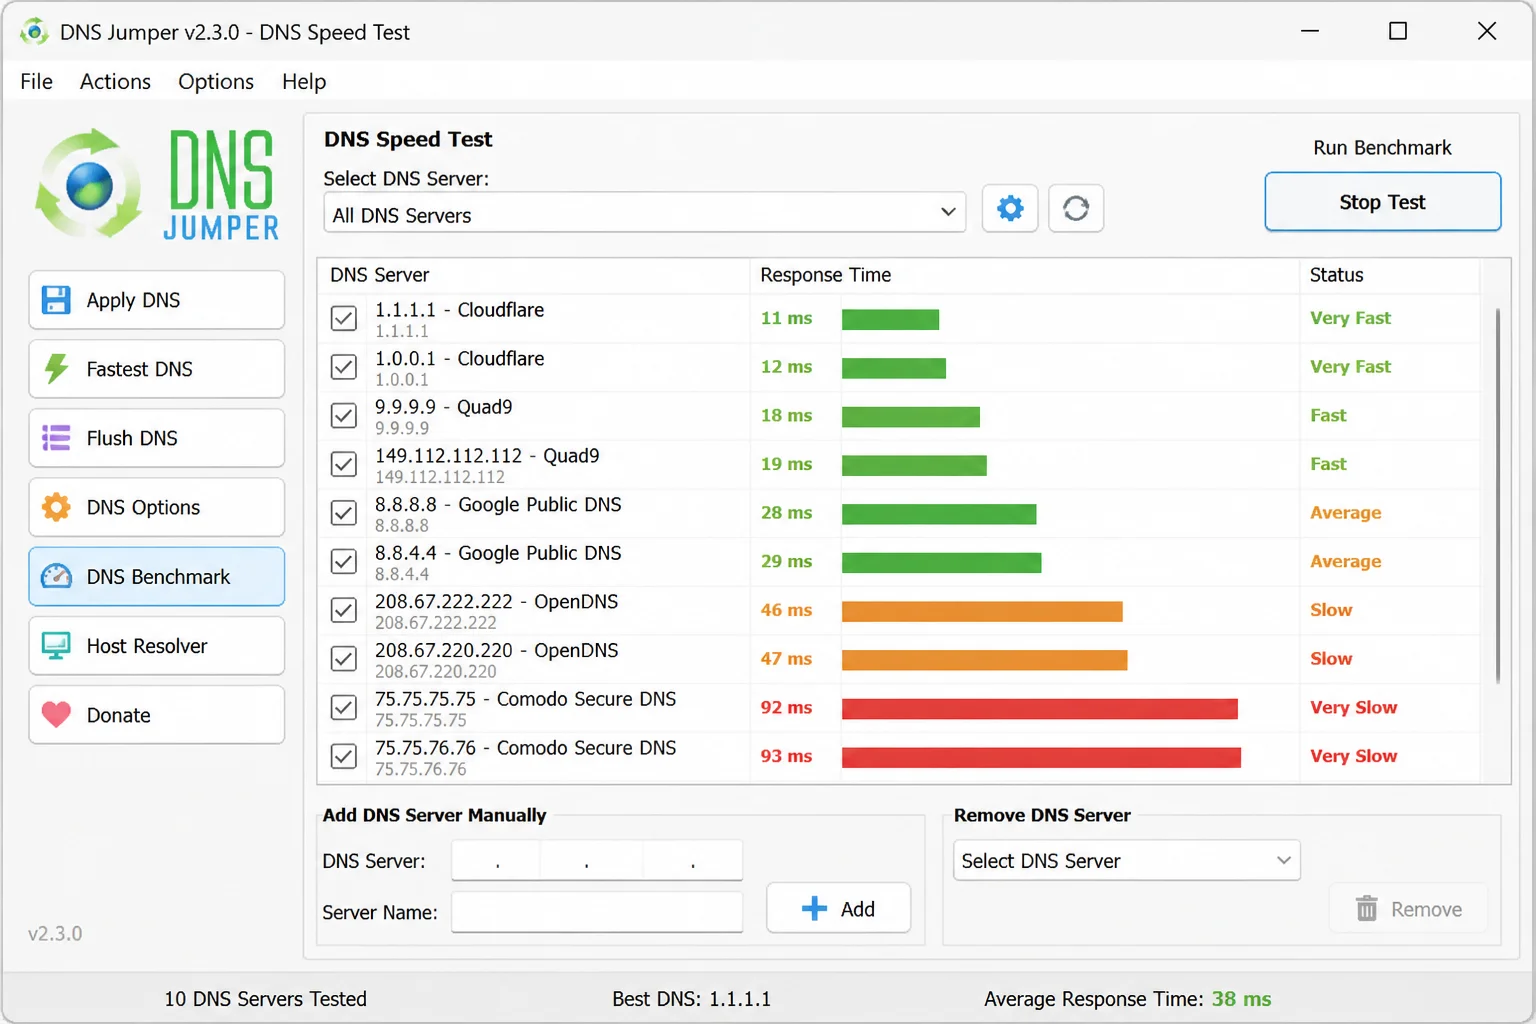
- Select the option that applies the chosen DNS servers.
- Use the cache-flush option after the change.
DNS Jumper should display the active DNS addresses once it finishes. So far, so good if websites open and the selected provider remains visible after you refresh the adapter information. For more information on setting up DNS over HTTPS, you can refer to the GitHub guide.
A fast benchmark result isn’t a privacy verdict. The test measures response time, so check the provider’s logging and filtering policies separately, as explained in the guide to preparing your PC for AI without losing privacy or speed.
Fix #3: Use DNSChanger for DNSCrypt
DNSChanger is an open-source Windows tool aimed at users who want encrypted DNS through DNSCrypt. DNSCrypt authenticates and encrypts DNS traffic between your computer and a compatible resolver, similar to the Cloudflare DNSCrypt guide.
- Open the project’s GitHub page.
- Read the release notes and installation details for the current build.
- Download the Windows release from the project’s release section.
- Scan the downloaded file with Microsoft Defender.
- Open DNSChanger with administrator rights.
- Select the network interface that currently has internet access.
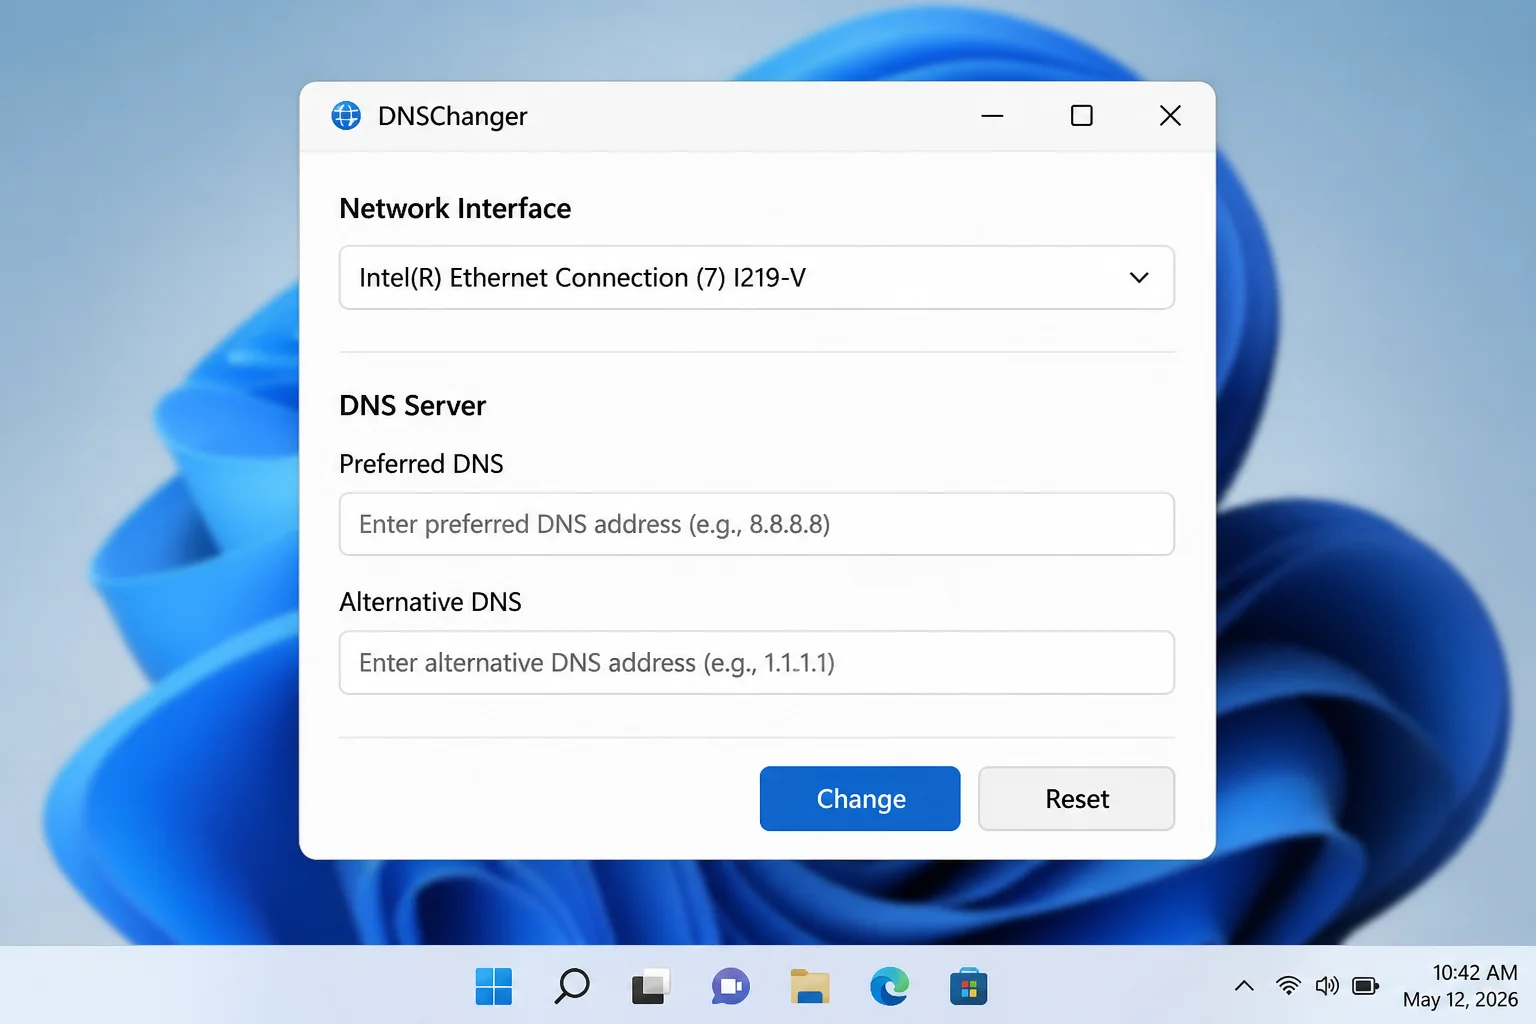
- Choose a supported DNSCrypt resolver.
- Apply the configuration using the button shown in your release.
- Open several websites to test the connection.
The exact button names and placement can vary between releases. The app should show the selected resolver as active after the configuration is applied. For more information on enabling DNS over HTTPS in Windows 11, you can refer to the SimpleDNS guide.
I’d skip this option unless you specifically want DNSCrypt. Windows 11’s built-in DoH setting requires less software and is easier to reverse, as explained in the guide to fixing Google Docs access issues on Windows 11.
Fix #4: Change DNS across operating systems with DNS Changer Desktop
DNS Changer Desktop provides a similar switching interface on Windows, Linux, and macOS. For an HDG reader using Windows, its main appeal is keeping the same DNS tool on a dual-boot or multi-computer setup, similar to the features offered by Microsoft Copilot.
- Open the project’s GitHub page.
- Check the current release details for supported operating systems.
- Download the Windows build.
- Scan the file with Microsoft Defender.
- Install or extract it according to the release notes.
- Start the application.
- Select your active Windows network connection.
- Choose a listed provider or enter supported custom DNS addresses.
- Apply the change using the control provided by the current release.
- Reopen the app to confirm the profile remains active.
Your chosen addresses should appear as the active DNS configuration. This tool is worth trying if cross-platform consistency matters, but Windows-only users get simpler recovery controls from Settings. For more information on setting up DNS over HTTPS on Windows, you can refer to the CleanBrowsing guide.
Fix #5: Set DNS with netsh
The netsh command is useful for scripts, remote support sessions, or computers where the Settings interface won’t cooperate. Run it from an elevated Command Prompt, as explained in the guide to fixing Steam error code 107.
- Open Start.
- Type
cmd. - Select Run as administrator under Command Prompt.
- Approve the User Account Control prompt.
- Run
netsh interface show interface.
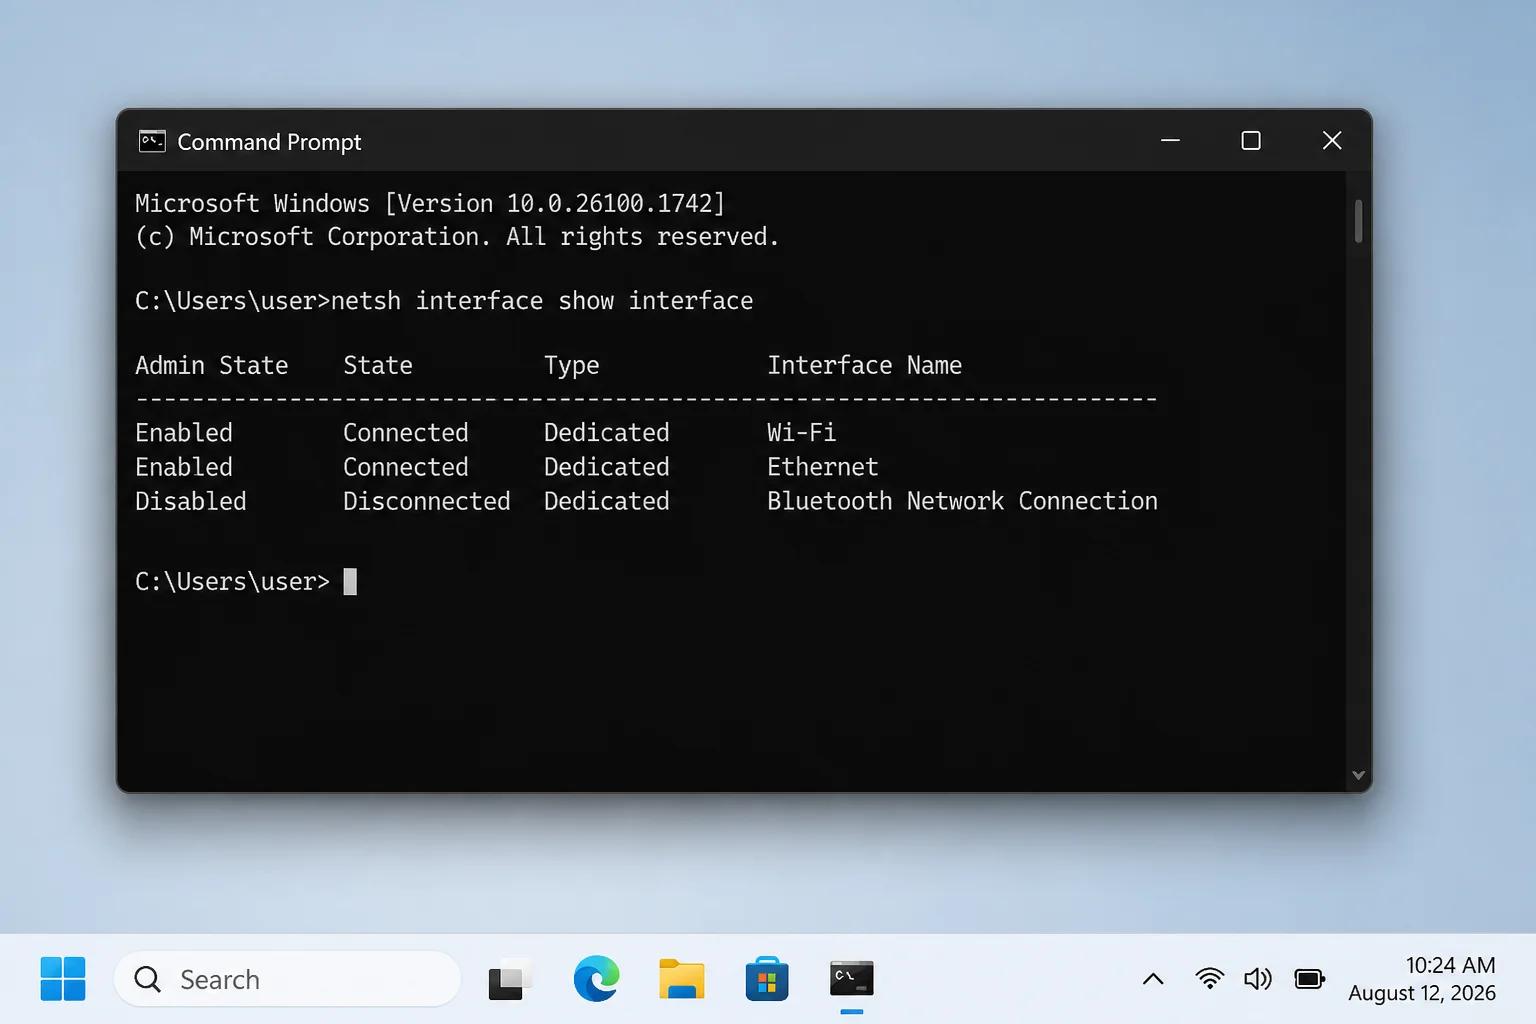
- Note the exact name of the connected interface.
- Run
netsh interface ip set dns name="Wi-Fi" source="static" address="1.1.1.1", replacingWi-Fiand1.1.1.1with your interface and preferred server. - Run
ipconfig /flushdns.
You should see "Successfully flushed the DNS Resolver Cache." Windows will now send IPv4 DNS requests to the address you assigned. For more information on setting up Google Public DNS, you can refer to the Windows Club guide.
To return the adapter to automatic DNS, run netsh interface ip set dns name="Wi-Fi" source="dhcp" with the correct interface name.
Enable a DoH template in Windows 11
Windows 11 recognizes several established DoH providers automatically. If a compatible server isn’t recognized, an administrator can add its template manually, as explained in the guide to the Canary Channel Insiders program.
- Open Command Prompt as administrator.
- Run
netsh dns add encryption server=1.1.1.1 dohtemplate=https://cloudflare-dns.com/dns-query autoupgrade=yes udpfallback=no. - Run
netsh dns add encryption server=1.0.0.1 dohtemplate=https://cloudflare-dns.com/dns-query autoupgrade=yes udpfallback=no. - Return to Settings > Network & internet.
- Edit the connection’s DNS server assignment.
- Confirm that encrypted DNS is enabled for both Cloudflare addresses.
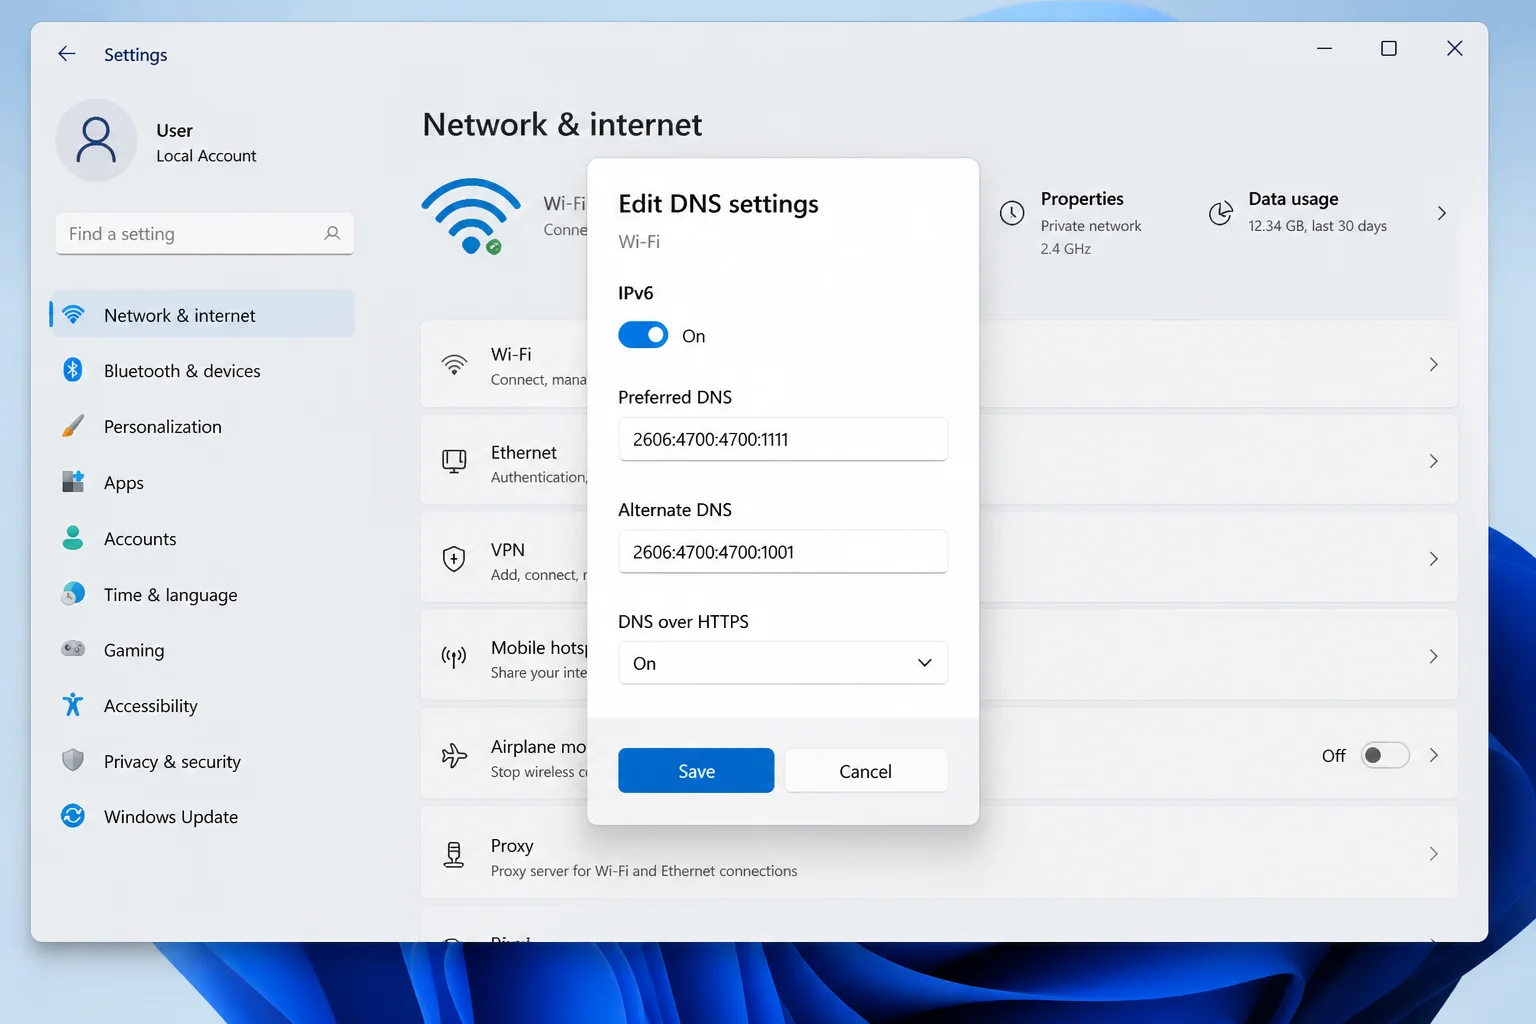
With UDP fallback disabled, DNS requests won’t silently drop back to unencrypted DNS when DoH fails. That protects privacy, but a blocked DoH connection can stop websites from resolving. For more information on fixing iCloud connection errors, you can refer to the Help Desk Geek guide.
Which DNS-changing method should you use?
| Method | Works for | Encryption support | Difficulty |
|---|---|---|---|
| Windows Settings | Occasional DNS changes | DoH on Windows 11 | Easy |
| DNS Jumper | Testing and switching providers | Plain DNS switching | Easy |
| DNSChanger | DNSCrypt resolvers | DNSCrypt | Medium |
| DNS Changer Desktop | Cross-platform setups | Depends on current release | Medium |
netsh | Scripts and remote troubleshooting | DoH templates on Windows 11 | Hard |
Windows Settings is the solid choice for a permanent configuration. DNS Jumper fits laptops that move between networks, while netsh makes more sense when repeatable commands matter. For more information on stopping Windows 11 from reopening apps after restart, you can refer to the Help Desk Geek guide.
Verify that the DNS change worked
Windows can show which DNS addresses are assigned, but browser-level secure DNS may send browser requests elsewhere, as explained in the guide to fixing Discord update issues on Windows.
- Open Command Prompt.
- Run
ipconfig /all. - Find your active Wireless LAN adapter or Ethernet adapter.
- Check the addresses beside DNS Servers.
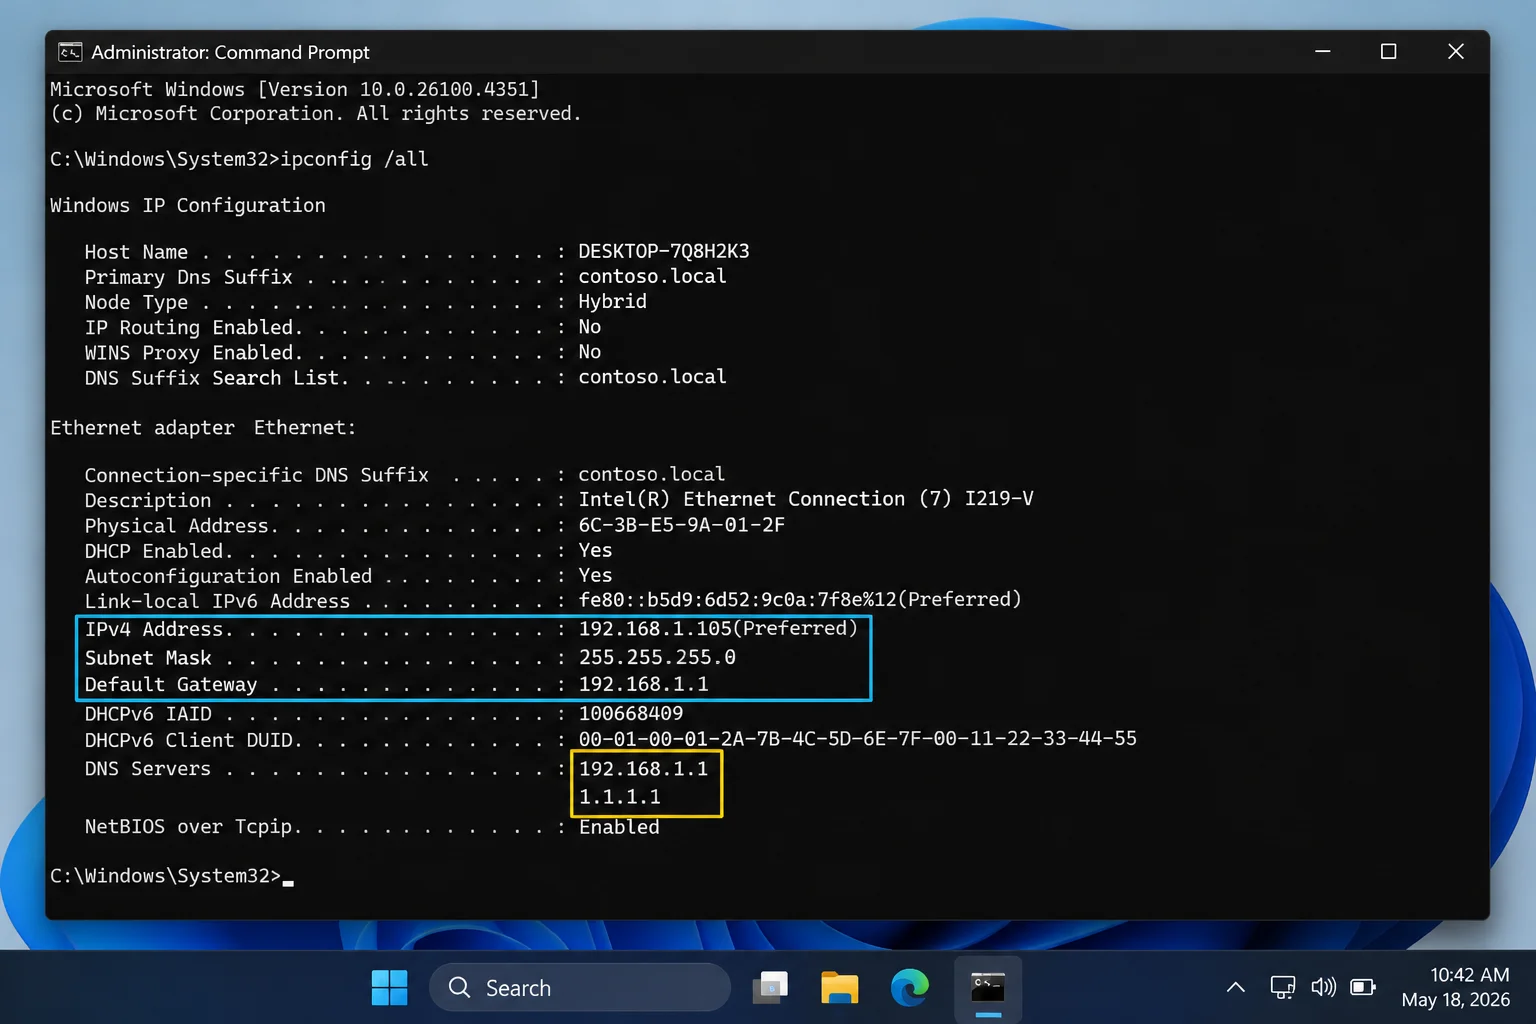
The listed addresses should match the provider you selected. You can also use that provider’s official connection-test page or a reputable DNS leak test when privacy is the reason for switching. For more information on fixing Microsoft Store error 0x80131500, you can refer to the Help Desk Geek guide.
When websites stop loading after a DNS change
An incorrect or unreachable DNS address can leave Windows connected to the network while websites fail to open. Return DNS server assignment to Automatic (DHCP), save the change, and run ipconfig /flushdns.
If automatic DNS works but your chosen provider doesn’t, the network or firewall may block that resolver. Try another established provider before changing firewall rules. For more information on fixing Discord disconnection issues, you can refer to the Help Desk Geek guide.
Conclusion
Fix #1, changing DNS through Windows Settings, is my pick for a stable Windows 11 setup because DoH is built in and rollback takes seconds. DNS Jumper is a good option for frequent switching, but repeated failures across several providers point to a router, firewall, or broader connection problem. For more information on updating Chrome browser, you can refer to the Help Desk Geek guide.