Microsoft calls its Planner application “a simple, visual way to organize teamwork.” Among other features, this project management app helps you make a project plan, create and assign tasks in different categories, and view plan data and statistics.
Anyone who has a subscription to Office 365, whether it’s a personal subscription or an enterprise subscription via your employer, has access to the Microsoft Planner.

Microsoft Planner Tutorial
Microsoft Planner has multiple front doors. Begin by signing into your Office 365 account. You can do that at any of Office 365’s many points of entry including:
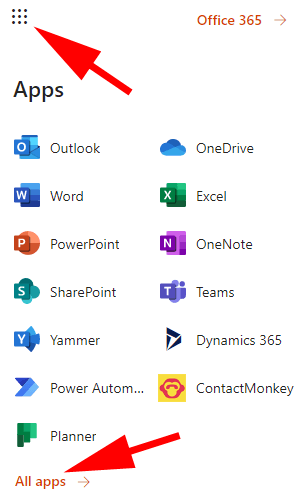
If you’re already signed into another area of Microsoft Office, you can find the link to the Microsoft Planner app by selecting the app launcher icon in the upper-left corner and choosing Planner. If Planner is not in the list, select All apps and find Planner in the list.
Alternatively, you can sign into Microsoft Planner directly at tasks.office.com.
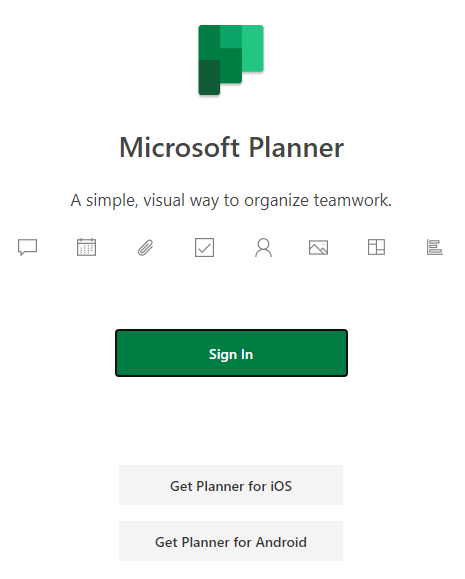
Once you’ve signed in, your first stop will be the Planner hub. From there you can start a new plan, view recent plans, view all your plans, or view tasks assigned to you.
Note the link to get the Planner mobile app at the bottom of the left menu. Select the link and click Send in the modal dialogue box.
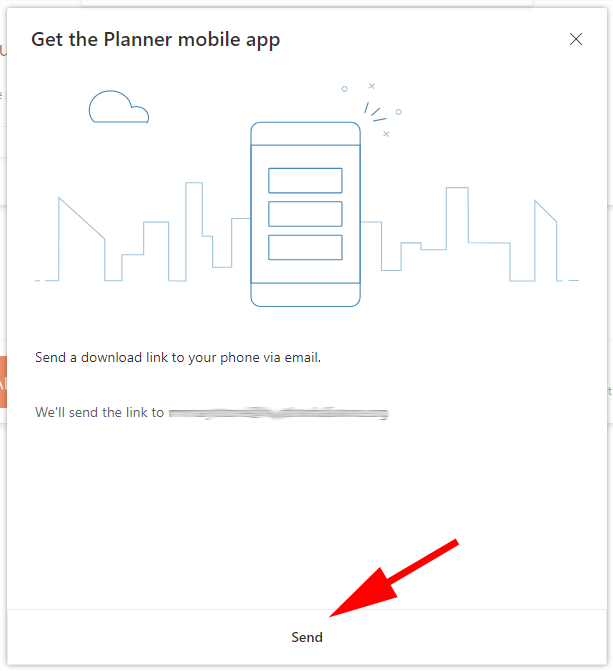
The Microsoft Planner mobile app is available for both Android and iPhone.
How to Build a Plan in the Microsoft Planner App
Before you can assign tasks to yourself or other people, you must create a plan.
Creating a Plan
In the left pane, select New plan. Fill out all the information requested in the New plan window.
- Give your plan a name.
- (Optional) If you’ll be inviting an existing Microsoft Group to your plan (say, for example, via Microsoft Teams), you can add your plan to the Group now by selecting Add to an existing Microsoft 365 group and then choosing a group for your plan. This is handy if you think you’ll have multiple plans for the same group.

- Decide whether your plan is public or private. If you choose public, then anyone in your organization will be able to see your plan. If you choose private, then only the people you add to your plan will be able to see it.
- (Optional) Write a group description. When you add new members to your plan, they will see the group description, giving them an idea of the purpose of the plan.
- Select Create plan.
Next you will see the main dashboard or Board for the plan you just created.

The dashboard view is card-based, much like Trello. Before adding tasks, add members of your team to the plan.
Adding Other People to Your Plan
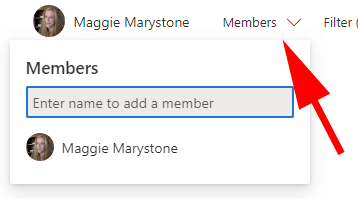
From the plan dashboard, select the Members dropdown. Enter a person’s name to add them as a member.
Adding and Assigning Tasks
Your plan comes with one default task bucket called To do.
- You can add a task to that bucket by selecting Add task.
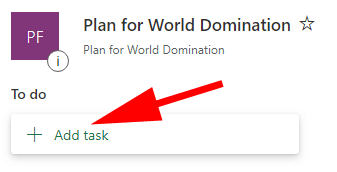
- You can create additional buckets for your tasks by selecting the Add new bucket link. Type the name of the new bucket and press Enter.

- Next, choose the Add task link under whichever bucket you want. Enter a task name.
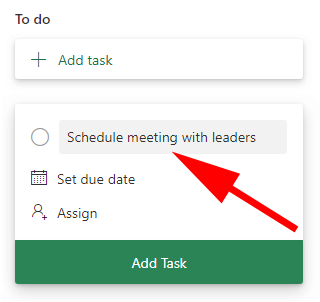
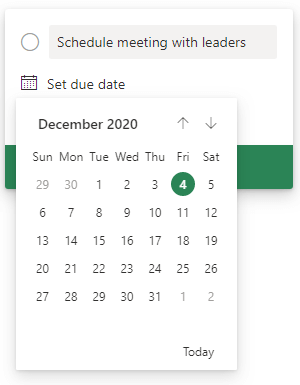
- Set the due date.
- Next, choose who this task should be assigned to. The task card will indicate Unassigned until you assign the task.
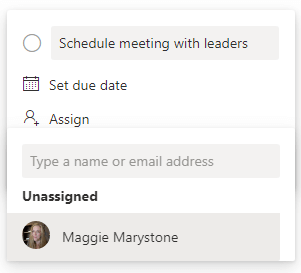
- Be sure to select the Add task button to save the task.
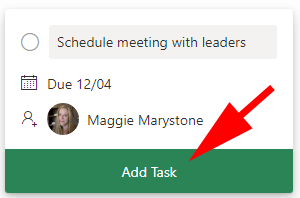
- Your task will appear as a card under the bucket you chose.
To add more details to the task, select the card on the dashboard. From there, you can add a label, change which bucket the task is in, and indicate the task’s progress, priority, start date, and due date.
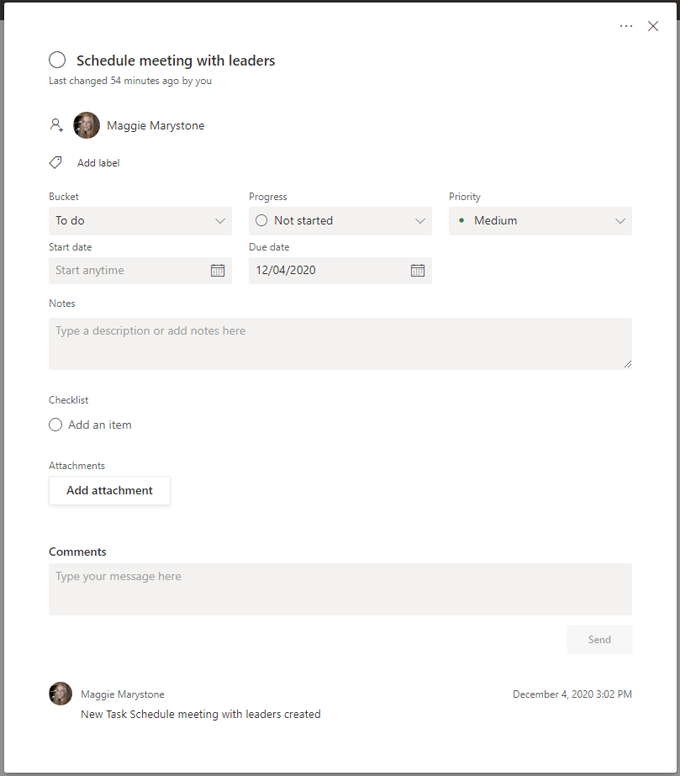
You can also add notes, checklists, and attachments. Any team member can add comments to the task.
Staying on Track
Microsoft Planner offers a variety of ways to get a bird’s-eye view of your plan.
Charts
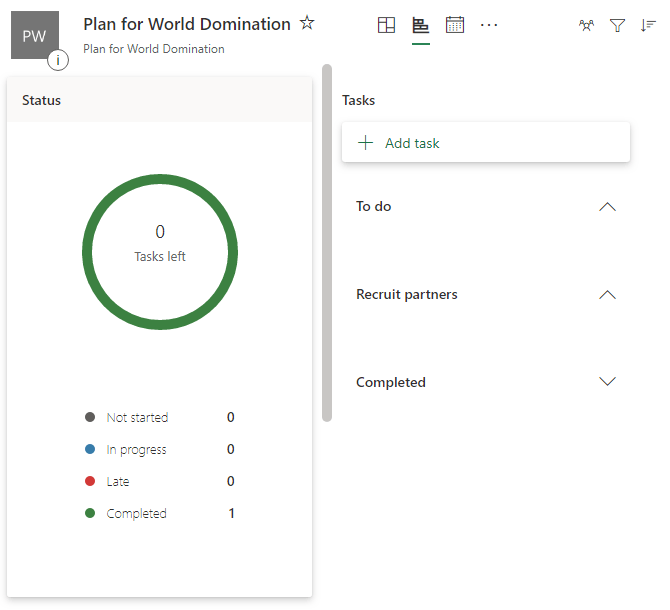
The Charts tab displays summaries of the status of all tasks in the plan, how many tasks are in each bucket, a chart showing how many tasks there are in each priority level (urgent, important, medium, and low), a list of the plan’s members, and how many tasks each person has been assigned.
Schedule
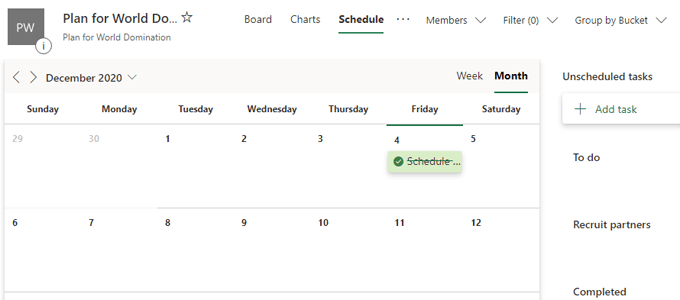
The Schedule tab displays all the tasks on a calendar so you can get an idea of which task deadlines are approaching.
Other Options
Select the three dots to the right of the Schedule tab, and you will find many other features of Microsoft Planner.
- Conversation will take you directly to Outlook so you can email team members.
- Members will take you to the Group Membership page for your plan where you can add and delete members.
- Files takes you to the group’s Sharepoint library where you can create, upload, delete, and edit documents related to your plan.
- Notebook launches a Microsoft OneNote notebook dedicated to your plan.
- Sites takes you to a page where you can create and edit a team Sharepoint site for your plan.
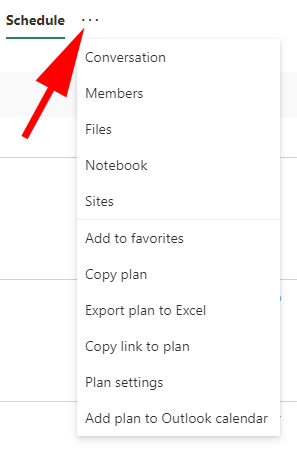
You can also add the plan to your favorites, make a copy of your plan within Microsoft Planner, export your plan to Excel, copy the link to your plan, and add your plan to your Outlook calendar.
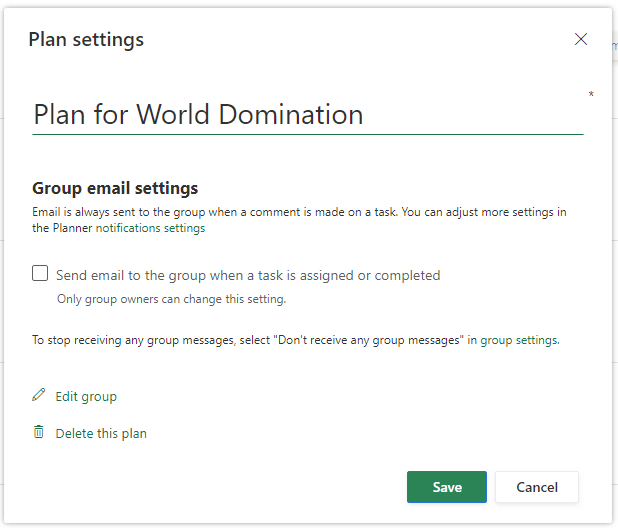
Group owners can select Plan settings to configure the group’s email settings and indicate whether the group should receive an email when a task is assigned or completed. This is also where the owner can delete the plan.
Completing Tasks in the Microsoft Planner
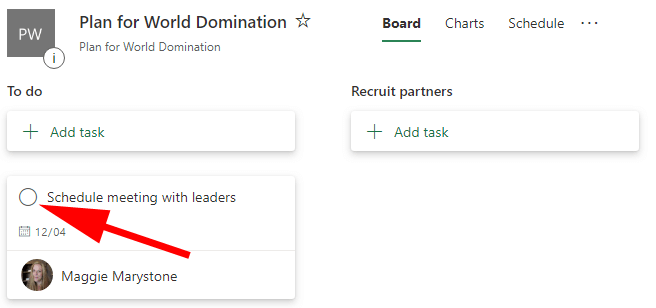
When a task has been completed, the person assigned to the task can mark it as complete on its card on the Board.
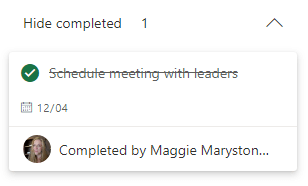
After the task has been marked as complete, you can find it again by expanding the Show completed dropdown.
Get Updates on Your Plan
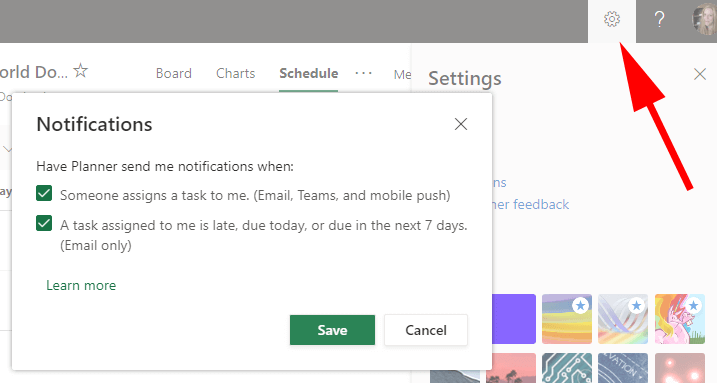
Plan members can choose when to receive notifications from Planner by selecting the gear/settings icon, selecting Notifications, and specifying their notification preferences.
Other Task Management and Collaboration Tools
Sometimes the sheer complexity of Microsoft is unattractive to users. If you’ve decided that the Microsoft Office 365 software suite is not for you, there are many other excellent task management and collaboration tools available.
Whichever tools you choose, having an organized project plan will help you achieve your goals.
Related Posts
Maggie Marystone is a freelance technology writer, human rights worker, and storyteller based in Chicago. Read Maggie’s Full Bio
