Facebook groups are a great way to share posts, images, and videos with other like-minded individuals. Groups based around locations, occupations, interests, and more are all available for Facebook users to join. If you can’t find a group that matches your interests, you can create a new group and invite others to join instead.
However, if you’ve joined a Facebook group that isn’t meeting your expectations, it might be time to leave. Leaving a Facebook group will remove the group posts from your Facebook timeline and stop you from posting or interacting with the group. If you want to know how to leave a Facebook group, here’s what you’ll need to do.
Things to Consider Before Leaving a Facebook Group
Before you leave a Facebook group, you should consider that leaving the group doesn’t mean that all of your interactions with the group leave with you. Any posts, likes, or comments you make will remain in place.
If the Facebook group is set to private, leaving the group will mean you lose access to these posts. You won’t be able to edit to delete them after you leave, and you would need to rejoin the group to make changes to any of the posts or comments you’ve made previously.
You should also consider what will happen to your Facebook group if you’re a Facebook group administrator. You will need to make sure you appoint other group members to become administrators to ensure a prompt handover, ensuring that the group can be managed with effective moderation in place.
If you’re the only administrator, Facebook may automatically invite other members of the group to become admin in your place. In some circumstances, the group might be closed entirely. If you still want to leave your Facebook group, you’ll need to proceed with the steps outlined below.
How to Mute a Facebook Group
Leaving a Facebook group removes your ability to post (and view other posts) in the group. If you want to stop seeing group posts, but don’t want to leave the group entirely, you can mute the group instead.
Muting a Facebook group hides group posts and notifications from your feed, but you can still view the group and interact with other members when you need to. If you see too many posts for the group in your feed, muting it can stop this from bothering you without needing to leave the group entirely.
On PC or Mac
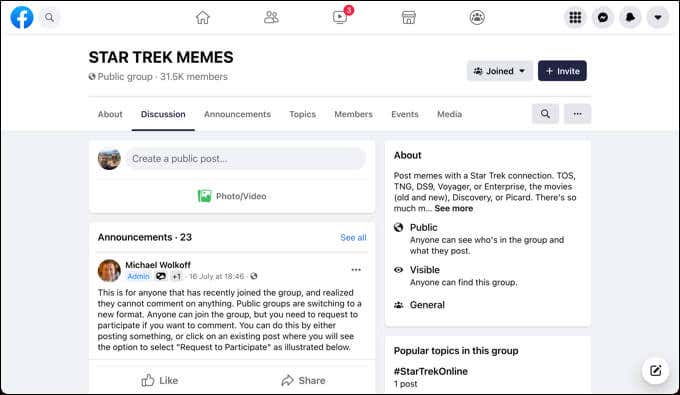
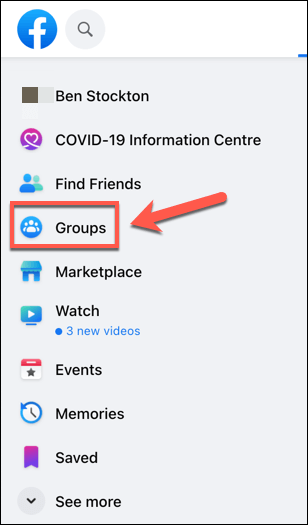
- To mute a group on Facebook on a PC or Mac, open the Facebook website in your browser and sign in. Select Groups from the menu on the left after signing in.
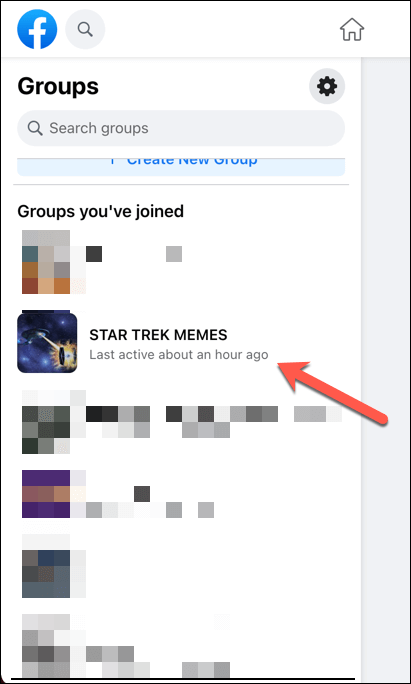
- In the Groups menu, select a group you wish to mute from the menu on the left.
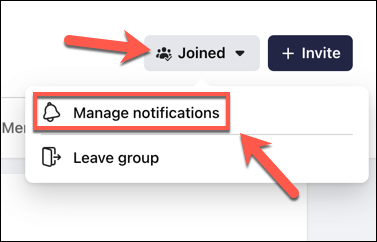
- After selecting your Facebook group, select the Joined drop-down menu in the top-right. From the drop-down menu, select Manage notifications.
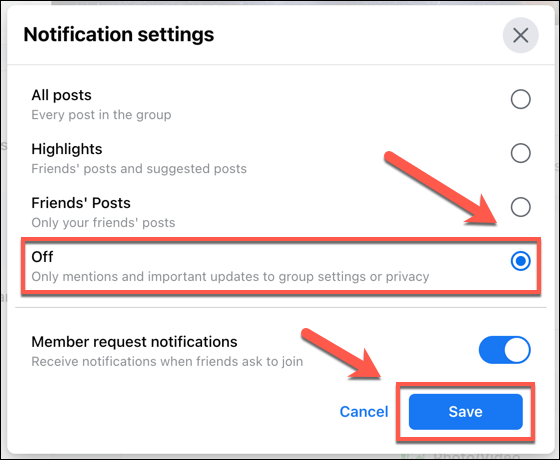
- In the Notifications settings menu, select a suitable option to reduce Facebook group notifications and messages (eg. Off to stop all notifications). Select Save to confirm your choice.
On Android, iPhone, and iPad Devices
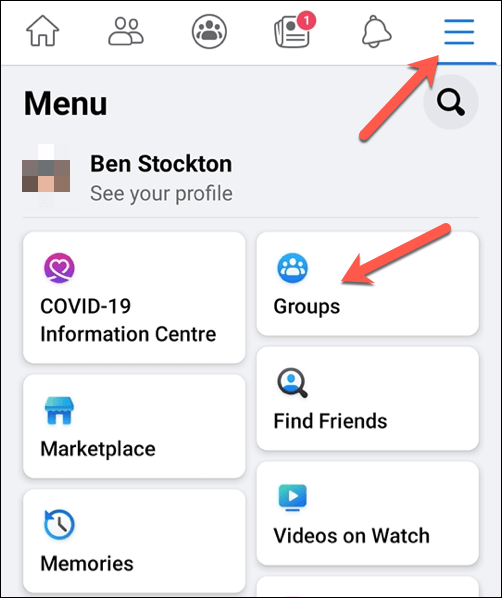
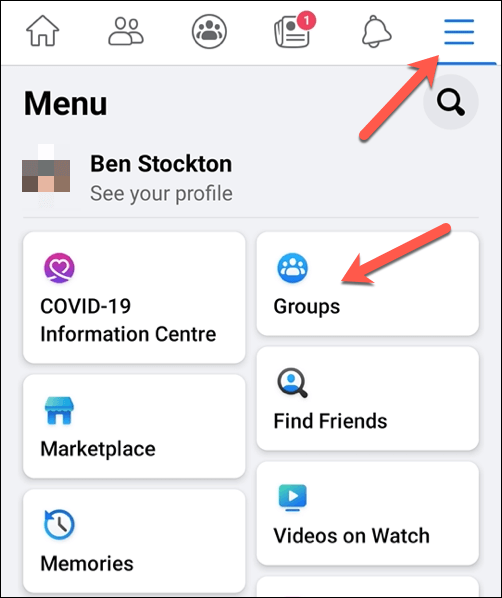
- To mute a Facebook group in the mobile app on Android, iPhone, and iPad devices, open the app and select the menu icon on the right. From the menu, select Groups.
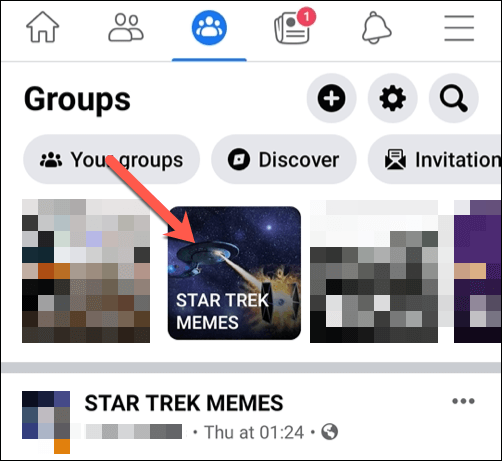
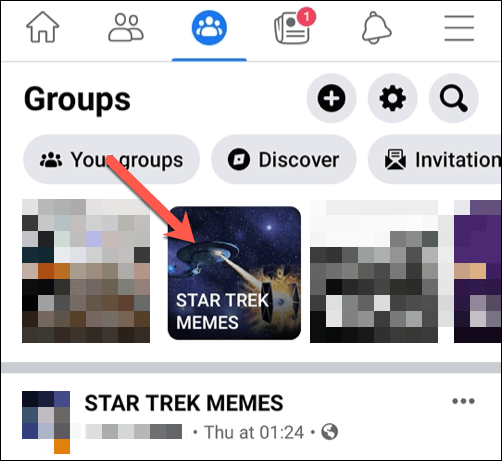
- In the Groups menu, select the group you wish to mute from the group icons at the top. Alternatively, select Your groups, then select your Facebook group from the list.
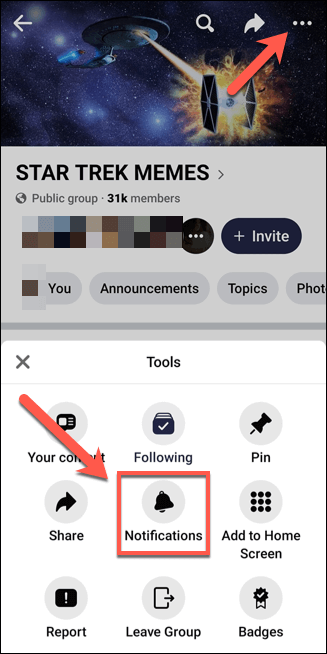
- Once you’ve entered your group page, select the menu icon in the top-right corner. From the menu, select the Notifications option.
- In the Notifications menu, select the appropriate level of notifications you wish to see. If you want to mute the group entirely, select Off. The change will be applied automatically.
How to Leave a Facebook Group
Muting a Facebook group is one thing, but if you want to completely remove yourself from a group on Facebook, you’ll need to leave it. Leaving a Facebook group is simple to do, but the steps will vary slightly, depending on whether you’re using the website or mobile app.
On PC or Mac
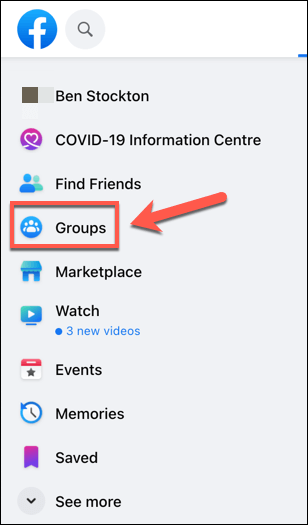
- To leave a Facebook group on a PC or Mac, open the Facebook website and sign in, then select the Groups option in the menu on the left.
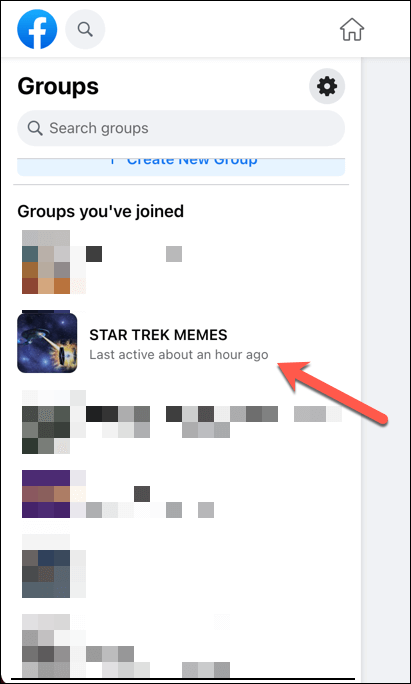
- In the Groups menu, select the group you wish to leave from the Groups you’ve joined section on the left.
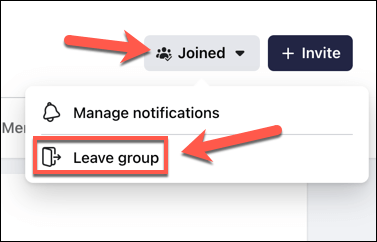
- In your selected group, select the Joined drop-down menu, which is positioned next to the Invite button on the right. From the menu, select the Leave group option.
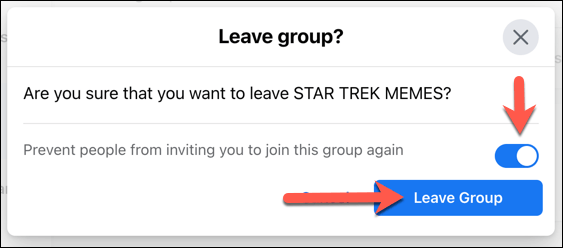
- You’ll need to confirm that you do actually want to leave the Facebook group. If you want to stop yourself being re-added in the future, select the Prevent people from inviting you to join this group again slider. Select the Leave Group option to confirm your choice.
On Android, iPhone, and iPad Devices
- If you want to leave a Facebook group on Android, iPhone, or iPad devices, open the Facebook app and select the menu icon in the top right. From the menu, select Groups.
- Select the group you want to leave from the group icons at the top of the Groups menu. Alternatively, select Your Groups, then select the group you wish to leave from the list provided.
- On the group page, select the menu icon in the top-right. From the menu, select the Leave Group option.
- You’ll need to confirm your choice. If you want to stop yourself being re-added in the future, select More Options > Leave Group Permanently.
- To leave the group (but allow yourself to be re-added in future), select Leave Group.
Your membership to the group will end immediately and you’ll no longer see group posts or notifications on your Facebook feed or in the Groups menu. If the group is private, you’ll also lose access to all posts and comments.
Managing Your Facebook Account
Joining a Facebook group isn’t permanent, and if you decide you want to leave, the steps above should help you cut the link. Before you leave, don’t forget that any posts you’ve made will remain in place – you just won’t be able to edit or remove them afterward if the group is set to private.
If you’d prefer to keep your interests private, you may want to set up an anonymous Facebook account. You can download and delete your Facebook data if you’re worried about your privacy, but you’re troubled by individual users, you could block them or deactivate your account to disable your profile and hide it from others.

