It’s now possible to save your live streams easily on most platforms, which is great if you want to upload them to another platform or archive them for safe storage. Twitch, Instagram, and Facebook have included this feature.
In this guide, we’ll show you how you can save your live stream on Twitch, Instagram, and Facebook.
How to Save Your Live Stream on Twitch
Twitch incorporates a feature called Video on Demand (VOD) which saves streams and allows users to see videos after they’ve been streamed. Via this feature, it’s possible to find and download your previous live streams. First though, you need to enable VODs, then saving them is easy.
Here’s how to set up your VODs to easily save your live streams:
- Open the official Twitch website and log in.
- Click your user avatar in the top-right corner of the screen.
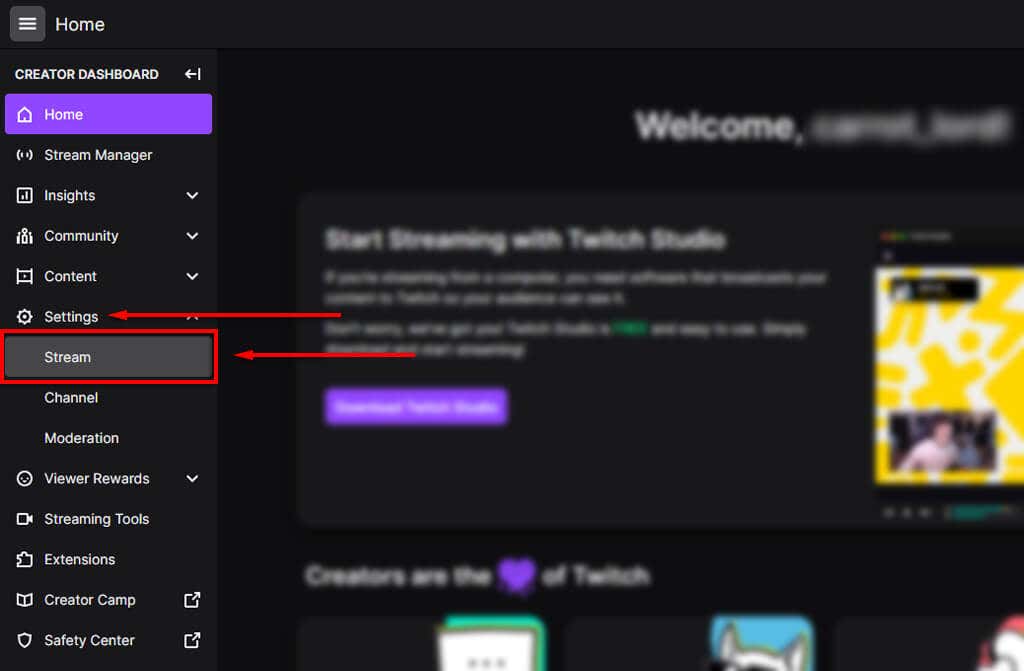
- Select Creator Dashboard.
- In the left-hand menu, select Settings then select Stream in the dropdown menu.
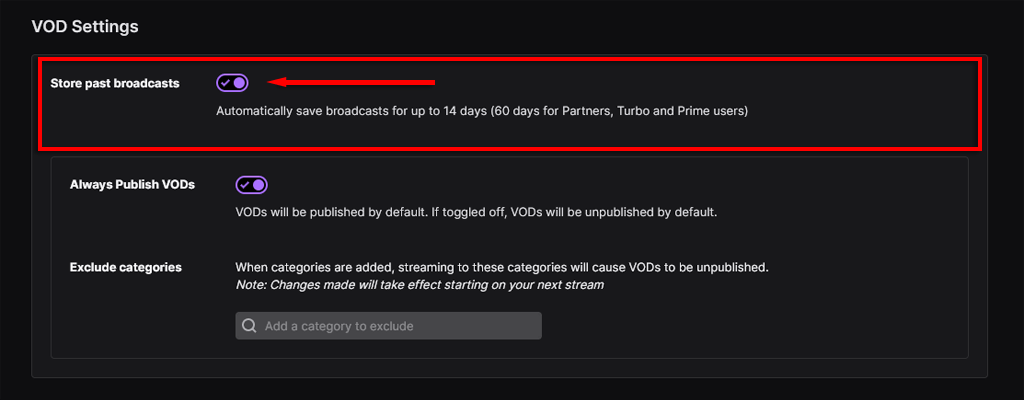
- Scroll down to VOD Settings and toggle on the switch for Store past broadcasts.
Now, each time you complete a live stream, Twitch will save the video as a VOD. These are saved for 14 days if you’re a Twitch standard user, or 60 days if you have a Twitch Turbo, Prime Gaming subscription, or you’re a Twitch Partner.
To find and save your live streams, do the following:
- Open the official Twitch website and log in.
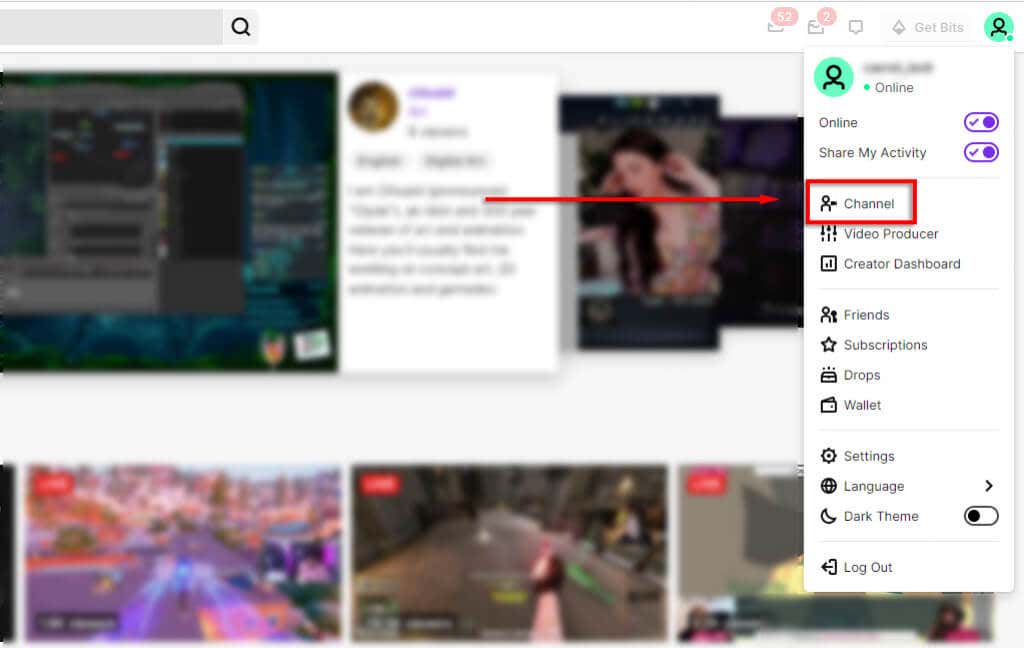
- Select your user avatar in the top-right corner.
- Select Channel.
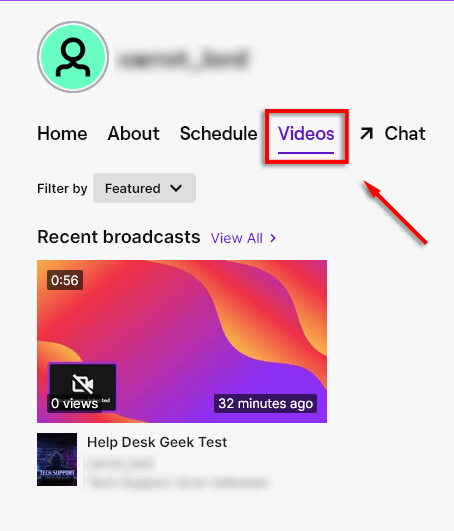
- Select Videos. On this page, you’re able to see all of your previously saved videos.
- Select Edit Videos at the top-right of the pane.
- Click the video you wish to save, then select the three vertical dots.
- In the drop-down menu, select Download.
Twitch also offers another functionality called Highlights which allows you to save curated broadcasts into short videos that remain on your channel forever.
Note: To download other people’s videos, check out our guide.
How to Save Your Live Stream on Instagram
Instagram introduced the ability to download live streams (also called broadcasts) around 2017, bringing it up-to-date with other platforms like Facebook and Twitter. Keep in mind, you’re only able to create and save a live stream via your mobile device.
To save your live stream on Instagram on Android or iPhone:
- Tap the Plus icon at the top-left of the app.
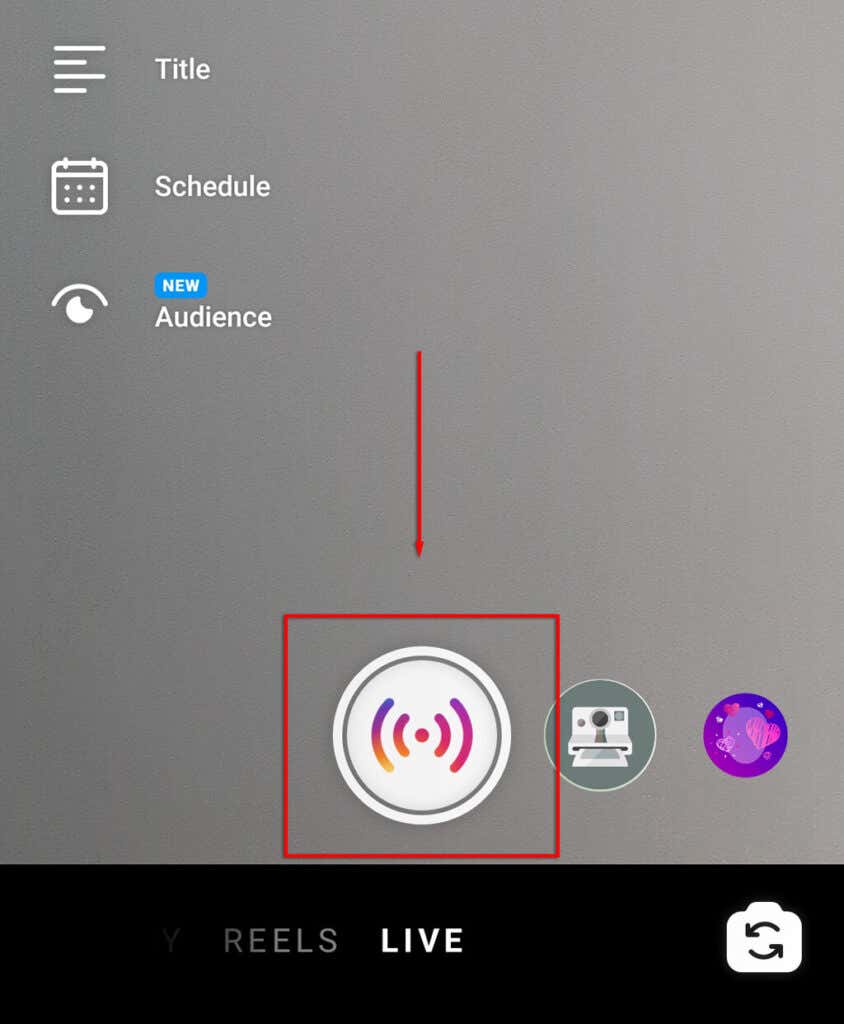
- Tap Live, and give Instagram any required permissions.
- Tap the shutter icon to start your live video.
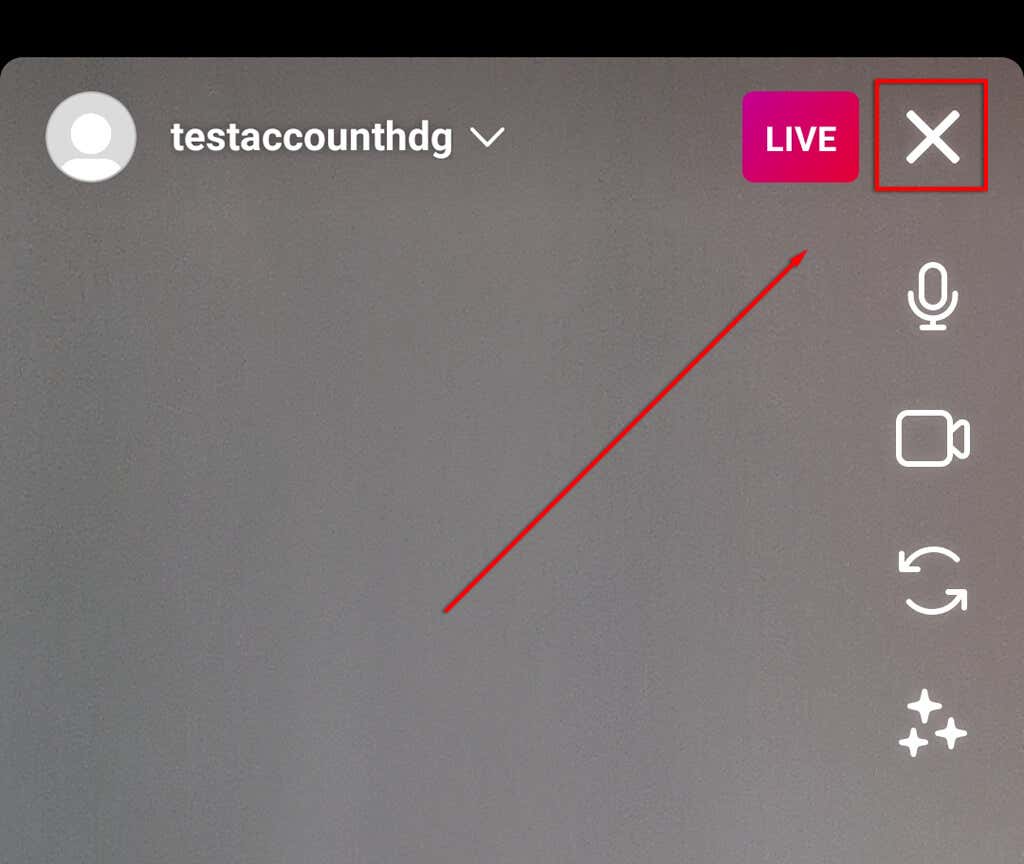
- Once completed, tap the cross icon at the top-right corner of the screen to end your stream.
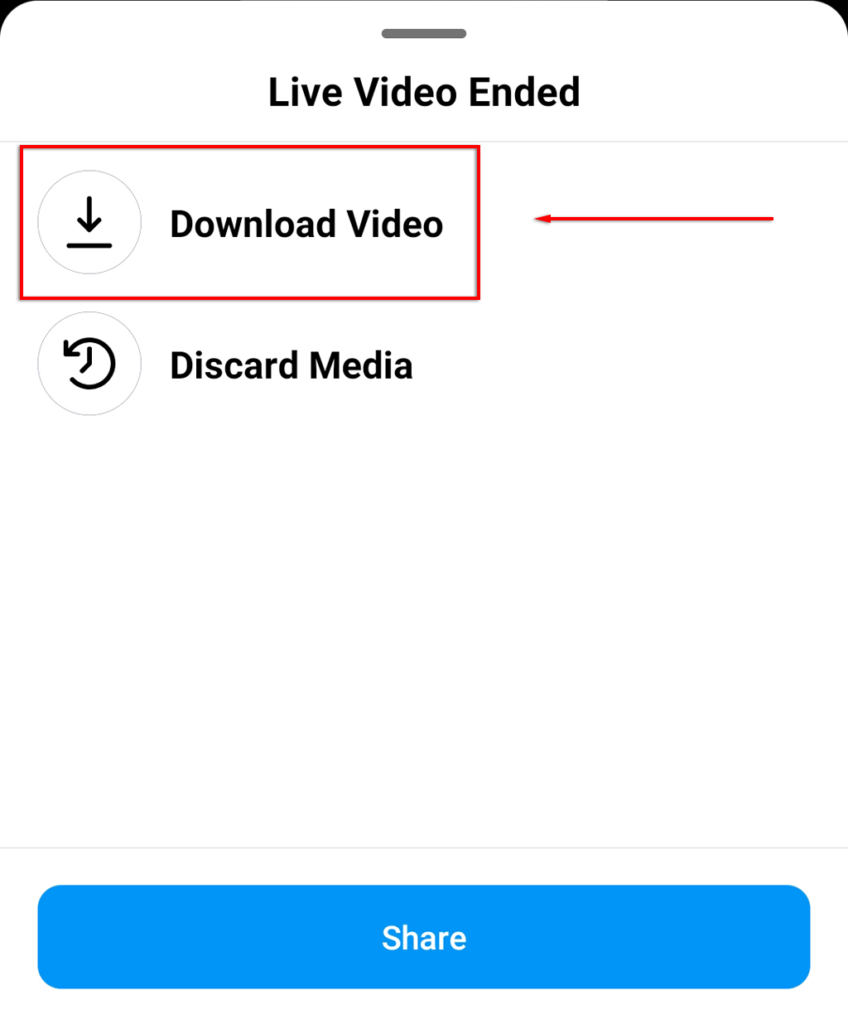
- A pop-up will appear asking you whether you want to save or discard your video. Select Download Video. The video will be saved in your camera roll.
Note: You’re only able to save your live stream as soon as it’s completed. Once you move past the final pop-up, saving the stream becomes impossible.
How to Save Your Live Stream on Facebook
As soon as you finish a live stream on Facebook, it will automatically post to your Facebook timeline and save it in your Facebook video library. This makes it incredibly easy to download if you want to archive it or post it to another platform.
To download your live stream from Facebook on PC or Mac:
- Head to Facebook and log in to your account.
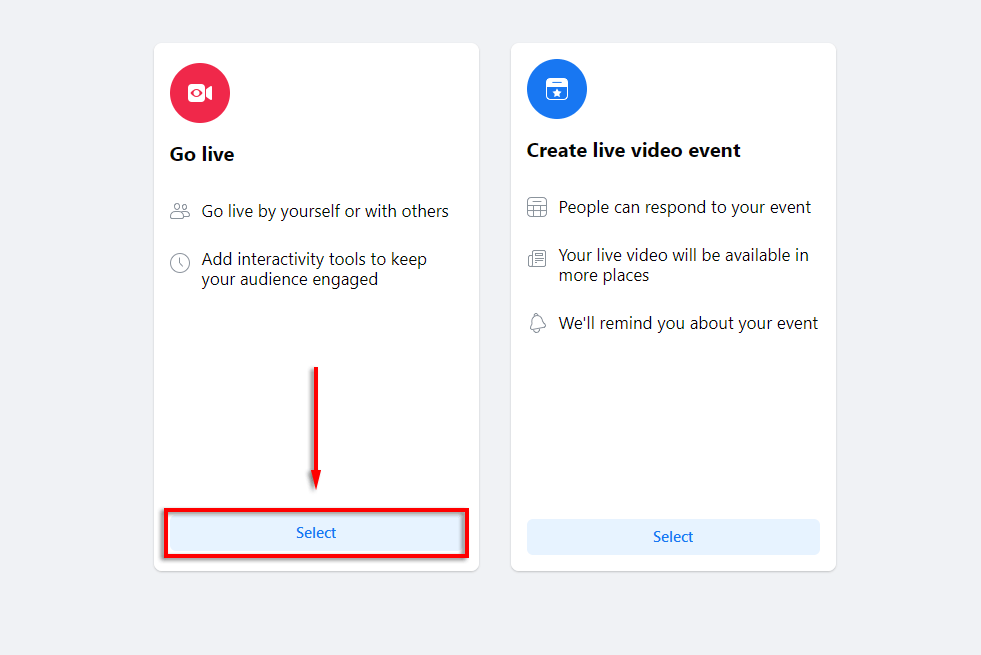
- Select Live Video.
- On the new page, select Go live.
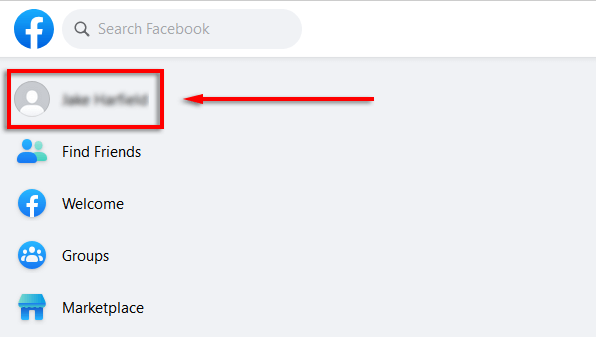
- Once you’ve completed your live stream, select your user avatar at the top-left corner to go to your profile.
- Select Videos.
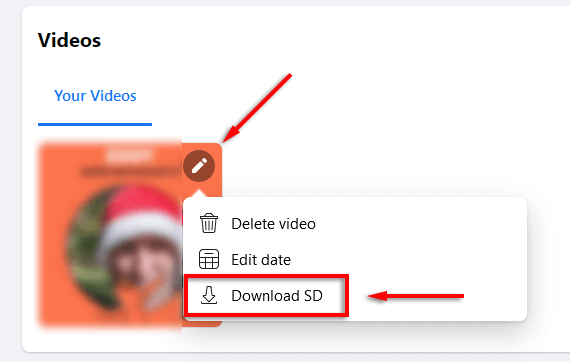
- You should see a list of all the videos on your account. Find your live stream and select the pencil icon at the top-right of the thumbnail. Next, select Download SD.
- The video will now be in your downloads folder.
Downloading live streams via Android or iPhone is more difficult. To do so:
- Find the video you wish to download in the Facebook app.
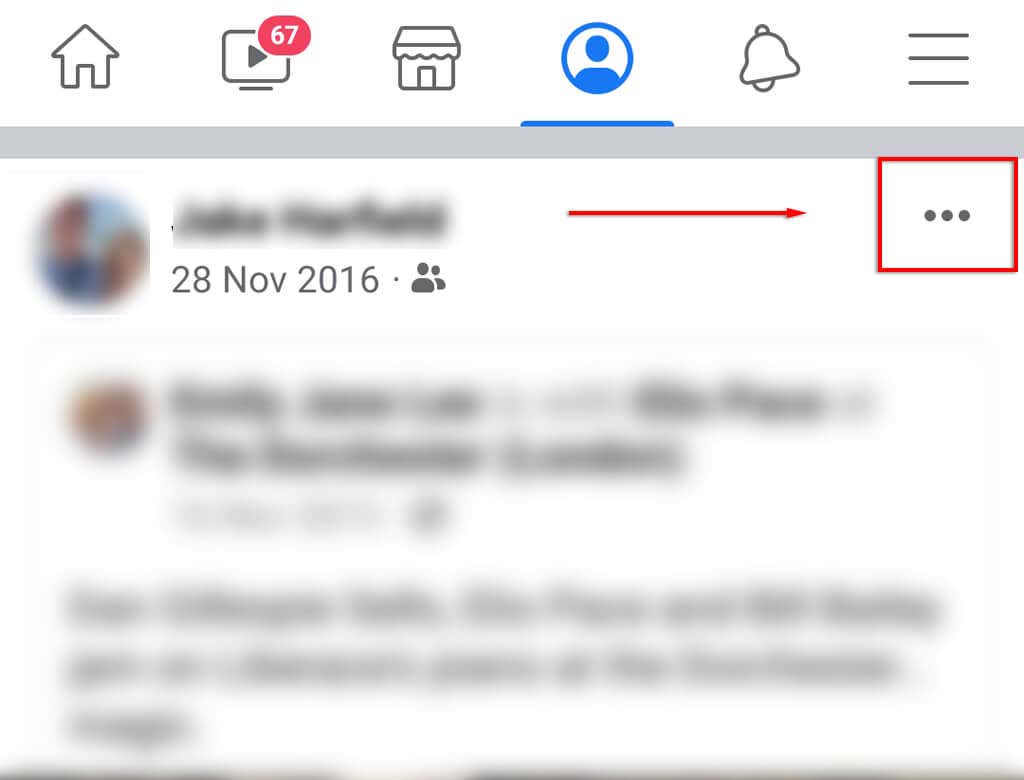
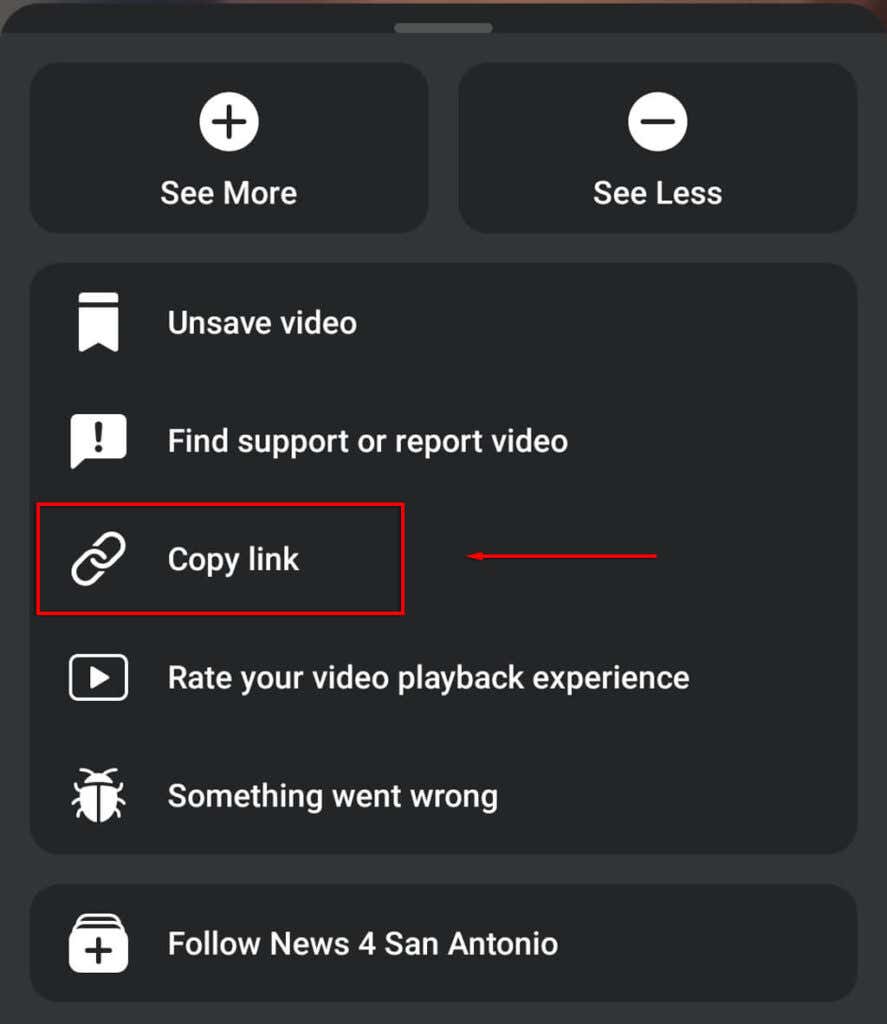
- Open the video, then tap the three dots at the top-right of the pane.
- Select Copy Link.
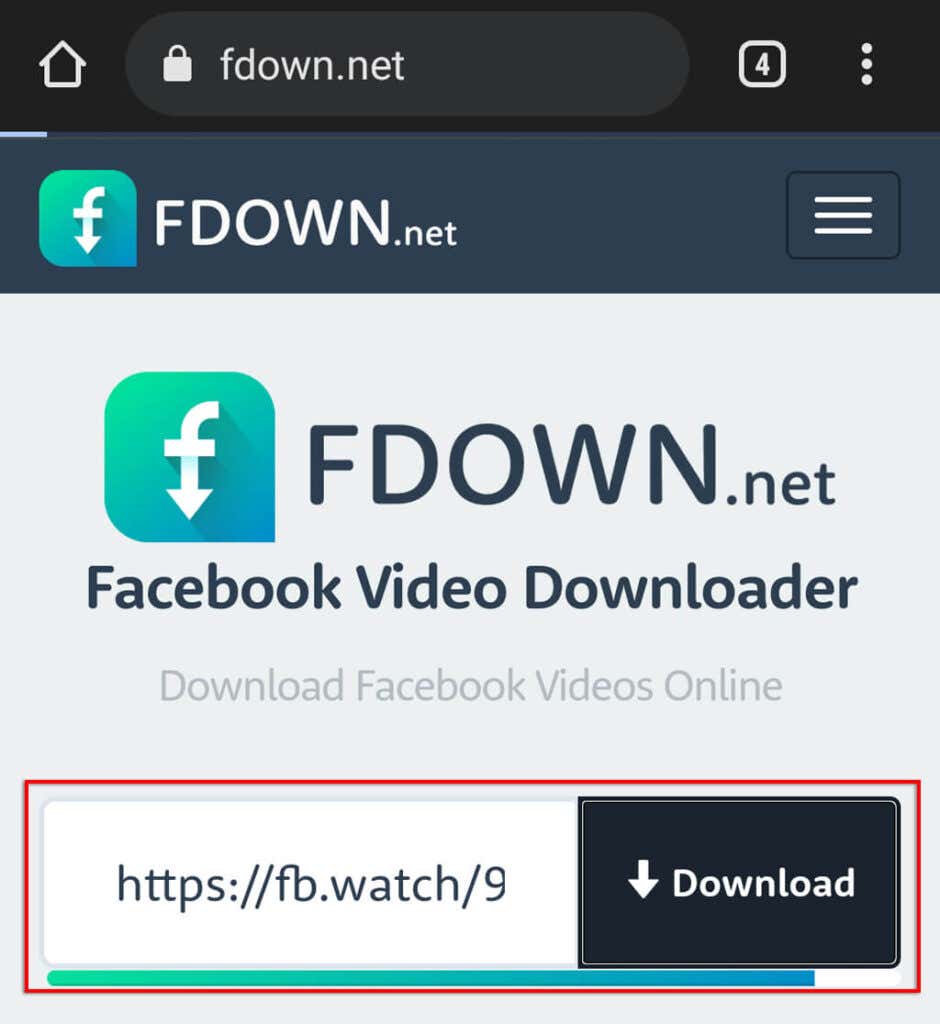
- Head to a website that allows video downloads from Facebook such as fdown.net. Keep in mind that there are no Facebook-authorized websites that allow downloading, so do so at your own risk.
- Paste the link and select Download.
Save Your Live Stream
Now you know how you can save and download your live stream on Twitch, Instagram, and Facebook. Luckily, it’s incredibly easy, and it’s a great way to ensure that you always have access to your previous videos, especially if you wish to reuse them in the future.
