It’s easy to add new columns and rows to an Excel spreadsheet. In this article, we’ll show you how to add a column (or row) in Microsoft Excel for desktop, web, and mobile.
How to Add Columns and Rows in Excel for Desktop
The following three methods will work for both the Windows and Mac versions of Microsoft Excel.
Method 1: Using the Home Tab
To insert a new column or row:
- Open your Excel spreadsheet.
- Select the Home tab.
- Use your cursor to select any cell within your worksheet where you want to add a new column or row.
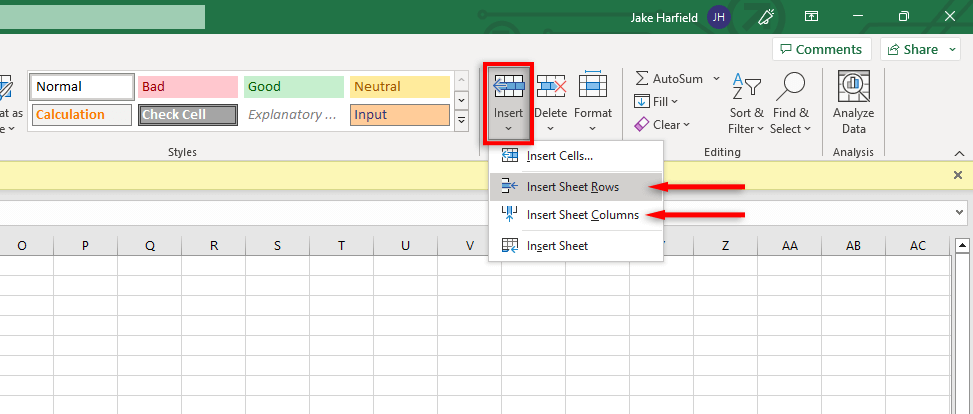
- In the Cells section of the Home tab, select Insert.
- In the drop-down menu, select Insert Sheet Columns or Insert Sheet Rows. This will add a new column or row at the selected cell.
- To delete columns, repeat this process and select Delete rather than Insert.
Note: When you select a column or row that has formatting applied, that will apply to the new column or row that you added. If you don’t want this to occur, select Insert Options, then select Clear Formatting.
Method 2: Right-Click
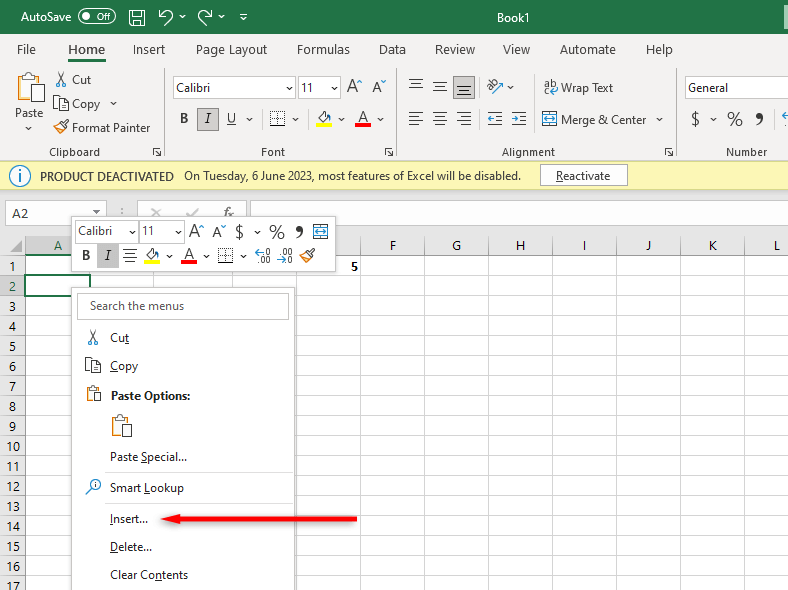
An alternative method is to right-click a cell where you’d like to insert a new row or column.
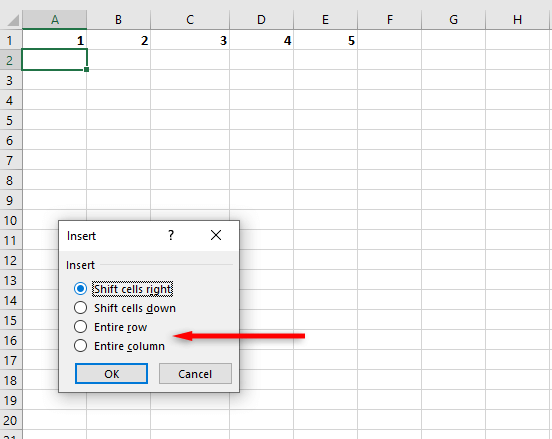
Then, select Insert… and select either Entire row or Entire column.
Method 3: Use Keyboard Shortcuts
The quickest way to add columns and rows in Excel is by using the built-in keyboard shortcuts. To add a column, click the column letter to select the entire column. This is known as the column header. Then, press Ctrl + Shift + + to add a new column.
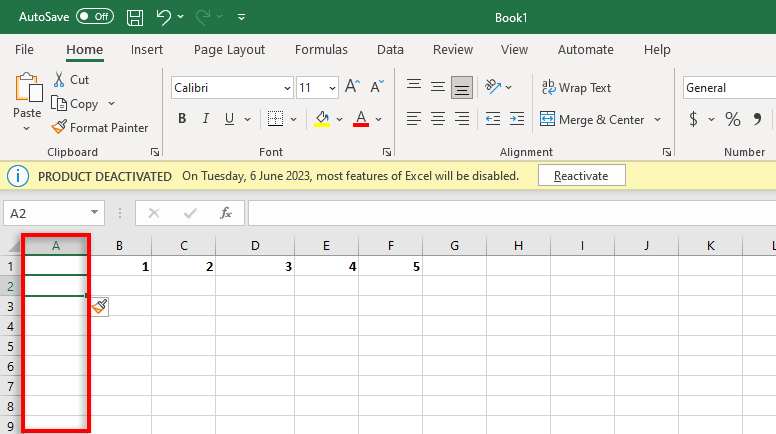
For example, if your selected column is Column A, your inserted column will appear to the left and the original column will become Column B.
To add a new row, do the same thing but select the entire row by clicking the number on the left-most column. This is known as the row header.
You can insert multiple columns or rows at the same time by selecting a number of columns and rows. When you press Ctrl + Shift + +, they’ll appear to the left (or below).
Note: You can also use the alternative keyboard shortcut for adding columns, Alt + I + C.
How to Add Columns and Rows in Excel for Web
To insert a new column or row in Microsoft Excel for the web:
- Open your Excel sheet.
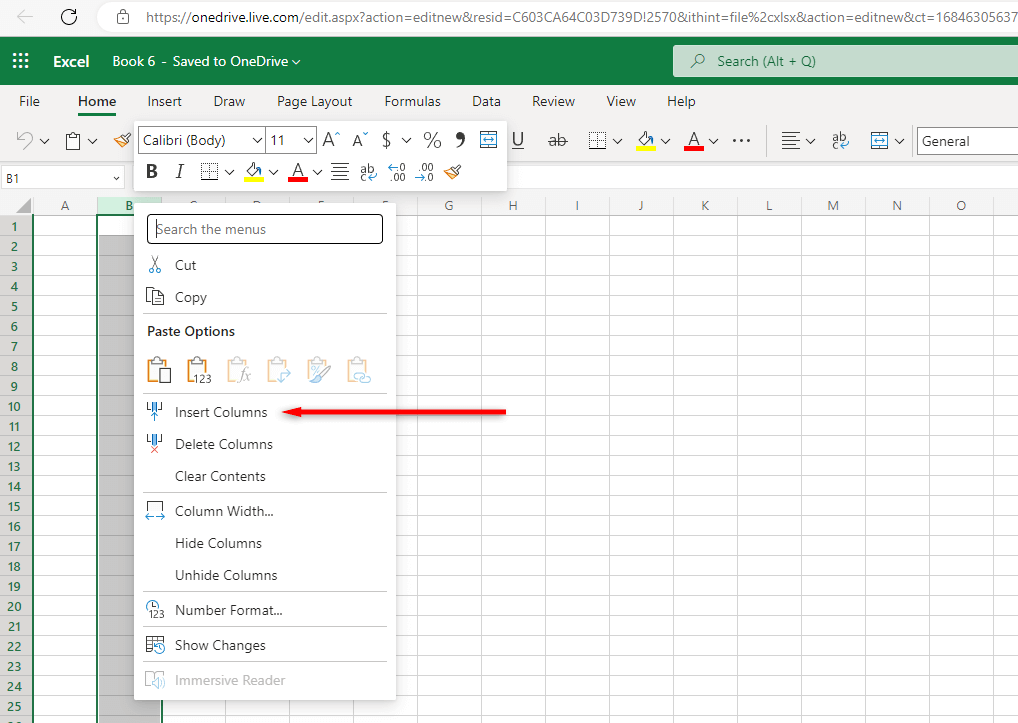
- To insert a single column or row, right-click the existing column header or row header where you want to insert it and select Insert Column or Insert Row.
- To insert multiple columns or rows, select the number of column headers or row headers you want to add. Then, right-click the selection and select Insert Columns or Insert Rows.
How to Add Columns and Rows in Excel for Mobile
To insert a column or row on Excel for mobile:
- Open your Excel spreadsheet on your Android or iOS device.
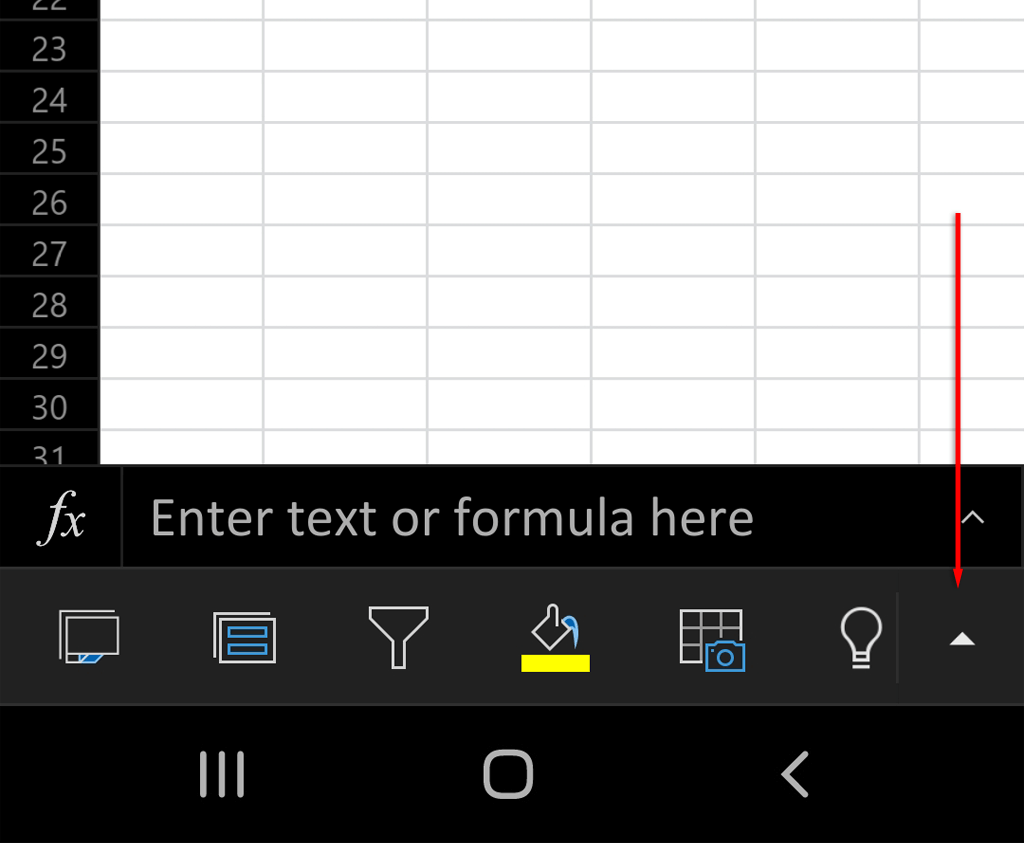
- Select the upward arrow at the bottom-right corner of the screen to bring up additional settings.
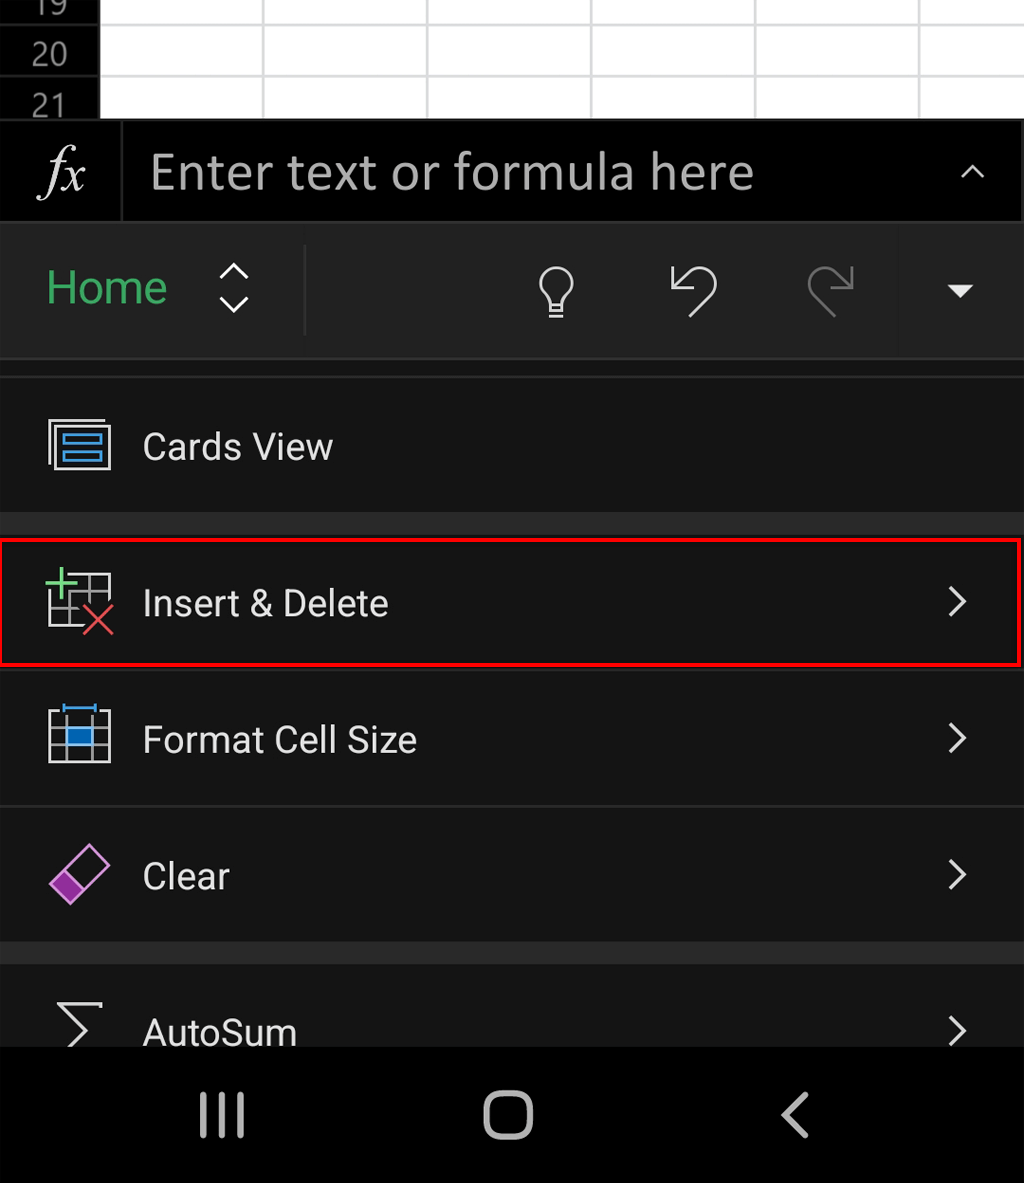
- In the Home tab, scroll down and tap Insert & Delete.
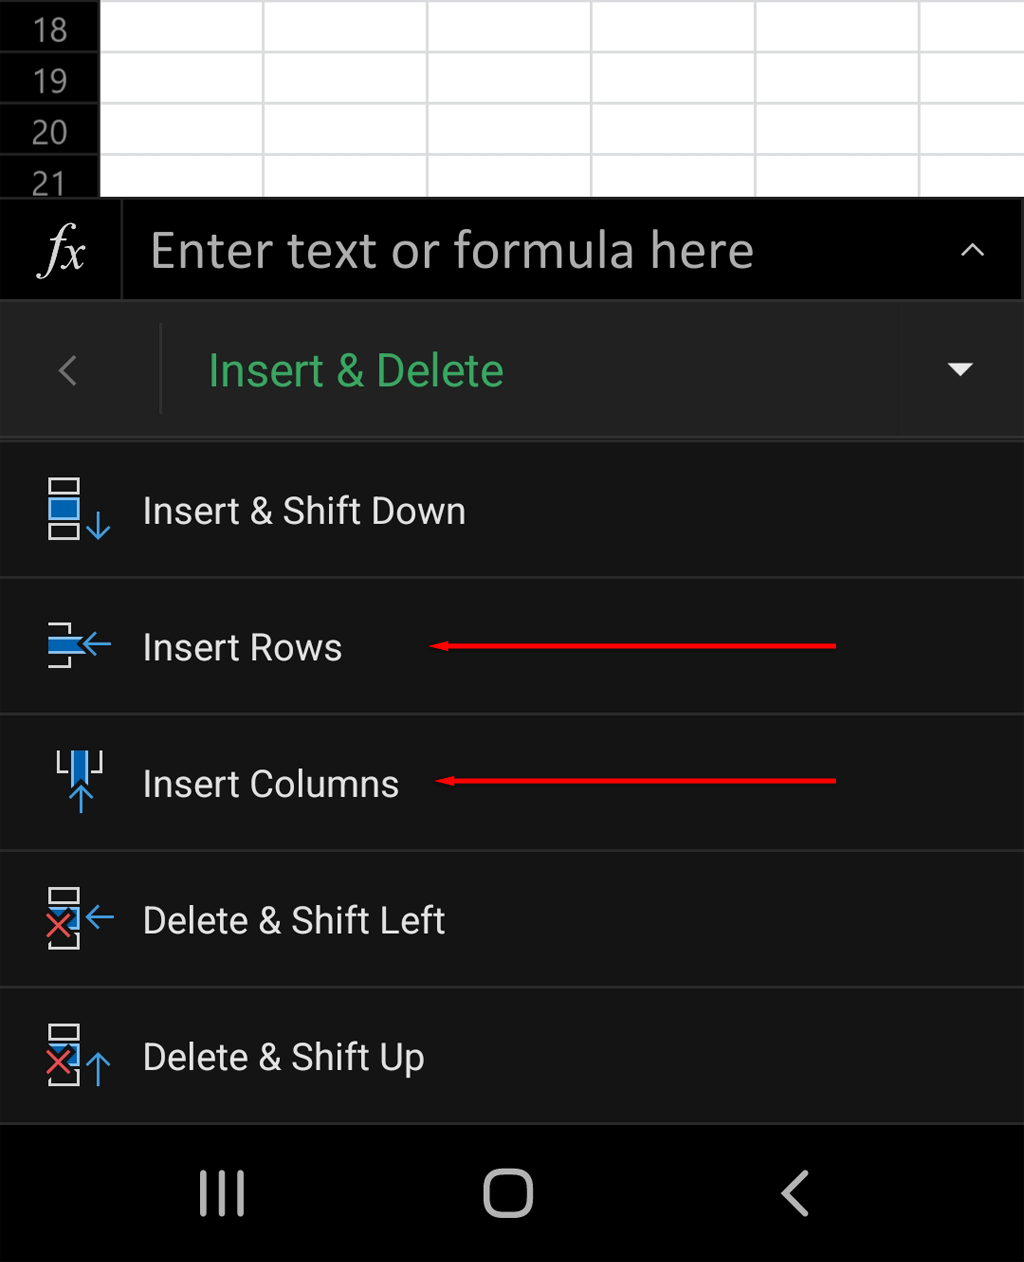
- Select Insert Rows or Insert Columns to add new rows or columns.
Adding Columns Is Easy
Microsoft Office provides users with a lot of powerful tools, and Excel is one of the best. However, it can be hard to get used to, even if you know all the tips and tricks. Hopefully, thanks to this tutorial, you can now add columns and rows with ease.
Related Posts
Jake Harfield is an Australian freelance writer whose passion is finding out how different technologies work. He has written for several online publications, focusing on explaining what he has learned to help others with their tech problems. He’s an avid hiker and birder, and in his spare time you’ll find him in the Aussie bush listening to the birdsong. Read Jake’s Full Bio


