Are you trying to figure out how to save a Word Document as a JPEG? This blog post will break down the steps to successfully turn your Word document into an image with just a few clicks of the mouse. Whether you’re trying to add greater visual impact for presentations or create images for digital documents and web content, this post is here to help make that process easier so you can quickly transfer your words into pictures.
The method you’ll choose to convert your Word document will depend on the resolution of JPEG you’ll need, the number of pages you need to convert, as well as how fast you need it done. Unfortunately, there is no way to export a document as a JPEG directly, but the workarounds described in this article are very simple and easy to use.
Save As JPEG by Taking a Screenshot
If you need to convert only a single page, or a part of one Word document page into a JPEG, it’s easiest and fastest to do it by taking a screenshot. If you do it often, you might want to get screenshot software such as Windows Snipping Tool, LightShot, and Mac Screenshot App for macOS.
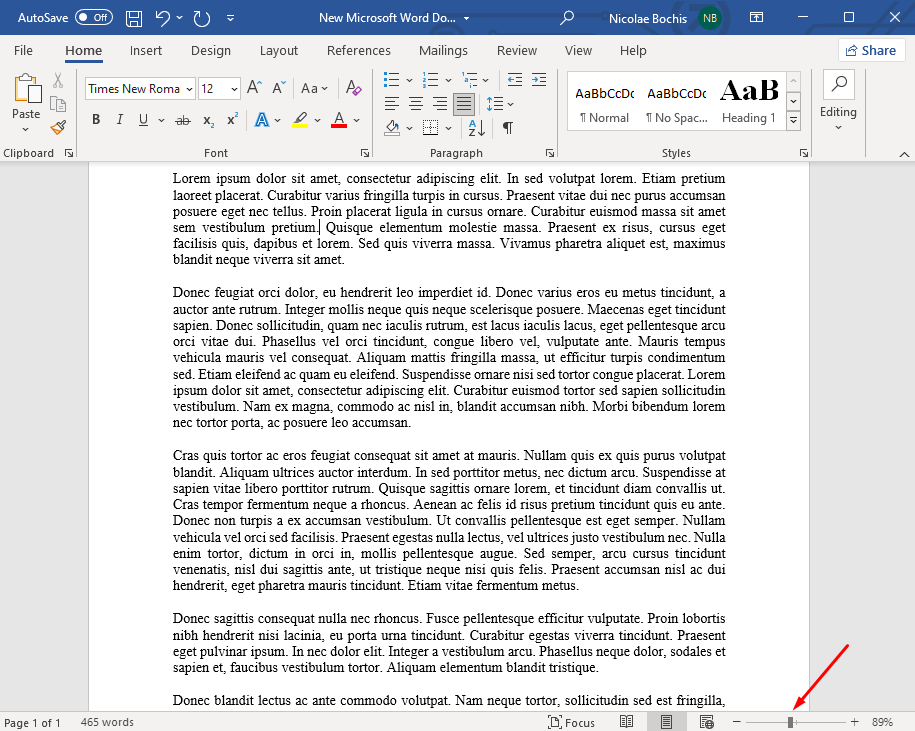
To take a screenshot of the whole Word document page, you’ll need to zoom it out so it fits the screen. Use the zoom tool at the bottom right corner of the screen. Either click on the minus symbol or drag the bar toward it.
Once your document is prepared, you can take a screenshot:
- In the Windows search bar type Snip & Sketch, and open the app. If using a Mac press CMD + Shift + 4 on your keyboard to open the Screenshot app.
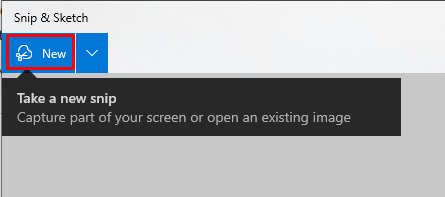
- Select New if using Snip and Sketch.
- You’ll notice your screen going darker, and Crosshairs appearing. You’ll need to click and drag the crosshairs over the entire Word document page.
- After making a selection, select the floppy disk icon at the top right corner of the app to save the image with Snip & Sketch. If using Mac, select File then Export.
- Select where you want to save the image file, give the screenshot a name, and select the JPG file type from the drop-down menu.
- Finally, press the Save button located at the lower right corner of the pop-up window.
Windows users can also use Paint to save their screenshots as JPEGs. In that case, you won’t be needing Snip & Sketch. Prepare your document page so it fits the screen and follow these steps:
- Press the Print Screen button on your keyboard while the Word document is open.
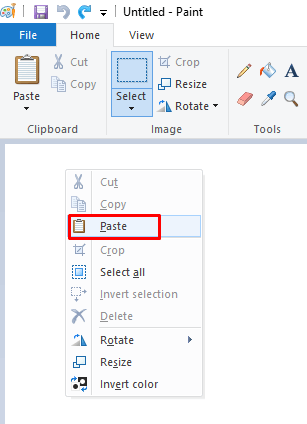
- Open Paint, and press CTRL + V to paste the screenshot as a new document. You can also right-click anywhere on the empty Paint document and select Paste from the menu.
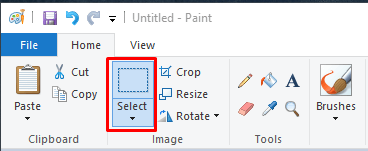
- The screenshot of your entire screen will show up. You’ll need to use the Select tool and use it to select only the Word document page or a part of it.
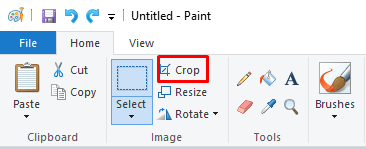
- Once the selection is made, click on the Crop tool in paint. This will leave only the selected part in the Paint document, and the rest will be removed.
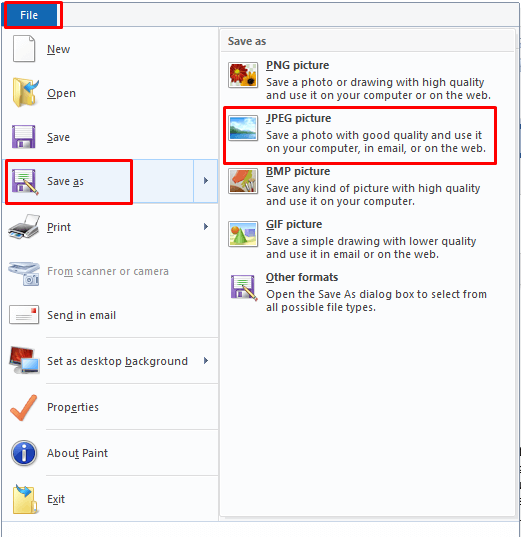
- Finally, click File at the top left corner of the screen to bring down the menu, then choose Save as, and select JPEG picture from the list.
As you can see, you can also choose to save your file as PNG, BMP, or even GIF. It all depends on your needs and what you intend to do with the screenshot image of a Word document.
Paste Text as JPEG in Word on Windows and Mac
Although you can’t export a Word document as JPEG directly from the Microsoft Word app, there is a way to save it as an image file by using the Paste options. Here’s how to do it:
- Select the text in your Word document that you’ll convert to an image. If it’s a single-page document and you need the whole page, press CTRL + A on your keyboard to select everything.
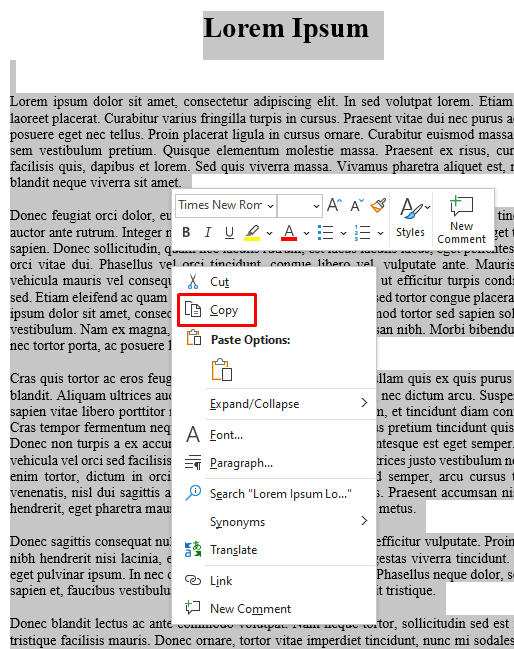
- Right-click anywhere in the document and select Copy from the menu.
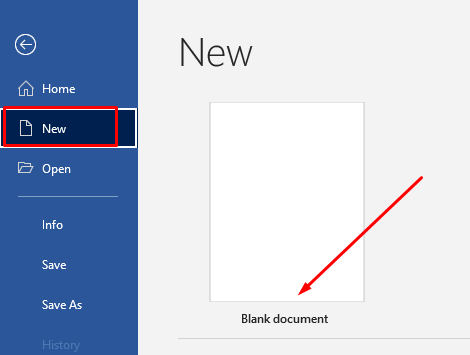
- Choose File from Word’s menu, select New, and open a new blank document.
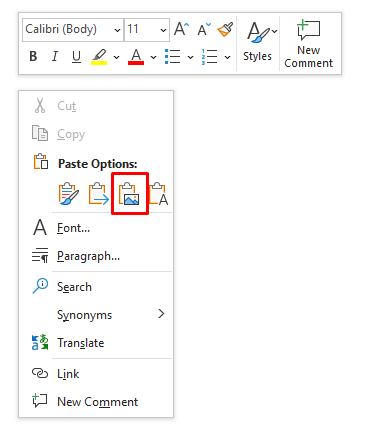
- Right-click anywhere on the new blank document and find the Paste options. Select the Picture paste option from the menu. Its icon is a clipboard with a picture in front of it.
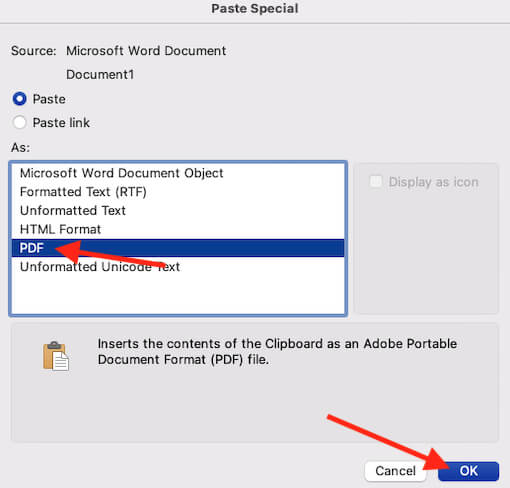
- If you are using a Mac, instead of Paste options, find Paste Special and click it. In the As section choose PDF, and click ok. The rest of the steps are the same as for Windows.
- You’ll notice that the copied text looks the same as the original. But if you click on it, a box will appear around it indicating it’s a picture. You can now manipulate its size, rotation, and text warping.
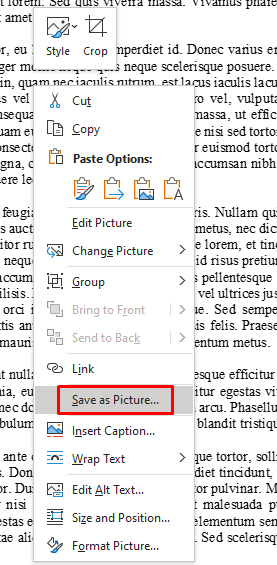
- Right-click on the picture you just created and select Save as Picture from the menu.
- A new dialog box will appear where you can set where you want your new picture to be saved, change the file name, and set the file type to JPEG. Once you are done,select the Save button.
Congrats! You managed to easily save your document as a JPEG never leaving Microsoft Word app.
Save as PDF and Convert to JPEG
In case you need to convert your entire multiple-page Word document into JPEG, using the methods described above would take a long time. Instead, you should save the document as PDF and continue from there.
Word allows you to save the document as a PDF directly:
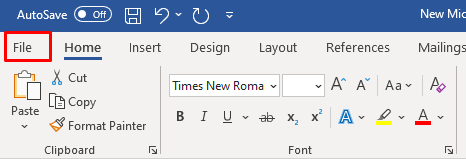
- Go to File.
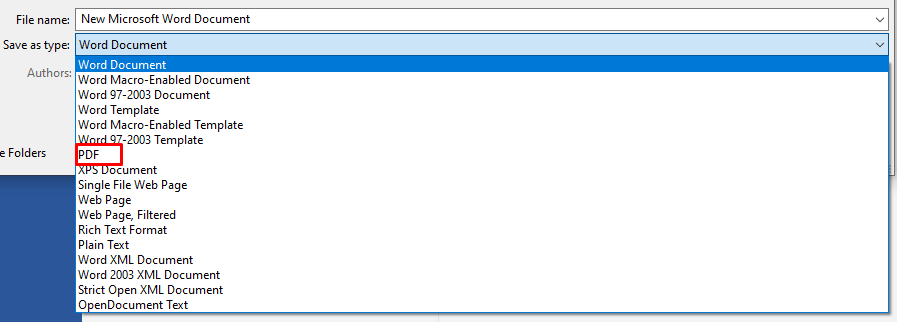
- Select Save as, and select PDF from the drop-down menu.
- Finally hit the Save button to finish.
Now you can use that PDF file to convert your documents into images. There are different ways to do it. Adobe Acrobat Reader allows you to export PDF files as images but it requires a paid subscription. Instead, you can use any other free converter software to convert a whole PDF file into JPEG images at once.
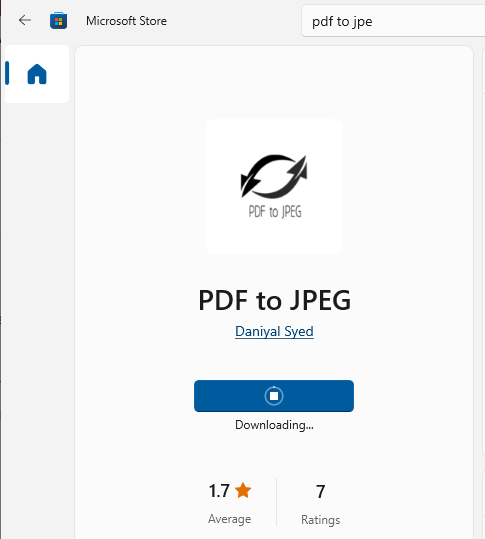
If you’re a Windows user, you can download a PDF to JPEG app from Microsoft Store. It’ll allow you to work on a whole document, page by page.
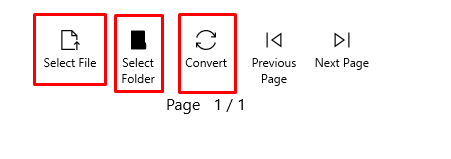
Simply select the PDF file you’ll convert to JPEG, then select the destination folder where you want the JPEG image to be saved, and finally press Convert.
This is an easy app to use to quickly generate JPEG images out of your PDF files.
Save as a JPEG by Using Powerpoint
If you’re familiar with the Microsoft Office suite, you can use PowerPoint to convert your Word document into JPEG. Here’s how:
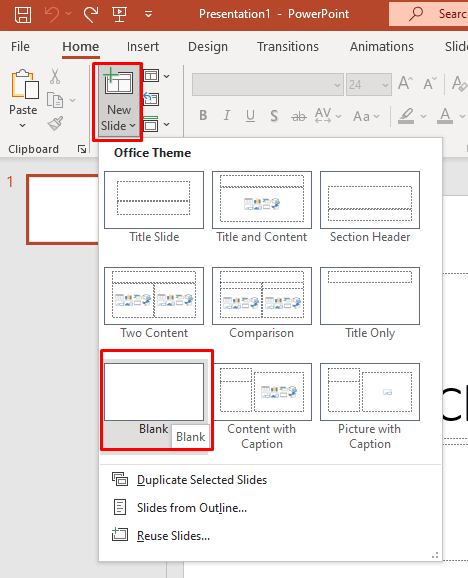
- Open your Word document and PowerPoint app. Open the blank slide in PowerPoint by selecting New Slide on the ribbon, and selecting Blank from the menu.
- In Word, select the page or part of the text you want to convert, and copy it by pressing CTRL + C on your keyboard.
- Paste the copied text into the blank PowerPoint slide by pressing CTRL + V on your keyboard. If your document is large, repeat the process until everything is copied to PowerPoint.
- Save the PowerPoint Slide as JPEG. Go to File, then Save as, and finally set the destination and the name of the file, and select JPEG from the file type drop-down menu.
If you have multiple pages to save as JPEG you can repeat this process as many times as it’s needed.
Save as a JPEG by Using an Online Converter
If you don’t want to install any additional apps, and you need a quick way to convert your word file into a JPEG, consider using online converters. Wordtojpeg is a free website that’ll do the job for you. The good thing is it’ll automatically make a JPEG out of each page of your document. In fact, you can upload a document as big as 50 MB.
Here’s how to use it:
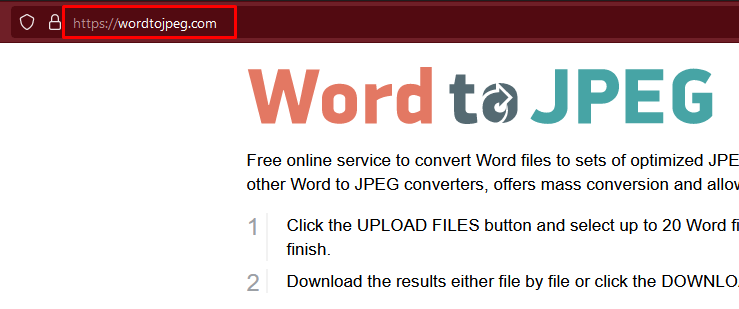
- Open the wordtojpeg.com website in any web browser.
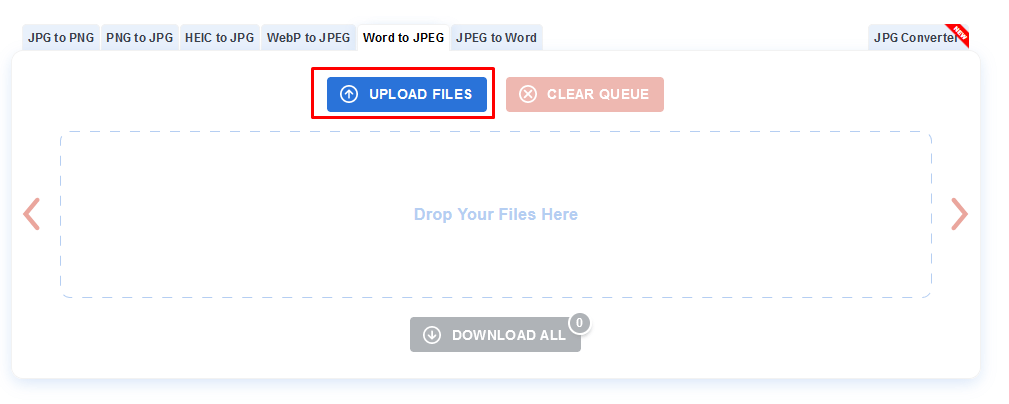
- Go to Upload Files.
- Select the Word document you’ll convert. Click Open to upload it.
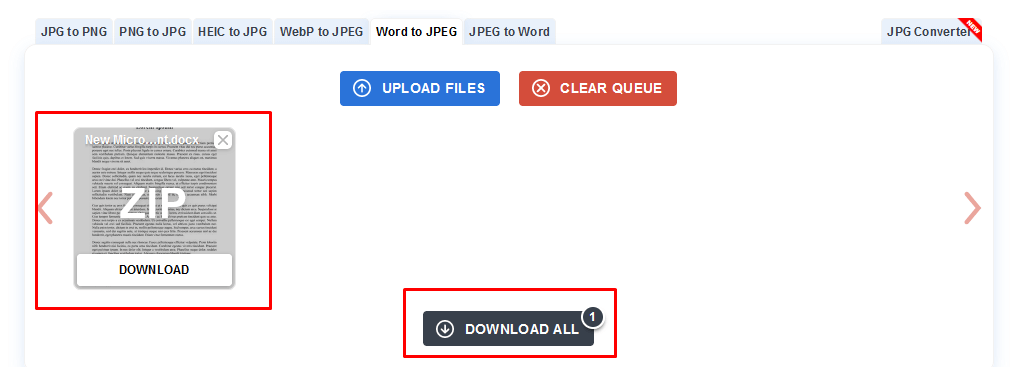
- Wait a moment for the converter to finish. Once it’s done you’ll see a download button on the thumbnail of your file. Click it. If you have multiple pages, this tool will convert files into separate JPEG files. Click the Download all button in the middle to save them all at once on your device. Select a download location and click the Save button.
- Go to a location where you saved the file on your device and extract the ZIP folder that was just downloaded. It contains all the JPEG images created from your Word document.
Now that you know how to save a Word document as a JPEG, you can easily convert your current projects into high-resolution images. Prepare your work for printing, presentations, and any other situation that requires a more polished version of what you’ve written.
Related Posts
Nicolae is a Jack of all trades technology writer with a focus on hardware, programming languages, and AI image-processing software. Over the last five years, he has ghostwritten numerous tech how-to guides and books on a variety of topics ranging from Linux to C# programming and game development. Nicolae loves everything that has to do with technology and his goal is to share his knowledge and experience with others. Read Nicolae’s Full Bio
