
“The Windows Installer service could not be accessed” blocks you from installing or uninstalling any .msi-based program. The service is either stopped, disabled, or has corrupted system files underneath it, all of which are fixable without touching the registry.
Fix #1: Start or restart the Windows Installer service
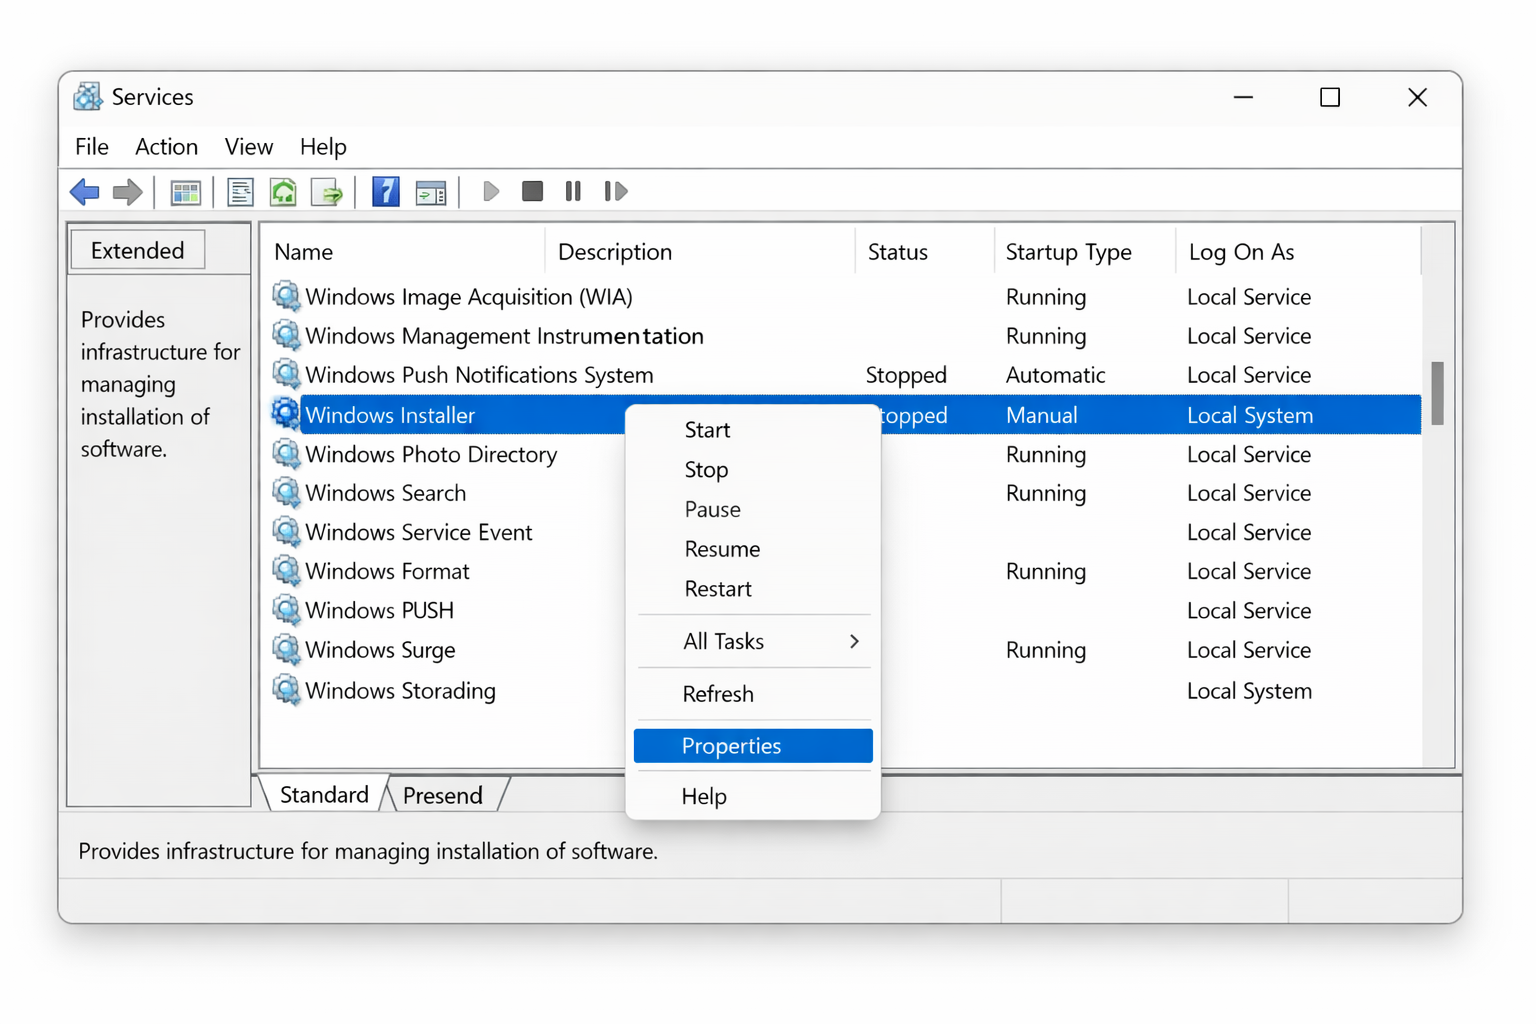
If the service is stopped or set to Disabled, every install attempt will throw this error.
- Press
Windows + Rto open the Run dialog. - Type
services.mscand press Enter. - Scroll down to Windows Installer, right-click it, and select Properties.
- Set Startup type to Manual, then click OK.
- Right-click Windows Installer again and select Start (or Restart if it’s already running).
If the service starts without error, try your install again. If it fails to start and shows an error code, search that code as it points to a more specific problem like a permissions conflict.
Alternatively, you can start the service directly from an admin Command Prompt:
- Press
Windows + Xand select Terminal (Admin) or Command Prompt (Admin). - Type the following and press Enter:
net start MSIServer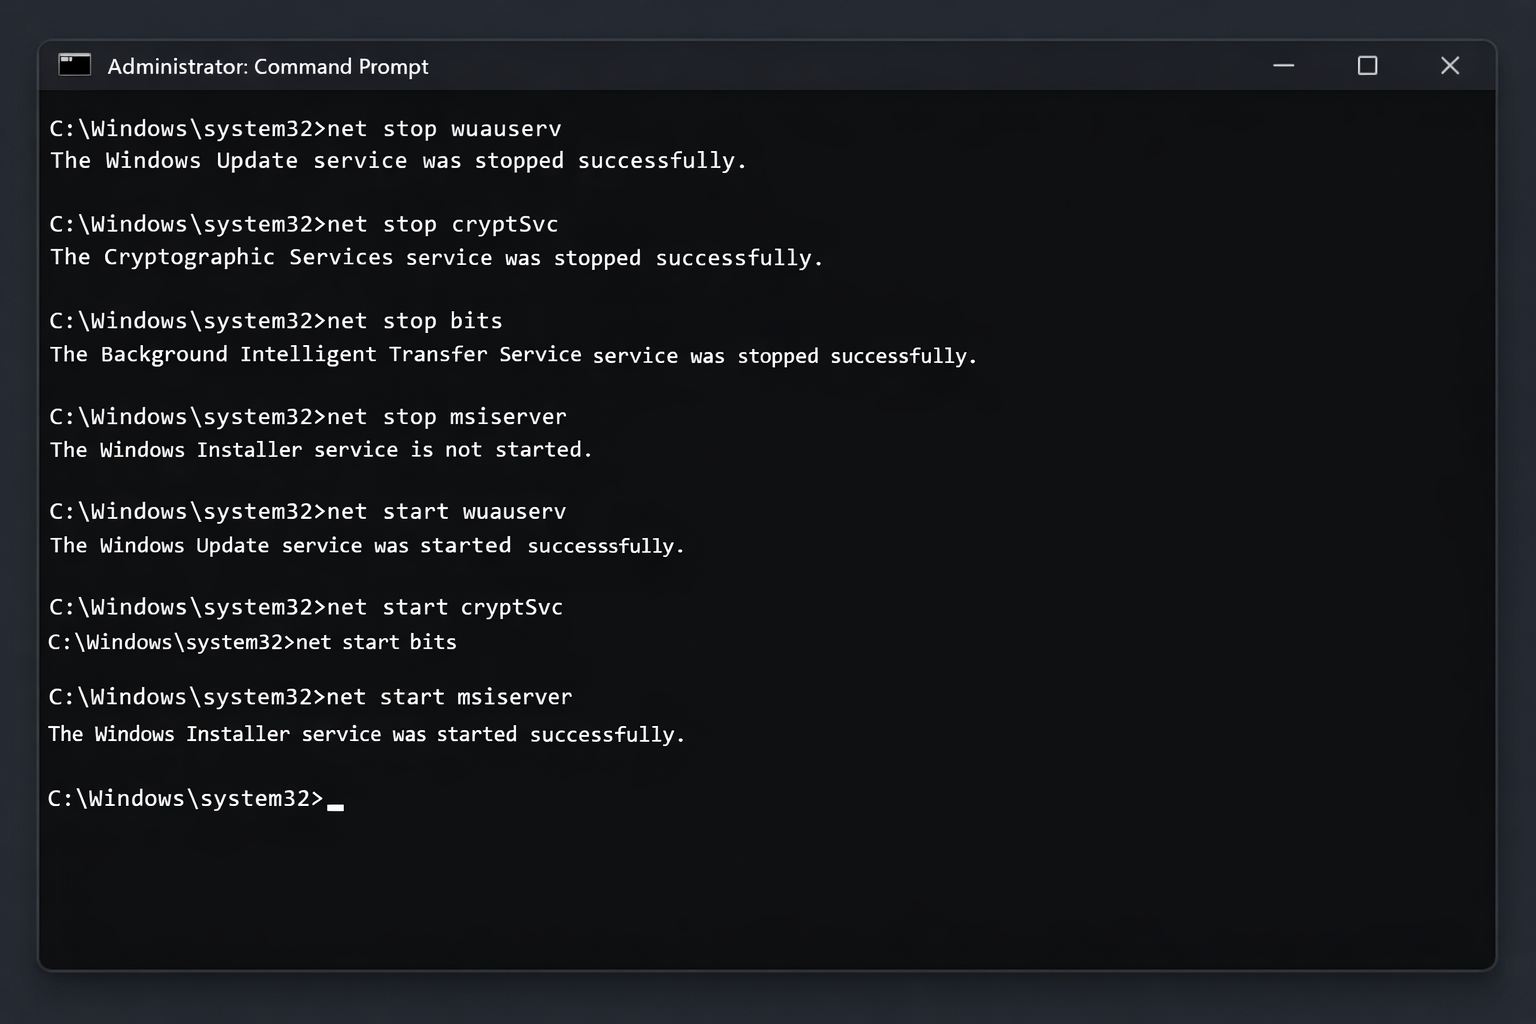
Fix #2: Re-register the Windows Installer engine
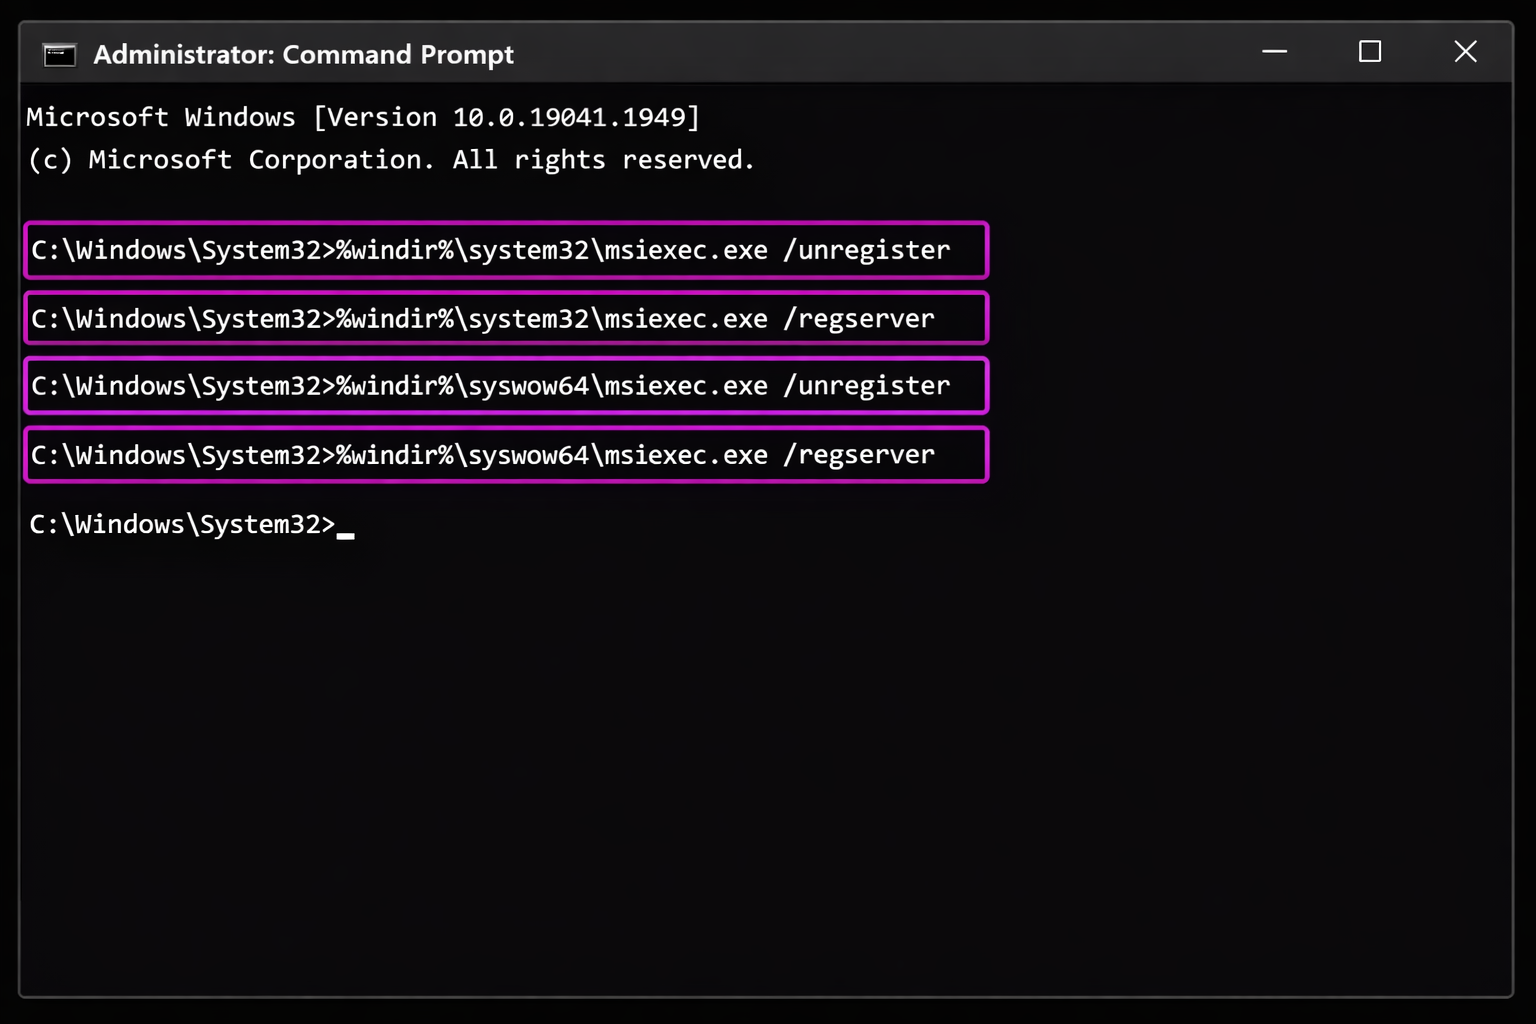
If the service starts but installs still fail, the MSI engine may have lost its registration with Windows. This is less effective on Windows 10 and 11 than it was on older versions, but it’s quick and harmless.
- Press
Windows + Xand select Terminal (Admin) or Command Prompt (Admin). - Run these two commands, one at a time:
msiexec /unregistermsiexec /regserver- Restart your PC.
After rebooting, try the install again. If you still get the error, move on to Fix #3 — re-registration alone won’t fix underlying file corruption.
Fix #3: Check for a rogue msiexec file in System32
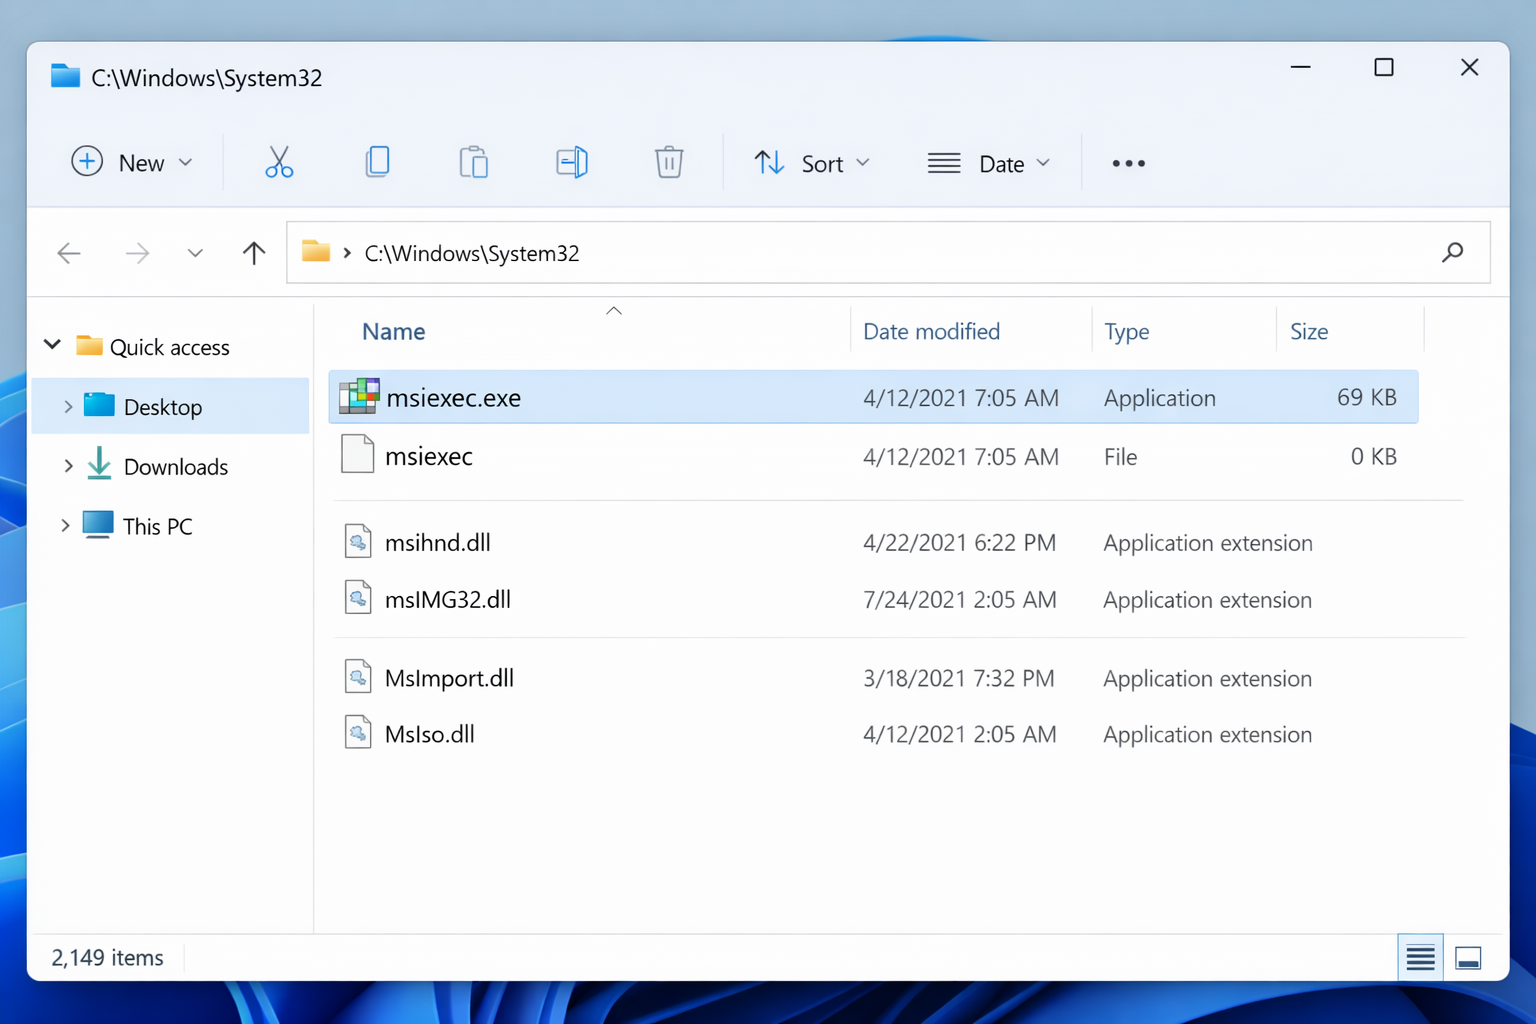
A known quirk: sometimes a second msiexec file appears in C:\Windows\System32 with no extension and a file size of 0 KB. Windows can get confused between the two.
- Press
Windows + Eto open File Explorer. - Navigate to
C:\Windows\System32. - In the search box, type
msiexec. - If you see a file named msiexec with no
.exeextension and a size of 0 KB alongside the legitimatemsiexec.exe, right-click the extensionless file and rename it tomsiexec.old. - Go back to services.msc, right-click Windows Installer, and select Restart.
Fix #4: Repair system files with DISM and SFC
If the service starts but the error keeps coming back, especially after a Windows Update, the underlying system files are likely corrupted. DISM repairs the Windows image first, then SFC patches any remaining broken files.
- Press
Windows + Xand select Terminal (Admin). - Run this command and wait for it to complete (it can take 10–20 minutes):
DISM /Online /Cleanup-Image /RestoreHealth- Once DISM finishes, run:
sfc /scannow- Restart your PC when SFC completes.
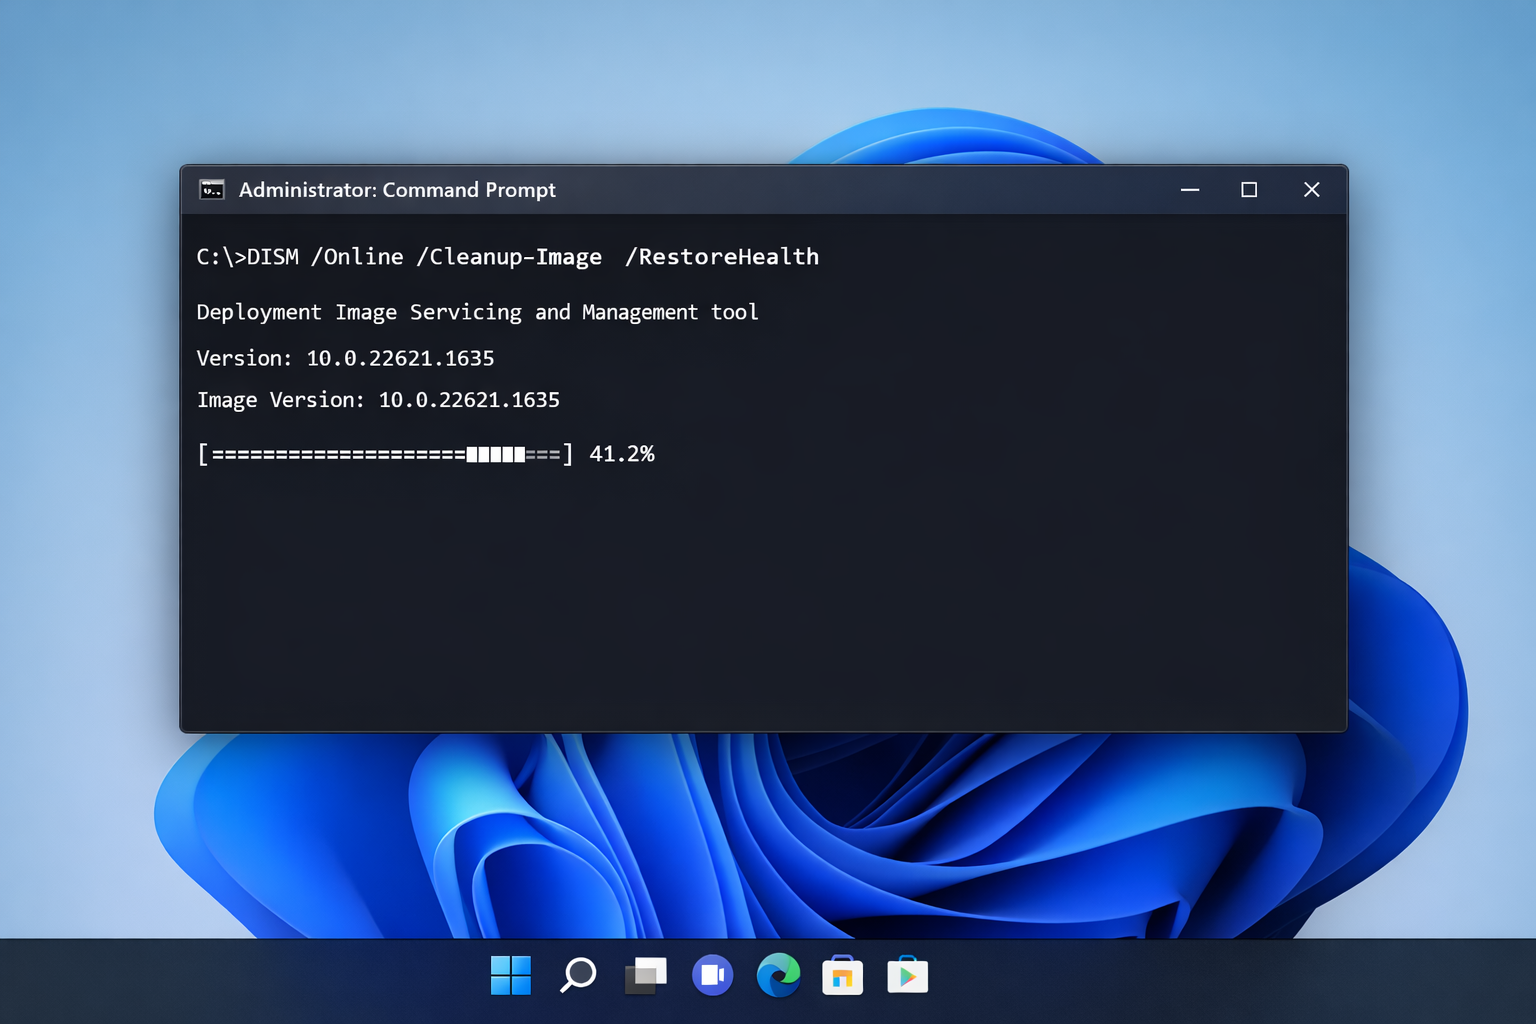
SFC will report one of three outcomes: no integrity violations found, it fixed corrupted files, or it found files it couldn’t repair. If you get the third result, the in-place repair in Fix #6 is your next step. You can also learn more about DISM errors on Windows 10 and Windows 11 if you run into issues running the command.
Fix #5: Run the Microsoft Program Install and Uninstall Troubleshooter
Microsoft’s dedicated troubleshooter specifically targets broken installer states and is worth running before anything more drastic.
- Go to Microsoft’s support page for the Program Install and Uninstall Troubleshooter and download the tool.
- Run the downloaded file as it opens directly without installation.
- Select Installing or Uninstalling depending on what you were trying to do.
- Follow the prompts. The tool will detect and attempt to repair broken installer registrations automatically.

Fix #6: Run an in-place repair upgrade (last resort)
If nothing above has worked, the Windows Installer components are corrupted deeply enough that a repair upgrade is the cleanest fix. This reinstalls Windows over itself, preserving your files, apps, and settings.
- Go to Microsoft’s Windows 11 download page (or the Windows 10 equivalent if you’re on Windows 10).
- Download the Installation Assistant or the ISO and run
setup.exe. - When prompted, choose Keep personal files and apps.
- Let the upgrade complete. This typically takes 30–60 minutes.
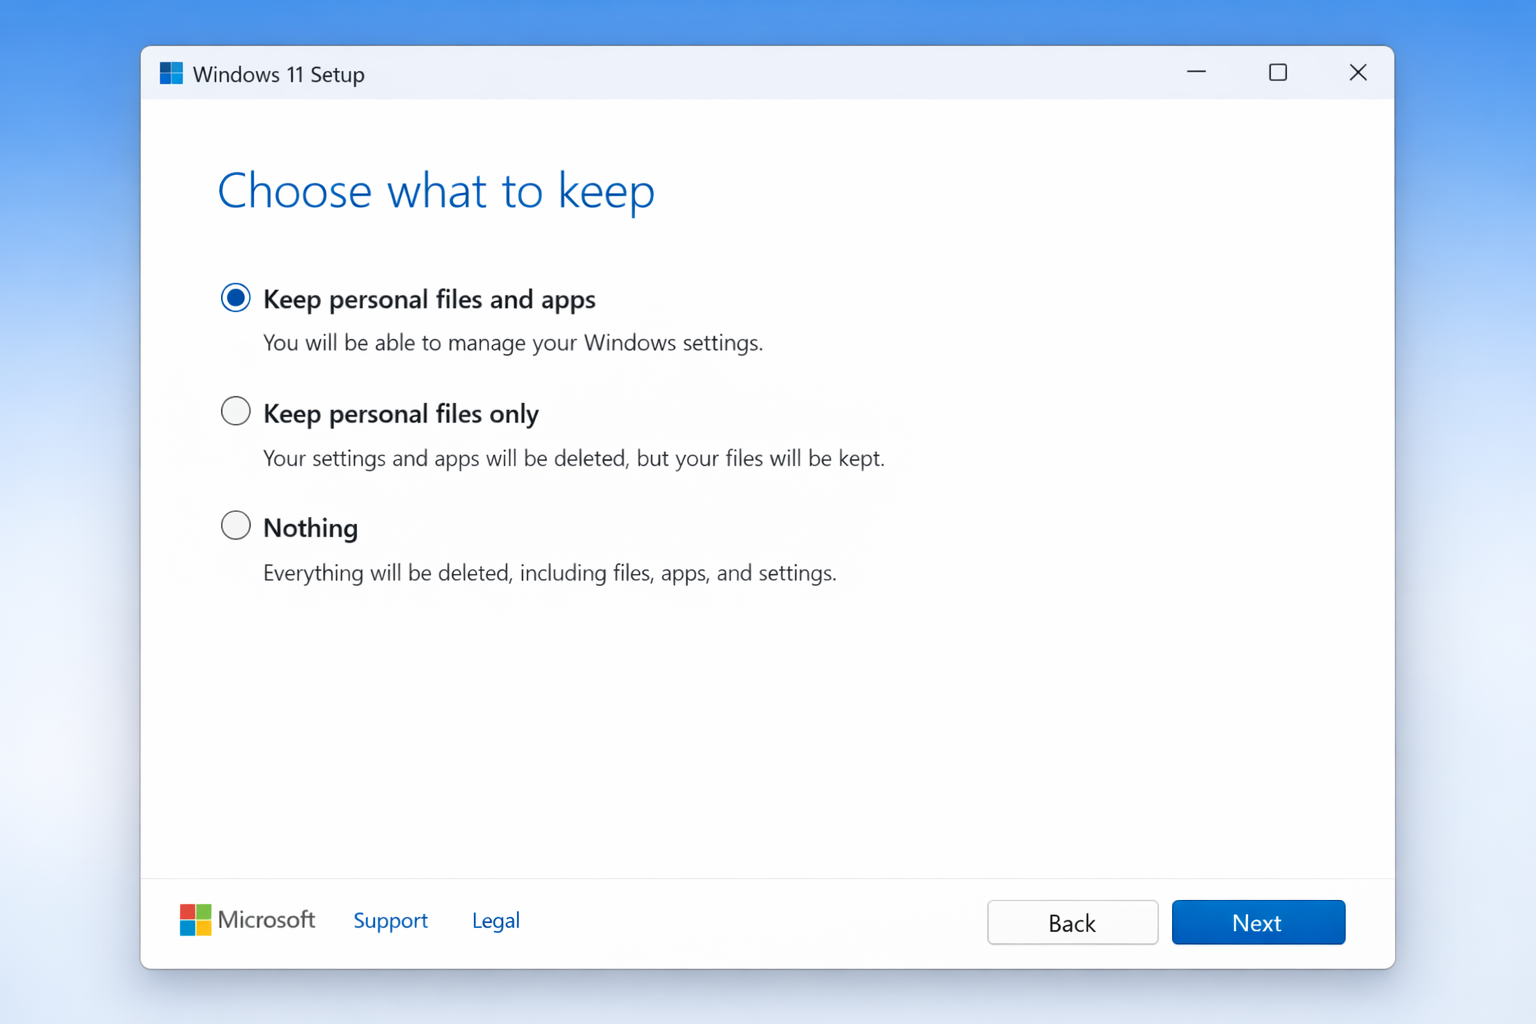
An in-place repair replaces all core Windows components — including the Windows Installer service — without wiping your data.
When none of these fixes work
If the error persists after Fix #6, the issue is likely a deep driver conflict, malware that has disabled system services, or a failing drive. Run a full malware scan with Windows Defender, then run chkdsk /f /r from an admin terminal to check for disk errors. If both come back clean and the error is still there, a clean Windows install is the most reliable path forward.
Conclusion
Fix #1 (restarting the Windows Installer service) resolves this for most people – the service gets disabled by botched updates or third-party software more often than anything else. If it keeps coming back after restarts, Fix #4 (DISM + SFC) is almost always the permanent fix, since recurring failures usually mean file corruption rather than a configuration problem.