In graphic design, a simple way to make something stand out is to add a border around it. In this article, we’ll show you how to add a border in Photoshop to images, shapes, and text.
The best way to amp up your Photoshop skills is to practice, practice, practice. Try adding a border in Photoshop by following the steps below.
How To Add a Border Around an Image in Photoshop
Imagine you have a photo or image that you want to add a border around in Photoshop. You’re planning on printing the image and getting it framed. Adding a border to the image will make it look like you’ve added an interior matte.
Let’s also imagine that you don’t want the border to cover up even one pixel of the image itself, so first you’ll need to increase the size of the canvas—the workspace around an image within an image window—and then add the border in that extra space. Fortunately, this is simple to do in Photoshop.
- Open your image in Photoshop.
- If the image has multiple layers, flatten the image by selecting Layer > Flatten Image.
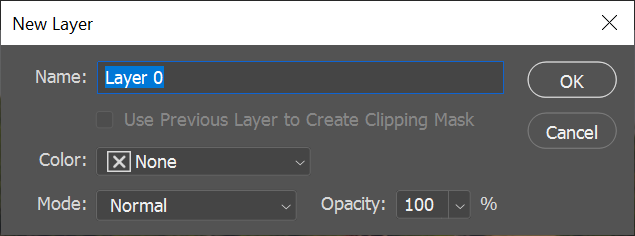
- Next, we’ll change the background layer into a regular layer that can be moved into a different spot in the layer stacking order and so you can change its blending mode or its opacity. Select Layer > New > Layer from Background. Alternatively, double-click on the layer in the Layers panel. Note that its new name will be Layer 0. Select the OK button.
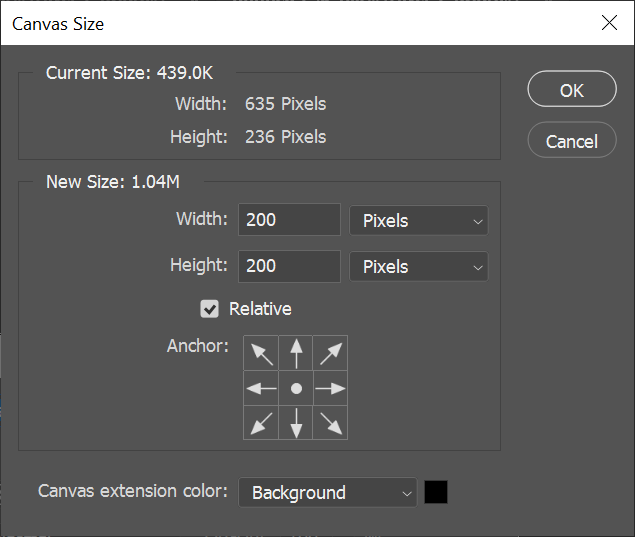
- Now we’ll make the canvas larger. Select Image > Canvas Size. You want to increase the size of the canvas to accommodate the border you want to add. Make sure the Relative box is checked and the anchor is set to the middle of the grid. Then enter the number of pixels by which you want to increase the canvas. Remember, half of the pixels will be added to each edge of the canvas, so if you want a border that’s 100 pixels wide, you’ll need to increase the width and height of the canvas by 200 pixels each.
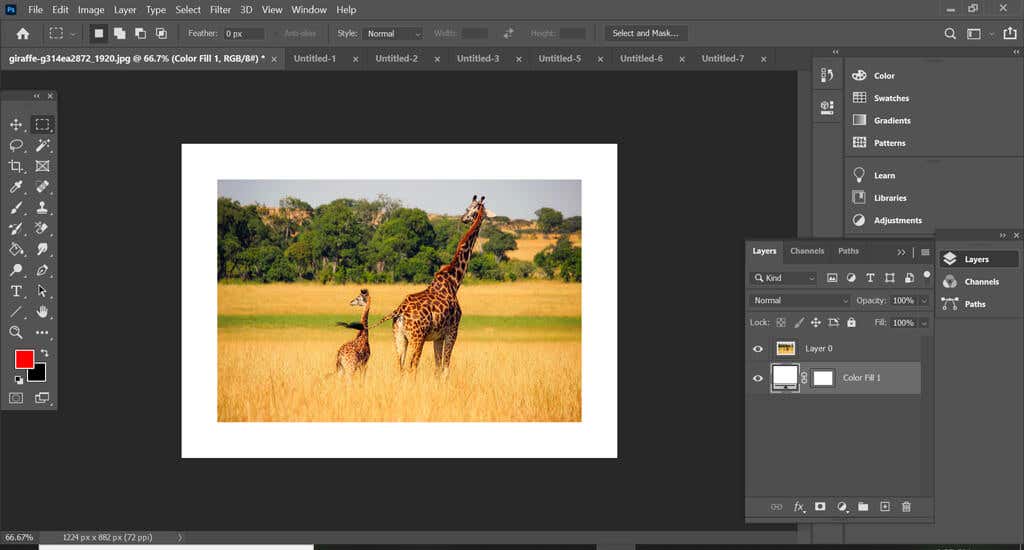
- Now we have an image with an expanded canvas.
6. To add a border, select the Create a New Fill or Adjustment Layer button in the Layers panel and choose Solid Color from the list.
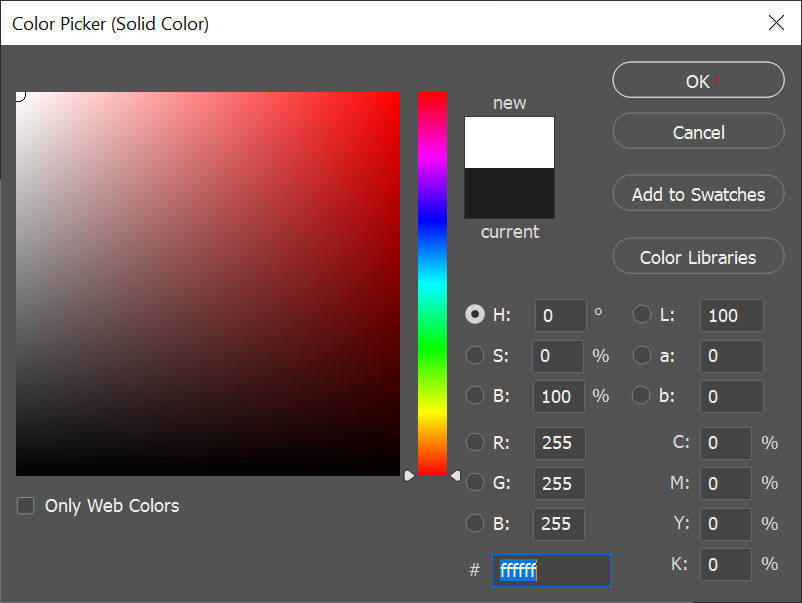
7. In the Color Picker window, choose the color you want the border to be and select the OK button.
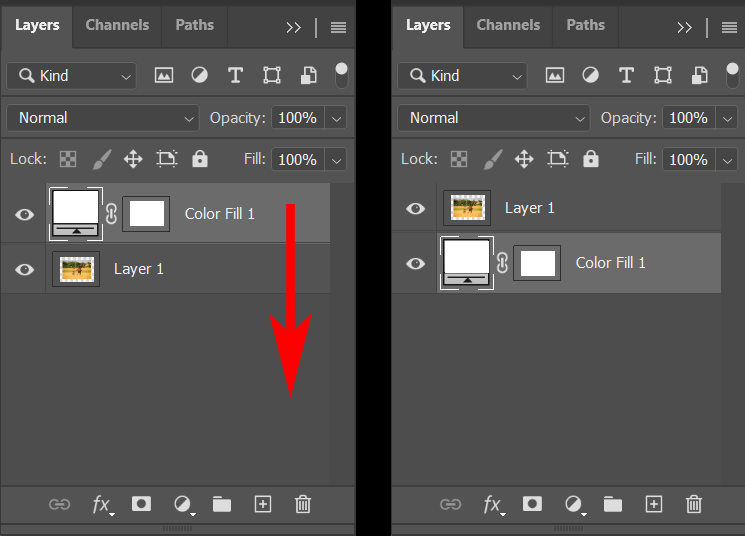
8. Finally, in the Layers panel, drag the color fill layer you just created below the image layer.
Now your image should have a border around it. You can save it, but remember to Save as… so you don’t save over your original image.
Play around with the color of the border by double-clicking on the Color Fill layer and choosing a different color, and try changing the thickness of the border by readjusting the size of the canvas (Image > Canvas Size). Enter negative numbers to make the canvas smaller.
How To Add a Border to a Shape in Photoshop
Next, let’s learn how to add a border to a shape in Photoshop.
- Open a file or create a new document in Photoshop.
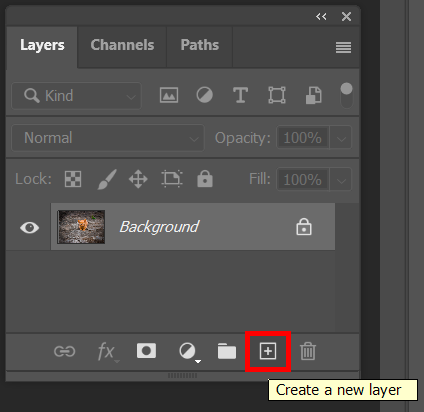
- Create a new layer using the button at the bottom of the Layers panel or by selecting Layer > New > Layer or by using the keyboard shortcut Shift + Ctrl + N.
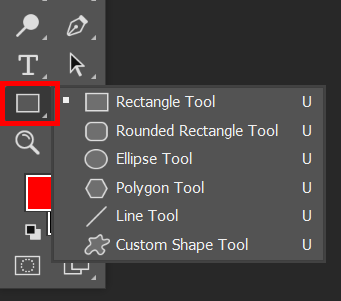
- In the Toolbox, select an outline selection tool. You could choose the Rectangle Tool, the Rounded Rectangle Tool, the Ellipse Tool, the Polygon Tool, or the Custom Shape Tool.
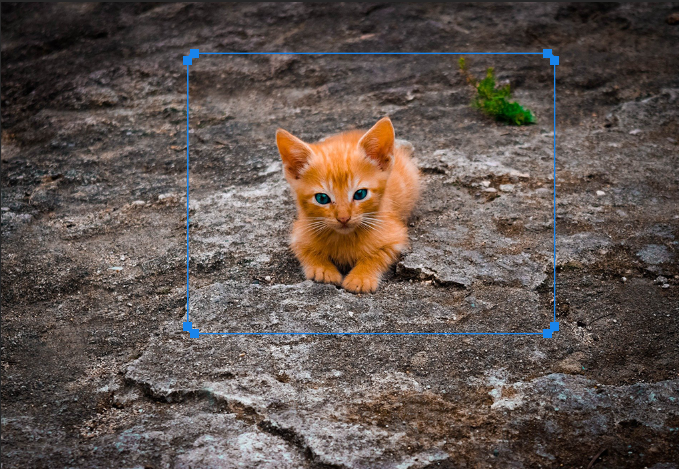
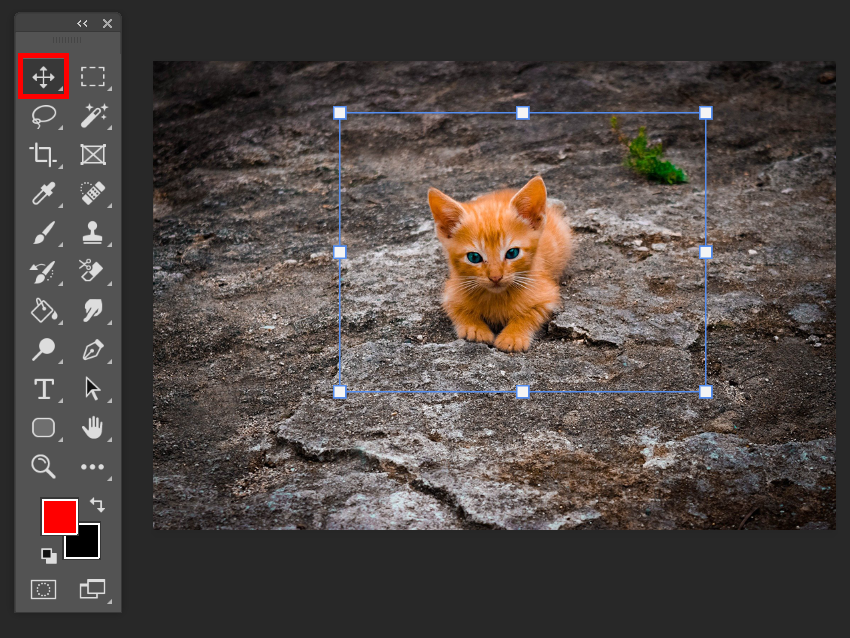
- Select the tool and drag it over the canvas so your image is framed.
- Select the Move tool to adjust the edges of the frame you created.
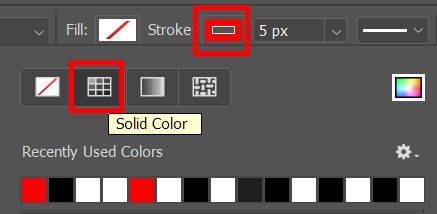
- With whichever outline selection tool you used in step 3 selected, make sure Fill is set to None in the options bar.
- Now we’ll add a Stroke to the frame, creating the border. In the Options bar, choose what kind of stroke you want (solid color, gradient or pattern) and its color. In the example below, we’ve selected a solid stroke in red. To access more color options, select the Color Picker—the multicolored box on the right.
- Next, select the thickness of the Stroke. You can type in the number of pixels or you can use the slider to select the Stroke’s thickness.
- Now you should see the border around the frame you created.
Be sure to Save as… so you don’t overwrite the original image.
How To Add a Border to Text in Photoshop
In Photoshop adding a border to text is called outlining. The process of outlining is similar to adding a stroke to a frame like we did in the example above.
- Create or open a new document in Photoshop.
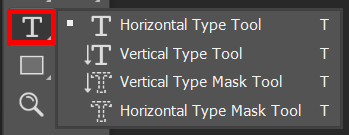
- Select the Horizontal or Vertical Type tool and type your text.
- In the Layers panel, right-click on the Text layer and select Blending Options or select Layer > Layer Style > Blending Options.
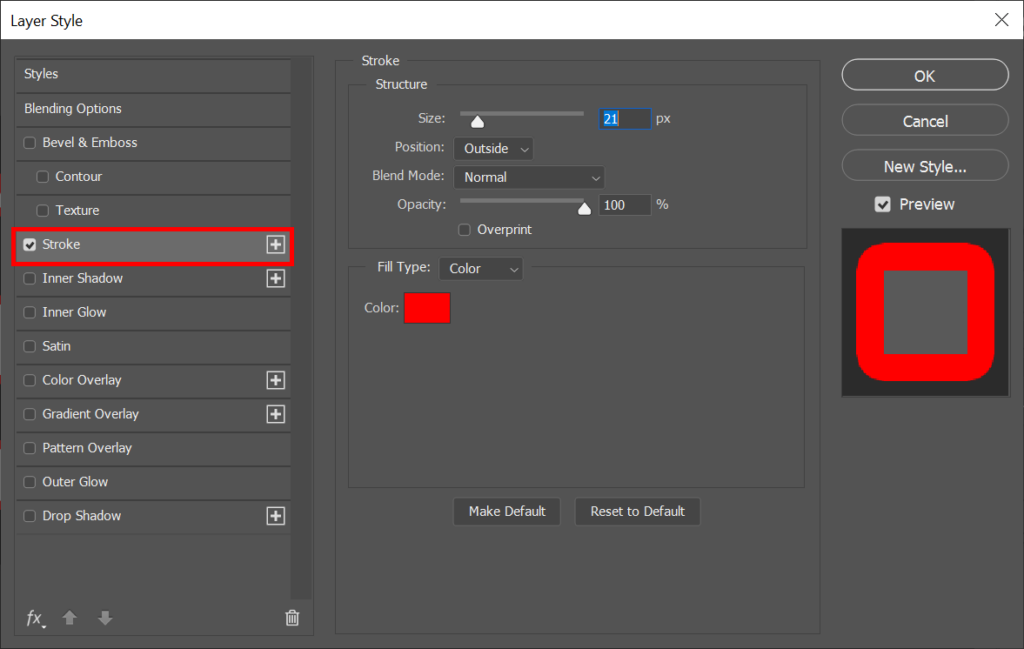
- In the Layer Style dialog box that appears, select Stroke from the list on the left.
- With Stroke selected in the Layer Style dialog box, you can then adjust the appearance of the text outlines. Set the thickness of the outline by entering a number of pixels or by using the Size slider.
- Set the Position of the stroke to Inside, Outside, or Center. If you have the Preview box checked, you’ll see the effects of your choices on your document.
- Select the Blend Mode and Opacity. (Learn everything you ever wanted to know on this topic in our guide to blending in Photoshop.)
- Next, select the Fill Type to Color, Gradient, or Pattern. If you choose Color, use the color picker to select the color of the text outlines. When you’re finished, select OK.
Photoshop is packed with features and functionality. To continue learning, check out our article on how to mask in Photoshop and then put your new knowledge to use by doing a face swap in Photoshop!
Related Posts
- How to Fix App Notifications in Windows?
- Using an Old Device? 5 Account Security Settings You Should Enable
- How to Find Features Moved from Control Panel to Settings in Windows 11?
- How to Back Up Your Android Downloads Automatically?
- Camera Not Working in Zoom or Teams? Quick Fixes for Windows and macOS
Maggie Marystone is a freelance technology writer, human rights worker, and storyteller based in Chicago. Read Maggie’s Full Bio


