Are you experiencing an issue where you can’t remove a printer from your Windows 10 or 11 PC? Chances are something is wrong with your system’s configuration. Luckily, you can tweak a few options and remove the stubborn printer from your computer.
You can perform all these procedures by yourself without hiring tech assistance.
Use Settings to Remove a Printer on Windows 10/11
If you use a method other than Settings to remove your printer, use the Settings app and you should have success in getting rid of your printer from your machine.
This method works on both Windows 10 and 11 PCs.
On Windows 10:
- Open the Settings app by pressing Windows + I keys simultaneously.
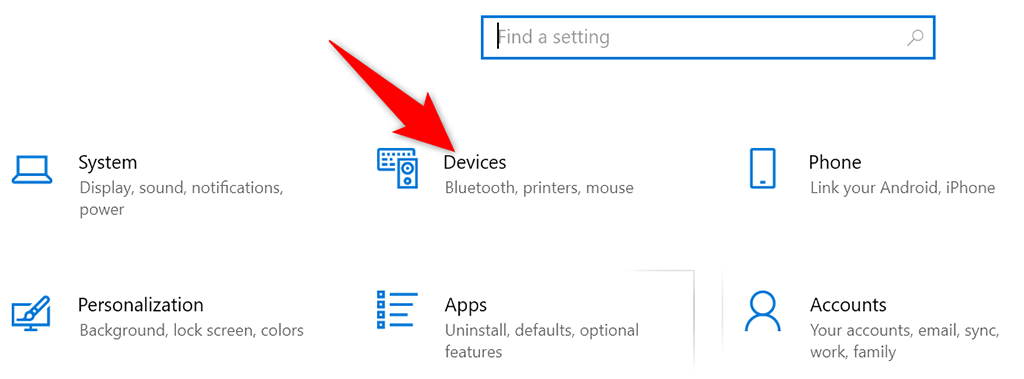
- Select Devices on the Settings window.
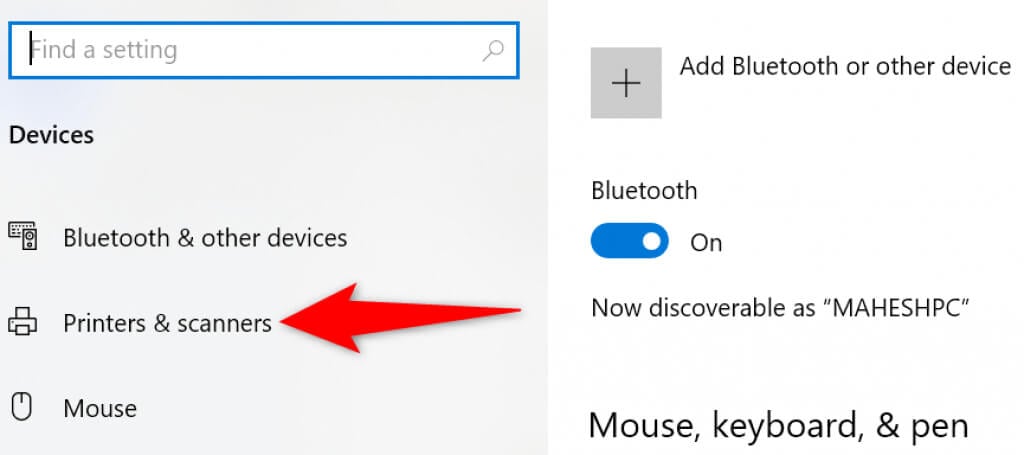
- Choose Printers & scanners from the left sidebar.
- Find and select your printer in the pane on the right.
- Select Remove device under your printer to remove the printer.
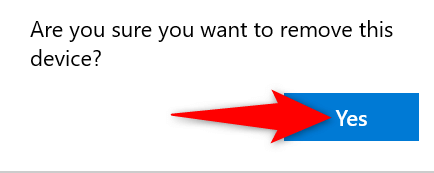
- Choose Yes in the prompt that opens to begin uninstalling the selected printer.
On Windows 11:
- Access the Settings app by pressing Windows + I keys at the same time.
- Select Bluetooth & devices from the left sidebar in Settings.
- Choose Printers & scanners in the pane on the right.
- Select your printer in the device list.
- Select Remove at the top-right corner of your printer’s page.
- Choose Yes in the prompt that opens to remove your printer.
Use the Print Server Properties Window to Remove a Printer
If Settings doesn’t remove your printer, another way to get rid of your installed printers is to use the Print Server Properties window. This window lists all your printers, and you can pick the one you want to delete from your system.
On Windows 10 and 11:
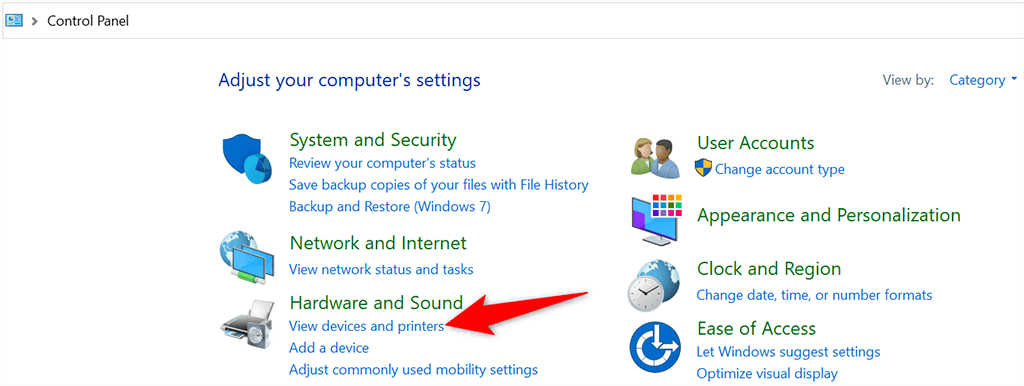
- Open the Start menu, search for Control Panel, and select Control Panel in the search results.
- Choose View devices and printers on the Control Panel window.
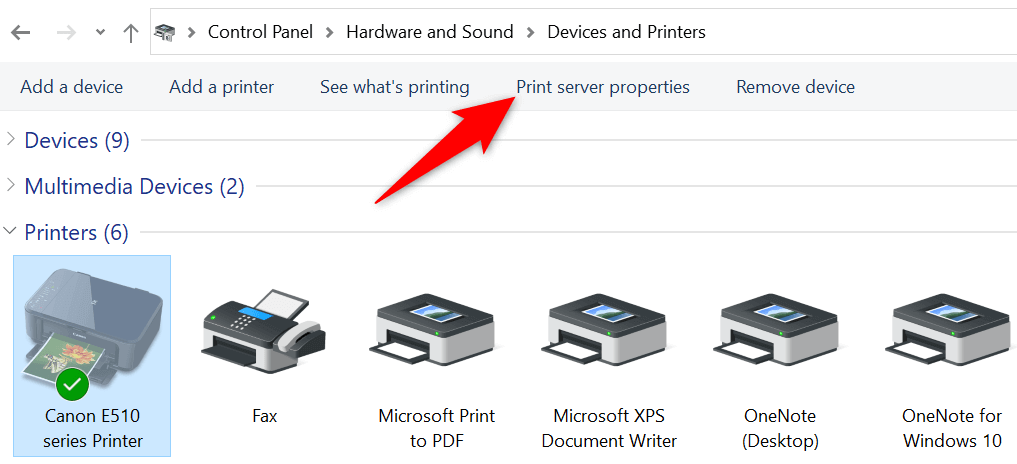
- Find and select your printer.
- Choose Print server properties at the top of your screen.
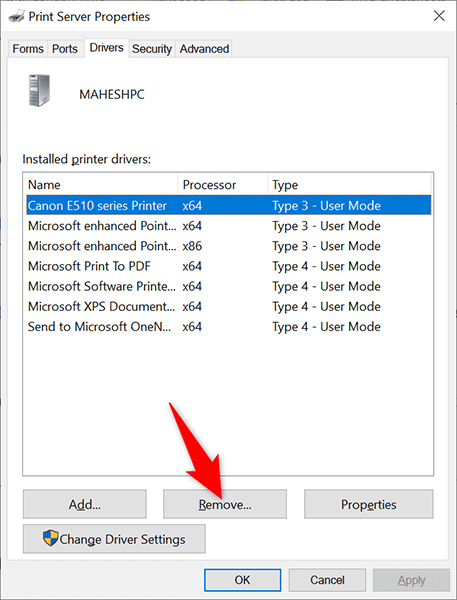
- Access the Drivers tab, select your printer in the list, and choose Remove at the bottom.
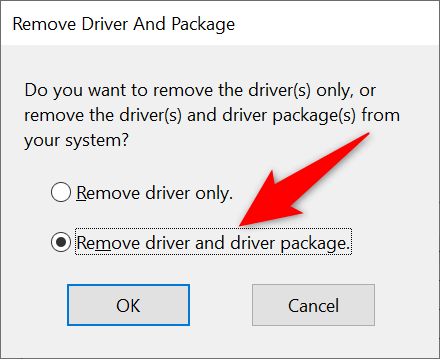
- Select Remove driver and driver package and choose OK in the prompt that opens.
- Restart your PC and your printer should be removed.
Uninstall Printer Software to Remove the Printer
It’s possible the printer software you’ve installed on your PC is causing interference with your printer removal process. In this case, first get rid of the printer software and then try to remove the printer itself.
- Launch the Settings app by pressing Windows + I.
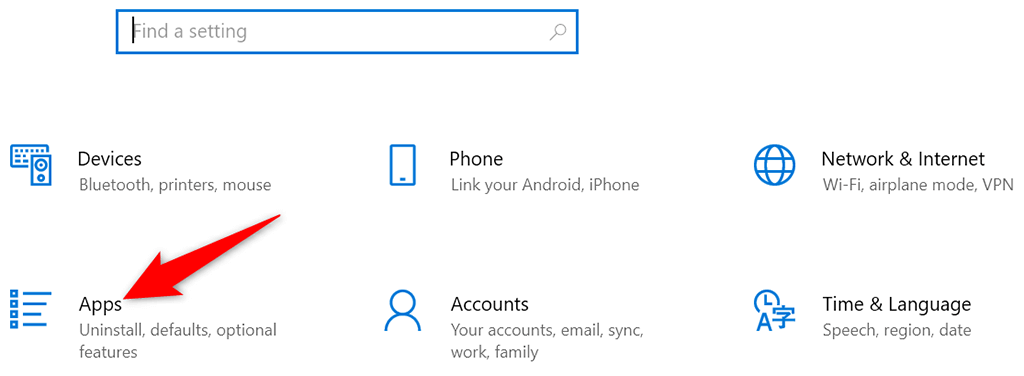
- Select Apps on the Settings window.
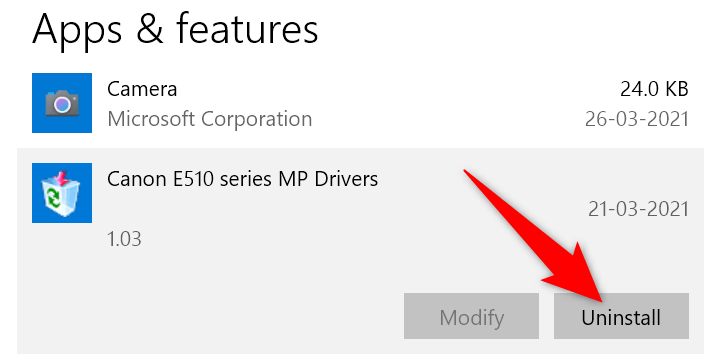
- Find your printer’s software in the list and select it.
- Choose the Uninstall button for your software.
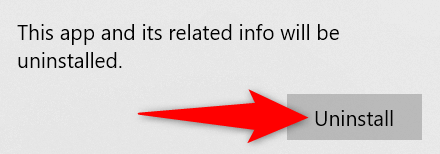
- Select Uninstall in the prompt to remove the software.
- Use the Settings app as described above to remove your printer from your PC.
Stop Print Spooler and Then Remove the Printer
To ensure print spooler service isn’t interfering with your printer removal process, stop that service and see if you can successfully remove the printer.
Once you’ve removed the printer, you can then restart the print spooler service.
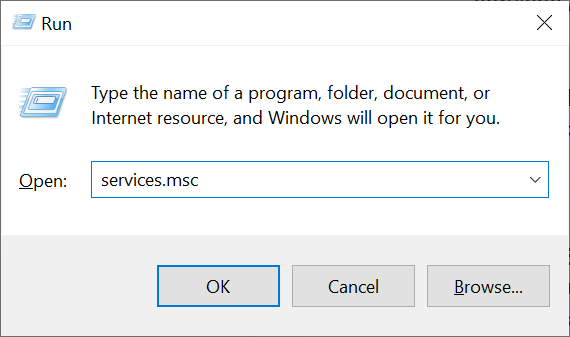
- Press Windows + R keys at the same time to open the Run box.
- Type the following in the Run box and press Enter: services.msc
- Find the Print Spooler service on the Services window.
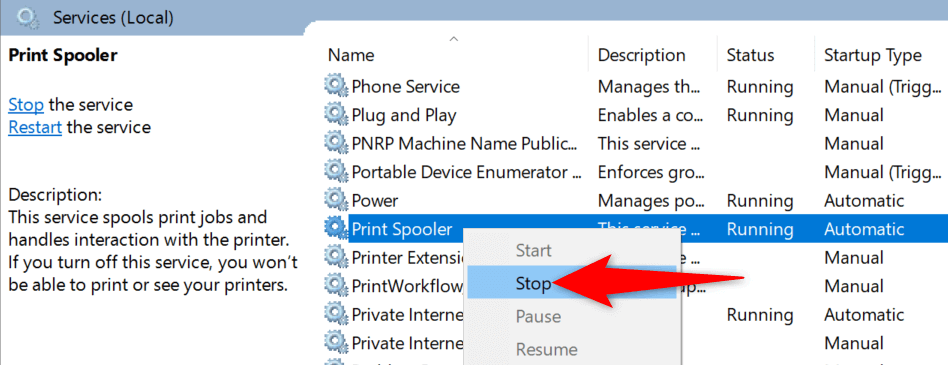
- Right-click the Print Spooler service and choose Stop from the menu.
- Keep the Services window open.
- Use the Settings app to remove the printer from your PC.
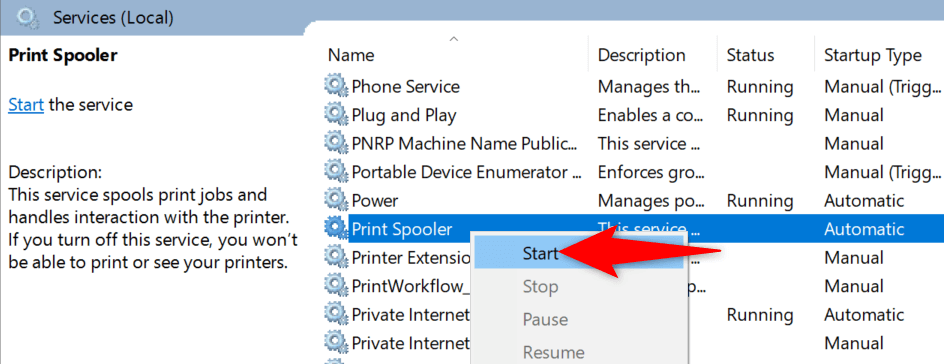
- When your printer is removed, come back to the Services window. Then, right-click the Print Spooler service and choose Start from the menu.
Clear the Print Jobs and Then Remove the Printer
A possible reason you can’t remove the printer from your Windows 10 or 11 PC is that your printer still has pending print jobs. You should clear these print tasks before uninstalling the printer.
To do so:
- Open Control Panel and select View devices and printers.
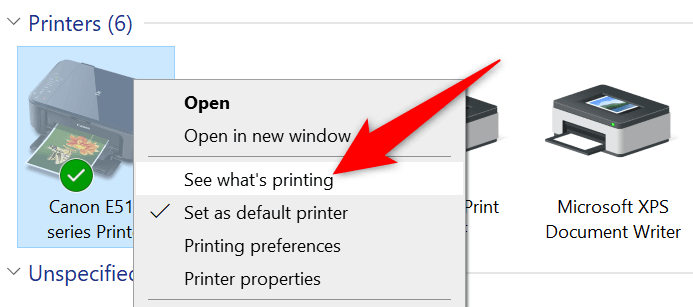
- Right-click your printer and choose See what’s printing from the menu.
- Cancel all print jobs in the window that opens.
- Remove your printer using the Settings app as outlined above.
Use Device Manager to Delete a Printer
You can remove pretty much any device from your computer, including printers, using Device Manager. Here’s how to use this utility to remove your stubborn printer:
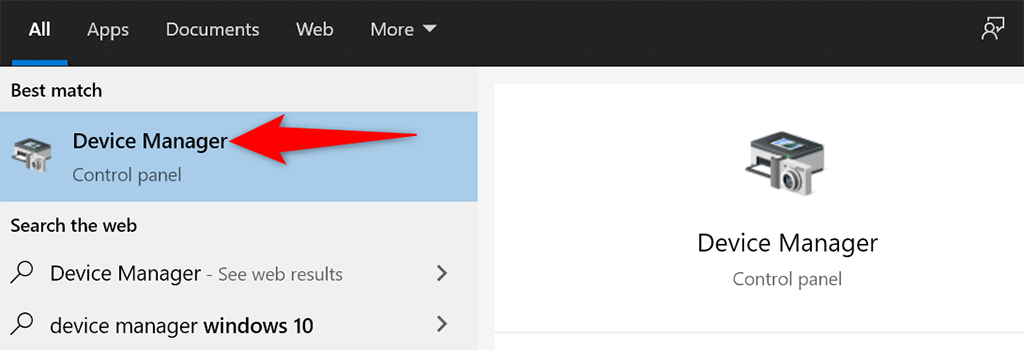
- Open the Start menu, search for Device Manager, and select that tool in the search results.
- Select View > Show hidden devices on the Device Manager window. This ensures your printer appears on the list.
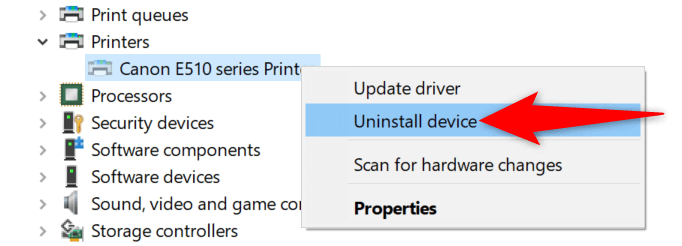
- Find your printer in the Printers section, right-click the printer, and choose Uninstall device.
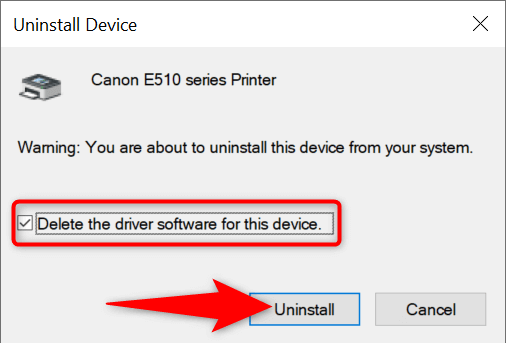
- Enable the Delete the driver software for this device option and select Uninstall.
- Reboot your PC and your printer will be removed.
Update the Printer Drivers and Then Uninstall the Printer
If you’re using outdated or faulty printer drivers, that may be why you can’t remove your printer from your PC. To deal with this, first update your printer’s drivers and then try to remove the printer.
Luckily, you can update your printer’s drivers automatically on both Windows 10 and 11 PCs:
- Open Device Manager and find your printer in the Printers section.
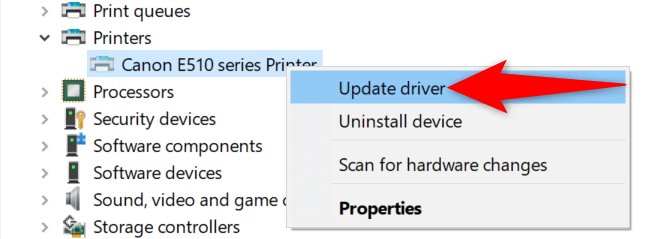
- Right-click your printer and choose Update driver from the menu.
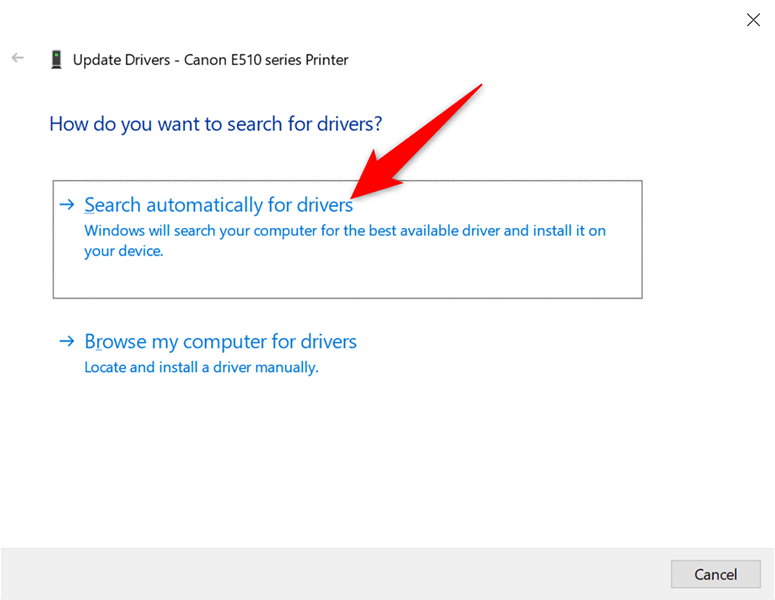
- Select Search automatically for drivers on the screen that follows.
- Allow Windows to find and install the latest drivers for your printer.
- Restart your PC when the drivers are installed.
- Use the Settings app to remove the printer from your PC.
Fix It When You Can’t Remove a Printer on Windows 10/11
There are many reasons your PC doesn’t let you remove your printer. Once you fix those underlying issues, you should have no difficulties getting rid of your printers from your computer. We hope this guide helps you out.
Related Posts
- Preparing for Windows 10 End of Support: Upgrading to Windows 11
- How to Fix a “This file does not have an app associated with it” Error on Windows
- How to Fix an Update Error 0x800705b4 on Windows
- How to Resolve “A JavaScript error occured in the main process” Error on Windows
- How to Fix the Network Discovery Is Turned Off Error on Windows
Mahesh has been obsessed with technology since he got his first gadget a decade or so ago. Over the last few years, he’s written a number of tech articles on various online publications including but not limited to MakeTechEasier and Android AppStorm. Read Mahesh’s Full Bio
