You don't even need to have an internet connection
Windows 11 just got even cooler! Its latest version, 22h2, now includes a feature called Live Captions, which can display real-time subtitles for audio and video files. Not only can this help those with hearing loss, but it can also assist non-native speakers or those trying to learn a new language. The best part? You can customize the subtitles to your liking and have them appear on any part of the screen. Plus, no internet connection is necessary to enable or turn off Live Captions.
You can use the Live Captions feature to turn the audio to text while watching your favorite shows and movies, or while listening to audiobooks or podcasts. However, this feature is not available on older versions of Windows, but don’t worry. Windows 10 accessibility features include the option to play the Closed Captions at the bottom of the video you’re watching, if the file is available.
How to Enable and Disable Live Captions on Windows 11
There are two ways to enable Live Captions on your Windows 11 device. No matter which one you choose, the end result will be the same, Windows will display an automatic transcription for the video or audio you’re currently playing.
Enable and Disable Live Captions From Settings App
- Launch the Settings app by pressing the Windows key + I on your keyboard.
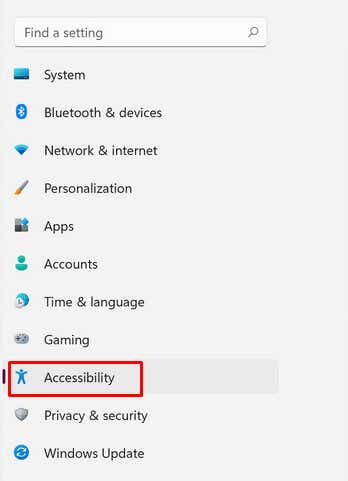
- Choose Accessibility from the left side menu.
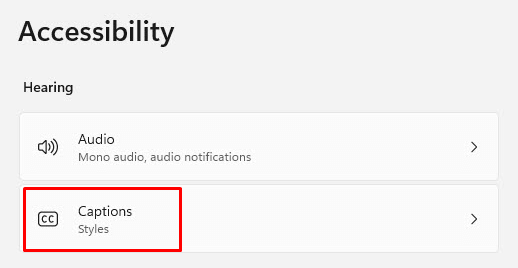
- Select Captions on the right pane, under the Hearing section.
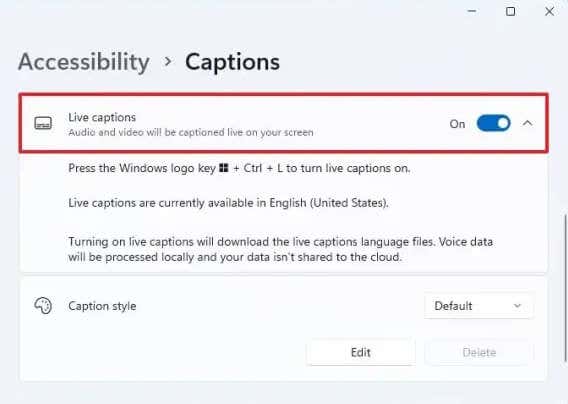
- The Live Captions section has a toggle switch. Click it to turn the Live captions on or off.
Note: When you enable the live captions for the first time on your device, it’ll prompt you to download your preferred language files. However, at the moment only US English is available. Microsoft is currently working on adding more languages. The download is not a big one, only about 98.3Mb, and it will be done in no time.
Enable and Disable Live Captions From Action Center
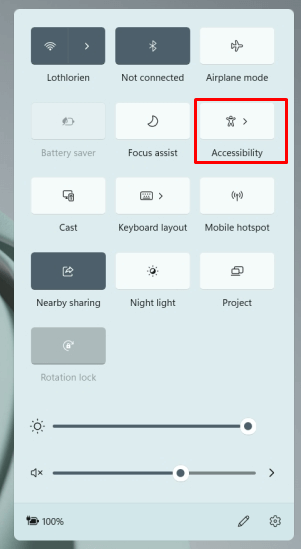
- On your keyboard, press the Windows key + A to open the Action Center.
- Select the Accessibility icon on the top right corner of the screen.
- When the next pane opens, you can toggle on and off the Live captions, just as in method 1.
It doesn’t matter which method you choose to enable or disable live captions, you can toggle them on and off just by pressing the Windows key + CTRL + L on your keyboard.
How to Personalize Live Captions
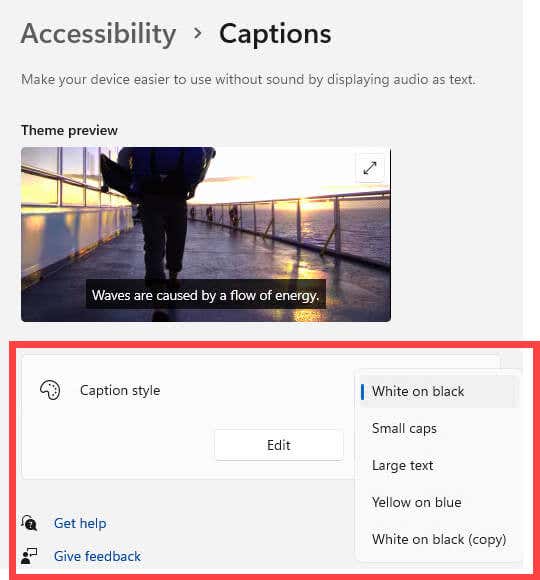
Windows 11 22h2 or newer, lets you customize the style of the live captions. This is an excellent way of making the captions easier to read. You can change the background color, text color, the size of the text, and its position on the screen. Here’s how to do it:
- Go to Accessibility and then select Captions.
- Under the Caption Style section choose one of the offered options: “White on Black”, “Yellow on Blue”, “Small caps”, or “Large text”.
- If you want you can select the Edit button and create a custom captions style that’ll suit your needs.
Caption Your Own Speech
Did you know that the Live Captions feature of Windows 11 lets you caption your own speech? Just use your microphone to do it. This is a great way of captioning live meetings, or your own podcast. However, you must make sure there’s no other audio playing on your device for this feature to work properly.
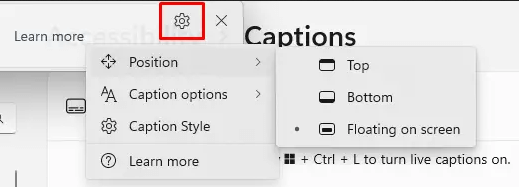
- Go to Accessibility, then Live Captions, and select the Settings button.
- Select the Caption options and toggle on the Include microphone audio option. You can also select the option to Filter profanity.
Note that this feature will automatically turn off whenever you toggle the live captions off, or when you restart your device. You’ll have to manually turn it on every time you intend to use it.
How to Enable Closed Captions on Windows 10
Closed Captions are not the same as Live Captions, nor are they a substitute for this Windows 11 feature. They are detailed and time-coded subtitles, and they’ll appear at the correct time during the video you’re watching. Although not the same as Live Captions, Closed Captions are of great help when watching videos in a foreign language. Deaf and hard-of-hearing people also use them to understand better what’s being said in the movies they’re watching.
You can turn on closed captions in Windows 10 by following these steps:
- Play the video, then right-click or tap and hold anywhere on the video until a menu bar appears.
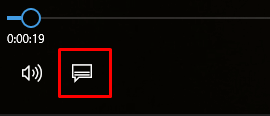
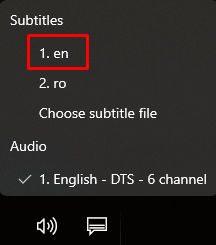
- If closed captions are available, a CC icon will appear. Click or tap it.
- Select the language you want closed captions to be displayed in.
- Closed captions will immediately appear, typically at the bottom of the screen.
If a closed caption file is not available for the video you’re watching, you should receive a pop-up message notifying you there are no closed captions to be displayed.
How to Customize Closed Captions on Windows 10
You can customize how your Windows 10 device is displaying closed captions:
- Go to Settings.
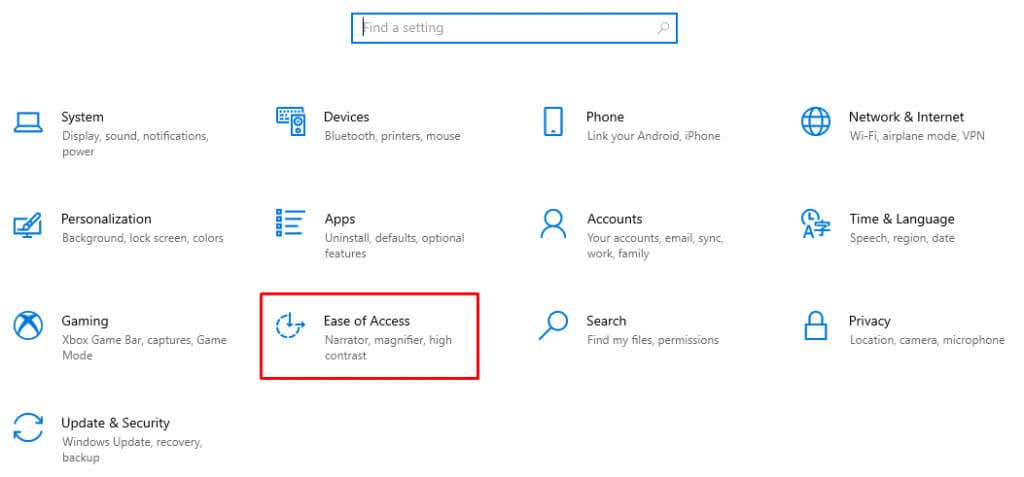
- Select Ease of Access.
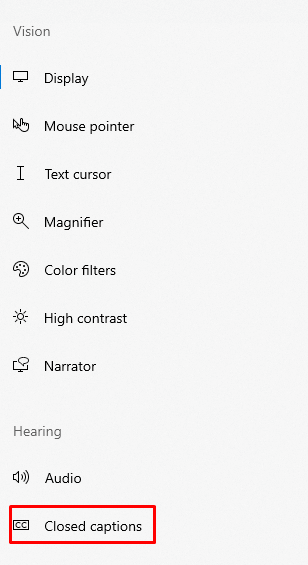
- Go to Closed Captions under the Hearing section.
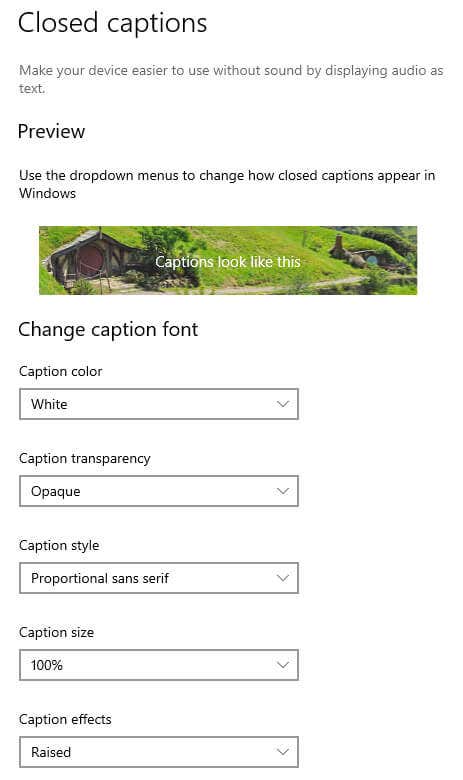
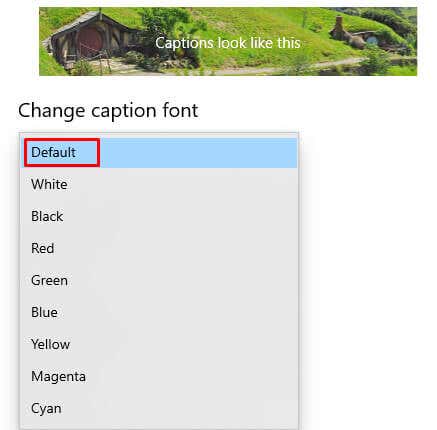
- Choose the caption color, its transparency, size, and style.
- Notice how the captions change in the preview window.
If you’re not satisfied with your choices, simply select Default for the drop-down menu for each category, and the captions will return to their original Windows 10 style.
Live Caption is an impressive feature that can provide audio-to-text convenience for users everywhere. It empowers users to hear what’s being said in newscasts, lectures, narrated video clips, and all other audio sources.
Also, it removes communication boundaries for learners of any language, aiding them to understand different dialects easier. So forget about expensive software or stressful troubleshooting – now you can use live captioning right inside Windows as if it were just another ordinary program.


