If you’ve tried ordering a pizza for delivery or contacted tech support about an issue with an app, you’ve probably encountered a chatbot. They may take your order or answer your question, sometimes even give you suggestions based on what you’re asking, and more.
By adopting bots, small and large enterprises reduce costs by handling routine queries and calls, thus replacing the number of staff needed for such tasks.

They’re also able to connect with a larger audience, which means even more engagement with customers. Finally, they provide better service 24/7 without taking breaks, and respond instantly with reliable accuracy.
This isn’t to mean that the human element is completely replaced, though. There are always agents available to handle complex issues that bots aren’t trained to answer.
If you have a website or Facebook page and want to create your very own chatbot for your personal or business brand, we’re going to show you how to get one.
Create a Chatbot For a Website
The first thing to do is to define your goals :
- Why do you need a chatbot?
- Who’s your target audience?
- What’s your end goal?
Your answers to these three questions will determine the kind of chatbot you’ll use – for example, support, e-commerce or news bots. Your end goal would be something like new sales, customer engagement, or simply creating a streamlined user experience for customers.
One of the easiest ways to build a simple chatbot for your website is by using chatbot software. These come with pre-built bot templates or you can create your own from scratch. For this guide, we picked Botsify, a platform that lets you create your own chatbots without coding knowledge.
Before creating your bot, map out a plan. If you have a FAQ document ready, you can create a plan for the kind of conversations the chatbot will have with your website’s visitors. This way, you can program it to offer certain actions that’ll help them reach their goals while on the site.
Botsify offers a free trial you can use to create and test launch your bot to see how it’ll work once it’s ready. Click Sign up for free at the top right side to register and use the platform.
Select what you want the chatbot to do on your website. You can select either of the following intents:
- Automate customer support for website LiveChat.
- Automate customer support for Facebook page.
- Generate leads for your business from website.
- Generate leads for your business from Facebook.
- Build Messenger audience for Facebook Marketing.
- Create Slack bot.
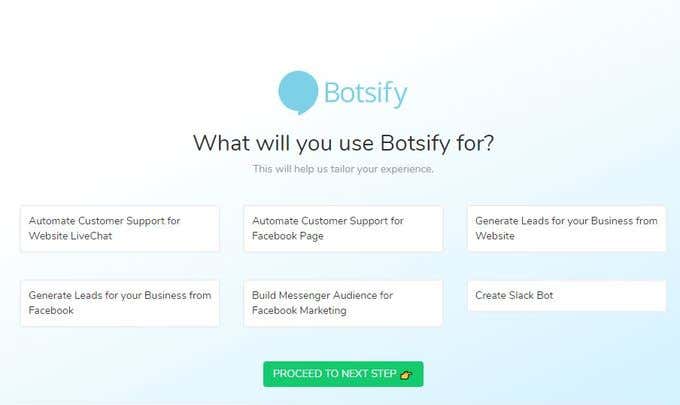
- Click Proceed to next step to set the questions you want to automate. Type in each question with its corresponding answer based on your FAQ list.
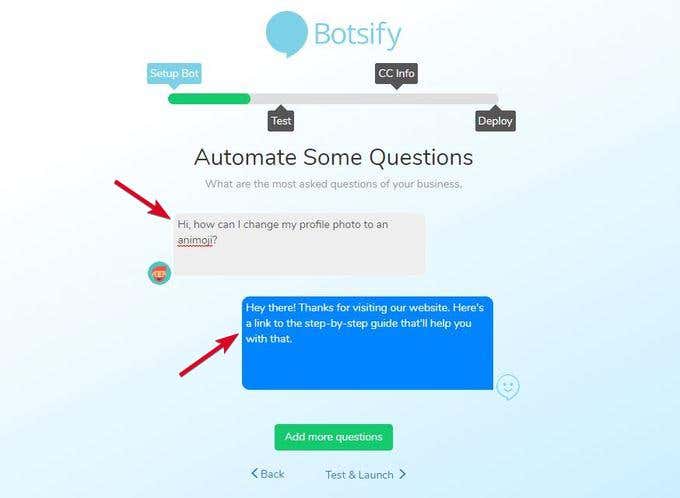
- Once you have all the questions covered, click Test & Launch.
- In the Customizations page, give your chatbot a name, add a greeting message, and then pick an avatar as well as the theme colors (they can be your brand colors or your favorite color combo)
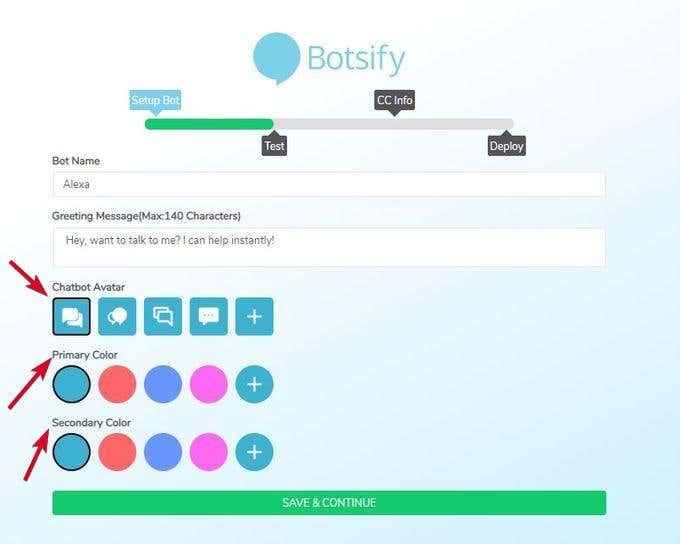
- As you customize your settings, you can see how it’ll look from the preview on the right side of the window. Click Save & Continue.
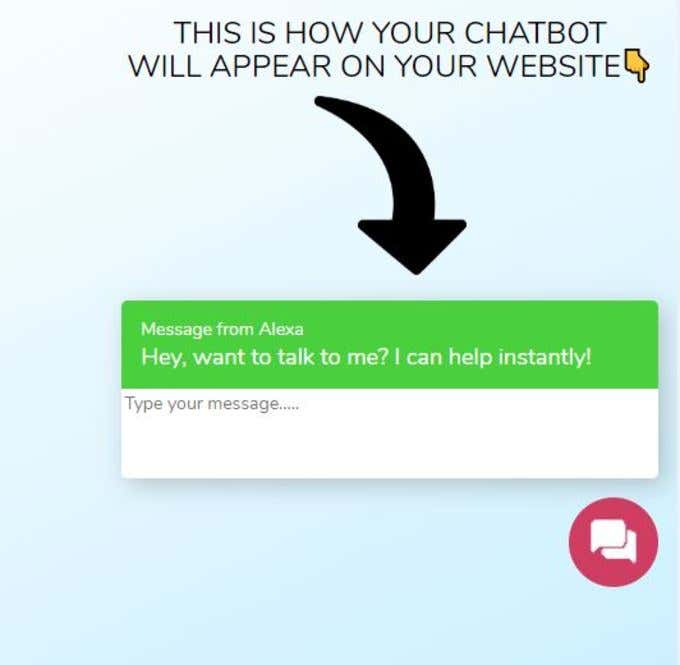
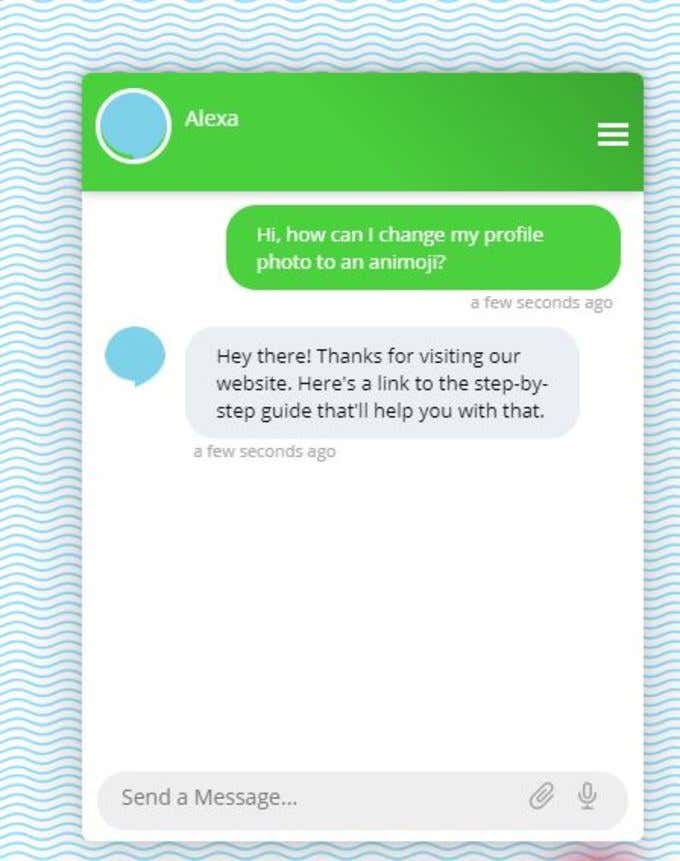
- You’ll be prompted to click the widget to test your chatbot on the right side of your screen. Test it by typing in one of the questions from your FAQ list and see how the bot responds.
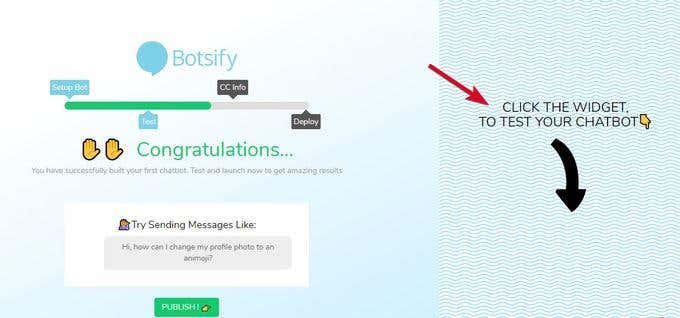
- If you’re satisfied with your creation, hit Publish to set it up on your website. Test it on your platform to ensure it’s working up to your expectations.
Create a Chatbot For a Facebook Page
You can choose to create a chatbot for your Facebook page using the developers quick start guide, or you can use software like we did when creating the website chatbot above. The latter is easier as you don’t need coding knowledge to use it.
For this guide, we’ll use Chatfuel as it’s one of the easiest tools to use, and you can deploy your bot in just 7 minutes. Below are the steps to create your chatbot.
- Sign up for a Chatfuel account by clicking Get Started for Free. Grant Chatfuel access to your Facebook email and profile.
- Link your Facebook page. Once the login is confirmed, you’ll be redirected to your Chatfuel dashboard.
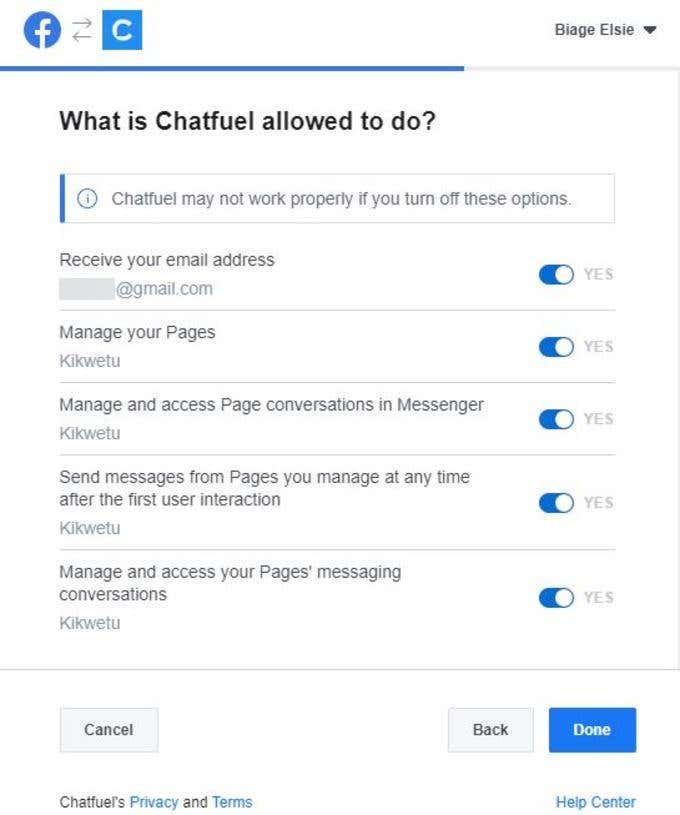
- Click Connect to add your Facebook page.
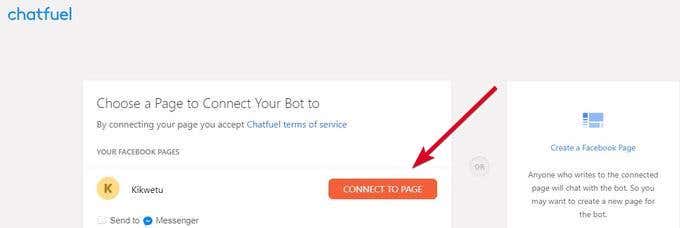
- A welcome message will appear confirming the successful linkage.
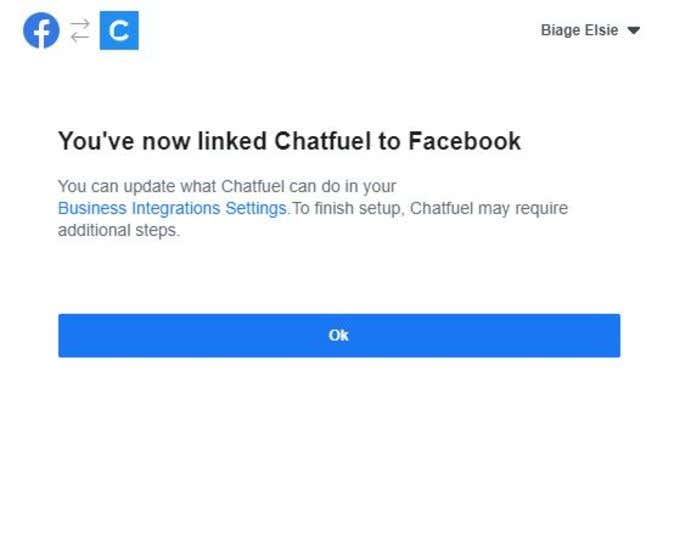
- Create a welcome message that your page visitors or customers see when they launch a Messenger session. It’ll tell them what to expect and how to move forward.
- In your Facebook page, click Settings>Messaging and set Show a messenger greeting to ON.
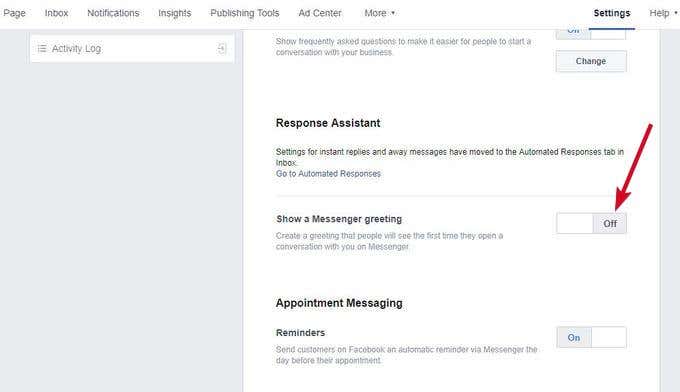
- Click Change, type in the welcome message and then click Save.
- Go to your Chatfuel dashboard, and click Welcome Message. Type your desired message – the changes will be saved automatically.
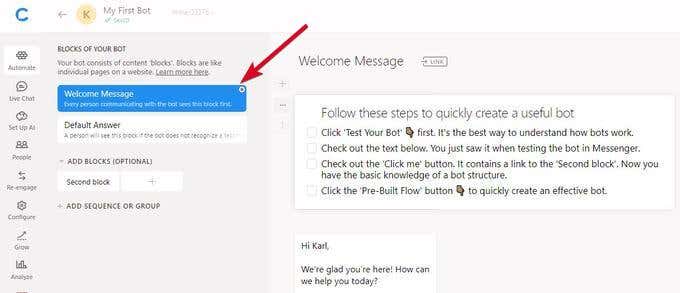
- Test the message from your Facebook page by clicking the Message button.
- Create a default answer in your Chatfuel dashboard, which tells users what to do next like email support, call helpdesk, or rephrase question.
- On your dashboard, select Set up AI>Add AI Rule.
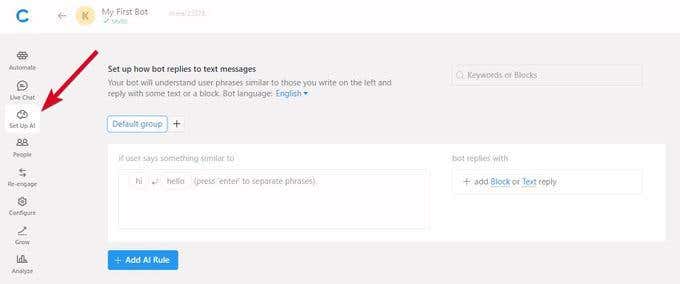
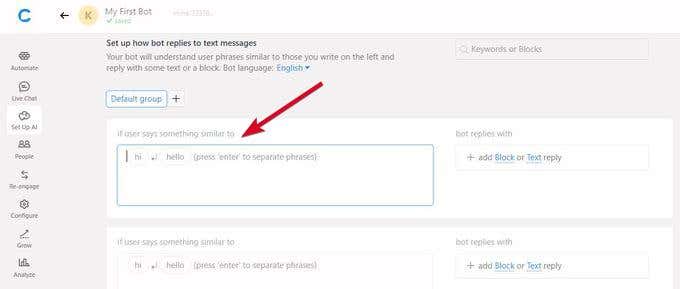
- Enter a keyword your visitors are likely to use like Help in the If User Says Something Similar To box.
- Enter a useful reply in the Bot Replies with Text box like Help articles or knowledgebase or Help section with a link to your Help page.
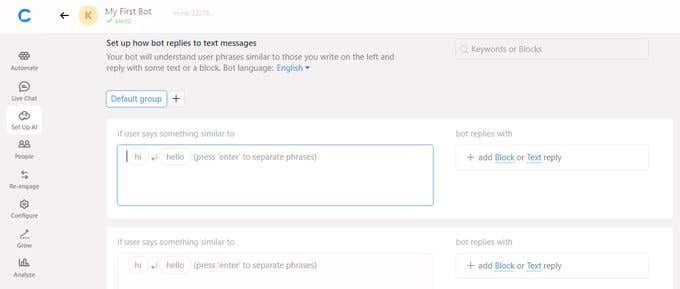
- Do this for as many keywords as possible. You can check with your customer support team for ideas on which keywords to use to set up your AI. Test the responses as you add them.
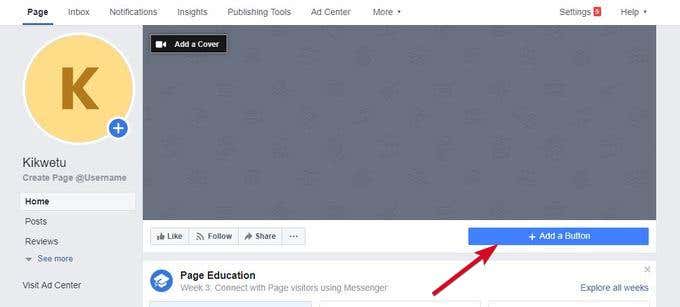
- Add Message button on your Facebook page by clicking Add a Button.
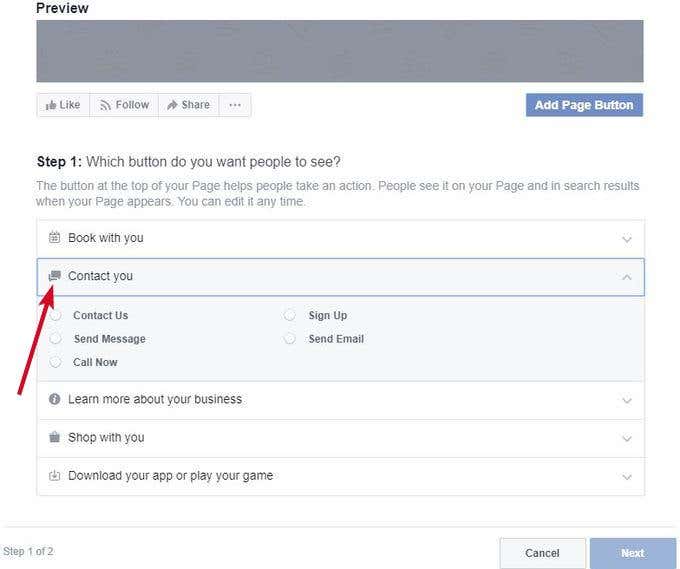
- Click Contact You>Send Message
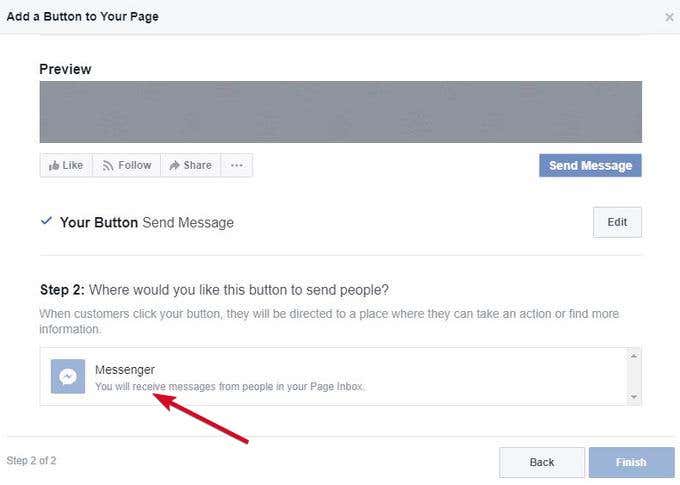
- Select Messenger as the default place to send people to and click Finish.
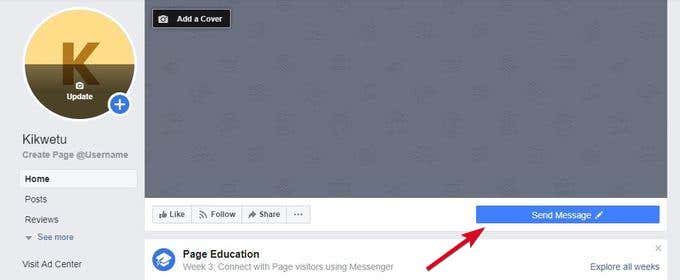
- The Send Message button will now appear on your page. Click it to test and launch your Facebook chatbot.
Related Posts
Elsie is a technology writer and editor with a special focus on Windows, Android and iOS. She writes about software, electronics and other tech subjects, her ultimate goal being to help people out with useful solutions to their daily tech issues in a simple, straightforward and unbiased style. She has a BCom degree in Marketing and currently pursuing her Masters in Communications and New Media. Read Elsie’s Full Bio
