When it comes to taking a screenshot in Windows, there is no dearth of options. But the most flexible and versatile method has always been the Windows Snipping Tool. From taking delayed screenshots to editing the captured images, the built-in tool boasted of a bunch of useful features.
And while Microsoft intended to phase out the tool for a time, it has now switched tracks and instead merged it with the Snip & Sketch tool. The resulting app has a cleaner UI and is packed with more capabilities than ever before, becoming the best way for taking snapshots of your screen.
What Happened to Snip & Sketch?
When Windows 10 rolled in, Microsoft announced a new replacement for the Snipping Tool: Snip & Sketch. This app would enable users to take screenshots more quickly and draw on top of those snips, such as circling important features, etc.
The thing is, it never really took off. While people liked the new functionality, the lack of staple features – like delayed snapshots – limited its utility. As a result, most users were forced to resort to the deprecated Snipping tool or install a third-party app to take screenshots on their Windows computers.
So with Windows 11, Microsoft has finally decided to merge the two tools together. The combined app is named the Snipping Tool and sports a rework of its old interface. Snip & Sketch features are still available, and can even be triggered by the previous shortcut.
Using the Windows 11 Snipping Tool from the Keyboard Shortcut
Like Snip & Sketch, the snipping tool can be invoked from a keyboard shortcut as well. While this approach misses out on advanced features like annotations and delayed snips, it is a great way to grab a quick screenshot.
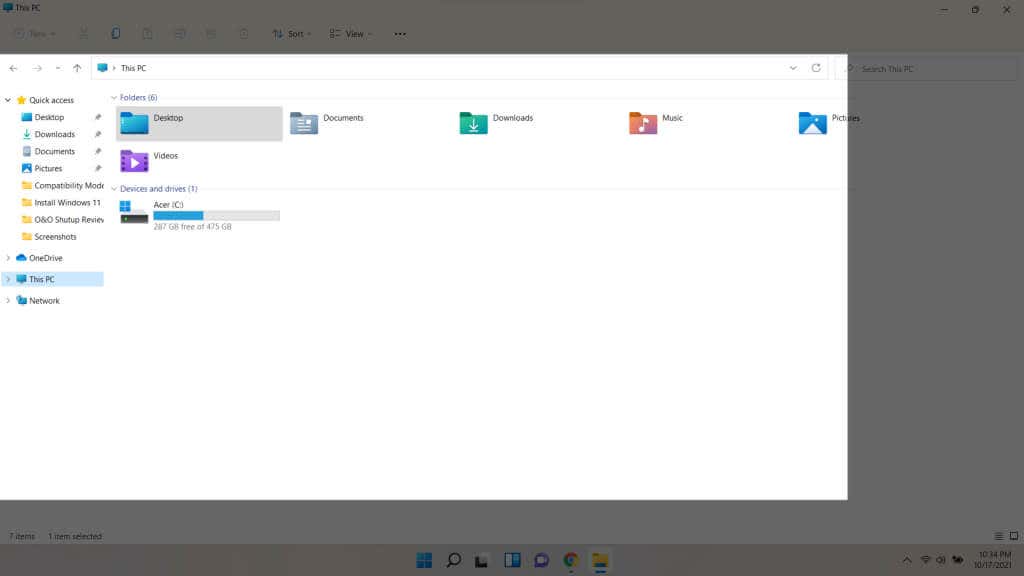
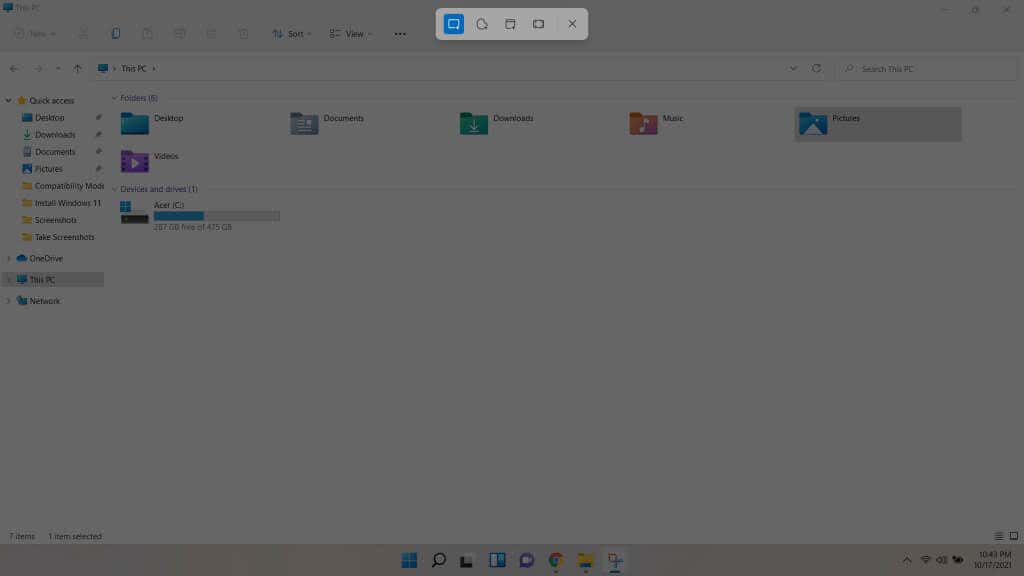
- To take a screenshot with the Snipping tool using a keyboard shortcut, press Shift + Windows Key + S. The screen will darken, with a small bar appearing at the top.
- You can select a shape from the bar, and use a selection tool of that shape to take a snip of the screen. The default is a rectangle, which you can drag out to the required size.
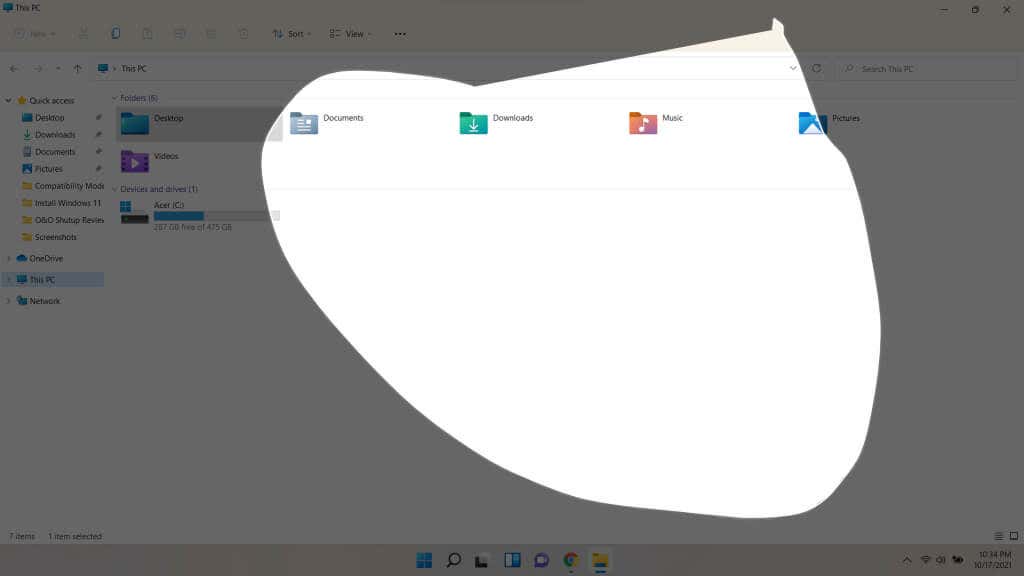
- The second option is more reminiscent of the Snip & Sketch tool, and allows you to draw free-form shapes. In this mode, you can take snips of any shape desired, cutting out the unimportant portions of the screen.
The snips captured through this method are copied to the clipboard. You must paste them into a program that accepts images, such as a word processor or an image editing tool. You can even paste them into things like emails.
While this makes the shortcut method a quick way to paste a snip into a document, a different method is required for saving screenshots directly. For that, we will open the Windows 11 Snipping Tool app.
Taking Screenshots With the Snipping Tool App
Using the Snipping Tool directly is the best way for taking permanent screenshots, as the keyboard shortcut only copies the snips to the clipboard. With the app, you can save the screenshots with a custom name, take delayed shots, and even annotate the snips by drawing over them.
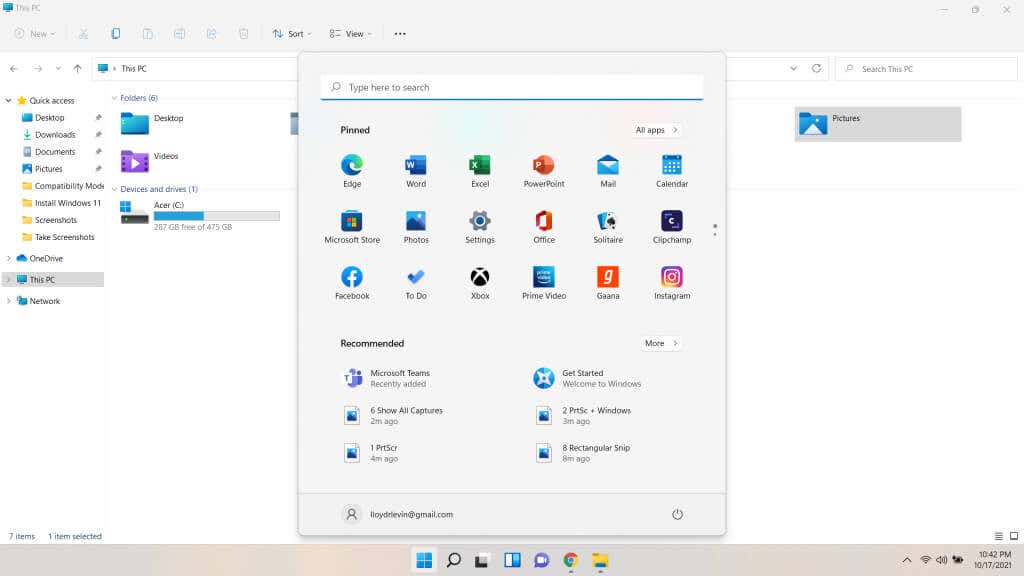
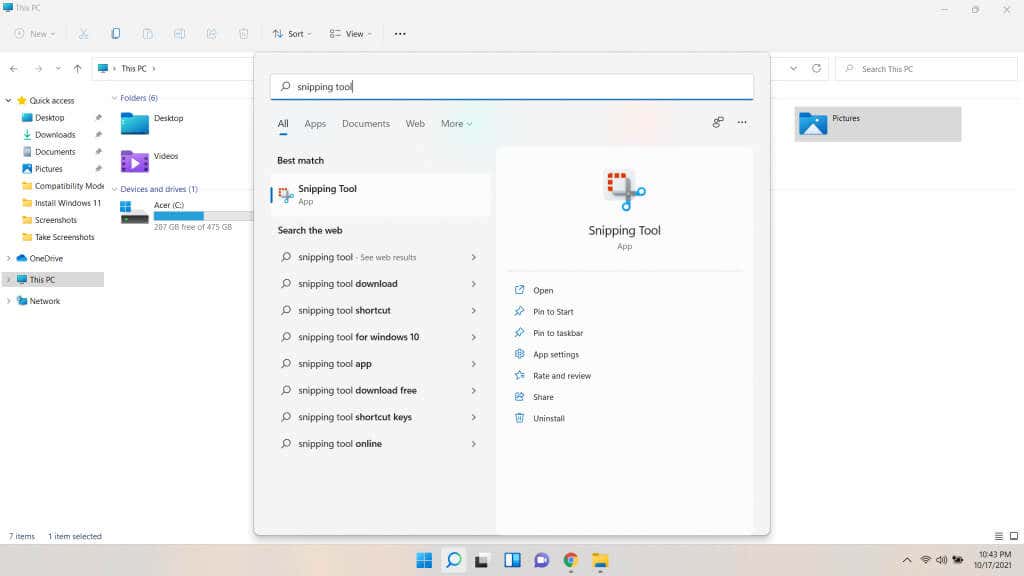
- First, open the Start Menu. Icons of important apps will be displayed, along with a search bar.
- Search for the Snipping tool through the bar to locate the app. Press Enter to open it.
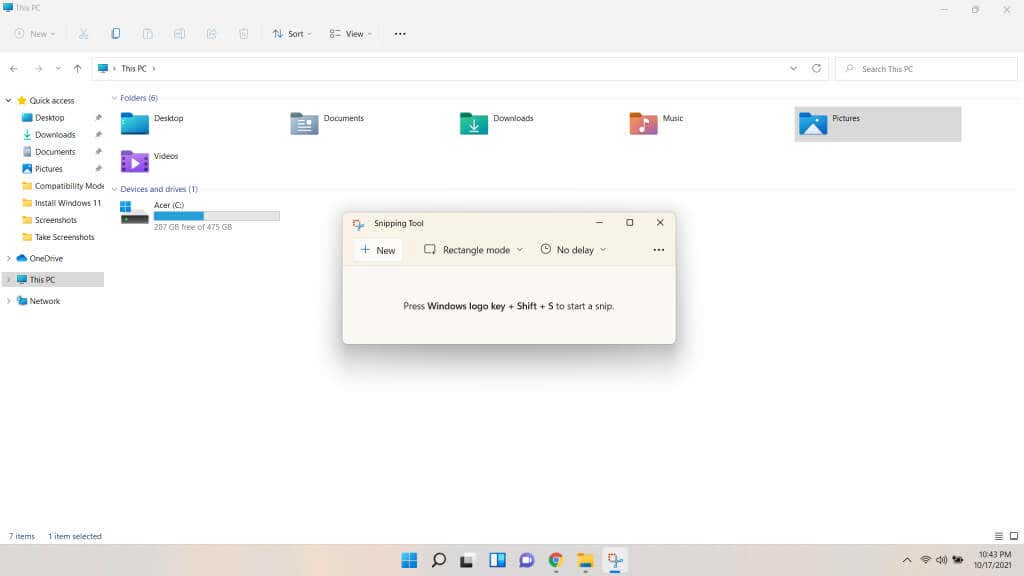
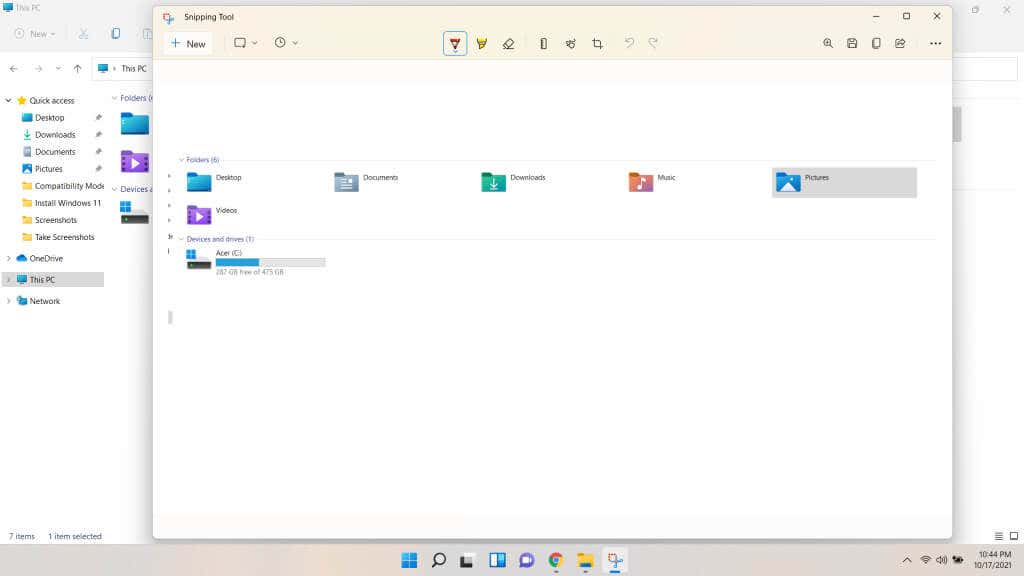
- The snipping tool interface has been reworked from its previous iteration. Windows 10 users will note the absence of most of the unnecessary options cluttering up the UI, in favor of a minimalistic window taking up very little screen space.
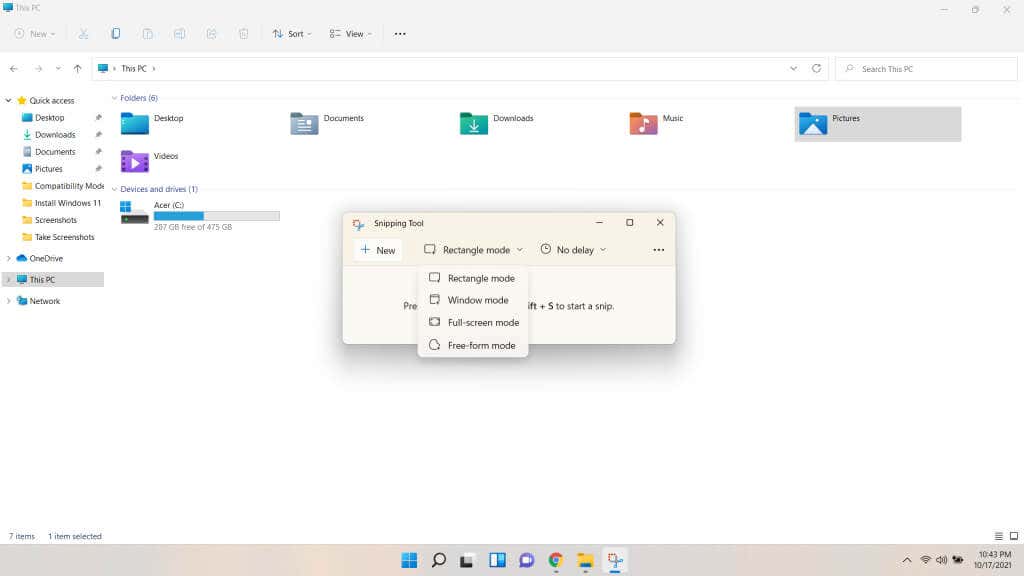
- You are given access to three types of options. New, of course, is for taking a screenshot. The second button is for selecting the Mode. The Rectangle mode is enabled by default, just as the keyboard shortcut. You can change it to the Window mode to take a snip of the active window, or Full-screen mode to simply screenshot the entire display. The free-form mode can also be used to draw a custom shape and snip it.
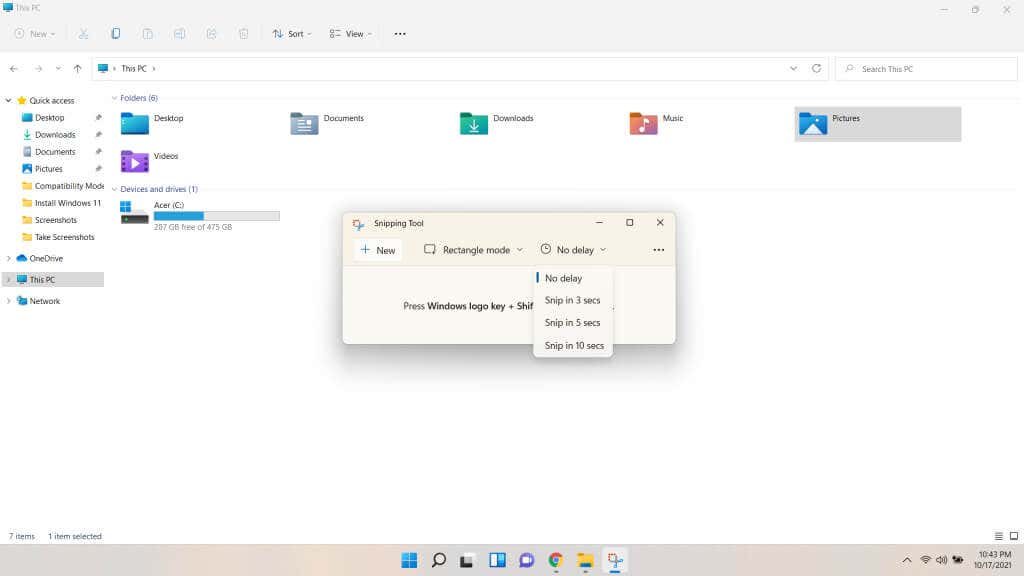
- The third and most powerful option is to set a Delay. Using this option, it’s possible to set up screenshots a few seconds in advance. This can let you take snips of things like drop-down menus or highlighted entries, which is otherwise impossible. And unlike with a shortcut, you can save these snips with custom names as well.
- After the options have been configured, use the New button to actually start a screenshot. Depending on how much delay you have set, the screen will darken either immediately or in a few seconds. The effect is identical to what you get by using the keyboard shortcut, so the method should be familiar. You can change the selection shape using the buttons at the top bar.
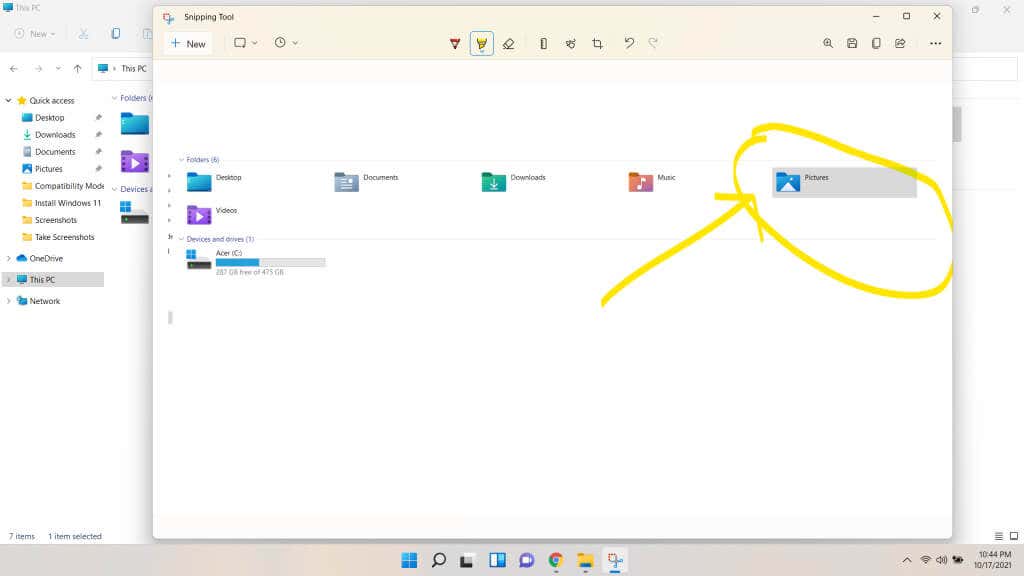
- Once you have taken a snip, you will be taken back to the tool, where you can view the screenshot and make any edits you want. You can use the Pen tool or the Highlighter to make annotations, or the Ruler to measure and crop the image.
- With the pen or the highlighter, you can select the color as well. The Eraser can be used to erase the strokes – don’t worry, it won’t erase the screenshot itself. This mode can be used with a drawing tablet to draw smooth strokes or write on the snip as well.
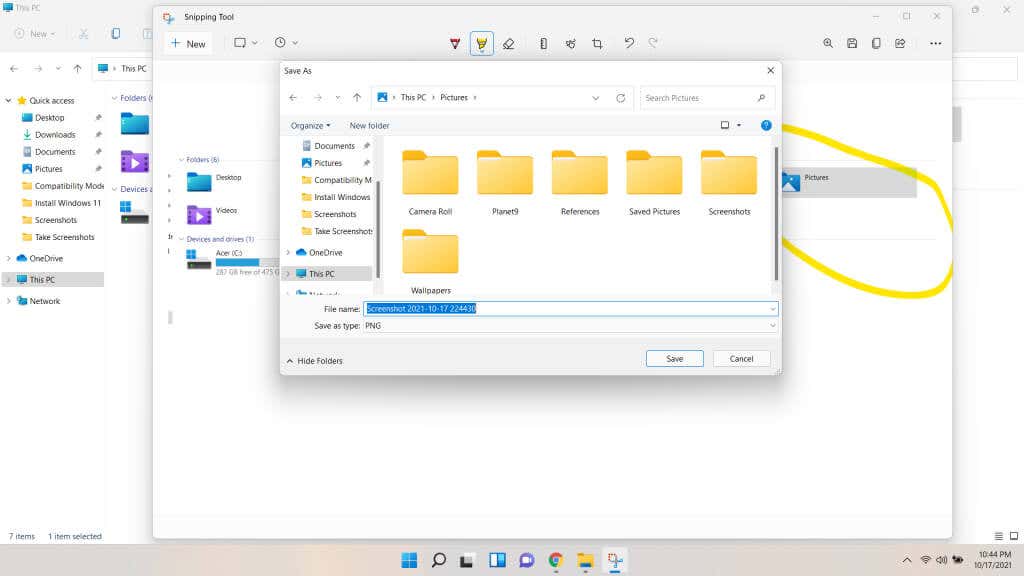
- To save your work, hit Ctrl + S or use the floppy button at the top right. You will be prompted to select a destination for the image to be saved. By default, it will be named by the date and time, though you can modify it to enter anything you want.
Is the New Snipping Tool Worth It?
The Snipping tool has always been the best way to take screenshots on Windows. The decision to replace it never went down well with the community, and the Snip & Sketch could never measure up to the classic experience.
Thankfully, you no longer have to choose. The Windows 11 Snipping Tool has returned in a more polished form, borrowing the new design elements of Windows 11 along with a couple of features from the other tool.
Now you can set delayed snapshots, draw custom selections, and even annotate the snips, all from one interface. Go on, give it a try. Taking screenshots on Windows has never been easier or more powerful.
Related Posts
Levin Roy is a software engineer who loves writing about technology. Whether it is Windows tips-and-tricks or in-depth guides about application development, Levin uses his practical experience and technical skills to create articles that can help solve tricky problems. Read Levin’s Full Bio
