Network discovery is a useful feature that lets your computer interact with other devices on your network. This feature plays a crucial role in home and office networks, letting you share files and printers, play games, and more – but it often stops working.
In this troubleshooting guide, we’ll explain how to fix the “Network discovery is turned off” error in Windows.
What Causes the Network Discovery Is Turned Off Error
Network discovery is a network setting that allows your computer to see other devices within the same network and vice versa. It is essential for sharing files and printers between devices, participating in networked games, and other essential network activities.
When network discovery is turned off, your computer cannot find other computers or devices on the network, and likewise, your device will not be visible to others. You also won’t be able to see shared folders.
There are a few things that might cause this error in Windows, including:
- The Windows network discovery feature is disabled. This is by far the most common cause of the error. Usually, this occurs when you’ve accidentally turned off this feature or reset your network settings.
- System services for network discovery are disabled. If the system apps and services required to run network discovery are disabled, it will cause this error.
- Your network drivers are outdated. Occasionally, outdated network drivers cause problems with network discovery and other key features.
- Your antivirus is blocking network discovery. Usually, this is a problem with Windows Defender. Most often, network discovery isn’t whitelisted, so the antivirus firewall prevents it from running.
How to Fix the Network Discovery Is Turned Off Error
Here are five ways to fix the network discovery is turned off error:
1. Turn On Network Discovery
As mentioned, the most common cause of this error is that the feature has been manually turned off. To fix it, you only need to turn it back on again. Here’s how:
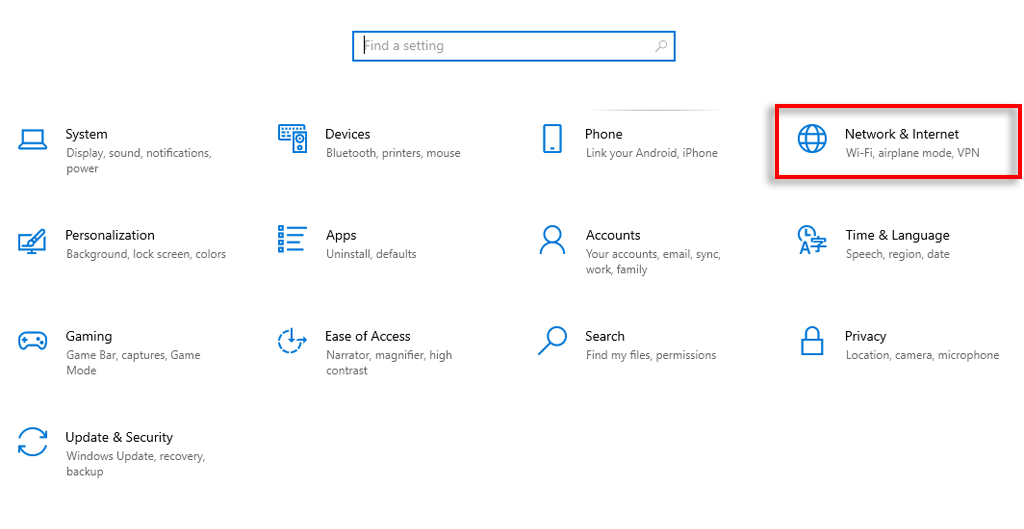
- Press Win + I to open Settings.
- Select Network & Internet.
- Under Advanced network setting, select Network and Sharing Center.
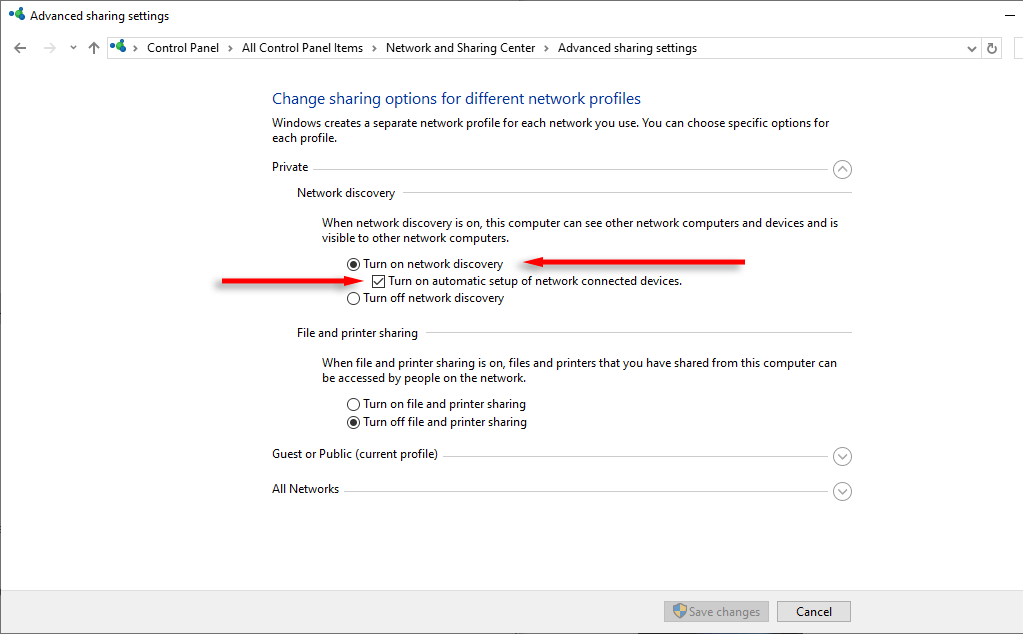
- Select Change advanced sharing settings.
- Expand the menus beneath both Private networks and Public networks.
- Toggle on Network discovery in both of these menus.
- Check the box beside, “Set up network connected devices automatically.”
Now, try to use network sharing again. If the error still occurs, something else is going wrong.
2. Turn on the Network Discovery Services
For network discovery to work, you need five essential services to be enabled. Here’s how to turn them back on if they’ve been disabled:
- Press Win + R to open the Run dialog box.
- Type “services.msc” and press Enter.
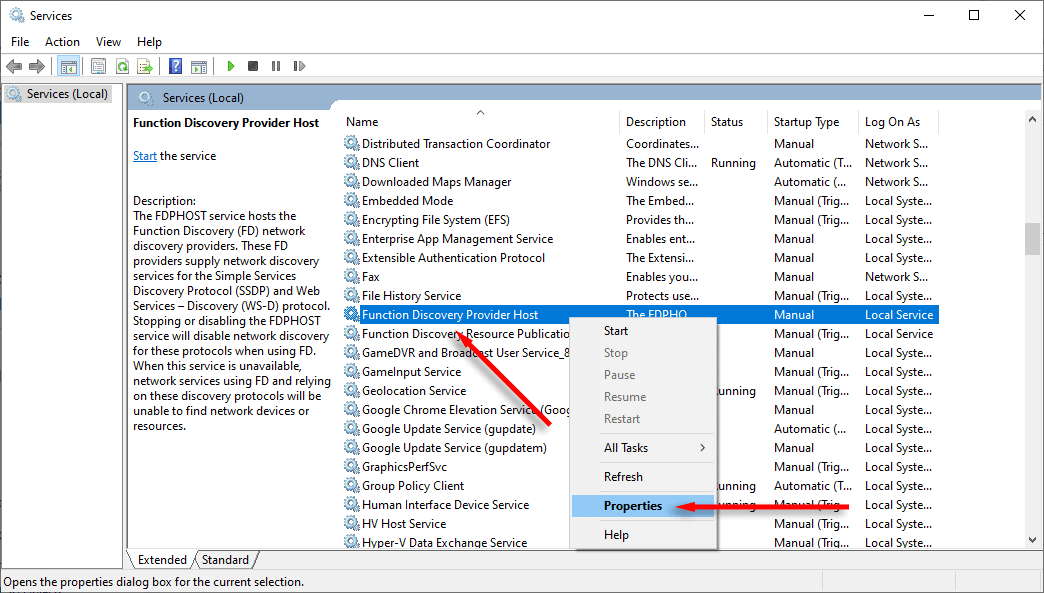
- Scroll down and right-click Function Discovery Provider Host, then select Properties.
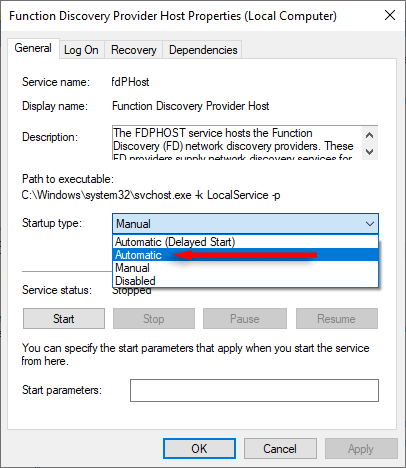
- In the Startup type drop-down menu, select Automatic.
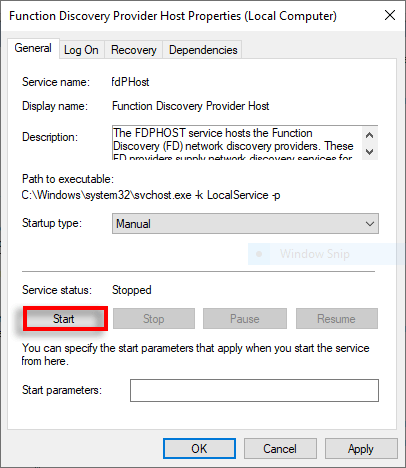
- Then press Start to turn on the service.
- Repeat this process for the following four services: Function Discovery Resource Publication, SSDP Discovery, UPnP Device Host, and DNS Client.
3. Whitelist Network Discovery in Windows Defender
Windows Defender may be blocking network discovery if the first two solutions haven’t fixed the error. Here’s how to whitelist the process:
- Press Win + I to open Settings.
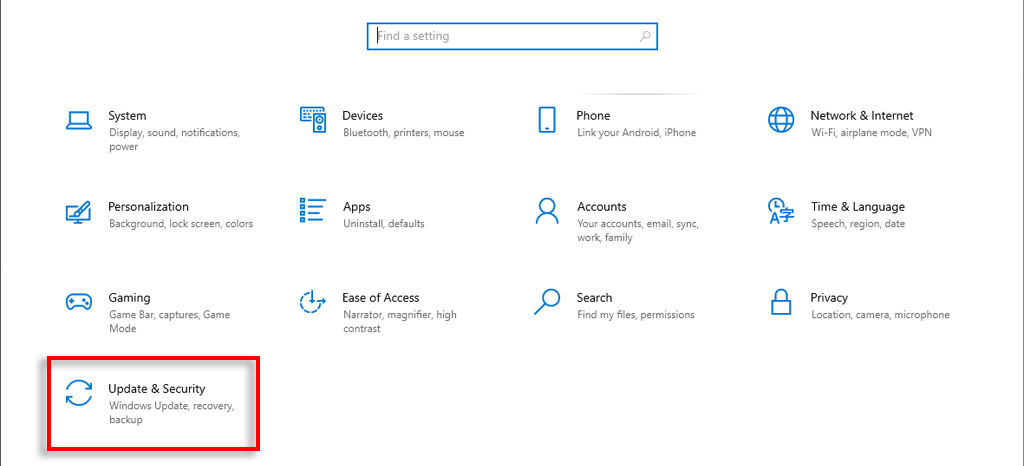
- Choose Update & Security.
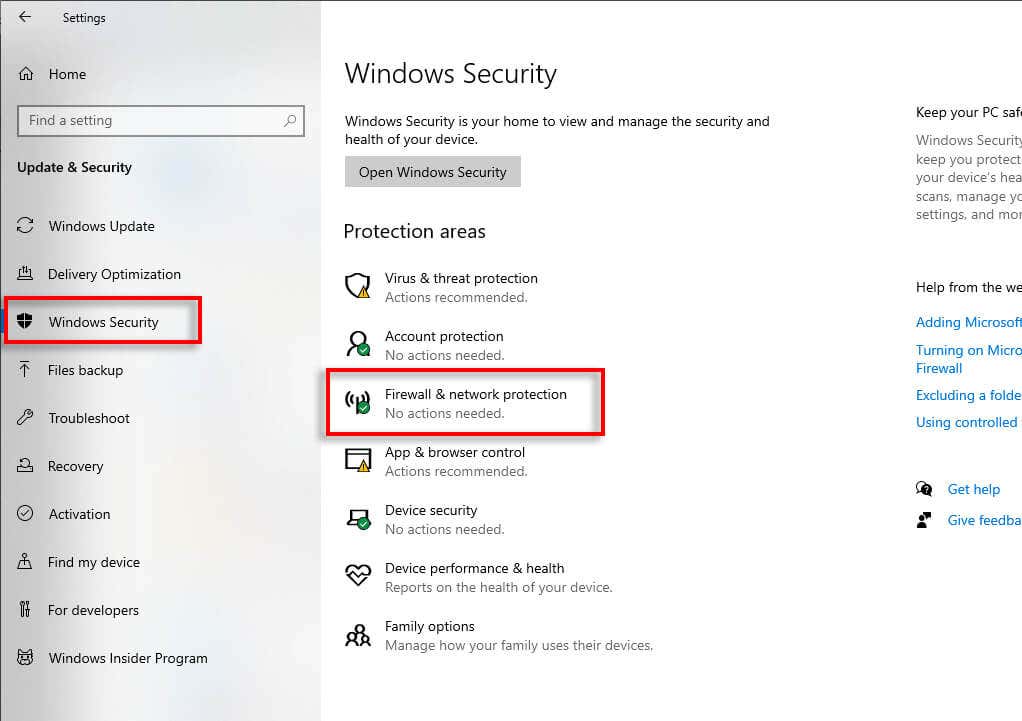
- Select Windows Security then choose Firewall & network protection.
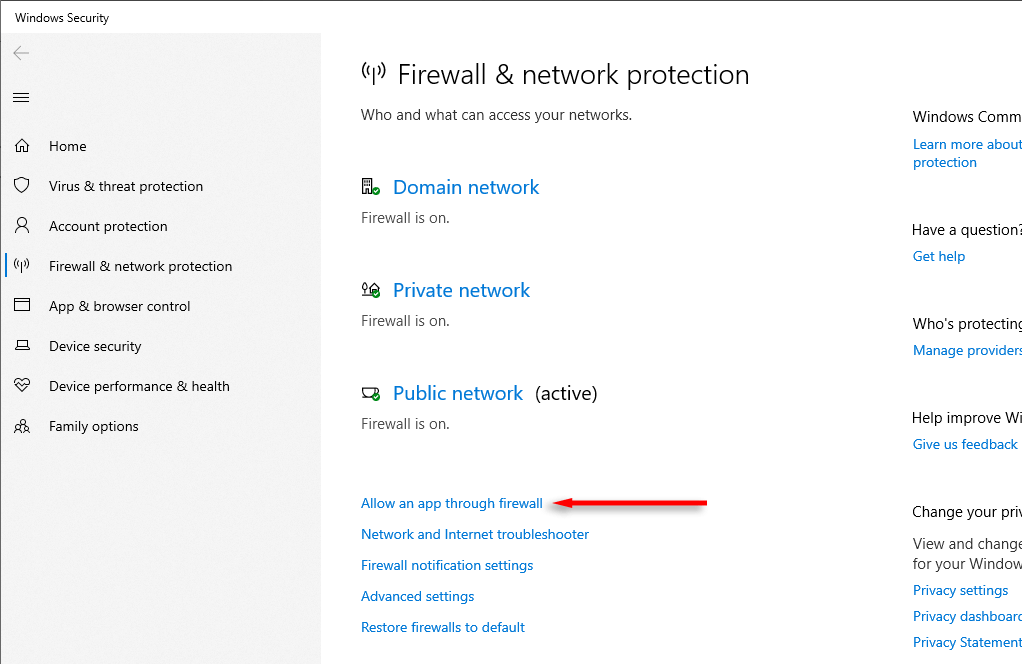
- Select Allow an app through firewall.
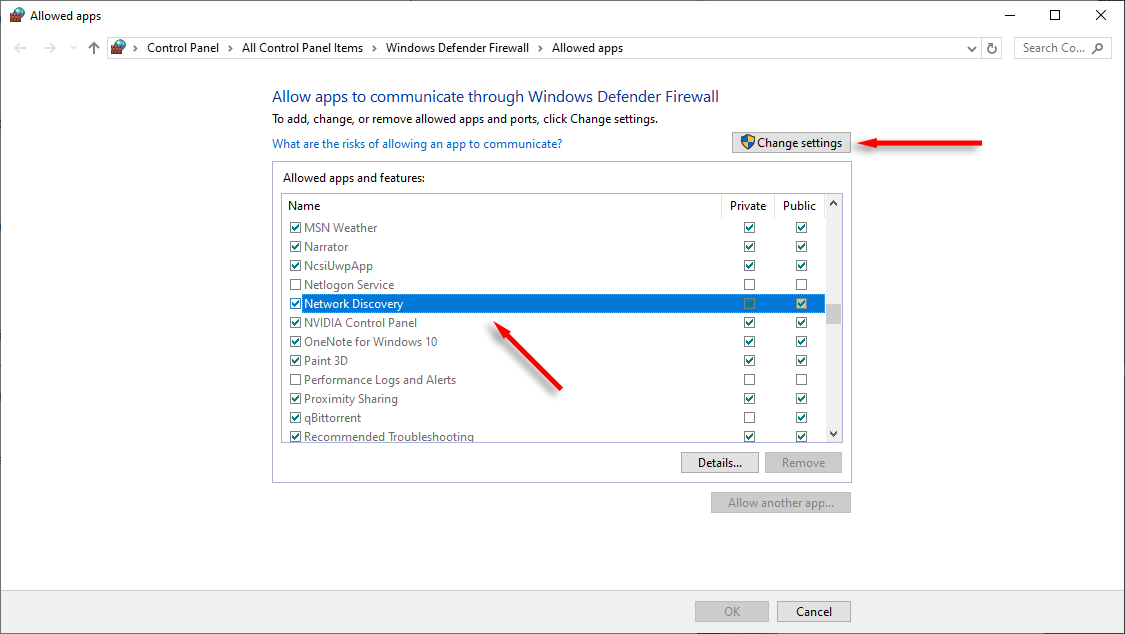
- Scroll down until you find Network Discovery, and make sure the Public and Private checkboxes are ticked.
- If they aren’t, press Change settings, then tick them.
Note: You can also whitelist specific devices on your network. This may resolve other issues with finding devices, related to the network discovery issue.
4. Update Your Network Adapter Drivers
If your network drivers are outdated, they might be causing problems with network discovery. Here’s how to update them to the latest version:
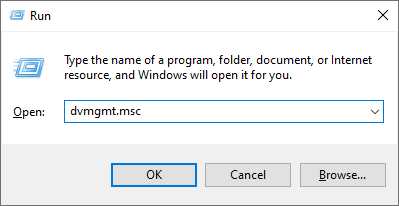
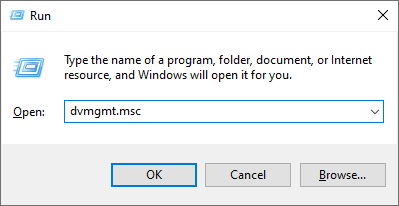
- Press Win + R to open Run.
- Type “devmgmt.msc” and press Enter.
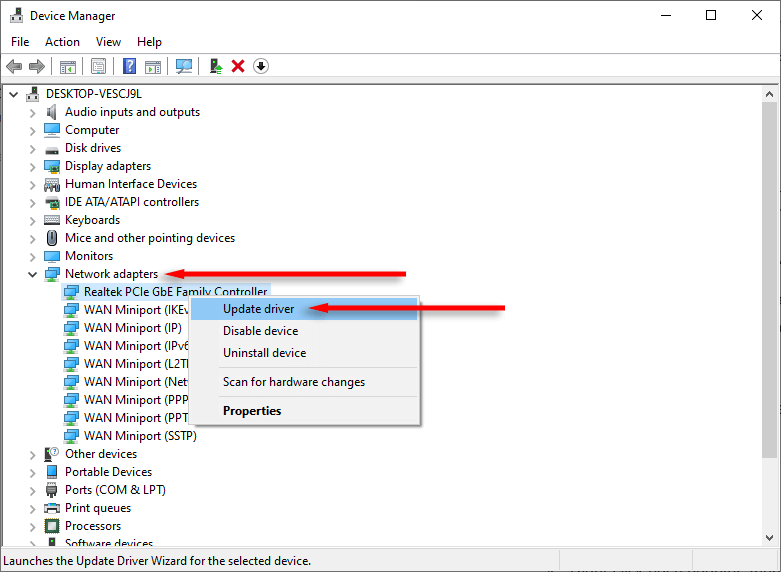
- Find the Network adapters group and expand the menu.
- Right-click each adapter, then press Update driver.
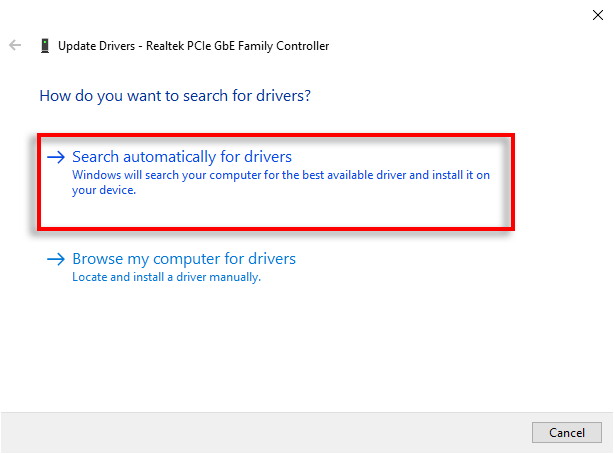
- Select Search for updates automatically. If there are new updates for that driver, your PC will install them.
5. Run the Network and Internet Troubleshooter
Windows has a built-in troubleshooter to help fix random network errors whenever they pop up. If nothing else has worked, it might find the problem and resolve it for you. Here’s how to use it:
- Press Win + I to open Settings, then select Update & Security.
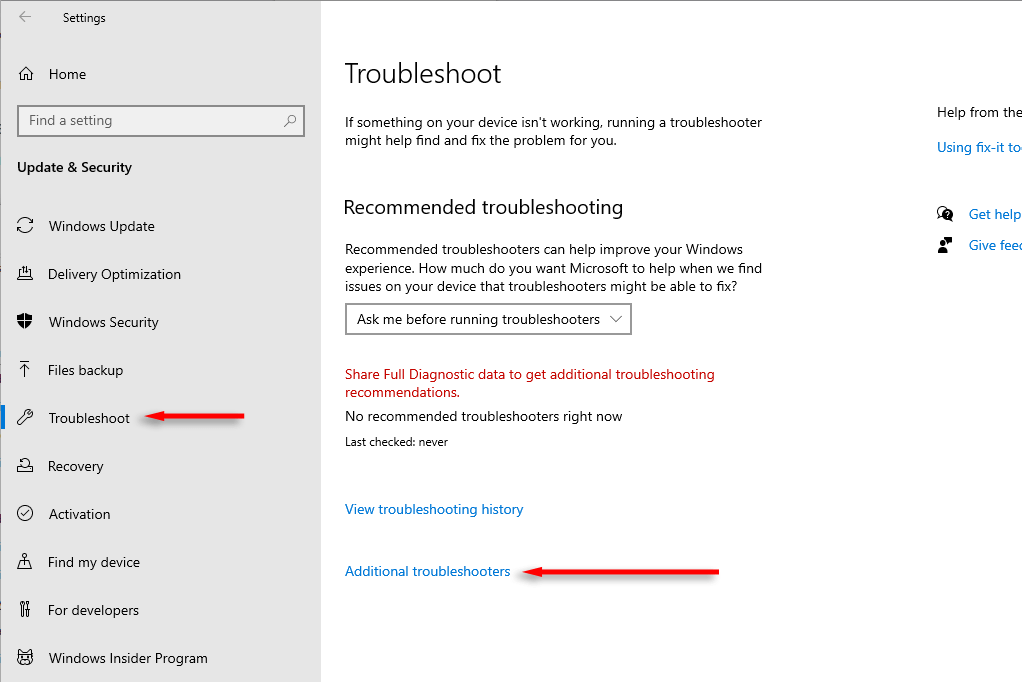
- Choose Troubleshoot, then Additional troubleshooters.
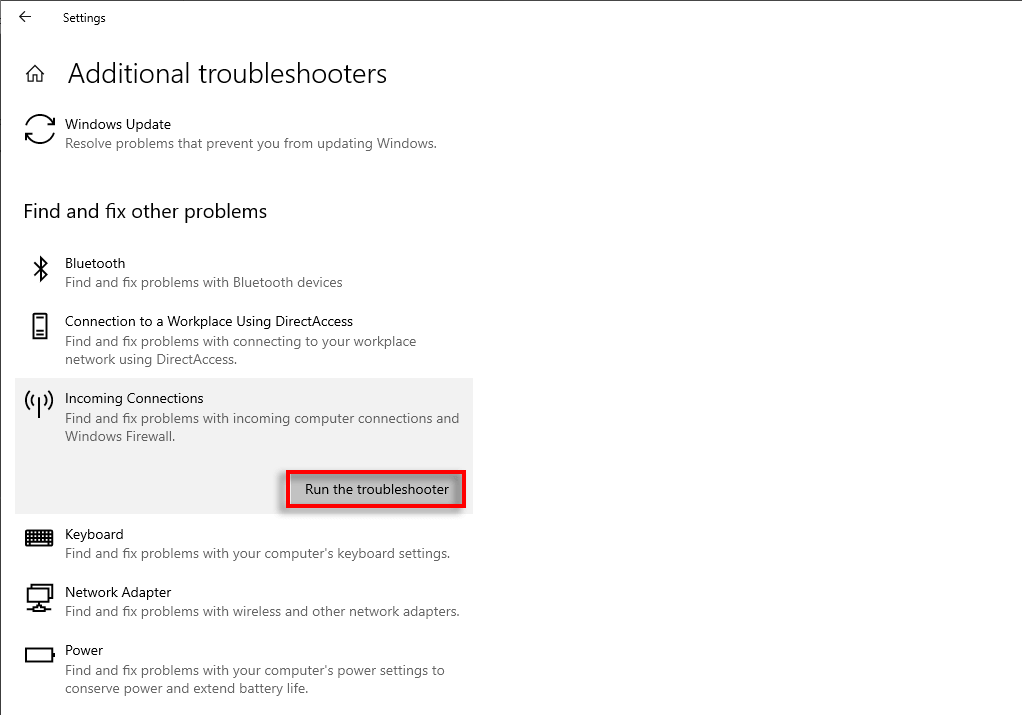
- Find Incoming Connections and press Run the troubleshooter.
- Wait for the troubleshooter to open, then follow the on-screen instructions. The wizard will try to find out what the problem is, then explain what to do in order to fix it.
Discover Your Network
Network discovery is a useful feature, but it can negatively impact your workflow if it stops working. Luckily, it’s usually not that hard to kickstart, and hopefully, this guide has helped you get it up and running again.
Related Posts
- Preparing for Windows 10 End of Support: Upgrading to Windows 11
- How to Fix a “This file does not have an app associated with it” Error on Windows
- How to Fix an Update Error 0x800705b4 on Windows
- How to Resolve “A JavaScript error occured in the main process” Error on Windows
- How to Change Folder Icons in Windows
Jake Harfield is an Australian freelance writer whose passion is finding out how different technologies work. He has written for several online publications, focusing on explaining what he has learned to help others with their tech problems. He’s an avid hiker and birder, and in his spare time you’ll find him in the Aussie bush listening to the birdsong. Read Jake’s Full Bio
