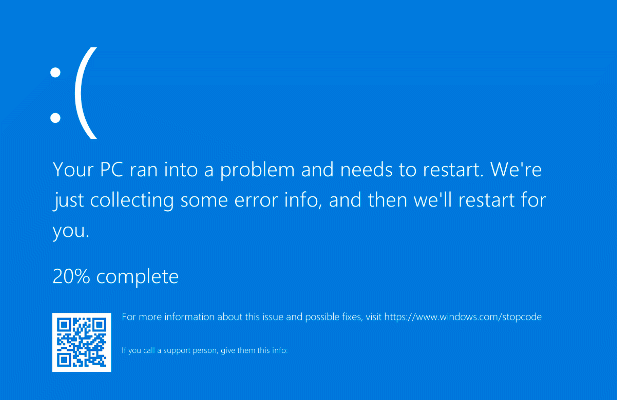
The adage that “nothing is perfect” is certainly true for software development, where bugs can and will derail the user experience. Unfortunately, if your PC crashes with a Blue Screen of Death (BSOD) error, a serious PC fault is occurring, and it’s usually (although not always) caused by bugs in some code.
One of the most unusual BSOD errors to appear is the “reference by pointer” BSOD (reference_by_pointer). Trying to track down the cause of this BSOD is tricky, but it usually points to problems that you can easily fix. So, if you’re trying to troubleshoot a reference_by_pointer BSOD error, this guide should help you.
What Causes a Reference By Pointer BSOD Error in Windows 10?
A reference by pointer BSOD error (also known as a reference_by_pointer or 0x00000018 error) usually points to an issue with your system files or device drivers.
To help prioritize system resources, Windows internally refers to running elements (such as an open window) as “objects” with numbers that identify how many times the elements are referenced (or used) elsewhere.
This value decreases until the object is removed, freeing up your system memory for other running services.
When a reference_by_pointer message appears, Windows is seeing an incorrect reference count for a running object. As this could be a serious security issue, Windows will stop and display a BSOD, forcing your system to restart and clearing all active memory in the process.
In almost every case, however, this is usually caused by a buggy piece of software. Hardware drivers are the most common cause, with graphics cards and other components like network devices often causing the message. However, it can also be caused by other issues, such as corrupt system files or even failing hardware.
Before you try anything else, you should check your BSOD memory dump files for more information. You will find vital clues behind the cause of a reference by pointer BSOD, such as a driver file (with a .sys file extension) or a system process (such as ntosknrl.exe).
Once you’ve located a possible cause (such as a malfunctioning driver), you can follow the steps below to resolve the issue.
Switch to Safe Mode for Troubleshooting
Following a BSOD, your PC is forced to reboot. If stuck in a reference_by_pointer BSOD loop (with each reboot causing another BSOD message), you’ll need to boot into Safe Mode to begin the troubleshooting process.
Safe Mode runs Windows with the most basic set of drivers and system processes required to function properly, allowing you to troubleshoot driver issues without risking another BSOD.
You can also use Safe Mode to analyze your BSOD dump files before you begin any other attempts to fix the problem.
- To boot into Safe Mode, you’ll need to interrupt the Windows boot-up sequence at least three times. To do this, power up your PC and wait until the Windows logo appears. Press your PC’s reset button (or press and hold your PC’s power button) to force a reboot, then repeat this at least two more times.
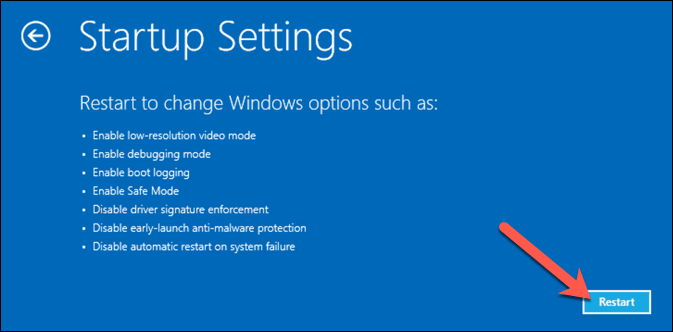
- Windows will boot into Automatic Repair mode to try and resolve a boot loop after three failed attempts to boot up. Once you reach the Automatic Repair menu, select Advanced Options > Troubleshoot > Advanced options > Startup Settings > Restart to access your boot-up options.
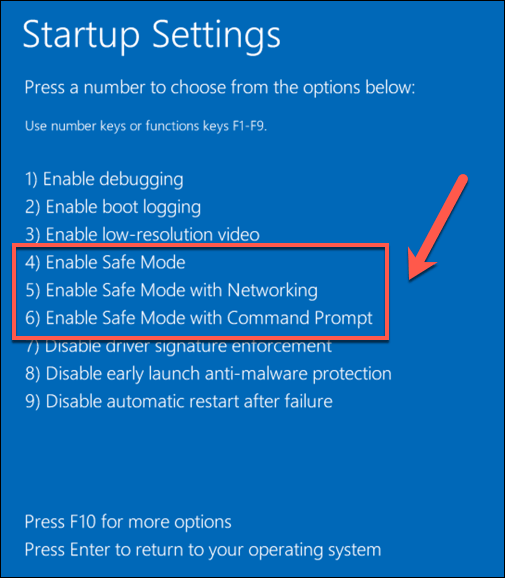
- After a few moments (and a quick reboot), select your preferred Safe Mode boot-up option using your keyboard number keys. For example, select 4 for standard Safe Mode, 5 for Safe Mode with networking features enabled, or 6 for Safe Mode with only a command prompt terminal visible.
Windows will proceed to boot up using your chosen Safe Mode option, where you can then continue with the troubleshooting steps outlined below.
Update System Files and Device Drivers
A bug in Windows or a device driver can cause a reference_by_pointer BSOD. To overcome this issue, you’ll need to make sure your system files and drivers are up-to-date using the Windows Update system.
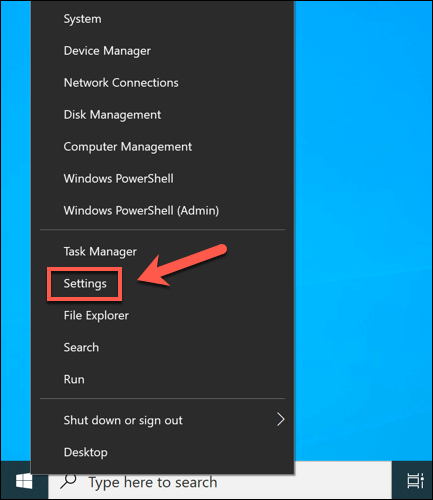
- To begin, right-click the Start menu and select Settings to open Windows Settings.
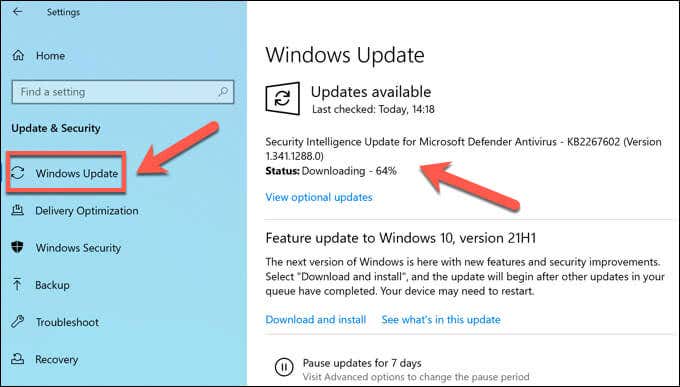
- In the Settings menu, select Update & Security > Windows Update. Windows should check for updates automatically but, if it doesn’t, select Check for Updates. Select Install Updates if any updates are available for you to install manually.
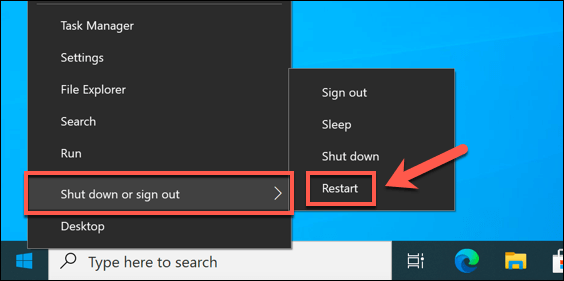
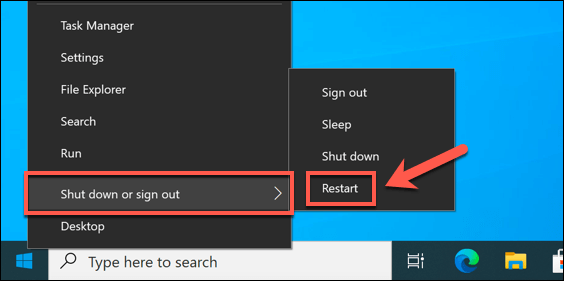
- Allow time for Windows to download and install the new updates for your system. Once this is complete, restart your PC to load the new updates and drivers and complete the process. You can quickly do this by right-clicking the Start menu and selecting Shut down or sign out > Restart.
Roll Back a Recently Installed Driver or System Update
While system updates undergo a rigorous testing process, bugs and issues can still occur.
If you only see a reference_by_pointer BSOD error after you’ve recently updated your system files or device drivers, you may have introduced a bugged set of files. Thankfully, Windows allows you to roll back a driver on Windows and uninstall any recent Windows updates that are causing issues.
How to Roll Back a Device Driver
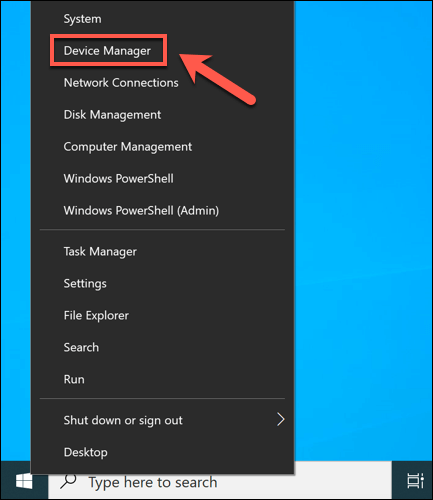
- To roll back a recently installed device driver, right-click the Start menu and select Device Manager.
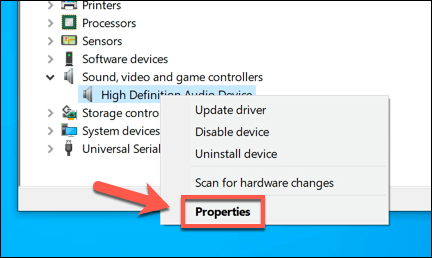
- In the Device Manager window, locate the device with the recently updated drivers. Right-click the device and select Properties.
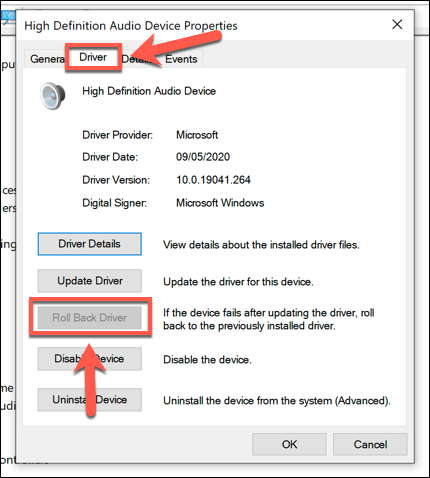
- In the Driver tab of the Properties window, select the Roll Back Driver option. This will remove the recently installed driver and restore the previously used version. After selecting Roll Back Driver, follow any additional on-screen instructions to complete the process.
- Once you’ve rolled back your driver, restart your PC to complete the process by right-clicking the Start menu and selecting Shut down or sign out > Restart.
How to Remove a System Update
- To uninstall a recent system update, right-click the Start menu and select Settings.
- In the Settings menu, select Update & Security > View update history > Uninstall updates.
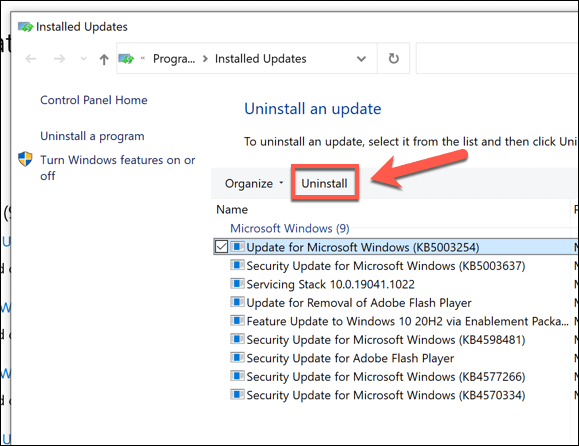
- An old-style Control Panel menu will appear. To sort updates by date, select the Installed On category title to sort them. Locate the update you wish to remove, then select Uninstall to remove it. If the Uninstall option isn’t available, the system update is considered essential and can’t be removed.
- Follow any additional on-screen instructions to remove the update. Once it’s uninstalled, restart your PC by right-clicking the Start menu and selecting Shut down or sign out > Restart.
Check Your System Files for Errors
Windows files are constantly changing, with settings and files updated regularly. Unfortunately, your Windows installation will face more catastrophic changes from time to time, from malware infections to hard drive sector failures.
If you think that your Windows installation is failing somehow and causing this BSOD error, you can check it for errors using the SFC and DISM tools.
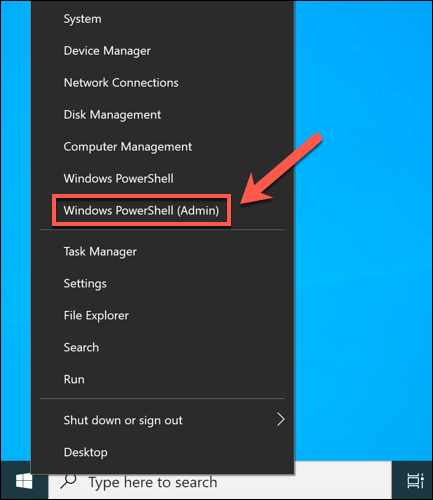
- To run these tools, you’ll need to open a new Windows PowerShell window. Right-click the Start menu and select Windows PowerShell (Admin) to do this.
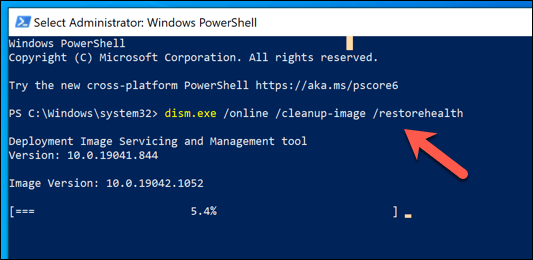
- In the PowerShell window, type dism.exe /online /cleanup-image /restorehealth and select Enter on your keyboard. This will check your Windows system image (used to reset your installation files) for integrity issues. If there are missing or corrupted files, DISM will replace them.
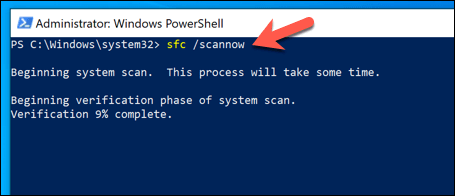
- Once the DISM tool is complete, type sfc /scannow to use the System File Checker tool to scan your Windows installation for errors. If it detects them, it will attempt to replace them using the fresh DISM-generated system image files, ensuring your installation is working properly.
Restart your PC once the SFC tool finishes a scan of your Windows installation files. If it can’t update or repair your files, you may need to look at more drastic options, such as resetting Windows 10 with a fresh installation.
Test Your Hardware (and Replace If Required)
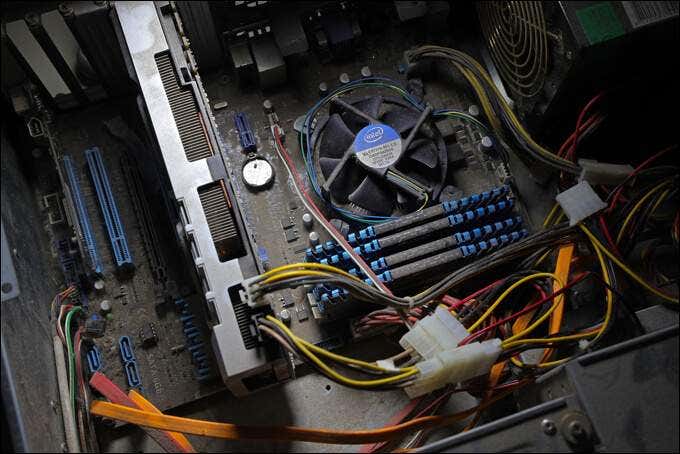
Corrupt or buggy files don’t only cause system instability. For example, if your hardware is overheating, overworked, or just plain failing, system errors like a reference by pointer BSOD are the next step before a full PC failure.
If heat is an issue, you’ll need to clean out your PC and consider upgrading your cooling to help resolve the issue. Your next step is to test your hardware thoroughly, using CPU stress tests and memory testing tools, as well as checking your hard drive for errors.
If your hardware is the problem, your only answer is to replace it. You can replace individual components (such as your motherboard or CPU), but if the PC is too old to repair, you may need to consider a complete upgrade, replacing your PC entirely with a fresh pre-built PC or building your new PC instead.
Recovering from BSOD Errors on Windows
A reference by pointer BSOD error isn’t usually something to worry about, but without regular system maintenance in place, it could point to a serious problem with your PC. Make sure to keep your important files backed up elsewhere so you don’t lose your files when your PC crashes and ensure you have system restore enabled.
If you can’t fix the problem using the steps above, you might need to consider more drastic options. If your hardware is faulty, you’ll need to consider upgrading your PC or replacing it entirely. Otherwise, it might be time to wipe and reset Windows to restore stability, although you’ll need to restore your files from a backup afterwards.
Related Posts
- Preparing for Windows 10 End of Support: Upgrading to Windows 11
- How to Fix a “This file does not have an app associated with it” Error on Windows
- How to Fix an Update Error 0x800705b4 on Windows
- How to Resolve “A JavaScript error occured in the main process” Error on Windows
- How to Fix the Network Discovery Is Turned Off Error on Windows
